In order to use facing bricks, the foam blocks from which the walls are made must be prepared. This problem is due to the fact that both materials that form the wall are classified as breathable. For this reason, when facing foam blocks with bricks, it is very difficult, and sometimes impossible, to bring both materials into full contact. However, this problem needs to be solved, since foam blocks are afraid of moisture. If you want your house to be not only beautiful, but also durable, you urgently need to line it with brick.
Facing foam blocks with brick helps solve the issue of waterproofing walls.
Main work activity
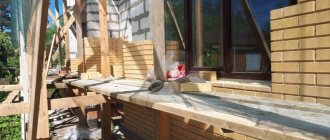
Now it's time to work with the brick.
The process is quite fast, for work you will need: A scheme for preparing cement mortar.
- facing brick;
- Portland cement m500;
- slaked lime;
- level;
- plasticizer;
- medium-grained sand;
- water;
- drill with a nozzle for solutions;
- containers for all materials;
- scaffolding;
- Master OK;
- rubber hammer;
- rounded sandpaper;
- roofing felt;
- gas-burner.
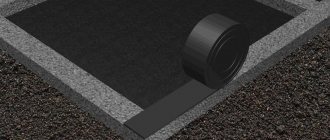
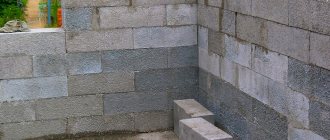
Before you start laying bricks, you need to protect the concrete from moisture. To do this, lay roofing material over the entire surface and burn it with a gas burner over the entire area. This procedure does not take much time, but must be performed as efficiently as possible.
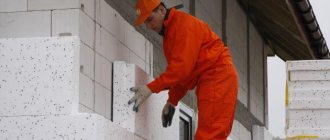
Now the main work activity begins. The most difficult thing is to lay out the first row correctly, because... The entire continuation depends on the ideality of the masonry.
Preparation of cement mortar is quite simple, because... To do this, you first need to pour 1 share of dry cement into an empty container, and another 1.5 shares of sand. All this is thoroughly mixed using a drill with an attachment. Then 0.3 parts of slaked lime is added and everything is mixed again. Next, add water in an amount of 0.6 to make the solution thick enough. When mixing the solution with water, a plasticizer is added. If you violate this sequence, you may get deterioration in quality or lumps at the output.
The laying of the first row looks like this:
Scheme of finishing a house made of foam block with facing bricks.
- A measurement is made between the wall and the brick at 35 mm, after which the thread is stretched from beginning to end. You cannot go beyond its limits.
- A small amount of cement mortar is poured under each brick. You need to look at the eye so that when you squeeze, there is a space of 6-9 mm.
- The brick is installed in its place and nailed on all sides with a rubber hammer. It is not advisable to use metal, because... it is highly likely to leave behind cracks or even split the material.
- The level is measured and, if necessary, additionally hammered down.
- For each subsequent brick, the mortar is first applied to the side, after which it is installed on the prepared surface.
- Checking with the level of the previous brick and, if necessary, additional hammering to the desired level.
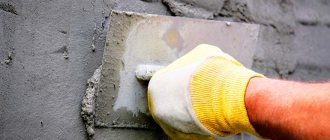
- Excess solution is removed with a trowel and transferred further.
When laying the mortar further, the difference will be small, because the level is no longer required.
But, naturally, not a separate vertical wall is being built, but a system with a load-bearing wall made of foam blocks. Therefore, for every 1 m², 9 points of contact are used. They are performed using special flexible ligaments. To do this, a 10 cm hole is drilled in the main wall, where a rod with a rubber seal is immersed, and a plate is laid on the back side of the brick. Between the 2 segments there is a movable element that will allow the surfaces to interact without risks, even subject to some deformations.
Construction of a foam concrete wall lined with brick.
When you reach a certain height, where your height makes work difficult or impossible, you need to use scaffolding, and if you don’t have it, you can use a stepladder, which will add more hassle.
But do not forget that the gap between the wall and the brick is made for a reason, but for ventilation. Therefore, at the height of the second and penultimate rows, air gaps are made between the bricks. The step between them is 5 bricks, so the quality of the structure will not suffer, and air will flow quite freely.
At the very end, using a special rounded sandpaper, the seams are rubbed down to achieve a perfect result. There is no need to press hard, and the erasing depth is no more than 3 mm.
Construction of facing facades
A facing facade is a separate element of a building or house, assembled from structural decorative materials and linked to the main mass, which can be made of monolithic reinforced concrete, or assembled from brick or foam blocks. Performing a decorative function, the cladding of buildings does not bear significant loads in the form of floors, which are absorbed by the main wall, and the connections between the cladding and structural layers are necessary to withstand wind loads and ensure a stable position.
Since the cladding and the main wall of the house are not connected to each other through a solution and often have different vapor permeability parameters, the lack of a ventilation gap will inevitably lead to waterlogging of the foam concrete, mold formation and premature destruction of the wall structure. To avoid this and ensure the century-long service life of decorative bricks, guaranteed by manufacturers, it is necessary to install a ventilation gap and a system for removing condensate and atmospheric moisture. Such a gap can be omitted only if the vapor permeability of the foam blocks is greater than that of the brick cladding. To do this, it is necessary to use blocks with a density of more than 1000 kg/m3, but they are rarely used for construction - in most cases this is not economically feasible.
Wall ventilation
Ventilation gap
The recommended distance by which the outer wall of the house should be separated from the cladding layer should be no more than 100 mm, and when installing an additional thermal insulation layer, the cladding should be separated from its outer surface by no more than 40 mm. By maintaining the specified distances, you can guarantee that warm air vapors flowing from the inside of the house to the outside will condense and flow down the inner surface of the decorative brick. Obviously, moisture must be removed from the ventilation gap, and in order to do this, the finishing brickwork of the house must be equipped with drainage devices.
The removal of condensate and atmospheric moisture from the space between the facing and structural layers can be organized using two types of devices:
- Standard plastic inserts equipped with an inclined gutter on the inside for moisture drainage and curtains on the front side, located at an angle that allows liquid to come out, but excludes the ingress of precipitation and insects from the outside.
- Homemade elements, which are cylinders, rolled along the long side from a nylon reinforcing mesh with dimensions of 650x200 mm and inserted into the vertical seams of the finishing wall of the house.
Ventilation insert in a vertical joint in brickwork
In order for condensation to freely leave the ventilation gap and the wall to remain dry from the inside, it is necessary to install waterproofing aprons under the bottom row of masonry, between the brick and the foundation, and above each opening.
Drain positioning
Layout of ventilation inserts
To ensure unhindered natural convection of air in the ventilation gap, it is necessary to place drainage devices on the same vertical axis with a step of no more than 6 meters, but not less than two. The first insert is installed directly on the bituminized apron between the foundation and the first row of finishing bricks, and the last one is in the topmost row. For optimal moisture removal, it is advisable to lay waterproofing in a horizontal seam between foam blocks or load-bearing wall bricks.
The horizontal spacing between drainage devices should not exceed 1 meter, and if there are openings, additional ventilation verticals must be formed in the amount of at least two for each obstacle. Each vertical should start from the base of the outer wall of the house and end in the outermost row of bricks.
The first vertical axis is formed at a distance of at least 250 mm from the corner of the house, and then in increments of up to 1 meter, and additional verticals, due to the presence of openings, are positioned no closer than 25 cm from their edges.
What brick to cover the house with?
Regardless of the material from which the facing brick is made, it must meet the following requirements:
- Correct shape geometry
- Clear edges
- Uniform color
- There should be no cracks or delaminations on the surface
- Frost resistance: F25, F35, F50, where the numbers indicate the number of cycles of alternating thawing/freezing, during which the products show no signs of visible damage, and the reduction in compressive strength does not exceed 20%. Products with frost resistance F25 are used in the southern regions of the country, F35 – suitable for central Russia, F50 – for more northern regions
- Water absorption – no less than 6%
If you read the manufacturer's annotations, you will remember the proverb: every sandpiper praises its swamp. Those who produce ceramic bricks extol its characteristics in every possible way and belittle the advantages of silicate bricks. And vice versa. This is understandable - competition. What do the facts say?
1. Ceramic brick – clay filler. The technology for its preparation is more complex and time-consuming than that of silicate, which is why it is more expensive. The price of one brick ranges (depending on texture, shape, color) from 10 to 25 rubles. Its positive properties:
- Water absorption – from 6 to 14%. GOST allows you to increase this indicator depending on the type of clay used.
- Frost resistance - F25, F35, F50. For clinker products this figure is 100.
- Low thermal conductivity – 0.3 – 0.5 W/m°C
- A large selection of standard sizes, textures and colors of products, which allows you to cover not only walls, but also columns and arches.
- Density – 1300 – 1450 kg/m3, clinker – up to 2100 kg/m3. This indicator is important for calculating the bearing capacity of the foundation.
2. Sand-lime brick. Filler quartz sand. The cost of the product varies from 7 to 16 rubles. Its properties:
- Water absorption – 6-8%.
- Frost resistance – from 15 to 50 cycles, depending on the manufacturer.
- Thermal conductivity - from 0.38 to 0.7 W/m °C
- Large selection of textures and colors of finished products.
- Density – 1500-1950 kg/m3.
A comparative analysis of the characteristics shows that both types of facing bricks have positive and negative properties. Ceramic products are superior in density (with the exception of clinker versions) and thermal conductivity. Not as radically as is commonly believed, but still.
Therefore, if it is necessary to increase the thermal conductivity of a house (this applies more to building structures made of cinder block, brick, etc.), or when cladding an old house to reduce the load on the foundation, then ceramic products are used.
3. Bricks that are made using semi-dry hyperpressing technology. For example, products from the Bassoon brand, with shell rock fillers. With other indicators almost equal to ceramic brick, it has frost resistance of up to 100-150 cycles and increased density. Price from 17 to 38 rubles. per product.
Compensation for thermal expansion of the wall
Temperature fluctuations in different regions of the country can reach from +50 to -50 o C, and sometimes over a wider range, which inevitably leads to changes in the linear size of the brick and relative displacements of the cladding by up to 0.1 mm per linear meter of masonry. To ensure the integrity of the facing layer, expansion joints filled with elastic polymer material in the form of a rope capable of repeated compression and expansion must be provided during construction. The optimal compensation mode is achieved through a grid of joints horizontally and vertically.
The marking of vertical expansion joints depends on the side of the world to which the façade of the building is facing, in particular:
- the western pediment is embroidered every 7–8 meters;
- the southern wall should be provided with seams spaced 8–9 meters apart;
- the eastern facade is equipped with compensation gaps in increments of 10–12 meters;
- the northern side of the building requires jointing every 12–14 meters.
The distance between expansion joints located in the horizontal plane is determined by the width of the brick and the nature of its support on the foundation, namely:
- With a masonry thickness of 120 mm and full support of the brick on the base, the seams can be spaced no more than 12 meters.
- With a facade 120 mm thick, which does not rest on the foundation with the entire plane of the brick, the distance between the temperature gaps should be in the range of 6–8 meters.
- Reducing the width of the cladding elements to 60 mm, even with full support, requires jointing every 4 meters vertically.
Selecting seam locations
Temperature gaps are made at regulated intervals for long and high walls, as well as when changing the geometry of the load-bearing wall, in particular:
- in the corners of buildings;
- for stepped bases;
- if there are ledges in the profile of the facades;
- in places where the structural layer is jointed, that is, where there are gaps in the reinforced concrete monolith or foam block/brick masonry.
Execution of expansion gaps
It is quite simple to make a vertical gap; to do this, during construction it is enough to leave the jagged seam between the mating parts of the facade unfilled or make it straight by cutting every second brick in the masonry in half.
It is more difficult to create a gap in the horizontal plane and this will require special consoles, which are metal corners reinforced with “kerchiefs” that are attached to the surface of foam blocks or other load-bearing wall material. The vertical part of such a corner is pressed against the structural layer or insulation, and the horizontal shelf coincides with the expansion joint and the overlying row of facing bricks is laid on it.
Combination of facing bricks with other materials
Laying facing bricks can be combined with the use of other facing materials. This combination can decorate the facade and create an original, effective design. Different materials emphasize each other’s qualities; the use of contrasting colors makes the decoration more expressive and bright.
IMPORTANT! Most often, a combination of different types of bricks is used, since this is the easiest way to combine materials due to the same dimensions.
The following types of ligaments can be used:
- Ceramic with glazed.
- Ceramic with hyperpressed (with a textured edge).
- Ceramic and colored (or engobed).
Other combinations are possible depending on the main facing material.
In addition, the combination of facing brick and textured plaster looks impressive, for example, when creating a geometric figure on a canvas in a different plane.
Textured plaster creates an independent element, or serves as a background for a three-dimensional pattern laid out with facing bricks - there are many options, and they all depend only on the capabilities and imagination of the builder.
Photos of modern one-story and two-story houses with facing bricks:
Strengthening openings
Any opening in a facing wall is a stress concentrator, and in the absence of structural reinforcement, over time, cracks appear in the corners of such elements, propagating further at an angle of approximately 45°. To avoid destruction of the cladding according to the described scenario, the construction of a decorative facade should include the insertion of reinforcing elements into the seams between the bricks. Structurally, such elements are two parallel metal rods with a diameter of 5 mm, the distance between which depends on the width of the masonry, and the connection is made through a profiled rod of a similar cross-section connected by spot welding. It is allowed to use galvanized steel as the rod material, since the element is completely embedded in the seam and is located in the alkaline environment of the masonry mortar.
Such reinforcements are laid on consoles, fixed to the surface of foam blocks or other load-bearing wall material and used to construct expansion joints, making it possible to eliminate the latter or significantly increase the step size. By framing the openings in the facade with the help of similar reinforcing elements and hanging the first row above the windows or doors with the help of special “stirrups”, it is possible to impart rigidity to the structure and avoid cracking of the cladding.
The described reinforcement system is an innovation that in recent years has successfully replaced the reinforced concrete beam, which is widely used to strengthen openings by laying it on top. The length of such a beam should be greater than the opening being reinforced, and the ends should be embedded in brickwork. The use of such a structural element spoils the appearance of the facade, violating the integrity of the picture assembled from facing bricks, and is therefore not recommended for use.
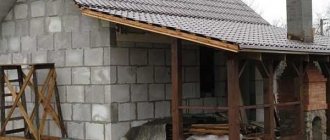
How to lay facing bricks (foam blocks)
In order to use facing bricks, the foam blocks from which the walls are made must be prepared. This problem is due to the fact that both materials that form the wall are classified as breathable. For this reason, when facing foam blocks with bricks, it is very difficult, and sometimes impossible, to bring both materials into full contact. However, this problem needs to be solved, since foam blocks are afraid of moisture. If you want your house to be not only beautiful, but also durable, you urgently need to line it with brick.
Facing foam blocks with brick helps solve the issue of waterproofing walls.
Structure of wall formation with facing masonry
The main thing in the technology of wall cladding is the connection of the inner and outer layers with each other. In this case, you should not arrange a brick bond, as this will reduce the heat-insulating functions of the brick. Typically, metal structures, such as reinforcement, are used as a binder.
The optimal option for forming a wall is the following scheme:
Air gap for building ventilation.
- facing layer;
- air gap between the brick and foam block layers;
- reinforcement layer;
- vapor barrier layer;
- anchors for securing insulation;
- insulation coating;
- foam blocks;
- plaster.
Such a sandwich will perform good insulating functions. Moreover, the insulation will be not only air (retention of heat or coolness), but also water (protection of foam blocks from moisture).
Features of foam block cladding
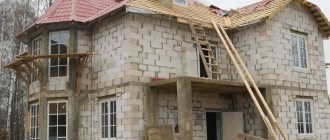
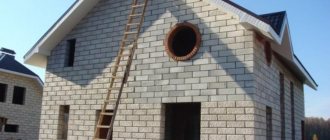
Houses made of foam concrete are built quickly, literally in a few weeks. This process can be carried out independently, without the involvement of outside labor. However, if the process of erecting walls is delayed, you should not follow the usual tactics in these cases of sequential work according to the principle of “first the walls, and then the cladding.” While you are building the main elements of the house, the foam blocks will become saturated with moisture, become covered with dirt and take on an unpleasant appearance.
It is necessary to clad a house with foam blocks immediately as the walls are being erected, without waiting for their construction to be completed. Tiles, facade panels, stone, and brick are used as facing materials.
The most popular material is usually facing brick.
Types of facing bricks.
It is beautiful, reliable and prestigious. In addition, finishing a house with brick can combine maximum protection and the basis for a flight of designer imagination.
Typically, cladding is carried out in two ways - in parallel and after the fact. In the first case, it is produced simultaneously with construction. However, few people do this. Most often, facing work in parallel with the construction of walls is abandoned due to a lack of labor.
Post-facto cladding is carried out immediately after the wall laying is completed.
However, it is very important to complete the work before the rains. This linking of work deadlines to weather conditions negates all the benefits of sequential work.
The weather does not take into account your needs and the established rhythm of actions. If cyclones come and your walls are defenseless, there will be a lot of extra work.
Finishing materials
There are several suitable materials that allow you to cover the outside of a house with foam blocks. What is better to finish is up to you to decide. What can be used for finishing:
- creation of a ventilated facade. For this, any facing material can be used with a small gap between the foam block wall of a private house and the lining. Lining, good siding or ordinary decorative panels may be suitable;
- facing brick. When finishing a house made of foam blocks with bricks, the necessary space between the wall and the brick also remains. In addition, there will be no problems with air ventilation;
- special mixtures for plaster. This material can also be used for home decoration. In this case, you need to know what material to buy. When purchasing, be sure to read the instructions on the package or check with the seller. You need to know exactly what purpose the plaster you choose has.
Important! You can cover the house with silicone paint, provided that after painting all the seams are tightly sealed. But it is used extremely rarely, so we will not consider this option.
Ventilated facade
Initially, it is necessary to install a curtain façade. Let's look at step-by-step instructions for this. Before making the cladding, you need to collect tools and materials:
- screwdriver;
- drill;
- construction corner;
- roulette;
- a plumb line and a building level (you will need all this to get the most even surface possible);
- sheathing;
- hacksaw;
- hammer.
The peculiarity of the ventilated facade is that the procedure for exterior wall finishing is quite simple. In order to finish the facade, you only need to complete a few steps.
Step 1. Installation of the sheathing. The material for it can be either metal or wood. The most economical option is to use a wooden beam with a diameter of 50 millimeters.
Step 2. The distance between the branches of the sheathing should be no more than 60 centimeters.
Step 3. Lay special mineral wool between the beams. This will insulate the building.
Step 4. Install the cladding.
The ease of installation work is due to the fact that there are special locks on the siding that perform a strengthening function. With their help, fixing the material occurs quite easily and quickly. Despite the simplicity of the installation instructions, you need to remember some points that must be taken into account when working:
- in the lower and upper parts of the finish you need to make special holes for ventilation;
- When installing the sheathing, be careful. The entire weight of the cladding falls on it. It is advisable to use anchor bolts for fastening - this will strengthen the structure.
An interesting video with footage of finishing a house with different types of siding on a ventilated facade. Basement siding panels were used to finish the facade, it turned out very cool and naturalistic:
Facing brick
If, when choosing a finishing material, you chose facing bricks, you should immediately warn about the complexity of the work. When compared with other types of finishing, working with brick is the most labor-intensive. If difficult work scares you, choose another way. This means that the quality result will depend on the accuracy of the brick laying, so the process will be very labor-intensive. What you need to prepare for work:
- a set of measuring instruments (tape measure, level, corner);
- solution for fixing the material;
- flexible connections;
- Master OK;
- facing brick.
How to fasten the cladding and facade of a building
Facing bricks cannot be laid separately from load-bearing walls. This option will soon lead to the collapse of the outer facing layer.
A combination of internal walls and cladding must be made, which is done using different techniques:
- Bandaging layers with bonded bricks. This option is suitable for the simultaneous construction of load-bearing walls and an outer decorative layer. In parallel with this, insulation is installed and a ventilation gap is created.
- Bundle using reinforcing bars. Sections of thin reinforcement (8 mm in diameter) are hammered into holes drilled in the walls. The free ends of the rods are laid in inter-row seams. The disadvantage of this method is the gradual rocking of the rods due to movements of the outer layer of the cladding due to temperature expansion. Some movement of the rods occurs, violating the strength of their connection with the load-bearing wall.
- Binding using a reinforcing mesh fastened to a load-bearing wall. This option excludes the possibility of using insulation, so it is not used often.
- Using flexible connections. Polymer rods 6 mm thick are installed in the wall using dowels. The free end is equipped with a sand coating, which enhances adhesion to the mortar in the inter-row seam. This option eliminates all the disadvantages of other methods - there is no possibility of pulling out bonds, and cold bridges do not form.
Ventilation device for walls made of foam concrete and aerated concrete blocks lined with bricks
The insulation is fixed to the finished load-bearing wall made of lightweight concrete blocks with wire anchors, pre-embedded in the masonry (I play the role of fasteners: special washers with an anti-corrosion coating), or special disc dowels at the rate of at least 5 pieces. per 1 sq.m. To protect fibrous insulation from blowing, they are covered on the air gap side with windproof fiberglass or other appropriate material (for example, membrane type). It should be taken into account that an additional ventilation gap of 20-40 mm wide must be left between the insulation and the facing layer. The outer wall, which protects the insulation from adverse external influences and forms the facade of the building, is constructed from facing bricks (or lightweight concrete blocks with a plaster layer). Its thickness is 1/2 brick. To ensure ventilation of the walls, special vents are installed in the bottom row of the masonry - gaps between the ends of some bricks 10-12 mm wide at the rate of 75 cm for every 20 m2 of wall surface (Fig. 1). As a rule, each finished wall should ultimately have 4 holes in the first row of masonry and 4 holes in the upper, eaves part of the house. The spacing between holes should not exceed 4 m.
FIG.1. Ventilation device for walls made of lightweight concrete blocks lined with bricks
For lower vents, you can use slotted brick , laid on its edge so that outside air through the holes in the brick has the opportunity to penetrate into the air gap in the wall. Ventilation holes can also be made by partially filling the vertical joints between the bricks or blocks of the lower course of masonry with cement mortar. A restrictive wooden strip placed in the middle of the vertical seam will allow its lower part to be left unfilled with mortar. The inner and outer layers of the enclosing three-layer structure must be connected to each other by flexible connections (Fig. 2).
FIG.2. Structural diagram of a three-layer wall: 1 - brick cladding; 2 - flexible connections (anchors); 3 - heat-insulating plates; 4 - block masonry; 5 - plaster; 6 - air gap
From the point of view of heating engineering, the latter are cold bridges and can significantly reduce the thermal resistance of the entire enclosing structure. At the same time, the greatest reduction in thermal resistance comes from the use of rigid brick connections, so they are installed less frequently. The use of stainless steel connections significantly reduces heat loss. In this case, the walls must be connected to each other with embedded elements (rebar brackets with a diameter of 4-6 mm). The ends of each bracket, bent in different planes, are located in the mortar layers of the connected walls - in each row of stone (through 3 rows of brick in height) at a distance of no more than 750 mm. Anchors are fixed in horizontal or vertical masonry joints with a depth of insertion of the anchor into the wall of at least 120 mm. It is also possible to use T-shaped anchors made of 4 mm thick stainless steel strip. Welded mesh made of reinforcement with a diameter of 4-6 mm and with cells of 50 x 50 mm, which are very common in construction, are the least preferable. Reinforcing mesh is installed through 6 rows of facing bricks. The use of flexible fiberglass or basalt plastic reinforcement, which has very low thermal conductivity, can be considered optimal: in this case, heat loss, as a rule, does not exceed 2%. Such connections are laid in the masonry seams to a depth of 60-80 mm at a distance of 600 mm from each other along the height of the wall and 500-1000 mm along the wall (2-5 pieces per 1 sq.m.).
Methods and types of masonry
The technique of laying facing bricks has its own specifics and differs in many respects from the methods of laying ordinary material.
NOTE!
The cladding is done in one layer, which complicates the task and places significant demands on the strength and stability of the canvas.
There are a large number of types (schemes) of masonry, the main task of which is to create an aesthetically attractive surface, the formation of a certain geometric pattern that is repeated along the entire length of the canvas or creates a single decorative element.
To fully understand masonry schemes, you should first define the terminology. The side working edge of the block is called the “spoon”. The end one, the smallest in area, is the “poke”. Accordingly, the spoon row is laid out sideways, with the spoon side out. Bonded row - a row of blocks laid with end faces. The upper or lower parts, on which voids are visible, are called beds.
There are three main types of masonry:
- Straight. Masonry in which one type of material is used. In this case, any alternation of the position of the briquette, laying with the spoon or butt side, alternation of rows or individual bricks with different positions of the edges, etc. is possible.
- Decorative. This type of masonry involves the presence of two or more types of bricks (usually different colors are used, but there may be other options). Various geometric patterns and rosettes are laid out, and façade elements are designed. This method is more complicated, since it requires monitoring the correct placement of bricks of the desired color, compliance with geometry, correct counting of rows, etc. To perform such masonry, you must first create a diagram indicating all the parameters of the canvas to facilitate control or execution of the work.
- Artistic. This is a more complex type of decorative masonry, using three-dimensional patterns - bricks protruding from a common plane, forming geometric figures of varying degrees of complexity. the height of different bricks can be different, which allows you to create figures of great complexity and expressiveness.
Many masonry schemes have been developed over many centuries.
The most commonly used:
- A half-brick spoon. The most common scheme, in which all rows are spooned, each subsequent one is laid offset by half the length of the brick.
- Cross masonry. Rows of spoon and butt briquettes alternate.
- Gothic. Alternating spoon and bonded bricks in a row, between rows there is a shift of a quarter of the length of the block, bonded bricks are arranged like a snake above each other.
- Chain. Two spoon blocks and one butting block alternate in a row. The rows are shifted a quarter of the length of the block.
- Flemish. Alternating interlocking and interfacing bricks in a row, shifting the rows by a quarter of a brick. The tychkovye are located exactly in the middle of the lower or upper spoons.
- Dutch. A row of bonded briquettes is replaced by a series of alternating spoon briquettes with bonded briquettes.
These types of masonry are the most common; in practice, other, no less interesting, decoratively valuable options can be used.
Facing masonry methods
If you don’t know which masonry option to choose to cover your house with bricks, photos from the Internet will help you choose the appropriate option. Cladding a house can be done using one of the popular methods of laying wall material:
- Spoon and track laying are the most commonly used options. In this case, the material is laid with the long spoon side. In the next row, the vertical seam between the elements is shifted by half or a third of the element. This ensures constant overlap of the vertical seam.
- Block cladding of a house involves alternating rows of spoon and butt rows.
- Cross masonry is performed in the same way as block masonry, only you need to ensure that the vertical seam falls exactly on the middle part of the end part of the brick in the top row.
- Gothic styling is the alternation of products laid with a spoon and a poke in one row. In the next row, the vertical seam of the spoon must be shifted by 1/3 of the length, and the butt by 1/2.
- Chain or Brandenburg masonry is performed by alternating two spoons and one poke in one row. In the next row, the poke should fit exactly above the vertical seam of the two spoons.
- Chaotic masonry is most suitable for doing it yourself, since it does not require any alternations.
Types of facing bricks and how to make the right choice
The main types of facing bricks are:
- Ceramic. This type of facing brick is the most common. For its production, clay with special mineral additives is used, from which the molding mixture is made. It is passed through dies, and the output is a fully formed block, which is sent to the kiln for firing at a temperature of 1400-1600°. The resulting products acquire properties approaching those of natural stone - high hardness, low moisture absorption coefficient, strength, etc. Different firing modes provide the opportunity to obtain a wide choice of material colors - from light red to black. The combination of quality and cost of the material is optimal for consumers and makes ceramic brick the most preferred type of cladding.
- Clinker. This material is usually classified as a separate category, although it is, in fact, a type of ceramic brick. The production technology and raw materials are similar, the only difference is a more severe firing regime - up to 1900°. The material becomes almost monolithic, completely resistant to moisture, the service life of clinker bricks is literally calculated in centuries. At the same time, for installation you will need a special composition of the solution, since the usual one does not adhere well to a surface that does not absorb water. In addition, clinker is a poor sound insulator. The high density of the material contributes to good conductivity of sound waves, which should be taken into account when choosing cladding. The cost of clinker bricks is higher than that of ceramic bricks.
- Hyper-pressed. This type of facing material is produced without the participation of clay in the composition of the feedstock. A cement-limestone mixture with additives is used for greater strength and to obtain the desired color shades. The main difference is the absence of a firing process. During manufacturing, the molded block is subjected to high pressure, which makes it very dense and hard. A feature of hyperpressed brick is its large weight - it is not made hollow, like other types, so the weight of the block is maximum. The working edges can have the texture of natural stone, which looks very expressive in the masonry. The price of the material is high, the area of application is the facades of expensive mansions.
- Silicate. This type of brick is made from silicate sand mixed with lime and water. It is distinguished by light tones of block coloring. The material has high water absorption rates, which reduces its frost resistance and durability. This circumstance reduces its competitiveness among other types of facing bricks so much that recently sand-lime brick has almost completed its career as a cladding, completely moving into the category of building material.
When it comes to choice, the clear leader in strength and resistance to any load is clinker brick. If decorative properties are considered as a priority, then hyper-pressed brick is ahead. In terms of price-quality ratio, the most preferable type of cladding is ceramic.
IMPORTANT! The decorative properties of the material are not so different from each other that one or another type can be unambiguously recommended as the undisputed leader. The main selection criterion is the user’s personal taste and preferences.
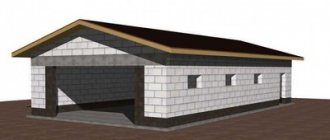
Brick house projects
“Home is my castle” - this is the phrase that comes to mind when talking about a brick house. Warm, comfortable, durable - it is the embodiment of comfort and home warmth.
Brick houses are distinguished by structural strength, a high degree of protection against fire and atmospheric influences, durability and low susceptibility to biological factors. Thanks to the use of different types and textures of bricks in construction, architects manage to create real masterpieces of construction art.
Also, the advantages of brick houses include excellent heat and sound insulation properties, environmental friendliness and the creation of a special microclimate in the house.
The modern market is full of many varieties of bricks. Decorative brick allows you to protect the facade of the house from atmospheric influences and makes it attractive. For the construction of small structures, solid brick is used, for two- and three-story buildings - hollow brick. The use of various masonry allows you to achieve increased thermal insulation of the house, making it even warmer and more comfortable.
The Proproject team has extensive experience in drawing up standard and exclusive projects for the construction of brick houses of any complexity. From us you can order an individual design of houses that fully meets the requirements and wishes of your family or choose a ready-made project.