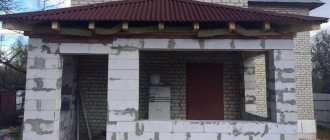
Currently, gas silicate block is one of the most popular building materials. This material has not been available in our country for long, but is chosen by 2 out of 3 construction companies. The fact is that this material combines a lot of advantages that greatly affect the quality of life in the built house.
Firstly, the price. This material is not expensive and can be purchased at any hardware store.
Secondly, unique practicality. The gas silicate block consists of a concrete base, but it is cut through by many small pores. Due to this, a unique ventilated microclimate is created, which does not release excess heat and, at the same time, ensures air circulation.
Thirdly, there is a large variability of sizes. You can choose a block exactly for the desired height of the room.
Interior finishing of a house from gas silicate blocks is a very important process that requires compliance with many rules, and in this article we will discuss them.
Plaster
The plaster layer can be created not only as the basis for a ventilated facade or clinker tiles. With proper selection of the mixture and competent execution of the work, it will become an attractive design solution in itself. It is recommended to use only specialized facade plasters. When working with acrylic compounds, you can count on long-term preservation of beneficial qualities, but you should be wary of open flame (the material can easily ignite).
Silicone plaster, which absorbs little water and is relatively inexpensive, demonstrates a wide variety of textures, but a meager range of colors. It should not be used where a significant amount of dust and dirt will fall on the walls. The gypsum composition dries quickly and is not subject to shrinkage, and only one layer is enough for decoration. But we have to take into account a low level of vapor permeability and accelerated wetting under the influence of precipitation. In addition, the surface of the plaster is often covered with stains, they will have to be painted over immediately - there is simply no other way to deal with it.
The procedure for plastering aerated concrete walls
Cement mortar, regardless of its composition (with or without plasticizers), is applied to aerated concrete in layers:
- Spray - the first layer is no thicker than 5 mm. The liquid mixture is poured or rubbed over the base to achieve optimal adhesion.
- Soil - the second layer of a thicker solution is applied at a depth of 1-2 cm, achieving leveling of the plane of the wall; it is this layer that is responsible for the overall strength of the entire “pie”.
- Covering is the third layer of 3 - 8 mm, rubbed over the wall with a float; its task is to level out the remaining unevenness as much as possible for subsequent finishing.
You can buy plaster in the form of a dry powder or a ready-to-use solution. Before applying the first layer, it is recommended to treat walls made of foam blocks and gas silicate with a smooth surface with special primers to enhance adhesion. In addition, the use of a primer makes it possible to abandon the three-layer application of plaster and limit it to primer and coating.
Interior wall finishing made of aerated concrete or foam concrete. Photo
Advice: After priming and before plastering, walls made of foam and gas blocks should be covered with a special plaster fiberglass mesh. This will increase the cost of the work, but will provide protection against cracking.
For covering, ready-made compositions are used, which in addition to cement contain lime, characterized by fine grain size. They are more vapor permeable than cement plaster, but allow for better smoothing for subsequent finishing. The covering can also be done with putty, which, if desired, can be given smoothness or texture in accordance with how the walls will subsequently be finished.
The drying time for cement plaster depends on the total thickness - 1 week for each centimeter, or better yet 2.
The general plastering technology looks like this:
- All existing cracks, potholes, chips, dents on the wall should be filled with the same adhesive solution that was used for laying it;
- The remaining minor flaws on the walls and all masonry seams are rubbed with a special grater;
- The entire surface of the walls is thoroughly dust-free;
- The entire surface is covered with a primer layer by layer and the layers are thoroughly dried, as recommended by the manufacturer of the composition;
- According to the specific technology chosen, layers of plaster are applied - spray, primer and covering, or only some;
- Prime the wall again;
- Cover with finishing putty for subsequent finishing.
- The walls are then decorated with suitable materials that the owner likes - paints, wallpaper, etc. The correct technology for performing all preparatory work with the required drying time for each layer will ensure exceptional durability of the plaster.
Theory alone is not enough to do the job efficiently; you need practical skill and experience, since it is impossible to demonstrate in words every nuance of plastering. It will not be difficult for a specialist with experience in this type of work to complete the interior and exterior decoration of the walls of a house made of foam or gas blocks, and for this type of work, depending on the volume, a team of 1-2 people is sufficient
Before starting finishing, it is important to wait 2-3 months for the new house to shrink, so as not to redo the cracked walls later
Criteria for choosing a finishing method
Rough finish
When choosing a method of interior finishing of a gas-construction structure for a particular room, it is necessary to proceed primarily from its purpose and climatic parameters, as well as the possibility of changing them, budget and personal preferences or design ideas.
For those who are just starting to master this difficult skill, the video in this article shows where to start, how to choose materials and make the cladding with your own hands.
DIY plastering
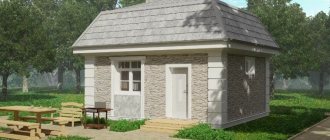
A private house
Finishing an aerated concrete house inside
In your own house made of gas blocks, there are at least three types of premises:
- With a normal level of humidity (halls, bedrooms, living rooms, children's rooms, hallways). For finishing, it is better to use ordinary drywall, wood panels, paper wallpaper, water-permeable paint and vapor-permeable plaster or decorative blocks of gypsum, sand and lime.
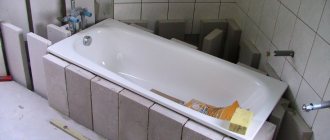
- With a high level of humidity (kitchens, bathrooms, saunas, swimming pool, door area facing the street). It is better to use waterproof drywall, plastic panels and tiles.
- For household purposes, in which the humidity level may fluctuate (storerooms, plinths, boiler rooms). Ideally, cement-sand plaster should be used here; fire-resistant materials are suitable for combustion rooms.
Internal finishing of aerated concrete house
Office premises, public institutions
Priming office walls
The decoration of the interior walls of public premises should be based on those types of materials that ensure maximum durability of the building structure and, naturally, meet the design ideas in interior design.
It is better to line rooms located far from entrances/exits with vapor-permeable materials, while those located nearby and in contact with the street atmosphere should be lined with waterproof materials.
Office decoration
Requirements for interior decoration
Finished room with finishing
When choosing a material for wall cladding from aerated block, you need to remember its high hygroscopicity.
Therefore, two problems arise simultaneously:
- Increase the comfort level of staying indoors. To do this, you need to ensure that there is no increase in humidity in the room. This can be ensured by a vapor-permeable finish and ventilation system.
- Reliably protect aerated block walls from moisture accumulation. Increased humidity inside the house will lead to the accumulation of moisture in aerated concrete and its rapid destruction. In this case, vapor-tight materials are used.
External wall insulation in section
The interior decoration of walls built from aerated block, no matter what material option is chosen, must comply with building codes.
If it is a vapor-permeable cladding, then it should not lead to the slightest retention of liquid in the aerated concrete, and if it is vapor-tight, it should not lead to the accumulation of dampness under a layer of finishing material on the wall surface. These problems can be solved by the correct choice of materials and their high-quality installation.
Cladding option
Comparison of the properties of vapor-permeable and vapor-tight finishes:
Vapor-permeable Vapor-tight Many professional builders choose this option. However, extremely strict requirements are imposed on the choice of material. It must have a high degree of vapor permeability. These are, first of all, materials such as: Gypsum. Perlite sand. Slaked lime. Chalk. Dolomite. Tree. Vapor-permeable properties prevent moisture from accumulating in the aerated concrete wall if condensation forms. This significantly extends its strength properties and durability of the entire structure. Vapor permeable is suitable for residential premises with normal humidity levels, in which it is necessary to maintain a healthy microclimate.
The vapor-tight finish allows for a greater variety of materials to be used. The main thing is that during operation the strength of the cladding and its vapor-tight properties are maintained. There are many methods for vapor-tight interior lining.
However, most often, the cheapest and most effective is used - applying plaster based on cement-sand mortar. The main thing in this method is to ensure complete waterproofing of the gas-block wall from both the foundation and the room. If these requirements are not met, over time, due to the high hygroscopicity of aerated concrete, the plaster will begin to peel off and the wall will be exposed to dampness. Therefore, it is not unimportant to eliminate all possible sources of dampness from both the facade and roof. Vapor-tight cladding is used in residential premises with high atmospheric humidity, for example, in the kitchen, bathroom, sauna, swimming pool, toilet, as well as for the interior decoration of non-residential warehouse or industrial premises.
Cement plaster applied from the inside
What types of finishing of aerated block walls are there?
The most popular options:
- Creation of frame-hinged finishing with plasterboard or plastic/wood panels.
- Plastering.
- Block masonry (decorative brick, tile, artificial stone).
- Final putty.
- Painting/wallpapering.
Ceramic tile cladding
The most popular methods of interior finishing
Progress of finishing work
Let's consider the most popular finishing methods, their features, characteristics, performance, advantages, disadvantages and scope of application.
| Type of finish | Features/Specifications | Scope/advantages/disadvantages |
| Drywall
| Installation of drywall is carried out on a pre-mounted wooden, plastic or metal frame and has the following features:
There are at least three types of drywall:
As an option for finishing a gas-block wall, you can use plastic or wooden panels. Their installation is carried out according to the same rules. | Advantages:
Flaws:
Wooden and plastic panels are best suited for rooms with a high degree of air humidity. These can be kitchen premises, baths, bathrooms, swimming pools. Depending on the type, drywall is used in all types of premises. |
| Plaster Plaster | The plastering process is necessarily preceded by the application of a waterproofing primer to the surface. In the future, the plastering process consists of the following stages:
If the plaster is vapor-permeable, the finishing material should have the same property. As a material for plaster, it is best to use special dry mixtures with high adhesive properties. Instructions with photos (pictures) on how to properly dilute the mixture and use it are usually included with the package. | The basis of plaster mixtures is cement or gypsum/lime as a binding component.
However, to prevent aerated concrete from absorbing moisture, it can be plastered only where the level of atmospheric humidity is at an acceptable level. Advantages of plastering:
Flaws:
|
| Block decorative masonry (tiles, brick, stone) Decorative finishing | Exterior finishing is often done in the form of decorative brick/stone/tile masonry. However, recently this method has begun to be used for interior cladding work. The only difference is the choice of material. For interior decoration, it is preferable to use vapor-permeable materials:
Naturally, the use of products for interior decorative block masonry from such materials is aimed at maintaining a healthy microclimate in the room. If the main task is to create maximum waterproofing, then it is better to use the same materials that are used for external cladding.
Today, finishing is done using so-called artificial stone. It can be based on a variety of components, but most often gypsum, lime and sand of various modifications. In general, the technology of internal block masonry is similar to the plastering process: preliminary preparation and priming are also required. | Decorative block masonry is used in the interior decoration of premises for various purposes - from residential/office to industrial and warehouse. For bathrooms, kitchens, toilets, swimming pools, saunas and baths, it is better to use tiles or blocks made of waterproof materials. Advantage:
Flaws:
|
| Final putty Finish putty of walls | Finishing putty, as one of the final finishing options and as preparation before painting or gluing wallpaper. The material used is a special industrially produced gypsum-based finishing putty. Paint and wallpaper applied to the finishing coating must be made exclusively from vapor-permeable materials. Paints must have a silicate or silicone base, and wallpaper must have a paper base. | Used for leveling walls. The putty material is vapor-permeable, so it can be used in rooms with normal air humidity. The putty has the following advantages:
Flaws:
|
| Painting and wallpapering. Surface painting | Painting and applying wallpaper not only has a decorative function, but also a way to create a vapor barrier. Wallpaper, like paint, can have both vapor-permeable and vapor-proof properties. Before applying wallpaper or paint, the surface must be prepared:
Wallpaper can be:
All dyes are divided into waterproof and vapor-permeable. Waterproof ones are mainly acrylic, and vapor permeable ones are silicate or mineral. | Depending on the type of room, its purpose, ventilation system and humidity level, a waterproof or, conversely, vapor-permeable base of paints and wallpapers is selected. Advantages:
Flaws:
|
Drywall installation
Review of comparative characteristics of various types of aerated concrete facade finishing
Finishing the external walls of a house made of aerated concrete is not an easy task. The list of materials suitable for this is extremely large. Let us present a comparative table that will help you make a choice in favor of one material or another and answer the question: “how to clad a house made of aerated concrete?”
Table 1. Finishing the facade of a house made of aerated concrete blocks: comparative characteristics:
| Type of finish | Positive sides | Negative sides | Cost of services for performing work (on a 10-point scale) | Price category of material |
| Plastering with insulation and subsequent painting |
| Seasonality of work Reduced strength and dependence on mechanical influences Requirement to strictly adhere to the order of work, otherwise it is almost impossible to correct errors | 8 | average |
| Siding installation |
|
| 6 | Below the average |
| Laying porcelain tiles |
| High price | 9 | High |
| Painting with textured paints | Weather resistance Color retention Ability to hide minor wall imperfections | Costly due to the large volume of required material Service life is lower than that of other types of finishing | 5 | Average |
| Finishing the facade with block house material |
|
| 8 | Above average |
| Decorative plaster |
|
| 9, some application technologies – 10 | Above average, some types - high |
| Brick cladding |
|
| 9 | Above average, and for some types of brick – high |
| "Wet facade" technology |
| Very high level of sensitivity to temperature conditions Seasonality of work | 6 | Below the average |
How to cover a house made of aerated concrete
Requirements for finishing materials
Finishing materials for aerated concrete must be selected taking into account the SNiP requirements for vapor permeability of the layers of the wall pie. Standards require that they be positioned so that the permeability constantly increases in the direction from the inside to the outside. This means that the interior finish should be less permeable to water vapor than the aerated concrete itself (and the exterior more permeable).
This is a basic requirement, compliance with which is a prerequisite for maintaining the performance of materials and creating a comfortable microclimate in the house. At the same time, installing completely impermeable materials is not as dangerous as using excessively permeable or hygroscopic layers. The fact is that the transition from a more permeable layer to a less permeable one occurs very slowly; the vapor does not have time to be completely absorbed and begins to accumulate, turning into the liquid phase. The finishing layer gets wet, begins to peel off, and the house becomes damp and uncomfortable. There may be mold or mildew that is not easy to remove.
If the interior decoration of a house made of aerated concrete is made of impermeable materials (or with low permeability values), it is necessary to organize abundant and high-quality air exchange. Water vapor will begin to accumulate in the indoor air and condense on cold surfaces. In difficult cases, water begins to flow down the walls, which is unpleasant in itself. If the house is properly ventilated, water vapor is removed mechanically - together with the exhaust stream. Then the condition of the materials returns to normal, and a comfortable and cozy microclimate is created in the house.
Coloring
In most cases, gas silicate blocks are placed on glue. The thickness of the horizontal seam does not exceed 3 mm. The vertical seam can be even smaller if the blocks have a tongue-and-groove profile and are joined in a row without the help of glue. This is good for thermal insulation, but not in a decorative sense - even ordinary brickwork with jointing looks better. You can’t just take and paint a wall either - the seams will appear even through two layers of paint.
There are two ways to paint a facade made of aerated concrete blocks:
Traditional - on plaster. Apply a special thin-layer plaster for aerated concrete. Sand the surface until perfectly smooth, prime and paint.
To improve adhesion with the plaster mixture, blocks with a corrugated surface are produced Source n-dom.ru
Direct dyeing. For this method, it is necessary that the walls be laid out with chamfered blocks, or the chamfer of the blocks is removed before laying. This technique creates the illusion of laying walls from large wall stones with joint joints, and this is a construction classic. The painting process itself follows the traditional scheme: applying a primer, and after it dries, two layers of paint.
This is what a painted aerated concrete facade looks like with the chamfer removedSource stroy-gazobeton.ru
Plaster for aerated concrete in your city
Polymer cement cement plaster
Deep penetration primer
⇆
Start plastering the walls no earlier than 2 - 3 months after the roof of the house has been erected. The walls will shrink during this time.
Look at the advice of a professional on how best to finish walls made of aerated concrete and gas silicate from the inside of a room:
How to glue a ceiling cornice:
More articles on this topic:
⇒ What is good about aerated concrete. Pros and cons ⇒ The thickness of the walls of a house made of aerated concrete - gas silicate ⇒ Laying walls from aerated concrete and gas silicate blocks ⇒ Exterior finishing of the facade of single-layer (without insulation) walls made of aerated concrete, gas silicate.
More articles on this topic
- Cleaning the heat exchanger of a gas boiler or water column from scale
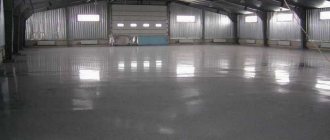
- How to make the right concrete floor in a wooden or frame house
- Air humidifier for apartments and houses - which one is better to choose?
- Materials for the construction of a single-layer external wall of a house
- Films and membranes for water vapor barrier and wind protection at home
- Do-it-yourself shallow strip foundation for a house
- Finishing, covering the walls of the house with vinyl siding
- Sewage system with active septic tank Topas for a private house
Features of the interior decoration of the walls of a house made of aerated concrete, gas silicate
Aerated concrete has high vapor permeability. This means that warm air from the room passes through the thickness of the wall and is gradually cooled to the temperature of the outside air.
In the warm air of a room, the content of water vapor is always higher than in the cold air outside.
As a result of air cooling in the thickness of the wall, water vapor condenses and the wall is moistened. The higher the vapor permeability of the wall, the greater the amount of water that condenses. To reduce the amount of water, the vapor permeability of the wall must be limited.
In addition, water should not accumulate in the wall. To do this, it is necessary that in the thickness of the wall the vapor permeability decreases in the direction from the outer surface to the inner one. That is, the interior finishing should have less vapor permeability than aerated concrete walls, and the exterior finishing should be more vapor permeable than aerated concrete.
The air temperature at which water vapor condenses is called the “dew point”.
Read the details: Article about dew point and moisture accumulation in the wall.
The inner surface of external walls made of aerated concrete (gas silicate) blocks must be protected with a layer of vapor barrier.
Limiting the vapor permeability of aerated concrete walls from the room side is necessary in all cases - both for walls with facade insulation and without insulation, as well as with finishing or cladding of the facade with any material.
The easiest and cheapest way to reduce the vapor permeability of an aerated concrete (gas silicate) wall is to impregnate the inside of the masonry with a primer and apply a layer of cement plaster:
- The surface of aerated concrete blocks is impregnated with a deep penetration primer in 2-3 layers.
- Cement plaster, which has low vapor permeability, is applied to the wall. The surface of the plaster is also primed.
- For finishing, it is also advisable to choose materials with low vapor permeability, for example, vinyl wallpaper, ceramic tiles.
Aerated concrete (gas silicate) blocks D400 have a dry vapor permeability coefficient of 0.23 mg/(m*h*Pa). For cement plaster this figure is 0.09 mg/(m*h*Pa).
Ceramic tile
Tiles are an excellent insulating material. It is impervious to moisture and does not let heat out of the room. Therefore, it is perfect for areas such as saunas and swimming pools.
To install ceramic tiles on gas silicate blocks, you must use a special adhesive. It will allow you to reliably isolate the seams between the blocks and the tiles. When installing in rooms where there is a large amount of water (bathtub), it is necessary to use a continuous adhesive layer. This will protect the gas silicate blocks from destruction.
Consider a ventilation system because excess moisture will accumulate in the area of the tile seams. This will create conditions for the development of mold and mildew.
Pros.
- Easy to clean from dirt.
- Excellent moisture insulation.
- Has a positive effect on thermal insulation.
- Various visual design options.
- Gives the room a strict look.
Minuses.
- Difficult installation.
- Relatively high cost.
- Fragility during transportation.
Wall-mounted cladding
The principle of its operation is the same as that of brick cladding, that is, it assumes a ventilation gap between the load-bearing wall and the facade material (this design is also called a “ventilated facade”). There are many types of curtain cladding, but the most commonly used are:
- Decorative (artificial) concrete stone
- Wooden plank
- Fiber cement or other siding
- Clinker tiles
- Porcelain tiles
- Roofing metal - corrugated sheeting or seam covering (for barnhouse style houses)
- Facade bitumen tiles
The facade material is attached to the wall made of aerated concrete using a substructure - guides, most often in combination with a sheathing installed on them (sometimes - a solid flooring). For wooden sheathing, roofing metal, and some sidings, guides and sheathing made of wooden blocks 40-50 mm wide and 10-40 mm thick are used. The bars are fixed to the wall with nails or self-tapping screws for aerated concrete. Often, before installing such cladding, the facade is covered with a vapor-permeable, waterproof and windproof membrane.
In other cases, the guides and sheathing are thin-walled profiles made of galvanized steel. They are attached to the blocks with one or another fastener for aerated concrete (expansion dowels, dowel-nails, anchors, etc.), providing gaskets made of waterproofing material, for example, butyl rubber tapes, at the point where the profiles adjoin the wall. Some substructures suggest that steel brackets are first mounted to the blocks, and then guides are installed to them. Steel elements are usually connected to each other using self-tapping screws.
In fact, the main difficulty is to choose the right fasteners for the guides, whose pull-out load will correspond to the aerated concrete and cladding. The pitch of the guides and sheathing depends on the size and weight of the facing elements, that is, they are selected individually for the type and model of material. It should be noted that manufacturers of facade cladding give clear recommendations on the construction of the substructure, and often offer all the necessary components for its installation. Especially if the facing element has a specific shape, and to secure it you need, for example, a lathing with special fasteners.
Review of finishing materials, characteristics and properties
1. Plaster compositions.
Gypsum and lightweight cement-lime varieties, applied in a thin layer to walls treated with special primers, have properties suitable for protecting and decorating gas blocks. In this case, DSPs are rarely used and exclusively in rooms of a country house with high humidity loads - bathrooms, saunas and lavatories. This is due to both the closure of the cells with an impermeable layer and the risk of it coming off or cracking due to its high weight.
Light gypsum varieties are used for interior decoration, both to prepare the base for finishing, and as an independent coating. They are applied in a layer of 5 to 50 mm and adhere well, placing minimal load on the structure. Such cladding implies the presence of a vapor-permeable outer covering or a proper system of ventilation facades; the inability to remove internal condensate and steam is considered a serious violation.
Products made of porcelain stoneware or tiles are best suited when it is necessary to create a moisture- and vapor-permeable coating that is subject to frequent washing and similar loads. They are fixed to an adhesive layer that protects the porous blocks from getting wet and are operated under the condition that powerful exhaust ventilation is provided. This variety is the most expensive, with the only exception being cheap tiles.
Ignoring ventilation requirements is unacceptable; this leads to the accumulation of condensation, which gradually destroys the grout in the joints and inevitably penetrates into the blocks.
3. Covering aerated concrete walls with wood.
This method is considered optimal: imitation timber, lamellas or eurolining look attractive and have vapor permeability indicators similar to gas blocks. Natural wood provides additional protection against heat loss and releases phytoncides into the air, which suppress the development of harmful microorganisms. The type of wood does not matter much; the final option is selected based on the budget. In order to protect them from drying out or rotting, such panels and lining need to be coated with hydrophobic primers or varnishes. The limitations of wood finishing include the need for a ventilated façade.
4. Pros and cons of drywall.
Valued for reducing so-called “wet processes”, hiding possible defects and communications, and ease of installation. To cover the walls from the inside, gypsum boards of standard thickness (12 mm) are used, glued with special glue or fixed to the frame of the lathing, in rooms of an aerated concrete house with high humidity - gypsum boards, in kitchens and near chimneys and ventilation pipes - gypsum plasterboards. In terms of permeability, drywall is not inferior to plaster with a similar composition. The features taken into account include the need for additional decoration (gypsum boards are the basis and by themselves look unattractive) and restrictions on the use of conventional brands in unheated rooms.
5. Panels made of artificial stone.
This variety is considered a relative novelty - composite products with a texture that imitates natural materials are chosen for interior decoration, both to emphasize certain areas and as an independent cladding. They are laid in a similar way to tiles and are used under similar requirements. Preference is given to artificial stone based on gypsum, tuff, travertine or lightweight mineral chips; it weighs less and costs less than cement composites.
Best suited for arranging rooms with high humidity: lining, siding or similar lamellas are not afraid of excess moisture or drops. They are fixed to a light lathing with the obligatory covering of the surfaces underneath with waterproofing films or mastics. Despite the availability and complete elimination of dirty processes (plastic is 1.5-2 times cheaper than wood), this option is more often selected for the exterior decoration of buildings (including in ventilated facade systems with or without an insulating layer). The service life of the lamellas directly depends on their quality; acrylic varieties have proven themselves best.
Tips for choosing cladding
Materials for interior decoration are selected simultaneously with façade ones; when the walls are completely covered with aerated blocks, natural ventilation is not enough to ensure a comfortable microclimate and reliability of structures. The selection also takes into account:
- Humidity loads. The surfaces of showers, kitchens and unheated rooms require special attention; specialized cement-based plaster, moisture-resistant grades of plasterboard, tiles or plastic are best suited to protect them.
- Expected external effect. Wood, tiles, gypsum panels and special types of plaster are well suited for decorating a house; an original result is achieved by combining them (lining the edges of openings with artificial stone, zoning).
- Volumes of circulating air, the ability to enhance natural ventilation. In the absence of the latter, preference is given to vapor-permeable products with the condition of ensuring free access of flows to the gas blocks from the facade.
- Easy to install, do the work yourself.
- Adhesion to the working base. In this regard, gypsum plaster has proven itself best; it is recommended to use it as a rough layer when preparing aerated concrete walls for wallpapering or painting.
- Service life, need and frequency of updates, maintainability.
An alternative option is to clean the masonry joints and cover the surfaces with 3-4 layers of hydrophobic composition or paint. But for all its originality, it is rarely chosen and mainly in certain areas. A common practice is to wallpaper walls (on plasterboard or a thin layer of plaster), in which case their ability to breathe depends entirely on the base material. The sequence of actions when finishing indoors is not particularly important, but experienced builders begin work from the back rooms and complete them at the entrance to the building, this eliminates the spread of debris throughout the house.
Recommendations from experts
Experienced craftsmen will always tell you which water repellent for aerated concrete is better. In addition, they will be able to give useful advice on conducting work.
You should not leave aerated concrete material open, because during rain it will become saturated with moisture, and some of its properties will deteriorate.
Construction work should not be carried out from such material from the end of the autumn season to mid-spring. At the same time, it is not advisable to plaster the walls, since the material contains a lot of moisture. You shouldn’t rush to install the plaster layer either. If you do not maintain it for a certain time, a layer with a low level of vapor permeability will be created on the block surface.
Do not carry out work in the autumn season. When the heating is turned on, moisture moves towards the street, creating condensation vapors under the plaster. Excess moisture causes the finishing material to crumble.
If short-term conservation of an object is planned, water drainage is ensured from horizontal surfaces. Protective screens are installed on the canopies, and window sill areas are covered with plastic film. The surface of the walls is left open.
We found out how to treat aerated concrete from moisture. It is known from reviews that aerated concrete stones easily transfer some accumulated moisture when the air inside becomes too dry. In such a case, walls made of such material provide moisture.
It must be remembered that the amount of water in the block pores deteriorates the thermal insulation properties of the material. In addition, a wall saturated with moisture creates a load on the foundation, which increases the likelihood of accidents.
Features of a house built from gas silicate blocks
An advantageous advantage of gas silicate blocks is excellent sound and heat insulation. However, this material also has a significant disadvantage - high permeability, which is why it cannot be called completely ideal.
It is worth noting that as a result of sudden temperature changes, condensation of water vapor begins to occur in the structure of the block, which leads to the formation of moisture accumulation.
This phenomenon is significant, and has a negative effect on the thermal insulation characteristics, as well as a decrease in frost resistance and increases the risk and likelihood of the development of bacteria and microorganisms on the surface of the building material.
The problem of waterlogging can only be dealt with by increasing the vapor permeability of the outer surface of the wall, and this will require a special low-porosity finishing material.
How and with what materials can you cover the walls of a house built from gas silicate blocks.
Myth eleventh - “a wall without external insulation does not meet the requirements of thermal protection”
First, a few words about the requirements imposed by building codes on the external walls of residential buildings that are constantly in use. The first requirement is to ensure sanitary and hygienic comfort in the room. The second requirement of the code for external building envelopes is to contribute to an overall reduction in energy consumption for heating the building. To simplify the calculations carried out when designing thermal protection, the concept of “standardized value of heat transfer resistance” Rq min was introduced. For the first temperature zone, which includes half of the entire territory of Ukraine, incl. and Kiev, the minimum permissible heat transfer resistance of the walls of residential buildings is 2.8 m2 °C/W (DBN V.2.6-31:2006, Table 1). This value means that with a constant temperature difference between indoor and outdoor air of 1 °C, a heat flux with a density of 1/2.8 = 0.357 W/m2 will pass through the wall. And with an average temperature difference over the heating period of 21.1 ºС, the heat flux density will be 7.53 W/m2. Over the entire 187 days of the heating period, about 33.8 kWh of thermal energy will be lost through each square meter of wall. For comparison: through every square meter of window, almost 5 times more energy is lost - about 160 kWh.
The next stage of designing thermal protection of buildings is calculating the need for thermal energy to heat the building. As a rule, at this stage it turns out that the calculated values are significantly lower than the required ones (i.e., the calculated energy consumption is less than the standard one). In this case (in commercial construction), they lower the level of thermal protection of individual building enclosures or (in the case where the customer has to operate the building himself) choose an economically optimal solution: save on one-time investments or rely on savings during operation. The minimum value of heat transfer resistance of external walls of residential buildings, to which thermal protection can be reduced, is 75% of the standard - 2.1 m2 °C/W
Now let’s talk about the heat-protective characteristics of masonry made from aerated concrete blocks.
1. When calculating a wall according to energy saving conditions, we take the average thermal conductivity of aerated concrete at operating humidity as the calculated value. For residential buildings in Ukraine and aerated concrete grade of average density D400, we obtain the following values: calculated humidity 6%, calculated thermal conductivity 0.12 W/m °C (test results from NIISC).
2. The coefficient of thermal uniformity of masonry along the wall field (without taking into account slopes and areas of interface with floors) will be taken equal to 1. Various calculation models show that when laying on a thin adhesive joint of 2±1 mm, the coefficient of thermal uniformity can be reduced to 0.95-0 .97, but laboratory experiments and field surveys do not record such a decrease. In any case, in engineering calculations an error within 5% is acceptable.
3. Thermal insulation of interface zones with floors and window slopes are separate constructive measures with the help of which it is possible to achieve an increase in thermal uniformity to values even greater than one.
Now, using the formula R = 1/αн + δ·r/λ + 1/αв we will find the heat transfer resistance of aerated concrete masonry of different thicknesses (at aerated concrete density of 400 kg/m3).
| Masonry thickness, mm | Heat transfer resistance, m2 °C/W |
| 100 | 1,00 |
| 150 | 1,40 |
| 200 | 1,82 |
| 250 | 2,24 |
| 300 | 2,67 |
| 375 | 3,31 |
As can be seen from the table, already with a thickness of 250 mm, a wall made of aerated concrete D400 can meet the requirements for the walls of residential buildings in order to reduce energy consumption for heating. And with thicknesses of 300 mm or more it can be used even without checking the specific energy consumption for heating. So, a single-layer aerated concrete wall with a thickness of 300 mm or more is completely self-sufficient from the point of view of regulatory requirements for external fencing of residential buildings.
Interior finishing of aerated concrete walls
The advantage of aerated concrete is that this material “breathes” and it is desirable to preserve this property of “stone wood” when finishing walls. Inside heated rooms, warm air contains more moisture than cold air outside. The air in residential premises is humidified from many sources: moisture that enters the air during wet cleaning, during cooking, evaporates from indoor plants and drying clothes. And the person himself is also a source of moisture in the room, which evaporates when breathing or sweating. Moisture is also intentionally introduced into the dry air of modern apartments and houses using humidifiers.
A separate category of premises consists of baths, swimming pools and showers, built into residential buildings or allocated to separate buildings. It is precisely these rooms with very humid operating conditions that must have a vapor barrier on the inner surface of the walls.
Fig. 10 Vapor barrier and waterproofing of wet rooms
As a vapor barrier, we can recommend: impregnation of walls with drying oil or cold bitumen mastics, application with oil putty, finishing with ceramic tiles, wallpapering with polymer coating (vinyl wallpaper), wallpapering with rolls, waterproofing, etc. bitumen materials, vapor barrier device made of foil (for steam rooms and saunas).
It is also important to find a balance between interior and exterior decoration. For example, if the walls inside the building are finished with vapor-permeable materials, and the walls outside are vapor-tight, then some of the steam inside the room will be absorbed into the aerated concrete walls and linger there, this will lead to increased humidity in the walls.
Plastering aerated concrete walls indoors
There are no special requirements for indoor plasters. The required resistance to air permeation is provided by plaster with a thickness of 5 mm and a density of 1000 kg/m3. Gypsum plasters are convenient for interior decoration. You can use lime, lime-cement and cement compositions. The main characteristic of plaster is workability. Strength and frost resistance are not very important when decorating interiors. Each subsequent layer of plaster can be applied only after the previous layer has completely dried.
Fig. 11 Plastering walls for interior decoration
Cladding aerated concrete walls with ceramic tiles or stone
Tiling can be done directly on the masonry. If the temperature and humidity of the room impose special requirements on the finishing layer, then a coating polymer-cement or bitumen hydro- or vapor barrier can be applied under the tiles. Or tiling with ceramic and porcelain tiles in wet areas can be done on a previously plastered or lined with gypsum fiber sheets and primed surface. When facing with natural or artificial stone, it is important to choose the appropriate, high-strength adhesive. When filling seams, it is convenient to use a plunger gun.
Fig. 12 Wall cladding with ceramic tiles
Painting
But since in this case you will still have to paint the aerated concrete wall, it is logical to look at the use of paint. Paints and varnishes of this kind are divided into two groups: some contain reinforcing fibers and add texture, while others form an attractive relief. Both types of coloring mixtures can be applied to aerated concrete blocks with a simple roller without additional manipulation. The created layer has a matte tint, the tonality of which can be easily adjusted with color additives. Paints and varnishes for aerated concrete are guaranteed to work for at least 7 years and will absorb some water.
This solution eliminates the occurrence of cracks, and the refusal of the developers to use a water-based organic solvent helps prevent the occurrence of bad odors. Before applying paintwork, it is necessary to remove all dust and smooth out minor defects using a grater. Painting is carried out either immediately or using façade putty (depending on the complexity of the situation).
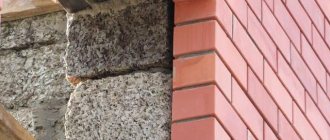
Facade cladding made of aerated concrete, aerated silicate blocks and bricks
If in the future it is planned to line walls made of blocks with bricks, then the conditions for this must be created at the stage of laying the foundation. The width of the foundation should be such that bricks and blocks can rest on it at the same time. The overhang of half-brick facing masonry from the foundation should not be more than 30 mm.
The vapor permeability of brickwork with jointing is significantly less than that of a wall made of aerated concrete blocks. Therefore, condensation should be prevented from forming at the boundary of the brick cladding and the wall made of aerated concrete blocks.
To do this, an air gap of 30-50 mm must be left between the brickwork and the aerated concrete wall.
The width of the gap is selected based on the height of the building and the convenience of its arrangement.
To prevent the gap from becoming clogged with masonry mortar when laying the facing layer, an adjustable sheet of foam plastic should be inserted into the gap between the brick and aerated concrete in the masonry work area. The thickness of this sheet will determine the width of the gap.
Ventilation must also be provided in the gap.
. To do this, leave ventilation ducts in the brickwork with a total area of at least 1% of the cladding area. Vents are made at the top under the eaves overhang and at the level of the base, leaving the vertical seams between the bricks unfilled with mortar.
On the inner surface of the brick cladding, water may appear in the gap and flow down. Water can penetrate when the wall gets wet from the outside or appear as a result of vapor condensation if the ventilation of the gap is insufficient. To protect aerated concrete walls from moisture, it is necessary to properly waterproof the base for walls with brick cladding.
There is no need to create a gap between the brick cladding and the aerated concrete wall.
In this option, it is imperative to finish the interior walls with materials with low vapor permeability, especially in wet rooms.
Such cladding without a gap inevitably leads to
to an increase in the operational humidity of the wall and, as a consequence,
to a decrease in the thermal resistance of the wall.
The indoor microclimate is deteriorating, and energy costs for heating are increasing.
Brick cladding without a gap is quite acceptable for buildings that are not intended for year-round use (not heated in winter).
The brick cladding is attached to the wall using ties. There must be at least four connections between bricks and blocks per square meter of wall.
Window and door openings in the cladding are covered with steel corners supported on the edges of the openings by 250 mm. from each side.
Options for attaching brick cladding to an aerated concrete wall:
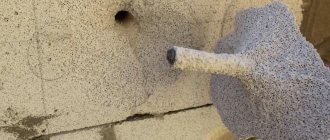
Through embedded parts left during the construction of aerated concrete masonry.
When laying on glue, stainless steel bandage tape 19.1x1.1 mm can serve as embeddings. or ordinary galvanized perforated strip 20x1.5 mm, used for electrical installation work. For a more durable fastening, the strip can be additionally nailed to aerated concrete.
When laying blocks on the mortar, the following is used to fasten the cladding:
- Special flexible basalt-plastic connections that are placed in the masonry seams. The flexible basalt connection must extend into the load-bearing and facing walls at least 90 mm.
- Masonry galvanized steel mesh, which is laid in the seams of masonry blocks and cladding. The masonry mesh can serve as a convenient support for slabs of mineral wool insulation, which are laid between the wall and the cladding.
Fastening the cladding layer to the wall with stainless steel rods (left) or spiral nails for aerated concrete (right)
In addition, the brick cladding is connected to the wall with special spiral nails for aerated concrete, which are driven into the body of the aerated concrete with a hammer;
or stainless steel nails with a length of at least 120 mm, hammered into aerated concrete in pairs at an angle of at least 45° to each other, or rods that can be cut from stainless or galvanized wire with a diameter of 3-6 mm.
For cladding it is best to use clinker bricks. The article “Cladding the walls of a house with clinker bricks” describes the advantages of clinker, as well as other secrets of cladding walls with brick.
In low-rise construction, the design of an external three-layer wall is very popular: load-bearing wall - insulation - brick cladding.
If you want to insulate an aerated concrete wall, then read on: How to insulate a wall with brick cladding.
Exterior finishing of aerated concrete
First, let’s talk about how you can’t trim. You cannot insulate with polystyrene foam or expanded polystyrene, plaster the outside with ordinary sand-concrete plaster, or paint with covering film-forming paints. If necessary, you can use mineral wool as insulation and paint it with paints that do not block the pores for moisture to escape from the wall. Now let’s talk about how to finish a foam concrete façade.
Curtain facades: lining, siding, panels, etc.
When finishing with any materials that are mounted on the sheathing or guides, a gap remains between the finishing material and the wall. It is called ventilation, since in this gap, with the correct design, there is active movement of air from bottom to top. The correct device is the presence of holes in the finishing material at the bottom and top. This ensures the movement of air flow from bottom to top. This flow carries away moisture, which is removed from the room. This device solves the problem of condensation and also maintains normal wall humidity. Since aerated concrete has lower strength characteristics at high humidity, maintaining its normal humidity contributes to a longer “life” period. The dependence of the strength of aerated concrete on the percentage of moisture content is presented in the graph.
Dependence of the strength of gas silicate on humidity
When exterior finishing of aerated concrete with a ventilated gap, most of the time it has a humidity in the range of 10-15%, i.e. is in the optimal zone. To create such a gap, a lath is placed over the entire area of the wall, ensuring a distance of 3-5 cm from the wall to the exterior finish.
An example of lathing for siding or lining
For the lathing, wooden beams (treated with antiseptics) are used, metal guides - galvanized profiles for plasterboard or special ones for ventilated facades. The frequency of the lathing is 40 cm. Using this principle, aerated concrete facades are sheathed with clapboards, siding, and facade panels.
When attaching the sheathing to the wall, the question arises: with what, or rather, “what” to attach the sheathing to the gas silicate. You can simply use self-tapping screws (black ones, they are stronger), but in order for the sheathing to hold well, you will need a lot of length. This means that metal goes deep into the body of the block. In winter it is an excellent cold bridge. But this is not the worst. When exposed to wind loads, the frame vibrates, and the vibration is naturally transmitted to the fasteners. Under the influence of vibrations, foam concrete is crushed. As a result, the screw may fall out.
And that is not all. Due to the temperature difference - the relatively warm aerated concrete and the quickly cooling metal of the screw - condensation forms on the screw. When the temperature drops, it freezes, destroying the body of the block. In general, do not simply use self-tapping screws to attach the sheathing to the aerated concrete from the outside.
Fastening galvanized profiles to hangers
To avoid such a situation, plastic plugs are inserted into the wall and dowel nails are used. Ordinary ones are of little use, although they are better than just self-tapping screws. If you use regular ones, the length of the plastic plug should be at least 30 mm.
In general, it is better to attach it to special ones, which are called “for aerated concrete”. They are available in specialized stores that sell hardware. You may not find them on the regular construction market. From ordinary ones they are doused with larger sizes of the plastic part, as well as more developed screw plates.
Types of dowels for gas silicate
The installation method is standard. A hole is drilled under the dowel plug (plastic part). Depending on the shape of the screw surface, a plastic insert is driven into it (the upper dowel in the photo) or screwed in (the lower one). Then the screw is screwed in.
How to install a dowel in aerated concrete
When using wooden blocks or galvanized profiles, they are attached to such dowels. The sheathing installation step is smaller than usual - it is about 40 cm. This is for a more even distribution of shock loads that occur during strong winds. An example of covering aerated concrete with siding can be seen in the video. There are many useful nuances.
Brick finishing
If you cover an aerated concrete façade with bricks correctly, it will stand for decades without problems. A prerequisite is that there must be a ventilation barrier between the wall of the finishing material and the wall made of aerated concrete. Its width is at least 30 mm. In order for it to work, when laying finishing bricks, vents are left in the lower part - small holes into which air will enter. To prevent animals from getting into them, they are covered with ventilation grilles.
The principle of “operation” of the system with a wall made of finishing bricks spaced 3-5 cm
Only this type of finishing, unlike ventilated facades, should be taken into account when calculating the foundation. Firstly, the mass of brick finishing, even half a brick, is considerable, and it must be taken into account when calculating the bearing capacity of the foundation. Secondly, the width of the finishing is taken into account when determining the width of the foundation: the overhang of the brick cannot be more than 3 cm, and a ventilation gap of 3 to 5 cm is also needed between the wall and the finishing.
But, if you simply place a brick wall at the required distance from the wall of the house, there is a very high probability that it will simply fall. Therefore, it is necessary to connect the walls of foam concrete and brick. To do this, even at the stage of laying foam concrete, thin plates called “flexible connections” are installed between the blocks. It's best if they are made of stainless steel. The environment in the solution in which these strips are embedded has an alkaline reaction, and in an alkaline environment metal, even galvanized metal, quickly deteriorates.
Mounting plates are inserted into the seams to bond with the foam concrete brick trim, but they are galvanized and the brick trim may fall off after a few years
The plates on the wall surface are placed approximately 60 cm in every second row, the maximum height distance between two rows is 50 cm. The plates are arranged in a checkerboard pattern. It is worth placing them more often in the area of corners, window and door openings.
Installation of flexible connections when finishing bricks with and without insulation
Sometimes when laying the plates they forget about them. In this case, a dowel is screwed into the wall, to which a metal perforated plate or also a special stainless steel pin is already attached. Another option: when laying bricks, a hole is made in the wall exactly opposite the seam into which a pin is driven. The pin should extend 10 cm into the concrete body and almost the entire width of the brick. But the pin is not flexible and can break both aerated concrete and brick finishing (into a brick floor, for sure). Therefore, it is better not to suffer from such “savings”. How to finish aerated concrete using finishing bricks with a ventilator - in the video.
How to plaster a facade made of aerated concrete
As already mentioned, plasters for aerated concrete can only be used with high vapor permeability. These plasters are expensive, but they are applied in a thin layer. Therefore, to obtain a smooth surface, a number of preparatory measures are required.
You can start plastering work when the humidity of aerated concrete blocks is no higher than 27%. Before starting work, the surface is treated:
- removes dust with a brush;
- use a grater to level the surface;
- dents and chips are repaired with glue mixed with aerated concrete dust, which was obtained when cutting the blocks.
Minimum layer - up to 10 mm can not be reinforced. Due to the adhesive additives in the composition, it will adhere tightly to the surface. If the layer is 10-15 mm, reinforcement with a fiberglass mesh is necessary; with a thickness of 15-20 mm, a metal mesh is required. External finishing of aerated concrete with plaster of greater thickness is impractical.
The mesh for outdoor use should have a mesh of about 3 mm. It must be resistant to alkaline environments (written on the packaging), otherwise after a couple of months it will lose strength and will no longer hold the plaster. As a result, the finishing layer will fall off.
Exterior finishing of aerated concrete with plaster
Reinforcement is carried out over the applied layer of primer mixture. It is also used specially, has excellent adhesion to foam concrete, and creates the basis for applying decorative plaster. The composition is applied to the wall in a strip. Before it freezes, a mesh is rolled out over it. Using a notched trowel or grater, press the mesh into the solution. After it has completely sunk, take a regular wide spatula and level the surface, adding mortar if necessary. The leveled surface is left to dry. The period depends on the material used and is specified by the manufacturer. The average period is 7 days.
A primer is applied to the dried surface of the reinforcing layer. It performs several functions:
- equalizes the absorbency of the base (reduces it);
- paints it gray (it is white);
- reduces porosity.
Using the dried primer (in the description), the final finish is applied - decorative plaster. The technique for applying it depends on the type of composition.
Myth one: “laying blocks with glue is more expensive than with cement mortar”
Well, this is not so much a myth as a simple delusion stemming from laziness. It’s too lazy to spend a couple of minutes on a comparative calculation. Let's look at the “simplicity and cheapness” of mortar masonry. First, regarding the ease of laying with mortar compared to glue. Perhaps, for “builders” whose youth was spent in student construction brigades, and simply for masons who have lived for a long time, mortar masonry is more familiar. And retraining to work with thin-layer glue will require some effort and time from them. But for a person starting from scratch, as well as for someone who has spent time on retraining, masonry with glue requires less time and effort. There is an objective reduction in labor costs when laying blocks with glue (compared to laying with mortar), which is even reflected in the reduction in estimated prices for such masonry.
Now about the cheapness of the solution compared to glue.
Back in the 80s, masonry with thin layers of “mastic” and “glue” was considered as a way to reduce the consumption of binder during masonry work. The consumption of c/p solution (seam thickness 10-12 mm) is 5-6 times greater than the consumption of glue. Despite the fact that aerated concrete adhesive is one of the cheapest dry construction mixtures. Glue costs about 2 times more than a simple cement-sand mixture and costs 5-6 times less. Yes, there are individual manufacturers of dry mixes who manage to sell adhesive for cellular concrete at relatively high prices. Well, that’s why they are separate, so that with their exception they set off the general rule: adhesive for aerated concrete is a cheap replacement for mortar (with good accuracy of the geometric dimensions of the blocks). Thin-layer adhesive should always be used for laying aerated concrete blocks. To improve the economic, thermal and strength characteristics of masonry.
The procedure for finishing work
The external and internal appearance of a building made of aerated concrete, the durability of the finishing and the frequency of necessary cosmetic repairs are determined by the correct selection of finishing materials, the general design of the building, the qualifications of workers and the procedure for carrying out all work. Design features of the building that extend the life of plastered surfaces include creating a roof that protrudes as much as possible, which protects the walls from getting wet during slanting rains. As for the procedure for carrying out the work, firstly, all external finishing work should be completed in the warm season, allowing the aerated concrete box to stand for at least 6 months to complete mainly the processes of shrinkage and drying of the aerated concrete blocks, and secondly, carry out external finishing work only after completion of the interior (including pouring the floors), and not vice versa! This is due to thermophysical processes involving the transfer of steam from the interior to the external environment and to the drying processes of the aerated concrete itself. We have repeatedly observed the appearance of microcracks on the surface of external plaster even when using the most skilled labor, but in violation of the specified sequence. However, with correctly selected external plaster, even such microcracks do not lead to peeling of the protective coating, although the durability of the entire structure, of course, decreases. Thus, in the case of using the façade plaster mixture “Egida X-1 S-42” as external plaster, during the entire period of operation (up to 5 years!) at none of the objects where it was used, peeling of the external coverings from aerated concrete walls. Let us now move on to presenting possible finishing options for the erected structures, based on the assumption that these structures were erected in compliance with the technological principles listed in sections 1 and 2, i.e. the walls have been erected, the roof of the building protrudes significantly above the walls, the customer has chosen proven finishing compounds, the construction team is sufficiently qualified, the time intervals between the construction of the walls and their finishing have been observed, and the correct order of work has been chosen.
PVC panels
One of the most budget-friendly finishing options. They can be of different colors, different textures (even wood or stone tiles). Before installation, treat the walls with a waterproofing layer.
It is important to consider that PVC panels are not resistant to temperature differences and, therefore, it is not recommended to install them on outdoor premises (balconies, verandas).
When installing a PVC panel, the wall must already be leveled and there must be excellent ventilation in the room, since the panels are not very resistant to moisture.