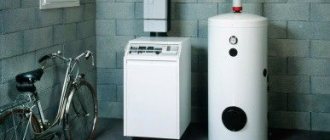
At the end of the summer season, a huge amount of all kinds of pickles, vegetables, fruits and other things accumulate in the cellar or basement. However, the happiness from natural products sometimes does not last long, as condensation forms in the storage room, and subsequently mold and mildew. As a result, everything grown on our own goes into the trash.
Therefore, at the first sign of moisture in a concrete cellar, you should take immediate action. Otherwise, crop loss will not be the only problem.
Where does dampness come from?
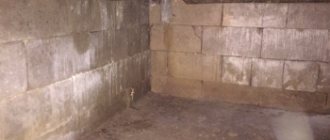
This problem most often occurs in basements. There can be many reasons for the appearance of condensation:
- Problems with the ventilation system. As a rule, this common mistake is made at the stage of designing houses. If the floor slabs were poorly laid, and the ventilation ducts were blocked by construction debris (or they were not designed correctly at all), then it is not surprising that moisture appears.
- The groundwater level is too high. This is almost a standard situation for most regions. In spring and autumn, heavy rains begin, which leads to flooding of basements and cellars. If the drainage system is poor, the humidity rises rapidly.
- Capillary penetration of moisture. During the construction of the concrete foundation, mistakes could have been made, due to which moisture from the soil began to penetrate through microcracks in the foundation.
If the problem is not solved, mold will begin to form. This means that the cellar under the house can “infect” the entire structure. Mold and mildew are known to be hazardous to health. In addition, increased moisture will lead to the fact that food will begin to deteriorate, and the walls of the cellar itself will collapse faster.
Therefore, it is worth periodically inspecting the underground storage facility for damage to the walls. Even the strongest concrete can crack if the installation process is not carried out correctly.
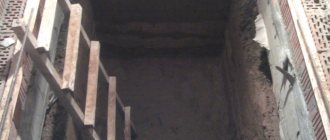
Strengthening beams
How to connect LED ceiling lights. How to install lamps in a suspended ceiling
This solution to the problem is used when there is no danger of the vegetable storage roof collapsing, and the walls are still able to take on a significant load and not collapse. The most common case in which the ceiling above the cellar has caved in and needs repairs is rotten or load-bearing joists that have just begun to rot. They can be replaced or strengthened and this is done in several ways:
- Installation of supports that will straighten the curved surface and take on part of the load.
- Installation of additional power structures parallel to the old ones.
- Dismantling the roof of the room from above and partially dismantling the existing floor joists and replacing them with new ones.
- Reinforcing the logs installed during the construction of the cellar with overlays made of wood or metal.
The first option is the simplest - you need to install several supports in those places where the deflection of the ceiling is most noticeable. Before inserting the supports, the sagging surface must be raised and leveled, and the supports must be installed at such a height that the plane after their installation is level. To distribute the load more evenly, it is necessary to mount a support platform made of metal or wood at the point of contact of the rack with the surface.
Additional power elements are mounted next to the sagging ones, at some distance. You will need to either install supports along the edges of the room on which they will lie, or make additional holes in the load-bearing wall to insert the ends of additional beams. The operation is very labor-intensive and requires certain skills in construction.
It is not always possible to dismantle the roof of this structure. Therefore, this repair option is most often not used. Otherwise, the technology for restoring floors will be similar to building a new storage facility for vegetables - all stages of roof construction will be identical.
It is much easier to strengthen existing power elements with overlays. To do this, it is necessary to support the existing joists with temporary supports so that the ceiling is level. After this, the linings are mounted on both sides of the reinforced log - on the sides or below and above. They can be made of wood, and in this case, they are bolted all the way through, and also tied on the outside with wire. The linings must have the length of the reinforced log.
If you use a metal corner or metal plates, you need to fasten them according to the same scheme. However, the difference here is that the metal must first be drilled and the holes in the beam must be made exactly in accordance with them. If drilling the joist itself is not possible, then the lining is secured with metal clamps.
How to understand that the humidity level in the cellar is high
There are several options for how to understand that emergency measures need to be taken. The easiest one is to use a hygrometer. This is a special device that shows accurate humidity levels in the room. As in a regular refrigerator, in a concrete cellar this figure should be 85-95%.
If there is no hygrometer, then proceed as follows:
- Pour water into a glass container and place it in the refrigerator for 24 hours.
- We put a container of cold water in an underground storage facility and see what happens.
- If after some time the glass begins to dry out, this indicates that the humidity is too low. If there are no changes on the walls of the container, we can say that the humidity in the room is normal. But if drops begin to appear on the glass, this indicates an increased moisture level.
Increased humidity is also indicated by condensation on the walls and ceiling and the appearance of puddles of water on the floor. But how to solve such a problem? There are several effective methods.
Options for solving the problem and their characteristics
The above conditions are the main reasons why condensation appears in the cellar. To eliminate it, it is necessary to carry out a number of measures aimed at improving not only the insulation characteristics of the room, but also increasing air circulation. Depending on the cause of high humidity, such measures may include the following areas:
- organization of complete ventilation;
- waterproofing the foundation and walls;
- creating a thermal insulation layer on the ceiling.
Cellar ventilation is constructed in two main versions: natural and forced. In the first type, the circulation of air masses is ensured due to the temperature difference on the floor and under the ceiling of the room. The natural ventilation scheme is based on the use of two pipes, providing an influx of fresh air and removal of used air. One ventilation duct is laid directly near the floor, and the second right under the ceiling.
External waterproofing
First of all, you need to conduct a detailed check of the drainpipes, slopes and drainage system. If there is no waterproofing of the cellar at all or it is done incorrectly, then everything must be corrected. We perform the following manipulations:
- We remove the old blind area.
- We dig a trench about 50 cm wide along the perimeter of the outer wall of the basement.
- We wait until the wet wall dries.
- We treat it with antifungal agents.
- We apply mastic, clay or concrete mixture with additives in the form of liquid glass to the surface.
- We make a new blind area and lay waterproofing material in it. For example, you can use roofing felt for this. Its edges extend along the cellar wall.
- We fill the hole. You can lay slabs, asphalt, gravel or any other material on top.
Ideally, you also need to lay out the underlying and drainage layer for the blind area (simple blind area) or carry out concreting (a more capacious but durable system).
But sometimes external waterproofing is not enough.
Internal waterproofing
To do this you need:
- Dry the room well.
- Remove all old whitewash on which fungus may have already begun to form.
- Thoroughly clean all cracks.
- Treat all surfaces with an antifungal compound.
- Treat the walls with liquid waterproofing (at least 0.5 m from the floor).
But even good waterproofing will not be able to protect against the formation of moisture if it occurs from the inside. Therefore, it is important that the room is well ventilated.
The process of insulating metal garage doors
Insulation of metal garage doors
Before carrying out insulation work, you must first remove condensation from metal garage doors. To do this, use ordinary rags and a hair dryer. The surface is wiped and then dried.
It is worth considering that even if the paint starts to peel off from the metal, there is nothing wrong with that if the inner surface of the metal doors is well finished. It is better to insulate such a structure in the summer, since condensation most often occurs in winter.
Basement garage
Insulation of the cellar from the inside
Condensation in a garage basement is considered a fairly common occurrence. This happens because the temperature in this type of room will always be lower than at the top of the garage. To prevent condensation from collecting in the garage cellar, it is worth considering not only the insulation of the walls, but also the ceiling. Also, do not forget about high-quality ventilation. For a private garage structure, only natural ventilation method is used. It involves:
- Pipes that go outside.
- Ventilation holes in the ceiling.
How the devices work:
- Pipes that will help remove air from the basement are placed in all corners. One end of them should be as low as possible to the basement floor, and the other should go outside.
- Condensation in a garage cellar can still form if the cellar is tightly closed. That is why we must not forget that it is necessary to make ventilation holes in the ceiling of the basement. Their number depends on the size of the garage. As a rule, there are at least 2-3 of them around the entire perimeter. They must be protected with a metal mesh.
- Eliminating condensation in a garage cellar begins with high-quality ventilation and drying of surfaces. Without such actions, it will be impossible to carry out high-quality insulation work.
Ventilation of cellars and basements
If air exchange is impaired, then an additional ventilation system is necessary. In this case, there are two ways:
- Provide natural ventilation. This is the easiest and most accessible way. To do this, you need to create so-called vents, that is, make small holes throughout the cellar. Their area is determined based on the area of the room itself. Typically the ratio is 1:400.
- Provide forced ventilation. This is quite an expensive pleasure. As a rule, this method is used if the room is large.
All this will help prevent problems in the future. But what to do here and now, when you urgently need to save the harvest?
Windows without “dew” are high-quality double-glazed windows and professional installation.
If your windows are “crying” or you want to avoid this problem when purchasing new glazing, come to us at Window Factory.
Our specialists will answer your questions, tell you and show you how to get rid of condensation: they will provide professional advice on caring for plastic windows, share useful tips, and help you choose the optimal double-glazed windows with guaranteed quality installation.
Residents of wooden houses often complain that their windows sweat and leak. Determining the causes of condensation will help you deal with this unpleasant phenomenon.
It is known that wooden houses are the dampest, and the most likely cause of condensation is high humidity.
A hygrometer is used to measure room humidity. If the relative air humidity is above 30-45%, the likelihood of condensation is high. The method of heating the house plays an important role.
Today, in wooden houses, different heating methods are used: air (stove), water (heating radiators), less often a stove and radiators are combined.
Intense heat loss in wooden houses occurs through walls, doors, windows, etc. In winter, increased energy consumption is added to heating costs, and this forces many to save on heating. Low temperature conditions in the house contribute to increased humidity and dampness, and this is a direct path to the appearance of mold, mildew, condensation on the windows, and ultimately becomes a real problem.
With stove heating, all efforts are aimed at maintaining a uniform thermal regime in residential premises.
Heating such a house is not an easy task for the owners. Temperature differences mean that some areas can be cool, and then when outside temperatures are low, condensation will form on the windows there. In heated rooms, the air is not completely saturated, the relative humidity is around 50-60%, and with insufficient air exchange and poor thermal insulation, moisture can also fall out in large quantities.
To maintain an optimal microclimate in this case, you should take care of regular ventilation. A good ventilation system, installing a hood in the kitchen, or replacing old windows with new plastic ones with a convenient microcirculation system can save the situation. Owners of homes with stove heating in winter need to check the chimney for proper air exchange.
Heating radiators contribute to uneven distribution of heat in the room; dampness often appears in colder places in the room, for example, corners
An increase in air humidity at the dew point temperature contributes to the appearance of condensation on the glass, the surface of which is the coldest in the room, which is why it is so important that the radiator battery is located under the window
The window unit must be sufficiently heated by the radiator, and the warm air must reach the window as low as possible.
It is important that the window sill does not cover the radiator by more than half; it is also not recommended to install a protective screen on the radiator, since this all prevents the full circulation of warm air in the window area. The cause of moisture loss on the glass may be the presence of a large number of indoor plants, an aquarium, or a large crowd of people in the room.
The solution is not to clutter the window sill and not to block the radiators with a screen or other objects, ventilate the room more often
The reason for moisture loss on the glass may be the presence of a large number of indoor plants, an aquarium, or a large crowd of people in the room. The solution is not to clutter the window sill and not to block the radiators with a screen or other objects, and ventilate the room more often.
Reducing the level of humidity in wooden houses is achieved through efficient and uniform heating and properly organized ventilation.
One of the possible reasons for the appearance of moisture on windows, and even mold on slopes, is a violation of installation rules. To prevent this, turn to the services of professionals: manufacturing companies that have long been known in the window market, who have established themselves as reliable contractors and competent specialists.
Well, now it's time to finish the article. All the material I wanted to share has been reviewed. I hope it will be useful to you, and you will use it if you need to understand why condensation forms on plastic windows. Improve your own practical skills and gain new knowledge, they say: “It’s never too late to learn!” That's all, thank you for your attention, successful and easy repair!
Traditional methods of drying and combating condensation
Old-fashioned methods come in handy in such a situation. In order to stabilize the humidity in the basement you can:
- Use clay bricks for drying. They are heated over a fire and then placed in the corners of the room. 2-3 hot bricks are enough. They will cool down and absorb excess moisture, and also dry out the air. Usually a few procedures are enough to forget about the problem for a while.
Healthy! Bricks can be replaced with smoldering coals, which are laid out in buckets and also placed in the corners.
- If mold has already begun to form on the walls and ceiling, then boric acid (20 ml per liter of water) or citric acid (100 g per 1 liter of water) will help. Ordinary table vinegar is also highly effective (if there is a lot of mold, you don’t even need to dilute it with water). You need to wear gloves and protect your eyes and respiratory tract. After treatment, you need to wait until the walls dry, after which they can be whitened.
- Ash and salt. As you know, the adsorbent quickly absorbs moisture. However, you will need a lot of salt or ash. But this method helps for a very short period of time. As soon as the adsorbent is saturated with moisture (and this will happen within a few days), it will have to be replaced with a new one.
- Paper and sawdust. As you know, these materials have very high hygroscopicity (the ability to absorb moisture). Therefore, along the perimeter of the room you can lay out old newspapers, sawdust, cardboard, etc. Once they become damp, the material will need to be replaced.
Such methods are easy to implement, but short-lived. If it is not possible to immediately solve the design flaws of the cellar or basement, then you can use other means.
How does condensation form on the ceiling?
To get rid of drops on the ceiling, you need to understand the causes of the processes occurring:
- The presence of a surface with the required temperature (dew point) for cooling vapors and condensation.
- Air saturation with moist vapor - there is a source of moisture entering the room.
“Dew point” is a term that all builders and architects have to deal with. Without calculations, it is impossible to properly insulate the house and utility rooms. This is the temperature at which water vapor transforms into a liquid state. This requires a decrease in the thermal index of the room air or contact with a cold plane.
Options for condensation formation:
1. Recommended humidity in the cellar is 85±5% at 1-5°C. Summer heated air, especially after rain, enters the underground through the supply ventilation. The higher the temperature of the gas, the more saturated it is with water vapor. Warm masses rise upward (natural convection) and condense upon contact with the cold surface of the ceiling. The temperature of the water vapor drops to the dew point. There is a transition to a liquid state, dampness appears.
2. In the food storage area, the air is heated from the sewer system (draining hot water).
2. The walls are not insulated enough, warm outside air enters, which condenses when in contact with a cold plane (ceiling).
3. High humidity in the underground, organized in a barn or gazebo, that is, in storage facilities under unheated rooms. The reason may be the penetration of groundwater or its proximity.
Identifying the causes of condensation
Preliminary actions:
- Products are removed from the premises. Storage in humid conditions is unacceptable.
- Raise boxes, drawers, collapsible storage systems to the surface and treat with soapy water.
- To remove moisture from the ceiling, dry the cellar.
Finding the source of the problem:
- Check ventilation: using a thin piece of paper or a candle flame. The hood attracts flames and paper, the supply hood repels.
- Inspection of the walls and blind areas of the house for the presence of cracks, damage, and wet areas.
- Checking the sewer and water supply systems of the house for leaks and violations of thermal insulation.
- Detection of moisture entering through the floor surface in the absence of obvious signs: humidity, puddles. Organize recesses in different parts of the room: dig holes in the earthen floor; in concrete, clay - drill holes.
Specialized devices
Today you can find many chemical anti-mold products on sale (some even use chlorine). However, using them in places where food is stored that cannot be removed during processing is simply dangerous. The best way to solve the problem is to use a dehumidifier. Today you can find several options for such units on sale:
- Simple. In this case, we are talking about a container and a lid into which a “tablet” is installed, consisting of pressed salt and other components that are adsorbents. The salt is saturated with moisture and gradually melts, after which the tablet changes. Usually one piece is enough for 2-3 weeks. The device itself costs about 600 rubles, and 2 tablets will cost about 400 for 1-3 months. This is the cheapest option. In addition, the device does not require connection to electricity.
- Specialized. In this case, we are already talking about a large device powered by electricity. The cost of such units is from 15,00 rubles, but their productivity is much higher. In addition, such dehumidifiers are usually equipped with additional functions. They trap the pores of mold and mildew and eliminate unpleasant odors. There are models with ionization function.
Some carry out quartzing. This will require an ultraviolet lamp. This does not have much effect on humidity, but disinfection is carried out, which can be done in more accessible ways.
Solutions
So, how to remove moisture in the cellar?
Ventilation
The air in any room must be renewed. If the cellar is separated from the living space by a wooden flooring, this occurs naturally, through cracks in it; concrete floors require ventilation.
The total price of all necessary materials will not exceed 600-700 rubles.
The simplest implementation includes:
- Two plastic sewer pipes . The diameter is determined by the size of the cellar: with an area of 5-6 square meters, you can get by with a 50 mm pipe; with 20-25 square meters, it is better to use a pipe with a diameter of 110 millimeters. The length depends on the height of the ceiling and the thickness of the ceiling above it; Usually a 3-meter pipe is enough to spare.
- Two deflectors (they are often sold under the name “mushroom” or “umbrella”).
One of the types of deflectors for sewerage.
Through the ceilings made with a hammer drill, pipes are passed from the street into the room; deflectors are installed after installation is completed. Their function is to protect ventilation ducts from rainwater.
In addition: the shape of the deflector provides increased traction in windy weather.
The channels are installed at different levels: one of them reaches almost to the cellar floor, the second ends at the ceiling. The deflectors, accordingly, after installation also appear at different heights.
The instruction is related to the need to create constant draft in the ventilation ducts:
- through the higher of the pipes, air will be removed from the ventilated room;
- through the one below - enter.
Ventilation installation diagram.
An important point: it is worth considering the possibility of limiting the air flow. The easiest way to do this is to buy a pair of couplings and plastic drain plugs of the appropriate diameter and drill several small holes in each of them. Why is this necessary?
Remember: if in winter air comes from the street with lower humidity than in the cellar, then in summer the picture is the opposite. Excess moisture will fall out in the form of the very condensation that we are trying to get rid of. By limiting ventilation, we will sharply reduce its amount; however, it is not worth completely shutting down the channels: gases released by the soil in high concentrations can be dangerous to health and even life.
What to do if the volume of the cellar is too large for a ventilation pipe of a reasonable diameter?
- Install several pairs of pipes in different corners of the room.
- Increase the air flow through one pair of ventilation ducts by installing a duct fan in the exhaust pipe. Precisely in the exhaust - to avoid its hypothermia or moisture condensation on the motor winding in the winter cold.
Exhaust ventilation is made forced.
Thermal insulation of the floor
Let us remind you: a typical picture in a cellar, the room above which is not heated, is a cold ceiling with drops of condensation on it. What if we equalize the temperature of the ceiling with the temperature of the walls and floor?
How to do it? Reliably insulating the ceiling from the cold of the street. There are several possible solutions here.
Internal insulation
Structurally, such insulation is completely identical to the foam coat that usually covers the walls of residential buildings. Insulation requires dense (C-25 and higher) foam plastic, plastic disc-shaped dowels at the rate of 5 pieces per sheet, fiberglass mesh with a 2-mm mesh and cement-based tile adhesive. The ceiling is pre-primed with antiseptic primer.
The operating procedure is usually as follows:
- Glue is applied to each sheet of foam plastic at several points, after which the sheet is pressed against the ceiling and additionally secured with dowels. The holes for them are drilled with a hammer drill directly through the foam.
One of the ways to apply glue.
- A thin layer of glue is applied to the surface of the finished foam plastic thermal insulation with a wide spatula, into which the fiberglass mesh is immediately pressed. It performs a reinforcing function.
- The dried surface is completely plastered with the same glue; if necessary, it is painted with any water-based paint or covered with structural plaster.
Insulation in a wooden floor
If there is a wooden floor above the cellar, thermal insulation can be laid between its beams. Mineral wool usually acts as insulation. Doing this work with your own hands is more than easy; The only subtlety is that mineral wool is laid both above and below in layers of vapor barrier material.
The insulation is laid with a vapor barrier film.
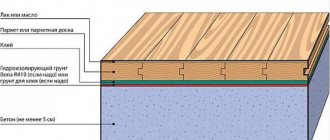
Insulated screed
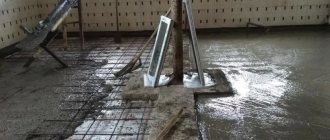
In the case of a cellar without any building above it, insulation is laid at the construction stage.
The same method can be applied if there is an unheated garage upstairs with a sufficient ceiling height, which can be reduced by 12-15 centimeters.
- Insulation is laid out on the surface of the ceiling - polystyrene foam with a density of C-35 or extruded polystyrene foam.
- It is covered with waterproofing material. Usually dense polyethylene is used.
- Reinforcing steel mesh is laid out on stands 3-5 centimeters high (depending on the expected thickness of the screed). As a rule, reinforcement made of wire 5-6 mm thick has a mesh size of 10 centimeters.
- Finally, the screed itself is laid out. Use a ready-made mortar or a cement-sand mixture in a ratio of 1:3.
Tip: to make the solution more mobile, a little liquid soap or washing powder is often added to it.
Insulated screed in section.
Drainage
What to do if there is condensation in the cellar, and for some reason all the methods listed above are not applicable or have shown to be ineffective?
Let's turn to logic again. Moisture condenses on the coldest surface in the room. So let's introduce a new factor - a heat exchanger with a temperature lower than that of the ceiling or walls!
How to do this in practical terms? The obvious solution is to use a special device - a dehumidifier. This is the simplest heat pump that pumps thermal energy from one radiator to another; in this case, on a colder surface, of course, moisture immediately condenses, which flows into a storage container or into a drainage tube.
Schematic diagram of an air dryer.
However, a regular window air conditioner can also be used as a dehumidifier. The old BK-1500 is quite capable of collecting up to 15-20 liters of water per day. Water is discharged into a canister or, if possible, into a sewer or drain.
Cellar disinfection methods
The following methods are commonly used.
Quicklime
Its quantity depends on the perimeter of the room. Usually 3 kg of mixture is taken per 1 m3. In this case, the lime is poured into a container in which it will reach half. After this, the powder is poured with water and not mixed. At the next stage, you need to leave the room as quickly as possible, close the door to it and block all ventilation holes. It is necessary that the cellar is as airtight as possible. After 18 hours, you can open the underground storage and ventilate it well. It is recommended to repeat the treatment after a week. Lime vapor will destroy all fungi and mold. There will be no parasite larvae or insects left.
Important! Of course, before such treatment you need to take everything out of the cellar and try not to use it until the smell of lime disappears.
Smoke bombs
They are also often called sulfur. Such products can be purchased at any hardware store. Checkers may come with different instructions, but the general principle of use is quite simple:
- We remove all items made of metal or with metal elements from the premises. If that doesn’t work, then coat them with lubricant (solid oil will do).
- We light the sulfur bomb and place it on the previously prepared metal surface (you will have to throw it away later). The checker will begin to smolder.
- We quickly leave the cellar, close the door and all openings.
- We are waiting for 6 hours.
- We ventilate the basement for at least 12 hours. In this case, it is advisable not to go into the cellar, but simply open the ventilation holes and the door.
During the smoldering process of the checker, sulfuric acid is formed, which is very effective in combating mold and other consequences of high humidity. However, it is worth noting that many who have used such checkers say that they have to be used at least twice. One procedure is not enough.
All these methods will help solve the problem of condensation in the cellar or basement. It is advisable to solve design defects as soon as possible, and if you urgently need to get rid of moisture without removing all products, then folk remedies will help.
What is a possible substitute for coal?
Coal - charcoal, coke or stone - are not the only combustible materials for heating the basement. It can also be used for drying cellars using other types of fuel, including electrical appliances. The technique for using them may differ slightly from the tactics used with coal. As an alternative to combating condensation, the following types of heaters can be used:
- Propane torch. The ignited device is also lowered underground on a cable. But, you need to more closely monitor the behavior of the flame and ensure safety from fires.
- Kerosene stove. Kerosene blowtorches are also used for heating. But there is an even higher risk of fire if there are flammable materials in the ceiling or shelving elements.
- Heat gun. Such devices are used for heating hangar rooms and working with thermoplastic materials (stretch ceilings, etc.). The power of the device must be at least 3-5 kW.
- Potbelly stove. A portable metal stove can also help remove moisture from the cellar. The potbelly stove should be placed in the basement with a chimney connected through a hatch and the room should be heated.
This approach will not only eliminate condensation in the underground, but will also clear the floors of insects, rodents and fungus. It is not recommended to use burners and potbelly stoves alone - you need an assistant who will stay outside and monitor safety. This is associated with a high risk of gas poisoning or loss of the ability to leave the cellar on your own. The heat gun alone can be lowered on a cable, and the potbelly stove needs to be melted below.
Attention! You cannot go into the basement during the procedure, as temperatures can reach 70ºC, and all oxygen will be replaced by smoke and carbon monoxide.