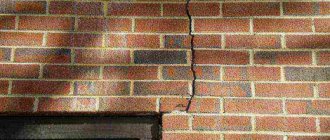
The need to hang a chandelier, install wall cabinets, a socket, etc., sooner or later arises in the life of every owner of a living space. Considering that concrete columns, floors and ceilings are quite common in modern apartments, it may turn out that the fasteners have to be mounted on a concrete structure. If you are “lucky”, then it is quite natural to wonder how to drill concrete?
Concrete is one of the most durable building materials today. However, its strength in this case is the main problem, since it is not possible to drill reinforced concrete without specialized equipment and relevant knowledge. At the same time, calling specialists to form several small-sized holes will cost you a disproportionately large amount.
Drilling a wall with a hammer drill: photo
If you want to save money, then it would be quite reasonable to think about solving this problem yourself. Despite the obvious complexity, the right approach and strict adherence to the technological part of the process will help you achieve a high-quality result. This article will provide you with detailed instructions on how to drill concrete with your own hands.
You've almost drilled to the required depth and you can't go any further.
Almost - this means, for example, for a depth of 5 cm you underdrilled 5 mm.
Then you hit something. There are rare cases when you come up against something major, for example, some hard monolithic cobblestone that cannot really be drilled out or crushed in any way. If the self-tapping screw on which you are going to hang the structure does not have strict load requirements, then try taking the same self-tapping screw, but 5 mm shorter, and simply cut the dowel, which is not fully inserted into the hole and sticks out with a small end, with a construction knife. as shown in the picture:
Next, just take a self-tapping screw that is 5 mm shorter and screw it into the trimmed dowel. This is not a very good practice, but sometimes there are situations when nothing else can be done and then this is the way out!
Drilling concrete
Electric hammer drill
Tools
To drill a reinforced concrete surface, you need to use specialized tools - in this case, you won’t be able to get by with a homemade tool.
Depending on your preferences and the diameter of the hole, you can use a hammer drill or a small electric hammer drill. The first option has less power, but at the same time has less weight and a convenient design. The hammer drill, accordingly, has greater potential, weight and dimensions.
In addition to the existing tool, it is necessary to purchase special drill bits that allow you to work with a concrete surface. For a hammer drill, drills with a Pobedit tip are selected.
The hammer drill has its own set of impact attachments, which, in most cases, are quite sufficient. As additional components for a hammer drill, you can also use drills with a tip.
Concrete drills
To form holes with a diameter of 35 to 120 mm, crown bits are used, which have Victory teeth - with their help, grooves for sockets, switches, etc. are drilled. If you are wondering whether it is possible to drill concrete with a screwdriver, then there are also tungsten carbide coated bits for this purpose. However, it should be noted that they are only suitable for units with a power of at least 1 kW.
Preparation
Before drilling into concrete, you need to prepare the available tools. First of all, the fixing cartridge is inspected for the presence of sand or other foreign elements - if any, they must be removed. For this purpose, you can use a clean, dry rag;
Hammer head
- The drill should fit into the groove freely so that you can feel that it has gone in all the way. This is a mandatory condition, failure to comply with which may render the tip unusable. If we are talking about a hammer drill, then the drill must be clamped as tightly as possible; in hammer drills, the clamping is carried out automatically;
- Before drilling into a concrete ceiling, you must protect your face with a respirator or plastic visor. When working with walls, the use of personal protective equipment is also desirable, although not so critical;
Drilling
The process of drilling concrete is not particularly complicated and consists only of the ability to work with the tool. When working with drills, you should combine the hammer mode with drilling.
If you use crown attachments, the impact mode must be turned off. The only possible problem during this process will be the reinforcement frame reinforcement that may get in the way of the drill.
Drilling concrete
Before drilling reinforcement in concrete, you need to change the tip for working with concrete to a regular metal drill and drill through the obstacle
It is important to remember to turn off the bumper mode before drilling reinforcement in concrete
In addition to the above, there are also a number of useful tips that will help you achieve quality results.
- Non-professional construction tools are not designed for long-term loads, which should be taken into account when working with them. The case must not be allowed to overheat - on average, the period of continuous operation of the equipment is no more than 15 minutes, after which the mechanism requires cooling. These 15 minutes of inactivity will be quite enough;
- When drilling, the drill becomes very hot and when a critical temperature is reached, the pobedit tip begins to deform. To cool the drill, simply immerse the tip in water - the more often you perform this operation, the less the consumables will wear out;
Concrete drill
If the drill is stuck, in no case should you try to turn it by increasing the speed - at best, you will break the drill, and at worst, you will render the tool itself unusable. It is necessary to remove the tip from the socket, charge a similar one and drill a hole next to it - only after this you can try to “rescue” the drill from captivity;
Diamond drilling
If you are thinking about how to drill through a concrete slab or create a large-diameter hole, then you cannot do it on your own. The most effective is diamond drilling of holes in concrete and cutting reinforced concrete with diamond wheels, which are carried out using specialized professional equipment.
Diamond drilling
The cost of installations is quite high, and purchasing them for single use is irrational. It would be wiser to invite specialists who provide their services at a very reasonable price.
Fundamentals of drilling technology for reinforced concrete reinforcement
To achieve a positive result - the absence of cracks and chips in reinforced concrete - it is worth remembering a few rules:
- Clear marking of all drilling locations with markings at once.
- Use of personal protective equipment - a dust mask that fits tightly to the face, headphones and goggles. Work only with protective gloves.
- The space around the future hole is covered with plastic film. All existing ventilation openings should also be closed.
- For drilling reinforced concrete, it is recommended to use drills made of hard alloys of the VK type with a minimum percentage of cobalt. The physical and mechanical characteristics of such alloys are given below:
| Brand | Bending strength, MPa, not less | Rockwell hardness, HRA, no less | Density, g/cm3 |
| VK2 | 1000 | 90,0 | 15,0…15,4 |
| VK3 | 1000 | 89,0 | 14,9…15,3 |
| VK3M | 1100 | 91,0 | 15,0…15,3 |
- The diameter of the drill bit for the reinforcement should correspond to the diameter of the future hole. Impact drills are used for drilling, and the rotation speed of the chuck with the drill should be the minimum permissible.
- The depth limiter on the hammer drill is set 5...10 mm deeper than the length of the drill. If there is no scale on the instrument. For marking, you can wrap a strip of colored tape around the bat.
- The drill feed at the initial moment of drilling should be minimal, then, upon reaching the steel, the feed and speed are increased, periodically clearing the drilling area of dust.
- If a blind hole is drilled, then to control the depth and quality of drilling, it is recommended to insert a hose with a nozzle connected to a compressor into the cavity and clear the cavity of any remaining material.
Carbide drills get very hot when drilling concrete, but this is not a disadvantage. However, due to the sudden change in drilling conditions for concrete and reinforcement, the durability of the drill is low in any case. The length of the working part of the drill should be chosen such that after drilling is completed, at least 20...30 mm of the drill body remains above the bit.
Is it possible to cut through reinforcement in concrete with a chisel?
An outdated way to remove reinforcement when drilling a hole in concrete is to use a chisel or core. This method involves cutting a metal wire. To do this, you will need to drill a large diameter hole to provide easy access to the fittings. After this, using a sharp chisel and a hammer you will need to cut the metal wire.
You can increase the size of the hole for free access to the reinforcement using a chisel on a hammer drill. If you have enough free space to work with a metal blade, you should definitely use this method. Sawing reinforcement with a metal blade requires a lot of time and effort, but this is quite feasible if you first make a through hole.
This is interesting! If you use a chisel or blade for metal, you should use tools made of high-speed and high-strength steel.
Methods and their characteristics
Destruction of concrete is carried out in 2 ways:
Before destroying the concrete, i.e. to decide on the method of dismantling it, it is recommended to make sure that violation of the integrity of the structure will not lead to other problems. For example, a load-bearing wall cannot be demolished.
Easy way
A small concrete block can be broken using a hammer or sledgehammer.
If the work area is large, a hammer drill will help make the work easier. The impact-rotational movements of the tool violate the integrity of the structure on their own, i.e. the person is not required to make any additional effort. It is enough to turn on and hold the instrument in your hands.
If you don’t have a hammer drill, before breaking a concrete slab (unreinforced), you can make several holes in it (over the entire area). To perform this work you will need a drill and a drill (concrete drill bit). The holes will weaken the strength of the structure and it may be broken.
When it is necessary to break a slab along a given trajectory, several holes should be made in it (along the line where the break should be). Wood plugs are inserted into the holes and they begin to water them. As the material becomes moistened, it will begin to expand, which will lead to disruption of the integrity of the slab.
Using powder
A silent and physically simple method of destruction is the use of powdered agent NRS-1. In the structure to be destroyed, it is necessary to drill a hole, the diameter of which will be about 8 cm. The holes should be located at a distance of about 55 cm.
Sour mixture
Do-it-yourself chemical destruction involves the use of special acidic mixtures. They corrode the material. They contain concentrated acids and substances that prevent the destruction of other materials. For this reason, it is not recommended to use acids without inhibitors.
The acidic mixture is poured over the dismantled area and wait until the chemical composition dissolves the concrete.
Tool preparation
To begin, select suitable drills that will be used in your work. For example, to drill a reinforced concrete wall, you need to purchase 2 types: for concrete and for metal. Any specialized store knows what they drill into walls of this type, so feel free to contact a consultant and he will help you choose the right products.
Concrete can be different, and how easy it will be to work depends on its “age”. To increase reliability, we recommend using high-quality drills. For impact drills, appropriate consumables with carbide tips are used. They easily drill through hardened concrete, promptly clearing the hole of accumulated crumbs.
To select a drill, use the following parameters:
- working part length;
- diameter;
- marking.
Scheme for drilling a concrete wall
Carefully calculate the depth of the holes in the wall and their diameter, because the final result will depend on this. For example, SDS hammer drills are used for holes up to 15 mm in diameter, and punch drills for 20 mm or more. Make sure that the spiral grooves of the product are greater than or equal to the length of the intended hole. This point is important, since too great a immersion depth makes it impossible for the tool to remove accumulated concrete chips. If all the conditions are met, the question is: “what is the best way to drill concrete walls and what kind of drill to choose?” - will disappear by itself.
Before you begin, make the final settings. An important parameter is the drilling depth. For paintings and light shelves, 25 mm is sufficient; installation of heavy hanging objects requires deeper holes. Most modern tools have the ability to adjust this indicator or a special limiter.
Execution technology
We have dealt with the need and the difficulties that arise, now we will look at how to properly drill a concrete wall.
Tool selection
First of all, let's decide what to drill into a concrete wall. Drills for wood and concrete, of course, are not suitable.
You can choose from the following options:
Drills tipped from Pobedit. But it should be borne in mind that in addition to rotation, a shock function will also be required.
But the question of how to drill into a concrete wall is not limited to the choice of consumables.
You also need to decide on the tool:
- Regular drill. Only if you don’t have anything more suitable and you only need to make 2-3 holes. And in this case, from time to time you will have to pierce the concrete layer with a steel pin with your own hands.
- Drill with impact function. It will cope with a small amount of work even if the diameter of the required holes does not exceed 13 mm. The fact is that the impact in such a device is carried out due to a metal “ratchet”, which wears out quite quickly under intense load.
Impact electric drill
Hammer. It can handle large volumes and can even use special nozzles in the form of crowns, which are ideal for drilling nests for sockets. In it, the impact is carried out due to the piston system, which is much more powerful and less likely to fail than the “ratchet” of a drill.
Hammer with "crown"
The following generalized table will help to summarize and give a final answer to the question of what is the best way to drill concrete walls:
| Tool | Scope of possible work | Risk of breakage | Diameter of the maximum possible drill |
| Hammerless drill with metal pin | Very small | High | 13 mm |
| Hammer drill | Average | Average | 13 mm |
| Hammer | High | Short | “Crowns” up to 120 mm |
Carrying out work
Now let's figure out how to drill a concrete wall. To do this, let's take a hammer drill as a clear winner of impromptu competitions.
The instructions for its operation are as follows:
- We check the shaft shaft for debris. If we find one, we delete it.
- Insert the drill until it clicks. In this case, in some models it may be necessary to pull the slider part of the “nose” of the tool towards you.
- We bring the hammer drill to the concrete surface strictly perpendicularly and begin to drill, lightly pressing on it.
Drilling a concrete wall with a hammer drill
- During the drilling process, the drill may get stuck. In this case, you should not try to loosen it in order to pull it out, as you may break off the tip. Simply remove the tool from the device, insert a drill of a smaller diameter and try to use it to widen the hole and free the captive product.
- Monitor the equipment while allowing it to cool.
Diamond drilling
This is another method of how to simply drill through a concrete wall. But only craftsmen who have special equipment (high-power electric motor and the like) use it.
How to drill a frame wall? This will not cause any difficulties, because diamond drilling allows you to obtain holes of enormous diameter and depth, without dust that irritates the eyes. At the same time, water is supplied directly to the drill, so it is cooled. Ultimately, the acquired holes have a discreet appearance, and the occurrence of cracks is completely excluded.
How to drill into tiles without cracking? See here. What is a jig for drilling holes? Find out further.
Drilling concrete walls in this way is done by specialists from specialized companies. So it is not advisable to stock up on a diamond drilling unit for independent work.
Source
Which hammer drill should you choose?
Drilling holes in concrete floors is difficult, since they have increased strength and often have a heterogeneous structure, including crushed stone, metal reinforcement and other fillers. A hammer drill helps to cope with this task.
, it can perform both impact and non-impact drilling. Therefore, when you have to carry out construction work such as installing plumbing, air conditioning, removing old finishes, laying electrical wiring, you cannot do without this tool. This device is multifunctional and is designed for drilling wide and deep holes.
Before you start drilling concrete, you need to choose the right hammer drill
, since it is available in several types, each of which is characterized by its own technical capabilities.
Nowadays you can find simple household and advanced professional hammer drill models on sale. Household ones are usually used for drilling holes in houses and apartments; they have a power of up to 900 W and are equipped with an SDS-plus chuck. Devices of this type are represented by the brands Black Deker, Bosch, Hundai, Skil, Enkor and Caliber. As for professional models, they are suitable for all socket boxes, have additional protection against vibrations and can work for a long time without interruption. Professional devices from such manufacturers as Dewalt, Makita, Hitachi and Metabo have also proven themselves well.
In addition, when purchasing a hammer drill for working with concrete, you should pay special attention to several indicators. Number of operating modes
Single-mode devices are not suitable for working with a concrete slab, since they are simple and have the functions of the most common drill. Dual-mode devices are capable of drilling (drilling with impact force); they are recommended to be chosen when you need to make through and blind holes in concrete. These types of hammer drills can simultaneously strike and rotate the drill; they are made of durable metal. Three-mode devices are also considered ideal for working with concrete surfaces. They are universal, perform impact without rotating the nozzles and quickly drill through concrete, revealing its hard structure
Number of operating modes. Single-mode devices are not suitable for working with a concrete slab, since they are simple and have the functions of the most common drill. Dual-mode devices are capable of drilling (drilling with impact force); they are recommended to be chosen when you need to make through and blind holes in concrete. These types of hammer drills can simultaneously strike and rotate the drill; they are made of durable metal. Three-mode devices are also considered ideal for working with concrete surfaces. They are universal, perform impact action without rotating the nozzles and quickly drill through concrete, revealing its hard structure.
- Weight. Impact devices, depending on their weight, can be light, medium and heavy. Lightweight models are electric tools with a performance of up to 800 W, their weight does not exceed 4 kg. They are most often purchased for processing simple floors. For working with natural stone and concrete, it is best to give preference to middle-class devices that weigh up to 8 kg and have a power of up to 1200 W. It is possible to drill a hole in concrete with a diameter of more than 40 mm using heavy devices, their weight is more than 8 kg, and the impact energy exceeds 13 J.
- Engine location. Today, manufacturers produce devices with horizontal and vertical motor placement. Horizontal hammer drills belong to the simple class; they are easy to use, but cannot cope with concrete surfaces.
They can be drilled
only small holes. Therefore, if you plan to chisel large and deep holes, then you need to choose a tool with a vertical type of engine placement. It can work for a long time, since the motor is cooled better in this position.
General principles of drilling
As already mentioned, drilling is a common activity for a repairman, and therefore it is important to immediately learn several main rules associated with this activity.
- Introduction of suitable equipment. There are a huge number of drills, each of which is designed for a specific type of material. Therefore, you should not try to drill concrete with a wood drill and vice versa. It is also important to take into account the conditions in which the tool will be used. For example, industrial drills cannot be used for interior repairs (this is simply dangerous). It is also important to take into account resistance to moisture: for external work you will need a tool of class IP34 if the climate in the area is wet and IP32 if you have to work in good weather. IPX2/ can be used indoors
- Correct markup. Before starting any work, it is important to carefully and accurately mark the drilling locations with a marker. You can also stick cardboard tape under the marker so that the drill does not slip on the material.
- Selecting the desired drilling speed. It all depends equally on both the material and the diameter of the blade. If we are talking about very thin drills (with a diameter of less than 3 mm), then you need to work at low speeds, at least four hundred per minute. For other drills, the following rule applies: the thinner the drill, the faster the drilling speed required.
In addition, it is important to ensure that the handle is firmly attached to the shaft of the hand drill. The drill must also not be allowed to skew.
How to work with tiles using a drill
Often people who do not have extensive experience in the field of repair are afraid to drill into such fragile material as tiles. But this can become an urgent necessity, because you need something to strengthen the various cabinets and shelves in the kitchen, bathroom or toilet. As annoying as it may sound, in almost all cases the condition of the tile after drilling is determined not by the master who takes up the drill
, and the one who laid these tiles. A competent tiler lays the tiles so that no voids are created between the tiles and the wall. In this case, careful drilling will not harm the tile in any way. If there are “air pockets” between the wall and the tile, then most likely the tile will crack.
In order to drill through the tiles correctly, you need to take a drill, masking tape, or a hammer drill (or a powerful drill with drill bits for concrete). Then you will need to perform the following steps:
- The drilling location is marked with a piece of masking tape and a marker. The adhesive tape is there to prevent the nail from sliding on the surface of the tile.
- Drilling is done strictly perpendicular to the material. The number of revolutions should increase evenly: from unlikely to 150-200 revolutions per minute. This way you can effectively avoid damage to both the material and the tool.
- It is important to ensure that the drill does not overheat. If smoke starts coming out, the drill
needs to be cooled down immediately.
Once the holes are made, you can insert dowels into them. This is done with a hammer.
How to drill through wood carefully
Wood is one of the “easiest” materials when working with a drill. But there are some subtleties here too.
- The drilling speed directly depends on the type of wood. Loose, not very hard varieties of wood will be possible even with a low-power device. Of course, the expected diameter of the hole also plays a role - the larger it is, the stronger the drill is needed.
- In order to make huge holes, you need to use special core drills. Their diameter can exceed 120 mm. As for depth, on average crowns are suitable for materials up to 20-22 mm wide, but there are also special models that can cope with widths of more than 60 mm.
- If you need to make a blind hole rather than a through one, then Forstner drills, which are available with a diameter of 1 to 5 cm, are perfect for this.
It is worth talking separately about drilling timber. Although it is comfortable to fix for upcoming drilling, the large thickness of the material makes it difficult. Drilling timber for future fastening in dowel holes. For a standard beam 18 cm wide, it would be best to take a drill with a diameter of 25 mm and a length of 36 cm. You will need to drill slowly, at low speeds. In terms of power, a 1300-1500 W drill is perfect. If the beam is not very long, then 2 holes on each side will be enough. If the length of the timber for the dowels is quite long, then you will need to make an additional hole in the center. After the holes are made, you can hammer them into the dowels using a hammer or a small sledgehammer.
How to choose sleeve sizes
When it is necessary to select the appropriate sleeve size and determine the size of the sleeve protrusion on the surface of the ceiling or wall, ceiling,
take into account the following features:
1. The protrusion of the sleeve above the floor surface will be equal to fifty millimeters in such rooms where water overflow is possible more than the mark of the floor covering. Such a room could be a shower room, in which the floor should be waterproofed. The gap between the sleeve and the pipe must be sealed with waterproof material.
2. There is no need to make the sleeve protrusion very large in all situations. The cost of the sleeve depends on its length, which means the installation cost will be less if the sleeve is shorter.
3.The installation method and sleeve length are directly related to each other. If installation is carried out in a hidden way, then a shorter sleeve can be used. If an open installation method is used, the sleeve must be of adequate size so as not to spoil the appearance of the room.
4. The distance between the pipe and the sleeve should be convenient in order to properly install the seal in the cracks. The circumference of the sleeve must correspond to the diameter of the pipe located in it so that part of the structure can be freely removed if it breaks.
Features of the use of sleeves, depending on their material and material of construction.
Important! Experts advise using pieces of polymer and steel pipes for sleeves, and roofing felt as a waterproofing material.
To choose the right sleeve material, it is worth considering the material from which the building is constructed.
For reinforced concrete structures, steel sleeves are suitable. They can be easily concreted directly at the factory, where panels for floors and walls are made, or during pipeline laying using special formwork. The inner surface of the steel sleeve is sharpened to remove burrs, which can damage pipes made of polymer material; the presence of roughness is dangerous for a pipeline system operating under pressure.
The edges on steel sleeves are flared, that is, they are bent outward, removing burrs from the surface.
Sleeves made of polymer materials have a low level of adhesion to cement mortar. Sleeves in elements made of wood and polymer are hermetically sealed using special technologies.
Ruberoid is not suitable as a material for sleeves, since it contains elements of oil, and this substance cannot in any case come into contact with polymer pipes. The material from which the sleeve is made must prevent the spread of fire from room to room.
To prevent fires that can aggravate polymer pipes, fire cutters are installed in the form of a high-strength casing or cuff containing intumescent elements. When heated, the components expand, filling the cavity inside and outside the pipe. Fire protection couplings are installed in places where the pipeline intersects walls and ceilings.
When pipelines cross the foundations of buildings, requirements must be followed to prevent groundwater from entering the basement. In this case, it is necessary to take into account the shrinkage process of the sewer system and foundation. The gap between the sleeves and the pipes should be treated with mastic or sealant, and the outer cross-section of the sleeve should be twenty centimeters larger than the same parameter of the pipe (according to SNiP 478-80).
When passing through ceilings, sewer and water pipes are also hidden in cases designed for protection. The space between the case and the concrete floor is filled with cement. If the partitions are wooden, then the space is filled with asbestos.
To compensate for changes in the pipe due to temperature changes in horizontal copper water pipes, a sliding support is used as they pass through walls and ceilings. During the development of the project, locations are determined. In the place where the pipe comes out of the wall, tees and elbows are installed to help maintain the location of the water pipes of the new room close to the wall surface.
Concrete drill bits for drills - what and how best to drill
Comparing different types of tools, you can see that they have visible differences. Those used for drilling monoliths have a pobedite head installed. It is made of high strength metal. Pobedit allows you to drill concrete slabs and rocks.
Products with a reinforced head are used to process monolithic concrete slabs, metal, wood and other materials. The purpose can be determined by the color of the tip. White color is provided for concrete treatment. Black is used for drilling in metal, and a light shade of metallic color is used for drilling in wood.
If they are doing one-time repairs in an apartment, then they choose a tool at a more affordable price. During professional work, the need to work with this tool often arises, so purchasing well-made units is more important. At the same time, it is profitable to buy a set. Each part in such a set is purchased at a lower price.
Cases when it is necessary to break through the foundation
The need to lay a sewer pipeline from inside the house through the foundation arises in the following series of cases:
- Lack of experience among builders when constructing a house and taking into account the location of future communication systems.
- Improvement of the structure - installation of water supply and drainage systems.
- Redevelopment of premises, adding bathrooms.
- Changing the position of the septic tank or receiving sewer line.
- Major repairs and modernization of housing with increased comfort.
In this case, the choice of pipe laying method is determined by the type of foundation. So, if the foundation is deep enough, you will need to drill it; if the depth is shallow and conditions allow, you can install a sewer underneath it.
Important! Before deciding how to drill a foundation for a sewer system, you must carefully weigh all possible changes in the operational characteristics of the structure and the consequences for the house. When performing work, it is extremely important to follow the recommended construction rules and technological instructions.
Drilling a foundation using a rig Source ytimg.com
Surface preparation
Before operating the device, you need to check whether there are any communications on the area of the selected surface. If you neglect this rule, you can damage the electrical wiring or the place where the pipe passes. A metal detector will help the worker cope with this task, since when it detects non-ferrous metals, iron or steel, it gives a specific signal.
If the selected section of the concrete wall meets all the requirements, then you need to mark a point and then begin operating the device.
The intended drilling location should be marked with a pencil.
How to drill without dust: options, the better
Construction work is always accompanied by dust and debris, but using some recommendations and tips, it can be significantly reduced:
- During operation, the hammer drill leaves a slight dust, so that it does not fly around the room, use a construction vacuum cleaner at the same time. Some brands of tools have a built-in vacuum cleaner, which makes the task easier;
- using a drill, it is best to either make a jig on the end or a bag, or make an envelope under the hole so that the debris falls into it.
How to drill holes in a brick wall: choosing tools and attachments
To make a hole in a brick wall, a hammer drill with a drill or an impact drill are suitable; the latter is most often used. Its power must be at least 600 watts, the minimum number of revolutions is from 2500 per minute. It is best to use a drill with continuously adjustable power and a quick clamp function.
Using the hammer drilling function, the drill becomes identical to a hammer drill. Increases speed and ease of operation. To make a hole in a brick wall you need to use the dynamic impact method. Without this, the drill will not be able to engage the inside of the brick.
The drills must be victorious. If through drilling is necessary, a drill is used
How to drill a load-bearing wall with a hammer drill in a panel house
In most panel houses, the walls are made of concrete; in order to make a hole with a hammer drill, you need to use pobedit drills.
In addition to them, you can use special crowns. They have soldering around the circumference. When using them, you need to disable the hammer drill's impact function.
Specialists use diamond drilling, which requires powerful equipment and skills.
How to properly drill a reinforced concrete pipe with a hammer drill
When using an impact drill for reinforced concrete, you need to use the “perforator” mode and pobedit drills. First, the hole is made smaller, then larger. The drill needs to be cooled periodically.
Important! When working with concrete, you need to avoid hitting the reinforcement, otherwise the drill will break. Using a special device you can check where it is located
How to make a hole in a concrete wall with a drill
It is difficult to drill into a concrete wall with a conventional drill. You need to install victory drills and select low speeds. A dowel is inserted into the desired location to help the tool pierce the surface. Next, drilling should be alternated with striking the dowel.
The drill must be constantly cooled, otherwise it will burn.
If the drill does not have a speed control, then it will not be possible to make a hole.
How to make a hole in a concrete wall in an apartment with a drill
For a small hole, you can use a punch. Most conveniently, it can be made from a drill, 8 mm in diameter. The end is sharpened sharply. The drill is placed in the desired place, rotated, while simultaneously hitting it with a hammer. Wet the drill periodically to make it work longer.
Choosing a location for the hole.
1. Choose the smallest possible opening size - usually 600-700 mm is enough for a person of average build to squeeze through. 2. Choose the maximum width of the slab to form such a hole - the more working surface of the slab remains on the sides of the hole, the more load-bearing capacity this slab will have. 3. If possible, plan the hole at the junction of two panels - this way you will save most of the slab without destruction. If you can’t make a hole at the joint, cut the slab as close to the center (width) as possible - the task is still the same - to get the widest possible working surface of the panel on the sides of the hole. 4. Along the length, make the hole as close to the edge as possible - if you look at the load distribution curve that the floor panel experiences during its operation, the maximum bending moment occurs in the central part of the slab. Closer to the ends, the fracture loads are much lower - that’s where we cut. 5. Plan the distribution of pressure on the floor slabs in this room in such a way as to minimize additional loads (furniture, partitions, weight of people) on the panel with the hole. 6. Consider strengthening the slab at the cut points - more on this below.
Difficulties when drilling holes in concrete
In the video tutorial of the article What is a dowel, we learned how to install dowels into a concrete wall, and at the same time drill it. However, there are situations that cause you difficulties when starting and during wall drilling work. In this article I would like to talk about such situations, and what should be done in these cases.
How to choose a drill for drilling reinforcement in concrete
The initial characteristic is the diameter of the hole, as well as the shape of the landing part. In this case, the drill is always designed for one-sided drilling, since for concrete surfaces it is almost impossible to align the axes of two holes that are drilled from opposite sides of the slab, wall or block.
How to drill reinforcement in concrete? In one pass, it is usually possible to obtain holes in the reinforcement if the maximum diameter of the cavity does not exceed 10 - 12 mm; in all other cases, preliminary drilling is performed first, and then reaming.
The choice of the size of the impact drill decides a lot. The disadvantage of a rotary hammer is that it sharply increases the level of vibration, and this will negatively affect the accuracy of the resulting hole. Considering that reinforced concrete has no plasticity, this circumstance will “help” break a hole or break off a piece of concrete along with under-drilled reinforcement.
Do I need to use a core or a bit? Experts think so. In addition, an impact drill with a rebar drill must be installed on a massive stand (or a tripod - when making vertical holes in the ceiling).
The best quality is obtained from hollow drill cores for reinforced concrete. They penetrate into the foundation only along the perimeter of the bit, leaving a cylindrical volume of concrete inside the tool. This piece is removed after drilling or periodically broken into pieces to ensure smooth operation of the drill. Drilling reinforcement in this way can be dry or wet (the second is preferable).
Specialized drilling tool
For example: exclusively for the needs of drilling reinforced concrete, the German company Bosch has developed equipment designs - ProDiager (drill for reinforced concrete) and RebarCutter (drill for rebar).
Features of the ProDiager line:
- Bit diameter, mm - up to 20.
- Durability before resharpening – up to 1000 holes.
- The number of bits in the holder is up to 10.
ULTIMAX's massive compact monoblock head is made from a carbide material similar to VK3, which allows drilling at the highest possible speed. Compatible with all types of powerful impact drills. Suitable for making holes and cavities in reinforced concrete, stone, granite and other materials.
The RebarCutter SDS plus-9 rebar cutter provides cutting of reinforced concrete and reinforcement embedded in reinforced concrete products. With the SDS-plus holder, the cutter can also be installed in conventional rotary hammers.
Specifications:
- The diameters of the resulting holes, mm – 16 – 32.
- Hole depth, mm – 120 – 300.
- Maximum tool runout, mm – up to 1.
Stationary models of rebar cutters are also available, which are equipped with a locking trigger switch. This cutter can be powered by a foot pedal, which improves the operator’s working conditions.
To drill holes for polypropylene pipes twenty (diameter = 21 mm) I need:
1. a drill for a hammer drill with a diameter of at least 22 mm (or better yet 25, remember that polypropylene expands for hot water supply?), and a length of at least 300 mm, this is the thickness of the plaster and concrete block. It was not possible to drill the sleeper with a drill. you'll go nuts..; 2. a wood drill, of the same diameter, at least 650 mm long, here I take into account the thickness of the conventionally drilled plaster and block, plus the “air cushion” and plus the sleeper itself; 3. a drill for a rotary hammer with a diameter of 12, a length of more than 730, here is the full thickness of the wall (do we remember that you can only drill on one side? Yes, and the horseradish holes towards each other will coincide with two, and if you measure thoroughly, then the slope is any will be different).
Drilling a wall at once with a large-diameter drill is very labor-intensive and time-consuming; it is much easier and faster to drill a thin one, and then expand the hole with a larger one along the guide. I use this method up to several passes with different drills in increasing increments, depending on the ultimately required diameter. The “old-fashioned” method is very effective, you save a lot of physical effort, and what is important in my case is time - the work at first glance is “the cat cried”, all it takes is to remove two tubes, BUT the wall...
So, I went to the store, not familiar with the prices for the tool I need? The price tag for hammer drills, along with the length and increase in diameter, grows not just proportionally, but catastrophically, however, the same applies to screw drills. Here are some screenshots with price tags:
Normal, right? And this is here in the provinces! I wonder what the cost is in regional and capital cities?
An alternative to a long screw drill is a feather drill, the condition of suitability is that you buy an extension cord, one is missing, you take two, luckily connecting them together is as easy as shelling pears. That's exactly what I did, I already had one extension cord.
As a result, I received the required tool at a reasonable price, but you can’t explain to the customer that the tool is expensive; to put it mildly, he’s not interested. Visibility is only two half-inch tubes installed, but how you did it is your problem. The point is that an identical order, as I wrote above, will probably go through in the next five-year period, and the instrument will lie idle.
Step by step how I drilled:
1. from the side of the attached room, using a hammer drill with a 12 mm drill, I drilled through the plaster and block; 2. widened the hole with a 25 mm drill; 3. drilled the sleeper with a 25 mm feather drill; 4. then, again installing a long thin drill, I drilled through the plaster at the exit; 5. with a 25 mm drill, on the other hand, I expanded the diameter towards.
It took about 30 minutes to do everything. Next, soldering the pipes is a different story. This is how I handled my next order in an accessible way; if any of you benefit from my experience, then it’s not in vain that I clicked on the keys.
Conclusion:
And one more thing: with feather drills, the option of gradually increasing the diameter does not work, you drill immediately with a wide feather, the price for them is a pittance in comparison with drills, and I have never seen wooden walls of great thickness.
Selecting a drilling tool
Hammer drill
The potential of this tool when making holes in a concrete surface has no limits. Often they are limited by the maximum permissible diameter of the device, the size of which is no more than 5 centimeters. And at the same time, a huge part of such equipment can drill a hole with a diameter of 3 centimeters. Sometimes this may be enough, but there are situations when this size is not enough. For example, the volume of the hole for ventilation is supposed to be large and in such a situation the hammer drill will not cope with the task.
When operating a hammer drill with your own hands, another problem may arise. While drilling, you may bump into the reinforcement with the drill. This may result in damage to the tool. In the best case scenario, the hammer drill will stop on the metal and will no longer be able to work. It becomes clear that in the presence of reinforcement in concrete, operating a hammer drill is difficult, and sometimes impossible. But if working conditions do not require the presence of reinforcing bars, then this tool is an excellent choice.
Carbide bit
This equipment is distinguished by drilling holes with a diameter of 5 centimeters to 45 centimeters. But alas, the characteristics of a conventional hammer drill do not make it possible to install a crown larger than 25 centimeters. The reason for this is that the power rating of the tool is too low. If it is necessary to make holes of large calibers, then it is worth using a different tool. Larger equipment has a different shank shape. However, there are special adapters that make it possible to use large crowns on low-power instruments. But it is worth remembering that this option is not always profitable and safe due to the fact that the equipment may be damaged due to the installation of a large crown. And drilling holes in concrete using the thin method can be dangerous.
This device has some disadvantages that limit the capabilities of such equipment:
- Cannot drill through reinforcement. During a collision with metal, the carbide crown is destroyed. And while thin metal can be drilled, thick reinforcement cannot be drilled.
- If a crown is used, the concrete can be drilled to a small depth. This indicator is limited to the bowl. However, there are situations when using this device you can drill holes in a fairly thick wall and pipe.
The point of drilling a hole with a hole saw is to use the bit and pick one at a time. When the depth required for the crown has been reached, it is necessary to hollow out the center in the hole using a pick, after which the procedure is repeated until the necessary is completed.
However, in this case, another problem arises - the limited immersion depth of the lance. This nuance can be eliminated if a special extension for the crown is installed correctly.
It is important to know that when performing such operations with concrete there will be a lot of dust around
To drill holes for polypropylene pipes twenty (diameter = 21 mm) I need:
1. a drill for a hammer drill with a diameter of at least 22 mm (or better yet 25, remember that polypropylene expands for hot water supply?), and a length of at least 300 mm, this is the thickness of the plaster and concrete block. It was not possible to drill the sleeper with a drill. you'll go nuts..; 2. a wood drill, of the same diameter, at least 650 mm long, here I take into account the thickness of the conventionally drilled plaster and block, plus the “air cushion” and plus the sleeper itself; 3. a drill for a rotary hammer with a diameter of 12, a length of more than 730, here is the full thickness of the wall (do we remember that you can only drill on one side? Yes, and the horseradish holes towards each other will coincide with two, and if you measure thoroughly, then the slope is any will be different).
Drilling a wall at once with a large-diameter drill is very labor-intensive and time-consuming; it is much easier and faster to drill a thin one, and then expand the hole with a larger one along the guide. I use this method up to several passes with different drills in increasing increments, depending on the ultimately required diameter. The “old-fashioned” method is very effective, you save a lot of physical effort, and what is important in my case is time - the work at first glance is “the cat cried”, all it takes is to remove two tubes, BUT the wall...
So, I went to the store, not familiar with the prices for the tool I need? The price tag for hammer drills, along with the length and increase in diameter, grows not just proportionally, but catastrophically, however, the same applies to screw drills. Here are some screenshots with price tags:
Normal, right? And this is here in the provinces! I wonder what the cost is in regional and capital cities?
An alternative to a long screw drill is a feather drill, the condition of suitability is that you buy an extension cord, one is missing, you take two, luckily connecting them together is as easy as shelling pears. That's exactly what I did, I already had one extension cord.
As a result, I received the required tool at a reasonable price, but you can’t explain to the customer that the tool is expensive; to put it mildly, he’s not interested. Visibility is only two half-inch tubes installed, but how you did it is your problem. The point is that an identical order, as I wrote above, will probably go through in the next five-year period, and the instrument will lie idle.
Step by step how I drilled:
1. from the side of the attached room, using a hammer drill with a 12 mm drill, I drilled through the plaster and block; 2. widened the hole with a 25 mm drill; 3. drilled the sleeper with a 25 mm feather drill; 4. then, again installing a long thin drill, I drilled through the plaster at the exit; 5. with a 25 mm drill, on the other hand, I expanded the diameter towards.
It took about 30 minutes to do everything. Next, soldering the pipes is a different story. This is how I handled my next order in an accessible way; if any of you benefit from my experience, then it’s not in vain that I clicked on the keys.
Conclusion:
And one more thing: with feather drills, the option of gradually increasing the diameter does not work, you drill immediately with a wide feather, the price for them is a pittance in comparison with drills, and I have never seen wooden walls of great thickness.
Two useful additions, naturally based on personal experience:
First:
When installing pipes, in addition to water supply, I also install sewerage if necessary. It’s no secret that the diameter of the pipes here is larger, from 40 to 150 millimeters; I don’t have a drilling rig with diamond bits, so I fulfill orders using the same hammer drill. I proceed as follows: I mark a circle of the required diameter on the wall, drill holes along its perimeter with a thin long drill, then, using the same principle that I highlighted above, I expand the diameter of each hole to the maximum available in the arsenal. Then, replacing the drill with a spatula and switching the hammer drill mode to chiselling, I get rid of everything unnecessary. So... I agree the work is not pleasant, but this is just one of the disadvantages during installation. It should be borne in mind that this process is relevant for a small wall thickness, say a maximum of 300 millimeters, but for a much larger thickness you present the customer with a fact: ordering a drilling rig is a device, as noted above, using bits with diamond tips. The operation is not cheap, but with all the “breadth” of choice... the customer pays, then we come in with the installation.
Second:
Let’s say you fulfill the first point yourself: you drill a concrete wall, trying to get a hole with a diameter of 140 millimeters, and you have a “surprise” in the form of reinforcement (usually in the walls of panel houses).. You can’t take it with a drill, electric arc welding will help, for lack of, grinder, which is problematic to use, access is difficult, you have to puff, creating access... in short, I don’t advise you to bother. Exit: cut by welding or gas cutting. There's no such thing? Find it! As in that saying: “It’s better to lose a day, but then fly in five minutes!”
Questions, additions: in the comments column, but that’s all for me today, best regards, Andrey.
Tired of looking for information from practitioners? Subscribe (scroll down the page) and the information will find you. Clicking on the social network icon is the best reward from you for me!