What to do and what not to do
Before giving advice on correcting other people’s mistakes, let’s say a few words on how to prevent them in general and bring out zero on the foundation with your own hands. It may be hard to believe, but you need to take care of the quality of the base even at the marking stage.
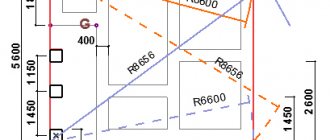
Pay attention to the location of the lacing.
They are initially set at the level of the upper edge of the plinth and serve as guides in the manufacture of formwork.
But why, with such a simple technology, the question: “How to level the zero of the foundation?” - sounds day after day both on construction forums and in queries to search engines? Mystic? No, just basic construction errors. Here are just a few of them:
- A solution with a high percentage of water. This most often happens when stirring by hand. More water accumulates in one of the corners and after it dries, a depression forms there. Sometimes, in this simple way you can earn a difference of 2-3 cm.
- Broken mark. It often happens that during the installation of formwork, the lacings move and builders, focusing on them, cast a deliberately crooked foundation.
- Frost heaving. And even experienced concrete workers fall for this rake. There is an opinion that it is better to build the foundation for the winter so that it is stable by spring. But the frost heave lifts the unloaded belt, even acting on it tangentially, and by April it is useless to look for the level there.
Pouring water into the device
Before starting measurement work, it is necessary to properly prepare the instrument. To do this, it is recommended to perform these steps in this order:
- Take a bucket of water or any other large container with an open surface. The bucket is placed at some elevation relative to the ground.
- One end of the device is placed in a container of water, and the other is lowered below the location of the bucket. Usually placed on the ground. In this case, due to the property of communicating vessels, the liquid begins to move through the tube, filling it.
- When filling, it is important to monitor the presence of air bubbles in the device. Wait until all the gas comes out of the tube. After this, one end is clamped with a finger or bent.
- The second horse is taken out of the container. Check the movement of water and again the presence of air.
- Both ends are closed or clamped and the device is transferred to the workplace.
After completing these steps, you can begin measurements.
Some tips
- To simplify the process, you can color the water poured into the device in a bright color. This will allow you to quickly determine the water mark in the tube without straining your eyes.
- The larger the diameter of the hose, the faster the liquid will level out in it. It is recommended to purchase products with a diameter of 10-12 mm.
- The leveling speed also depends on the length of the tube. Don't choose items that are too long.
Advice! If you need contractors, there is a very convenient service for selecting them. Just send in the form below a detailed description of the work that needs to be performed and you will receive proposals with prices from construction teams and companies by email. You can see reviews about each of them and photographs with examples of work. It's FREE and there's no obligation.
Foundations are the supporting part of any building; they are intended to be transferred from structures located above to the main ones. Many people ask the question: how to display zero on the foundation? This means that work must be performed in such a way that all points of its surface are located in one horizontal plane. Thus, you will quickly receive a reliable and durable foundation.
Leveling with concrete
If you are asked what is the easiest way to lay out a zero on the foundation, feel free to answer: “With concrete.” The whole procedure goes as follows:
Markers should be installed at the corners of the foundation. These can be ordinary wooden slats or pieces of reinforcement.
Then, using a water level, or even better, a laser level on markers, mark a horizontal level and take measurements from it to the foundation, thus determining the highest and lowest point of the foundation.
When the minimum and maximum are found, the formwork can be placed. Only this is done in such a way that at least a four-centimeter layer of mortar is placed above the top point - you can’t do less, it will crack.
Before pouring, it is useful to add a plaster mesh to the base and add a plasticizer to the mixture itself. Of course, the seam between the old and new concreting will be noticeable, but this defect will easily be hidden during subsequent finishing.
Elimination of side irregularities
Their alignment is carried out taking into account the amount of distortion. If the discrepancies are small, you can fix the mesh with staples or dowels and lay a new layer of plaster over it.
If the difference is large enough, resort to the following actions:
- The formwork is set according to the level;
- with slight distortions, the solution is distributed over the void areas formed between the walls of the foundation base and the formwork panels;
- when the gaps exceed five centimeters, it is necessary to apply a reinforcing mesh in the places where concreting is planned.
How to lay out a zero on a brick foundation?
The most important element of building a house is the construction of the foundation. In the process of work, you need to know how to correctly bring the base to 0 using a brick. It is important to know what technologies are used. One mistake in work can cost the stability of the future structure, so all stages of the process are carried out completely relying on the instructions.
Conclusion
Pouring a concrete plinth is a rather complex and at the same time very responsible job, which consists of a number of stages. Moreover, failure to comply with the technology on any of them can affect the quality of the entire structure. Therefore, from the beginning of work to the end, it is necessary to follow the recommendations given above.
For more information on this topic, watch the video in this article. And you can find out how to remove the base from the cartridge in other articles on our website.
Why put zero on the foundation with a brick?
In practical terms, displaying 0 on the foundation means giving the upper area of the foundation structure an exclusively horizontal location. It is important to take into account the fact that the level of the foundation is entirely located in one single plane. This need is based on the fact that the “cushion” performs important functions of the building, namely, it takes on the entire load of the structure. To ensure that the weight is evenly distributed over the entire plane, the upper level is set to zero, thereby avoiding premature destruction of the house.
Among the existing options, the optimal solution is when a concrete base is formed at the initial stage of pouring the structure. It is much easier to justify everything in theory than to implement it in practice, so in practice it is not always possible to derive a horizontal level that would be considered ideal. Often craftsmen deal with errors in their work, and such issues have to be corrected at later stages of work, after the base has been filled with mortar. Therefore, the method of obtaining the zero level using brick or stone is relevant.
Backfill
If the foundation was built not in trenches, but in a pit, then backfilling must be done. Moreover, this work also has its own nuances, so next we will look at how to properly fill the base.
This procedure is performed only after construction and the concrete must be completely hardened. It is very important to choose the soil for backfilling - it should not contain stones that could damage the waterproofing.
In addition, an important indicator when backfilling is soil moisture, it should be as follows:
- For heavy soils - 16-23 percent;
- For light and heavy loams – 12-17 percent;
- For light and dusty sandy loams - 9-12 percent;
- For silty sands – 8-12 percent.
After backfilling, the soil must be thoroughly compacted, after which the blind area can be performed.
Advice! After all the work on building the house has been completed, the base can be covered with siding or other facing material.
Tools and materials
It is customary to begin work on the construction of the foundation with the preparation of all necessary materials and construction equipment. To lay out the structure during the laying process you will need:
The tools you need to prepare are a hydraulic level.
- trowel;
- shovel;
- order;
- jointing;
- mooring cord;
- hammer-pick;
- hydraulic level;
- construction level;
- trough;
- concrete mixer;
- metal rod;
- work gloves;
- bricks;
- sand;
- cement;
- lime;
- fittings
The complete list of materials depends on the nature of the work on a particular site.
Check before work
Checking horizontality is necessary to identify defects in the base of the structure.
Before starting any construction activities, it is necessary to check the horizontal level of the surface. To do this you will have to use a construction hydraulic level. The check is carried out from the corners and gradually moves to areas of the base of the structure. If there are differences in the horizon, the necessary notes are taken and the orientation cord is pulled. After this, they move on to the main initial work processes.
How to level to zero when concreting?
The first step is to set the zero point correctly. To do this, a mark is made from the inner area of the formwork, preferably in one of the corners, which will be the alignment boundary. Next, we use the hydraulic level to determine the remaining three points. If such a tool is not available, an ordinary transparent hose will do as an alternative. To mark the corresponding boundaries, the latter is stretched from the marked area to opposite corners, after which water is released. The zero level is fixed at the primary point; in the process of balancing the liquid, a second point is selected and a mark is placed in this place. The remaining points are located according to a similar principle; no difficulties arise at these stages:
- In the finished formwork, it is necessary to make holes for the hose in the middle section of the planned walls.
- A cord or twine is threaded through the holes, after which the structure is fixed until tension appears.
- The zero level is measured and the concrete solution is poured.
- The construction rule is to level the mixture; it is important to distribute it evenly over all areas of the surface.
The level foundation is ready for the construction of the basement.
After the concrete solution has completely hardened, the ideally flat area of the foundation is completely ready for further construction of a basement or possible basement. In this case, do not forget about regularly checking the compliance of the horizontal and vertical levels of each brick row or building block.
Methods for leveling the finished base
Often builders need to reach zero on an already formed base of a brick surface. The algorithm of actions looks different than in the first case and consists of the following steps:
- The initial location must be marked with a hydraulic level or a special hose. The corners should be marked so that the location of all is obvious in relation to each other.
- After this, the wooden formwork is installed. It is important to take into account the moment that the design parameters coincide with the thickness of the base.
- Zero marks are measured in the corners, which in the future are transferred to the inside of the foundation.
- The reinforcing mesh is being installed in the formwork. The wooden frame is first sawn.
- A solution is prepared if the consistency of the correct mixture is poured into pre-moistened reinforcement rods.
A hose is used in the process of searching for the location of zero marks. However, it is important to remember the point that the water inside the latter moves by inertia. After the solution is poured into the formwork, it is necessary to ensure that the hose does not dry out from cracking. To avoid such problems, you should regularly moisturize the necessary areas.
Need for leveling
The construction term “bring to zero” implies the alignment of the prepared surface along the horizontal axis with minimal discrepancies in values along its perimeter.
In simple words, the implementation of this measure allows the foundation to evenly distribute the created loads over its entire area.
In the case of curvature of the support, excess pressure is created in a certain area, which has a detrimental effect on the strength of the elements being built and subsequently leads to premature destruction of both the foundation and the base. Leveling should be carried out at the concreting stage, when the solution has not yet begun to harden.
However, sometimes developers lose sight of this point and are faced with the need to draw horizontal lines after the concrete has completely set at the stage of arranging the base. In any of the presented situations, all measurements are carried out with one’s own hands with special care and accuracy, so that the foundation is as level as possible, and the entire building is practical and reliable.
The establishment of horizontal and vertical lines must be carried out not only at the stage of pouring the mortar, but also during the execution of brick or block masonry.
Leveling at the concreting stage
To successfully carry out the activity under study with your own hands, you should prepare the necessary tools and consumables:
- cement (not lower than M200);
- sand;
- reinforcement with a cross section of 10 mm;
- wooden slabs or boards for constructing formwork;
- ax and hammer;
- bayonet and shovel shovels;
- wide trowel and rule;
- hydraulic level;
- cord or rope.
Work order:
- Set the zero point. On the inside of the formwork, in one of the corners, we make a mark, which is the alignment boundary. Using a hydraulic level, we measure the remaining three points in the remaining corners.
If the above-mentioned measuring device is not available, you can use a conventional flexible transparent hose. To establish the desired boundaries, it should be stretched from the marked mark to the opposite corner and filled with water. Having set the level of the future location of the zero plane at the initial point, by finding the fluid balance we find the second point and make a mark. The remaining limit values are found using a similar principle.
- We make two vertical cuts in the formwork along the middle section of the future walls.
- We thread the cords or rope into the prepared cuts and fix them with the necessary tension.
- We pour concrete to the measured zero level and, using the rule, level the composition, evenly distributing it over all corners of the base.
Installation of cast-offs
This part of the work should be placed in a separate section, since cast-offs are installed depending on the type of foundation. They are necessary to ensure that the markings are not disturbed when preparing the pit. Cast-offs are pegs with parts of a board about 60-80 centimeters long nailed to them. Nails are driven into their ends so that the string can be secured for marking.
From the corners, cast-offs are dug in at a distance of half a meter. The ropes are stretched so that their intersections are exactly at the corners. All lines laid by cords must intersect each other at an angle of 90 degrees.
A strip foundation requires the installation of additional cast-offs, with the help of which it will be possible to lay out the internal boundaries. They are parallel to the main ones, and the distance between the perimeter lines and the additional ones is equal to the thickness of the future walls. If the foundation is columnar, then using ropes and cast-offs it is necessary to mark squares for future piles. The intersection points of the cords should indicate the locations of future supports.
https://youtube.com/watch?v=66CDCNNuep8
The classic way to set zero when the base is ready
Setting zero values on an equipped foundation is a complex procedure that requires knowledge of certain features of building materials and compliance with the technology for increasing compositions. To implement this activity yourself, you should perform the following steps:
- by using a hydraulic level or a transparent flexible hose, we mark the initial zero boundary of the surface (it is more appropriate to indicate the difference in readings in angles in positive or negative values, for example, “+30” or “-15”, reflecting information, respectively, about exceeding the zero value by 30 mm and placement below by 15 mm);
- according to the upper indicator of the difference in values, we install the formwork with a reserve (the formwork element is made of two boards or panels placed on each side of the foundation; inserts with a length equal to the thickness of the base are mounted between the components);
When pouring concrete in the future, it is important to take into account that the layer thickness should be at least 4-5 cm, since smaller values can lead to a breakdown in the strength of the composition.
- By analogy with the procedure presented above, we make cuts in the formwork and pull the signal rope;
- We carry out concreting of the surface to the measured boundary.
To increase reliability, before pouring concrete formwork, it is necessary, at a minimum, to drill vertical holes in the corners of the hardened base and place reinforcement bars in them, so that their upper edges are at a measured zero level.
We recommend watching a video on how to level the base using cement mortar.
Tips and tricks
When establishing the zero limit using a transparent hose, it is necessary to take into account the inertia of the liquid. Before taking measurements, you should wait a short amount of time for the water to “calm down” and take its final position.
In order to level out thin poured areas, it is recommended to periodically wet them, ensuring a uniform hardening process, and to ensure that the “lean” layers of concrete do not crack prematurely.
Leveling the foundation using brickwork
The presented method is applicable only if the foundation is placed at the same level with the ground surface. After waiting the required time for hardening, we proceed to laying bricks. Using the required number of rows of briquettes, we lay them in several tiers, evenly leveling the surface of the base. The placement of each element is strictly measured by level and plumb relative to the horizon.
Having given time for the equipped wall to dry completely, we cover it with waterproofing material and proceed to the manufacture of the plinth walls.
After completing the described procedures, you should sprinkle the areas of the foundation visible from under the brickwork, first with a small layer of sand and gravel mixture, and then with earth.
Watch the video to see how leveling is done using bricks.
To perform the installation work presented, it is advisable to use red brick, which is resistant to moisture and salt deposits. It is recommended to use high-quality cement as a fastening composition.
Choosing a level
When purchasing a device, study its type and functions. The final choice is made according to the following criteria:
- accuracy indicator. For domestic use, a value of 1.0 – 3.0 per ten meters of length is sufficient;
- lline length. For the construction of large objects, the beam must “shoot” a hundred meters or more; for private construction, its length of two to three dozen meters is sufficient;
- color shade of the beam signal. There are devices with red and green beams. The first option is more common, but for ease of operation it is recommended to use special glasses to distinguish the direction of the laser;
- power level;
- adjustment option. Manual adjustment devices are available, but it is better to purchase a device that can align lines automatically. It must be set at the control point, turned on, and the level itself will set up for work, giving an audible signal that it is ready. True, the cost of such a device differs significantly from the manual version;
- The battery capacity determines the operating capabilities of the device over time;
- IP protection. The level is used outdoors, so it is important that the device is protected from weather conditions;
- completeness. The kit must include special glasses, a signal catcher and other auxiliary elements that make working with the device easier. True, you will have to pay extra for their availability.