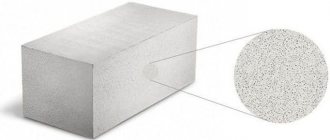
09/04/2019 Porous building materials, such as aerated concrete and foam concrete, require the use of special plastering technology. Their incredibly high water absorption capacity complicates the finishing process. Every professional builder has his own secrets. Using them, even a beginner can cope with the task of plastering and filling walls made of cellular concrete. We will simply tell you now about the main features of the choice of materials for finishing aerated concrete, foam concrete and plasterboard, as well as their application.
Difficulties of plastering cellular concrete
The high water absorption of cellular concrete blocks is fraught with negative consequences if the finishing technology is not followed. These materials, comparable to a bath sponge, absorb moisture. When applying plaster mortar to such a wall, all the liquid will be absorbed by the wall material within a few minutes. As a result, complete hydration of the cement or gypsum binder will not occur. The applied layer will acquire a loose and free-flowing structure. For reference:
Hydration of cement (gypsum) is a process in which the main component of the solution, as a result of chemical reactions, is saturated with a sufficient amount of liquid and, after complete hardening, forms a dense, solid structure (cement or gypsum stone).
For normal hydration of cement, the solution must retain a sufficient amount of liquid (be wet) for 8-10 hours after application. This is the only way to guarantee that the applied layer will receive the desired properties and will perform the task for a long time.
To reduce moisture absorption of aerated concrete or foam concrete blocks and gypsum boards, the most important stage in wall preparation is priming.
The easy way
It is easy to see that the above method is quite labor-intensive. There is also a simpler puttying method, in which you can only get by by applying putty. It is recommended to use the German composition “Glatt+Full” - it has good adhesion. "Glatt+Full" is produced on a cellulose-gypsum basis. The material forms a thick and reliable protective layer on the surface.
Even before applying the putty composition, we prime the wall. You can use any good primer (for example, water-dispersed primer “Ceresit CT17”). The choice of a water-dispersed composition is determined by the need to maintain the vapor permeability of the base.
After waiting for the surface to dry, we proceed to puttying. You need to work with Glatt+Full very quickly, otherwise the coating will quickly harden. The surface begins to harden within an hour. We process the frozen putty with a grater.
Priming is an important stage in preparing the surface of walls for plaster.
Regardless of the methods of subsequent finishing, as well as whether the work is carried out indoors or outdoors, priming of aerated concrete and foam concrete blocks is a necessary step. Primers are used to obtain the following effects:
- Reducing and leveling water absorption of the base. Any primer composition contains polymer fillers. Penetrating into the structure of the blocks, they bind to the base and compact it. This reduces the ability to absorb moisture and liquids.
- Strengthening the adhesive ability of walls. Porous blocks and drywall, due to high water absorption, are characterized by low adhesion ability. Priming the walls before plastering can slightly improve the adhesion strength of the mortars.
- Dust removal of the surface. The presence of a large number of small fractions of sawdust and sand on the treated surface negatively affects adhesion. This can even lead to peeling of the applied hardened layer. Priming will bind the particles and give the surface an adhesive structure.
What primers are used for aerated concrete and foam blocks before applying plaster?
For highly absorbent substrates, it is most rational to use either universal or deep penetration primers with the property of reducing the moisture absorption of materials. We recommend using the following types of primers for preparing walls made of gas silicate block, foam block, and other cellular concrete:
- Primer Ceresit CT 17 deep penetration. It is used on all types of highly absorbent substrates, strengthens, evens out water absorption, and enhances adhesion. Due to the pigments in the composition, when applied, it leaves a light tone. It allows you to visually identify gaps for the highest quality and uniform surface treatment. Interlayer drying - up to 30-40 minutes, complete drying in 2-4 hours (at room temperature).
- Primer Eunice for interior work. It is used for processing and preparing walls indoors. The composition based on acrylates perfectly levels out moisture absorption and binds dust (removes dust from the surface). Recommended for application to walls made of cellular concrete blocks and plasterboard. Interlayer drying - up to 40 minutes, complete drying - 3 hours.
- Ceresit façade primer ST 16. Specialized polymer-based composition with anti-frost additives. Ideal for priming external walls before applying decorative plaster. Can be used for interior work before subsequent finishing putty. Interlayer drying - up to 30-40 minutes, complete drying - 3 hours (at a temperature of 18-25 degrees).
- Primer Knauf Mittelgrund F. Concentrated composition based on polymer binders. Has a high ability to level moisture absorption. The composition contains a yellow pigment to visually determine the quality of application to the surface. It is recommended to dilute with water in a ratio of 1k5 (foam concrete and aerated concrete) and 1k3 (plasterboard). The primer has the property of frost resistance. It can be used when preparing walls before façade finishing. Complete drying - up to 6 hours.
There is a type of primer called concrete contact . It is not recommended to use it on porous, highly absorbent substrates such as foam concrete or aerated concrete . During the drying process, it forms a film that does not have sufficient adhesion to such materials.
Technology for applying primers before plastering and filling gypsum plasterboard, aerated concrete, foam concrete
It is recommended to apply primer to aerated concrete and foam concrete in at least 2-3 layers. GKL - no less than 1-2 layers. Each layer should be generous. This is important to achieve the best effect.
Manual and mechanized means can be used for application. Suitable:
- brush-brush;
- roller;
- sprayer for flowerpots;
- garden sprayer.
To treat a large surface area of the walls, you can also use a spray gun, which will significantly speed up the preparation process.
Before each subsequent layer, it is necessary to wait a technological pause - allow the surface to absorb the solution and dry. Pay attention to the recommendations of the primer manufacturer, namely, the time of interlayer drying and complete drying.
Further work should be started only after the recommended period of complete drying has passed. A completely dried layer guarantees high-quality polymerization of the composition in the structure of the blocks and the set of required qualities by the base.
Alternative
When vapor barriering aerated concrete blocks, the material must not be allowed to become damp.
However, there is another finishing option that is used relatively rarely for aerated concrete houses. Its essence lies in maximum vapor barrier of the wall surface using special primers and putty solutions.
It is used if the facade of the building is finished with a material that does not allow moisture to pass through - porcelain stoneware, facing tiles or stone.
In this situation, it is necessary to prevent moisture from absorbing into the aerated concrete. It is quite clear that in this case the owner of the house will have to fork out for the installation of fresh air ventilation in the house.
This method is rarely encountered for the reason that using such a unique material in construction in order to ultimately abandon all its advantages is very unwise and wasteful.
Choosing plaster for walls made of aerated concrete, foam concrete
Even a well-primed wall surface made of foam blocks and gas blocks is characterized by fairly strong absorption. Therefore, many builders additionally moisten the walls with plain water before applying the plaster mortar. This method allows you to extend the setting time of the solution, improve the hydration process and enhance adhesion.
For plastering aerated concrete and foam concrete bases, it is recommended to choose plasters that contain modifying additives. In particular, such dry mixtures should contain substances that reduce the rapid removal of water from the finished solution (have improved moisture retention). At this time, there are many similar plaster mixtures based on cement and gypsum binders, for machine and manual application, interior and exterior work. Popular:
- Cement plaster UNIS Silin universal reinforced. A cement-based composition with modifiers, developed for finishing interior walls and facades. Includes reinforcing fibers that increase the strength of the layer. Can be used on primed aerated concrete bases.
- Gypsum plaster Knauf Goldband. A gypsum-based composition with modifiers that increase the vitality of the solution. Can be used on pre-primed porous concrete. Recommended for finishing interior walls and partitions, including wet rooms. When finishing bathrooms, it is necessary to ensure a waterproofing layer and no direct contact with water.
- White gypsum plaster UNIS Ecolayer. Composition for machine or manual application. It has high plasticity and increased vitality of the solution. Can be used on foam concrete and other non-deformable, highly absorbent substrates with preliminary priming.
When using cement plasters, it is recommended to spray them with water for two days. The moistening process will have a positive effect on the intercrystalline bonds in the structure of the plaster, will improve hydration and increase the strength of the resulting hardened layer.
Work technology
In construction, 2 methods of laying plaster mixture are used:
- manual (using a spatula);
- machine (using mechanical devices).
Use your hands to cover small areas. After machine plastering, subsequent surface treatment is also carried out manually. Therefore, you need to remember that the qualifications of the master will affect the result of the work. Before starting work on your own, it is necessary to ensure the availability of the required tools and the required amount of building materials, and to carry out all the preparatory work.
Material calculation
In order not to waste money purchasing extra volumes of plaster mixture, you need to calculate the required volume of material purchases.
Let’s look at the example of the most popular gypsum plaster “Rotbant”. According to the standard, to apply a layer 10 mm thick over an area of 1 m2, 8.5 kg of mixture is required. Taking into account the 10% reserve, for plastering 100 m2 of area with a layer of 15 mm, you will need 143 kg of Rotbunt. If you purchase 30 kg bags, you will need to buy 5 bags of plaster.
To calculate the volume of required building materials, you can use a special calculator, with which you can easily calculate the required volume of building materials and compare prices in different stores.
Preparing walls made of aerated blocks using tile adhesive or adhesive for aerated blocks
Some cement and almost all gypsum and plaster mixtures are recommended for application to base cement plaster and other weakly absorbent substrates. They must be used directly on aerated concrete and foam concrete with extreme caution. Such compositions include:
- Cement plaster Knauf Diamant Bark beetle. It is used for finishing facades, giving a textured look for subsequent painting.
- Cement plaster UNIS Bark beetle-decor. A composition that is used for finishing building facades and can be applied to cement, lime-cement and concrete bases with low moisture absorption.
- Gypsum plaster Knauf Rotband. Composition for high-quality leveling of indoor walls. It is used on concrete surfaces and plasters with low water absorption.
There is a technology for preparing aerated concrete and foam concrete for application of similar types of plaster mortars. Its essence lies in the preliminary production of a thin base “bridge layer” for subsequent plastering. To create such a base layer, any cement-based tile adhesive for aerated concrete blocks or a plaster-adhesive mixture is perfect. Such mixtures contain modifiers that reduce the fluid loss of the solution. Accordingly, the hardened layer will go through a full hydration cycle and form a durable coating for subsequent finishing work.
To create a bridge layer before applying plasters, it is permissible to use:
- Knauf Sevener plaster and adhesive mixture. The composition contains fine sand and reinforcing fibers, which increase the strength of the layer. The composition also includes water-repellent modifiers, which improve adhesion with subsequent layers of gypsum and cement plasters.
- Universal glue Yunis Heatfacade. The main purpose of the material is to fasten insulation. However, the manufacturer allows the use of this brand of product to create a base plaster layer, provided that a reinforcing mesh is used.
When applying the base bridge layer, a reinforcing façade reinforced mesh must be used. It is installed after the solution is applied to the surface. Next, use a spatula to press the mesh to the base.
Some builders use a little trick. When creating a base plaster layer on a gas block, use a comb trowel with 6x6 mm teeth. Using this tool, grooves are created that give the layer a relief structure. When working, the spatula must be carried out in a horizontal direction. Thus, the formed surface will create additional emphasis and will not allow the plaster to “slip” during application.
Types of putties
There are several types of putty on sale:
- Cement. Can only be used indoors.
- Adhesive. It consists of 10% glue and also contains drying oil.
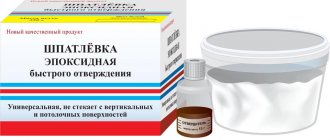
- Epoxy. It is used very rarely, mainly for sealing seams between tiles. Its main advantage over other types of putties is the easy removal of grease and dust.
- Plaster. A cheap option that can be used in dry residential areas.
- Oily. It is produced on the basis of drying oil.
- Polymer. The most expensive and high-quality putty.
Puttying walls made of aerated concrete and foam block
Puttying walls made of aerated concrete for interior decoration is usually done using polymer and gypsum mixtures. For facade finishing, preference is given to cement compositions. The puttying process can be performed in two ways:
- on pre-arranged plaster;
- directly along the block wall.
The putty dry mixture is selected depending on the finishing method and operating conditions. To ensure that the walls serve well and for a long time, we recommend purchasing proven brands of dry mixes. For example, the following types of putty are popular:
- Knauf Fugen. One of the most popular gypsum putties, which is used for interior decoration. It has good ductility and crack resistance, making it suitable for application on durable bases made of gypsum, concrete, plaster, gypsum board, gypsum fiber board, etc.
- Knauf Polymer Finish. Product based on polymer binders. It is characterized by an increased vitality of the solution (72 hours), which allows it to be used without problems for working over large areas. Due to the fine fraction of filler and binder, it forms a very smooth layer with high strength and crack resistance.
- Eunice Masterlayer. This material can be used both for thin-layer application with a thickness of 1 mm, and for leveling walls with thick-layer application up to 30 mm. It has good solution vitality and is recommended by the manufacturer for application directly to foam concrete and aerated concrete bases.
- Eunice Facade. Cement-based putty, which is used for exterior finishing of facades when preparing them for subsequent decorative work, for example, painting. These products are characterized by high weather resistance and frost resistance. Due to the modifiers in the composition, it has good plasticity, ensuring ease of work.
Putty of aerated concrete with plastered surface
Puttying aerated concrete with a plastered surface is considered a classic finishing method. In this case, the process is no different from puttying on any other walls. The existing plaster is properly primed. If the base is made of gypsum, then priming is performed at least twice. As primer compositions, you can use the same brands of primers (universal and deep penetration) as for plaster. You can start filling after the applied primers have completely dried.
The putty solution should be applied in two layers in small portions, carefully smoothing over the surface with a wide spatula. Each subsequent application should be smoothed over the finished layer, and not vice versa. Therefore, they start putting putty not from the top, but from the middle of the wall. It is also recommended to start from the corner junction of the walls, gradually moving towards the center.
On the first layer, minor irregularities, risks or sagging are allowed. After drying, defects are removed mechanically (with a spatula). The hardened layer of putty is primed again and the process of applying the solution is repeated.
It is recommended to make the second layer of putty as smooth and defect-free as possible. Especially when it comes to preparing walls for painting. After the layer has completely cured, the formed defects are rubbed down mechanically. To do this, you can use sanding paper with the finest grain, or a painting mesh. It's easier to do this manually using pads. Sanding machines also increase the convenience and speed of work.
After thorough cleaning, you should have a surface with shine and ideal geometry. Prime it with a deep penetration primer. After the soil has dried, you can begin subsequent decorative and finishing work.
Putty on aerated concrete without plaster
Puttying on aerated concrete without plaster is possible if several conditions are met. These include the ideal evenness of the walls and the absence of any defects on them. When building a new house, it is recommended to allow the material to completely shrink within 3-6 months. Otherwise, the applied layer of putty risks cracking.
Before applying putty, aerated concrete and foam concrete are leveled mechanically. For this, a special aerated concrete grater is used. Particular attention is paid to the places where blocks join, where there are small differences. It is necessary to rub until a smooth and even surface is formed over the entire area of the wall.
The leveled surface must be dusted and ground. It is better to choose a primer with deep penetration. It is recommended to apply it in two layers. Next, using standard technology, the wall is plastered in two layers.
You need to pay attention to the interlayer drying of the solution. The composition applied to the surface of the block dries very quickly. In the area of seams, the drying process takes longer. It is important to wait until the layer dries completely over the entire surface. Only after this should you begin applying the second layer of putty.
After the walls have completely dried, they are cleaned of small deposits and defects by grouting. Next, you can begin decorative finishing - wallpapering or painting.
Conclusion
The option of putting aerated concrete is up to you to choose; the first one is more durable and reliable, but if you have smooth, stable walls, then you can do it easier and choose the second technology. The video in this article will tell you important nuances of the workflow, and if you have questions on the topic, write them in the comments, and together we will sort them out.
Did you like the article? Subscribe to our Yandex.Zen channel
October 30, 2016
Cellular concrete blocks, Facade finishing materials, Plaster and wall putty
If you want to express gratitude, add a clarification or objection, or ask the author something, add a comment or say thank you!
