Beton-House.com
Website about concrete: construction, characteristics, design. We combine the experience of professionals and private craftsmen in one place
Cracks in concrete
Cracks in concrete are a dangerous and common defect. Their occurrence is due to a number of different factors: from violations of the technology for preparing the mixture at the enterprise, its transportation, and ending with non-compliance with the specifications of laying and supervising fresh concrete.
Repairing cracks in concrete on the street is a much more important problem that we often encounter. After all, it is precisely when exposed to weather conditions that more intense destruction and corrosion of the concrete body occurs. How to deal with this problem and what you need to do this will be discussed below.
Causes of cracks in screed
Cracks usually appear in areas of stress concentration. Next, we will consider in detail each cause of cracks in the screed.
Weak, low-rigid base
The concrete from which the screed is made can withstand high compressive loads. When using grade 300 cement, the strength exceeds 300 kgf/cm2. But the bending and tensile strength is tens of times less and depends on the design of the screed, the shape and number of expansion joints, the composition of the concrete and the reinforcing mesh.
Deviation from the recommended GOST and SNiP (collection of building codes and regulations adopted in the Russian Federation) technologies reduces the strength of concrete. If the base of the screed is movable, for example, an old worn-out wooden floor, or is insulated with polystyrene foam that is not suitable for its hardness, the concrete will become covered with cracks because it does not tolerate bending loads well. The answer to the question why the floor screed cracks lies in calculation errors or violations of the floor construction technology.
Incorrectly arranged expansion joints
Concrete has a rigid structure, so the absence or incorrect calculation of seams leads to the appearance of cracks. When the temperature in a room changes, the concrete heats up unevenly, so different areas are affected by different thermal expansion. These processes cause stress in the concrete, because the more heated material expands, while the less heated one remains the same size.
Expansion joints help relieve stress. They divide the screed into sections of 2-6 square meters. In such an area under room conditions, the temperature differences in the concrete are not sufficient to damage the screed and cause cracks in the floor. The screed is also fenced around the perimeter with a damper tape, which provides a thermal gap between the concrete and the walls of the room. Failure to comply with temperature gaps will destroy the screed due to temperature changes.
Excess or lack of water in solution
Concrete is an aqueous solution of cement, sand and crushed stone. The amount of water affects the mobility of the mixture. Thick mortar does not fill voids well and adheres to the base. The liquid solution fits well on the base, but when it hardens, it becomes covered with cracks. Such concrete has less strength than necessary, so during the operation of the floor, cracks will increase and deepen.
For each type of concrete work, including screed, the amount of water for concrete is determined individually. For pouring onto a flat concrete base, a thicker solution is used; for an uneven base, a thinner one is used. This issue is covered in more detail in GOST 7473-94.
Small layer thickness and weak reinforcement
The greater the thickness of the screed, the higher the fracture resistance. Therefore, in screeds less than 3 cm thick, made from ordinary concrete, and not self-leveling mixtures, cracks appear 2-3 times more often than in thicker ones. Pouring such a screed onto an old wooden floor will lead to cracks appearing after 3-5 months of use. To prevent cracks from appearing, pour self-leveling screeds and self-leveling floors onto wooden floors. These materials withstand fracture forces better, so cracks appear less frequently.
When pouring the screed in a warm, dry, ventilated room, moisten it every half hour for 10-12 hours. Excessively rapid evaporation of water from concrete will lead to the fact that the bottom of the screed, full of water, will shrink less than the top blown by ventilation. This will lead to tension in the concrete, which will form cracks. As the floor is used, the cracks will increase and deepen.
What building materials are suitable for repairing damage?
Today in any supermarket you can see materials for sealing cracks; they are designed to work with various types of surfaces. Both universal mixtures and special ones for external or internal use are sold.
Several of the most used types of putties from different manufacturers:
- Neomid Professional - for eliminating both street and internal damage. This putty is distinguished by its versatility, it is suitable for various materials. The content of reinforcing fibers allows you to work with deep and wide cracks.
- Semin Fibrelastic is a universal putty with increased elasticity, can be used both indoors and outdoors. Withstands significant loads when “breathing” cracks expand and contract, and does not lose its qualities due to changes in temperature and humidity.
- Profix - easy to apply and has plasticity and high adhesion to most materials from which walls are built. The mounting-putty mixture works great outdoors and is suitable for self-repair of small cracks; it can be applied textured.
- Unis Glare-thick-layer is a gypsum putty; manufacturers provide a 15-year guarantee on Unis seams. Used to correct internal defects.
You can prepare a mixture for sealing cracks yourself.
Cement-sand mortar is made at the rate of 3 parts sand to 1 part cement; for large or through gaps in the walls, crushed stone can be added, and for plasticity, add liquid soap in the amount of 30 g per 15 liters of concrete or silicate glue (1 liter per 15 liters of solution) , or PVA (100 g per 15 liters of mixture). The properties of the finished putty can be improved by adding fiber reinforcing fibers and ready-made plasticizers.
It is used for external cracks in brickwork, concrete, and aerated concrete. The advantage of this material can be considered its strength, and the disadvantage is its low elasticity, even in the presence of plasticizing additives; moreover, the finished solution cannot be stored for a long time.
There is no need to make silicone sealant yourself; it is sold ready-made in special tubes and is applied using a glue gun with a thin tip, which is convenient for filling cracks. The advantages of silicone are fast drying and high elasticity of the seam, moisture resistance. Disadvantages include the fragility and softness of the material. Silicone is used inside the home to repair small cracks.
—
Polyurethane foam is used to fill internal voids in cracked structures made of aerated concrete or aerated concrete; its advantage is lightness and excellent thermal insulation. The downside of polyurethane foam is its softness and lack of strength; an additional coating of plaster is required on top.
Elimination of large cracks
Repairing an old screed with large cracks in the technique differs little from the previous version. And yet, in this case, a mixture of cement and epoxy is used to fill the cracks. Large-area defects cannot be sealed with tile adhesive due to the low adhesion of the adhesive solution. What to do if the screed is cracked?
- First, the crevice needs to be grooved;
- It is desirable that the crack has a smooth edge on both sides;
- The resulting dust is removed with a vacuum cleaner so that the adhesive mixture has good adhesion to the concrete;
- After this, several deep cuts must be made across the gap to reduce the load on the seams;
- Then the prepared areas of the coating are primed;
- At the final stage of repair, a mixture based on epoxy resin is applied.
The apartment renovation with screed restoration is demonstrated in more detail in the video.
Briefly about the main thing
Cracks in screeds are a frequent and poorly controlled phenomenon. They are formed even with strict adherence to the work technique due to uneven shrinkage of the material, which does not have plasticity. They don't always require repairs. But if the defects occupy a large part of the surface and tend to grow and increase, and the floor “breathes” underfoot, the cracks must be sealed using cement mortar, tile adhesive, sealants or epoxy resin, depending on the situation. It is also advisable to fasten the largest crevices with metal brackets in the transverse cuts.
Features of bulk mixtures
A dry mortar intended for leveling the floor consists of several components:
- A binder (cement and/or gypsum), which, after mixing with water, gradually hardens and gains strength. If the first process begins after 30-40 minutes and lasts 3-8 hours, then the second lasts more than 28 days;
- A mineral filler that creates a kind of “framework” for the self-leveling coating. The permissible coating thickness and the level of compressive loads depend on the fraction (grain size) used in the mixture;
- Modifying additives, with the help of which some characteristics of the solution are improved (elasticity, spreadability, tear strength, fracture, frost resistance, etc.).
Hydration of cement.
Each of the elements requires certain operating conditions. For example, cement requires a strictly dosed amount of water to begin physical and chemical reactions; modifying and plasticizing additives require a certain temperature and humidity regime, etc.
That is why every serious manufacturer conducts laboratory tests, selects recipes, and looks for optimal options for use. After receiving the necessary information, technologists write detailed instructions for working with self-leveling floors. Moreover, it is as understandable as possible for both professionals and inexperienced “do-it-yourselfers.” And, of course, it is printed on every package.
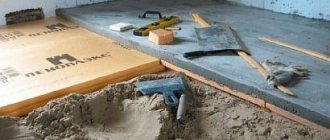
The process of forming a self-leveling floor includes three stages:
- Preparation of the base (testing for strength, absorbency and evenness, cleaning, partial leveling, priming).
- Mixing the solution.
- Pouring the mixture.
Following the instructions at each stage is very important, otherwise the result will not please you
How to repair a hole in a concrete wall
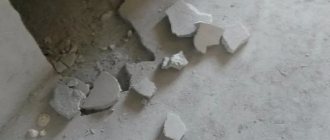
First, let's look at how to repair a hole in a concrete wall. Let's come closer to our wall and take a closer look at it:
Scary, nothing to say. When you completely remove the wallpaper and remove all the excess, this is what it will look like. Everything must be removed down to the concrete. White spots on the wall may remain if these are pieces of stubborn old putty or glue that have already grown together with the concrete and cannot be intensively cleaned.
In a separate article, we discussed in great detail and step by step how to prepare a wall for wallpapering. In the worst case scenario, deep holes will have to be repaired in it, and then it will need to be plastered (Lesson 1) and putty.
How to fill a big hole
After the very first intensive treatment of the wall, which is described in detail in this article, holes of a very different nature may form on it. Let's go to the corner of the wall:
When we beat off the old crumbling plaster, pieces of cement fell off along with it. Moreover, in old buildings, if you touch it, all the cement will fall out. I’ll say right away that what crumbles easily, beat it off in any case!
Well, in the end, in the very corner, from the ceiling to the floor, a long hole appeared! What to do with it? How to repair holes of this nature? You can’t just plaster it, because the hole is deep enough and the plaster will gradually crumble. It is in these cases that foaming is a good option. That is, we take polyurethane foam and pass it along the entire seam.
Here is a detailed video tutorial on working with polyurethane foam and sealing such a hole.
I ASK FORGIVENESS IN ADVANCE. In the video tutorial, a mistake was deliberately made so that readers would guess what was going on (there was such a competition): foaming, of course, is done from the bottom up, and not vice versa, as shown in the video. But, unfortunately, this video tutorial was not re-shot as needed. Therefore, everything in the video is correct, except for this nuance:
And this is what polyurethane foam looks like. In fact, there are a lot of types of foam on the market today, and here is one of the options:
Now let's move on to another part of the wall and see a fairly large chip on it:
Deep chips cannot be plastered (too deep) or foamed (there is nothing for the foam to hold on to). In this case, such a wonderful tool as the Kreps repair composition comes to the rescue:
The packaging shown here is in polyethylene, but there is also paper packaging. Repair composition is a special fast-hardening and very durable cement mixture intended for repairing deep chips in walls, concrete floors and other concrete structures.
Watch a detailed video tutorial on working with repair materials for filling large holes:
How to repair small chips
We just have to consider the case when you assessed your primed wall and found that it is smooth, and there are only small chips and roughness not exceeding 5 mm:
How to repair a hole in the wall in this case? The answer is simple - ordinary putty will do:
A separate article describes in detail how to putty a wall (and this, accordingly, is suitable for the topic of repairing small chips).
We determine the nature of cracks and the reasons for their appearance
At this stage it is important to determine the nature of the cracks. If they are small, that’s one thing, and the reason is more likely to be the quality of the mixture or improper care after pouring (here protection from rapid drying is necessary: the screed is covered with a film and wetted with water every 1-3 days), such cracks are practically not dangerous and can be easily sealed with liquid mortar
Also, such cracks can appear at the joints of the screed with beacons or at the junction of an already dried part with a new one.
Another option is cracks to the base (floor or insulation). Here you need to take the issue more seriously and seal the cracks with epoxy. If there are a lot of cracks, about 50% of the area is cracked, it is better to dismantle the screed and lay it again (which is sometimes not possible), following the recommendations for the device (reinforcement, maintenance, etc., this is discussed at the end of the article).
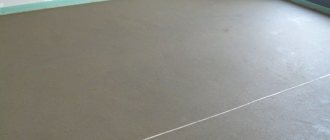
Small cracks, not to the base, not particularly scary
Coiling screed
A cracked screed may buckle, that is, vibrate under shock load. This is possible when laying on sand or polystyrene foam. If you have a piece of screed that is buckling, then it is best to seal the crack with epoxy resin. You can leave such a screed only if you are planning repairs for 10-15 years, no more. Perhaps it will need to be changed later, or maybe not - depending on your luck.
The vibrating screed must be strengthened
Tolerances
The width of cracks in concrete is an important factor for determining the technical condition and load-bearing capacity of a structure. SNiP 52-01-2003 specifies tolerances for the width of cracks. We present their values for various conditions:
- In order to preserve the reinforcement in concrete, their width should not be more than 0.3 mm for prolonged opening, and 0.4 mm for short-term opening;
- Based on the requirements for concrete permeability. This value cannot be more than 0.2 mm for prolonged opening and 0.3 mm for short-term opening;
- For hydraulic structures, the value is taken to be 0.5 mm;
- The crack should not be 0.3 mm wide, provided that the structure is in an aggressive environment;
- Cracks with a width of 0.3 mm or more should not be allowed if the concrete structure is reinforced with metal elements with low corrosion resistance.
Causes of cracks in screeds when drying
Cracks in fresh screed
To prevent cracks in the cement screed, it is necessary to dry it properly.
Before making a layer, you need to determine the load on the floor and select the appropriate brand of cement.
If heavy equipment or furniture is expected to be installed on the floor, then the grade of cement for preparation should be taken higher.
The screed must be poured in compliance with all requirements and rules.
Why the floor screed cracks when drying can be found out by studying some of the recommendations necessary for use when drying the screed:
- Violation of humidity and temperature conditions. The recommended temperature for normal drying of the screed is +15-25 degrees. If the temperature is more than +25 degrees, the floor should be watered until it is completely hardened - 28 days.
- Polyethylene coating. After the cement screed has been doused with water to maintain moisture, it should be covered with plastic film.
- You cannot walk on the screed. You can walk on a cement screed only on the third day; for this you need to lay boards and move strictly on them. You cannot put building materials on it or load it in any way.
- Limit ventilation. For normal drying, immediately after the solution is applied, it is necessary to close the windows and doors in the room to prevent drafts that contribute to the formation of cracks.
- House shrinkage. New houses always shrink, so cracks may form on the new screed after drying. The shrinkage process can last up to one year.
In order not to water the screed every day, you can, after watering it and covering it with film, cover the surface with wet sawdust or sand to better retain moisture. This is done 3 days after pouring, when all the beacons are removed and the holes after them are sealed. The screed must remain under the polyethylene for at least two weeks.
What to do to prevent concrete from cracking
It is impossible to avoid the occurrence of cracks once they have already appeared. It is necessary to understand the physical meaning of the appearance of discontinuities. The peculiarity of the phenomenon is the latent mode of crack formation.
Their occurrence can only be prevented in advance by using the correct technological methods, using appropriate materials, and carrying out work in favorable climatic and temperature conditions.
The technology for preparing the mortar requires the use of appropriate quantities of sand, cement and filler. Exceeding the concentration of the binder contributes to the formation of microcracks, which are dangerous due to their quantity and invisibility.
Crystallizing concrete must be moistened with water. The surface receives moisture, the volume of the outer layers is equalized relative to the inner ones, which did not have time to release water. The drying process is accompanied by the release of heat; on hot summer days, wetting should be done 2-3 hours after pouring.
Pouring concrete must necessarily be accompanied by periodic bayoneting and compaction of the mass. Eliminating cavities and bubbles inside the solution will avoid the appearance of deformation stresses that cause rupture of the surface layers.
Safety precautions
Repair of self-leveling coatings is carried out in ventilated areas, but without drafts. Do not allow working mixtures to come into contact with mucous or open areas of the skin. All workers must be equipped with personal protective equipment. These are protective aprons, gloves, masks, goggles.
If repairs are carried out using polymer mixtures, the use of open fire at the work site is prohibited. The use of electric welding is unacceptable
If materials come in contact with your skin, they may cause serious irritation. All compounds are immediately removed with fabric, gauze swabs. The affected area is washed generously with clean water and treated with an ointment based on petroleum jelly or lanolin. If material gets into the eyes, rinse them with plenty of water and seek medical attention.
"Long Run"
Downtime of mixers is expensive for the developer, so concrete is often dumped in one place and shoveled to distant areas without a tray. This leads to the separation of the mixture into separate fractions - large crushed stone is better captured by the entrenching tool, the liquid practically remains in place.
Pronounced consequences of concrete delamination.
The result is an uneven concentration of sand/crushed stone in individual areas, which cannot but affect the quality. There will be no design strength in any section of such a foundation, crushed stone is physically unable to envelop the reinforcement, cracks are inevitable.
Making expansion joints
One of the main reasons for cracking of a concrete slab is the lack of compensation gaps around the perimeter of its abutment to vertical barriers - walls, columns, thresholds, etc. And in rooms with a large area, the screed can crack and swell during shrinkage and during linear expansion, if expansion joints are not installed in it, dividing the solid slab into several sections independent from each other.
The expansion joint allows the screed to expand freelySource tb.ru
Before repairing cracks in the floor screed, it is necessary to arrange all the necessary technological joints in it, otherwise they will appear again and again. And the sooner you do this, the better.
It will no longer be possible to create gaps between the floor and the wall using a finished screed. But you can cut the grooves as close to the wall as possible using a grinder with a large diameter disk or a wall chaser. If there are columns, a shrinkage seam is made around them, but not parallel to the edges, but in the form of a diamond, so that the corner of the column looks at the straight section of the groove.
If the dimensions of the room on one or both sides exceed 3-4 meters, the seams must be cut across it.
The finished cracks in the floor are cleaned of debris and primed. After the primer has dried, they are filled with polyurethane sealant or special mastic. After drying, these compositions retain elasticity, which will allow the cut cards to move independently of each other without transferring deforming loads.
Filling the seam with sealantSource stiagka-pola.ru
For stone structures
For stone structures, we prepare putty based on cement, gypsum or a mixture of both. Compositions based on gypsum are best used indoors. Exterior repairs require cement. We add gypsum only as a small addition, about 7-10%, to reduce shrinkage and increase the setting speed.
Sift gypsum or cement through a fine sieve. Add sifted and washed sand, at the rate of two or three parts of sand to one part of binder.
Sift the sand through a fine sieve. We do the same with gypsum and cement.
We measure out the required amount of water, pour 10-12% of its amount into the PVA emulsion, add and mix the dry component.
Usually you have to use quick-hardening alabaster (gypsum). This composition sets within five to seven minutes after mixing, which is inconvenient. Setting will slow down if you add a little vinegar, liquid soap or shampoo to the water. Reduces the rate of setting of gypsum and the addition of cement.
Homemade putties do not have the strength and elasticity of factory putties, so it is not worth restoring the damaged body of your expensive car with their help. But for repairing surfaces in an apartment, where special hardness and ductility are not required, they are quite suitable.
Causes of cracks
First of all, to prevent cracks from plaguing the operation of a heated concrete screed, you need to figure out what the threat may be:
- The problem is in the foundation. The main floor may be too thin and uneven.
- Poor quality of installation of concrete screed. The percentage of cement and other components does not meet the strength requirements or other factors of quality installation are not met.
If the reason for this is the installation of the heating circuit and the finishing screed, then the situation can only be corrected by dismantling the top concrete screed.
If the problem is in the screed itself, cracks that appear on the surface can be fixed more easily. But before considering sealing methods, you need to know what can cause these cracks to occur.
There are no damper tapes or expansion joints
Cement screed tends to shrink during drying. If shrinkage occurs unevenly, with varying degrees of load on different areas, then the appearance of cracks, small and large, will not be long in coming. Incorrect shrinkage may be caused by:
- Uneven screed thickness.
- Different temperature indicators in different areas of the coating.
- Influence of other building design elements. For example, cement dries faster near the door, undergoing tension from neighboring rooms. Under such a load, the screed breaks. Such cracks can be covered with finishing mixtures. But all this can be prevented if expansion joints are used.
How are expansion joints made? They are left in the most stressful areas (near walls, door openings). They are designed to separate the cement drying process in adjacent rooms.
Also, the use of damper tape is necessary to protect the walls from the screed itself. Under the influence of temperature, it can expand, and then damage will be caused to both the wall and the screed itself.
The use of damper tape is mandatory
If the room has large areas, then expansion joints can be made in small sections of 4–5 meters. For example, you can make seams in the areas where two floors join. You can make seams immediately after pouring the screed, cutting with a grinder to a depth of 1/3 of the thickness of the screed.
Violation of solution proportions
It is necessary to follow the requirements for the ratio of water and dry mixture. But often inexperienced installers can make a mistake to make it easier to apply the solution.
Mixer for preparing solution
A solution that is too thin will be fragile, so you need to strictly follow the proportions set by the manufacturer. The manufacturer himself determines exactly the percentage of water and mixture.
It is also important that the solution is mixed thoroughly. These actions cannot be performed manually; you must use a special mixer
Wrong layer thickness
The layer can be either too thin or too thick:
- with a thin layer there will be insufficient strength, and the coating may not withstand the load;
- with a thick layer, moisture can cause deformation due to an increase in the resistance of the material.
Violation of the solidification process
It is worth knowing one of the main principles of the strength of a cement screed: the longer the moisture is retained, the stronger the screed will be. Accelerating hardening will only cause the opposite effect, leading to low strength. This may cause cracks to appear.
Therefore, it is necessary not only to protect it from drafts and sunlight, but also in no case to turn on the system so that it does not heat up the concrete.
How to prevent cracks from forming?
The first, most important rule to learn:
Excess water in a batch is your worst enemy. This means that you need to add just enough water to thoroughly mix the solution, but no more. Some inexperienced craftsmen think: the thinner the solution, the better it will level out and “stick” to the base. They are partly right: the liquid mixture is easier to knead and level, but the quality suffers seriously. And if this approach is still tolerable when pouring conventional screeds, then serious problems can arise when installing floating ones.
Ideally, the amount of water for mixing is selected so that the solution can be leveled using the rule, while ensuring that there are no voids in the mass itself. In other words, you should try to keep the amount of water to a minimum. To make it easier to prepare a thick solution, you can add “feri” to the water - a teaspoon of detergent or liquid soap per bucket of water. As a rule, the use of special plasticizers is unjustified - they are not needed if work is carried out at temperatures above +5 C°.
In addition to adequate proportions of water, it is necessary to prevent the solution from drying out quickly. Moisture is necessary for cement mortars to gain strength. Rapid loss of moisture will not allow the cement to display all its characteristics and the screed will not be strong. Therefore, before pouring, you need to take care of the absorbency of the base.
As you know, before pouring it is recommended to prime the base, thereby reducing its absorption. However, this is not a panacea for absorbency. For a smooth concrete base, a primer will be just right, but if there are areas of mortar on the base or the pouring is done over an old screed of poor quality, the best option is to first “saturate” the base with water. The base should be sprayed with water until it stops absorbing moisture, after which excess water is removed from the surface and poured. With such humidification, one should not forget about the danger of flooding the rooms located below and approach the issue wisely.
When you wet the base before pouring, you don’t have to worry about the primer - there is no need for it. Thanks to the wet surface, cement crystals will grow well into the base - even a primer cannot provide such adhesion.
If there are areas of foam blocks or other very porous materials on the base, they need to be puttied to “tear off” with any available cement mixture - for example, tile adhesive. When pouring onto the ground, you need to cover the entire area to be poured with waterproofing material, such as polyethylene.
And a little about the damper tape: this tape made of foamed polyethylene is intended for installation on walls before pouring, at the junction of the screed. When shrinkage of the poured screed occurs, the deformation tape slightly compensates for the narrowing. This is all in theory, but in practice the use of this tape is justified only on floating screeds. When poured directly onto a concrete base, the entire mass of the screed has adhesion not so much to the walls as to the base.
The second issue to pay attention to is reinforcement.
. When pouring wet screeds onto a rigid, immovable base, reinforcement is not required. However, if floating technology is used - a screed device on top of a layer of insulation or sound insulation - reinforcement is necessary. For this, masonry or other mesh is used; it is possible to replace the reinforcement with polypropylene fiber. The installation of screed using semi-dry technology does not require mandatory reinforcement (at least in residential premises).
When reinforcing with mesh, you need to ensure that the individual fragments are connected to each other or at least overlap each other. The minimum thickness of a floating screed is 4 cm. It is recommended to place the reinforcement in the middle of the layer or slightly lower, but the solution should envelop the mesh from below. The option when the mesh is attached to the base before pouring is ineffective, since the rods are in the solution only on one side.
Beacons also interfere with the integrity of the entire reinforcing fabric, therefore, when organizing a floating screed, it is recommended to use beaconless pouring methods. Although here a lot depends on the type of beacons.
Minor irregularities, roughness
The occurrence of such defects is determined by poor-quality cleaning of the base from construction debris. If irregularities were discovered during the process of pouring the material, then the floors must be treated as follows:
- first, using a special construction vacuum cleaner, clean the surface from dust;
- Any debris that has just been poured will have to be removed with your own hands. It is recommended to move around unhardened mortar in shoes specialized for this purpose;
- In order to remove small debris from the surface during the pouring process and smooth it well, it is necessary to use a notched trowel with teeth or a squeegee.
If defects were found already on the finished dried coating, then it is necessary to grind its surface followed by polishing. In this situation, it is recommended to perform sanding using the finest-grained sandpaper. After the defect is completely smoothed out, this area is cleaned, and only then the surface is polished.
How to seal small cracks
Minor defects in corners are considered to be gaps of no more than 2 cm. It will not be difficult to repair them - just putty the walls with your own hands. The composition for this should be selected based on the material of the walls themselves.
- When working on concrete, cement mortars should be used.
- Gypsum is only suitable for interior partitions - they are usually built from gypsum blocks.
- Acrylic putty is universally suitable for all types of coatings. But it has a low strength coefficient due to poor ductility.
- The most reliable option for sealing the gap between the walls is silicone sealants. But while they have high qualities, they also have a high cost. To save a little on this composition, you can stuff pieces of foam rubber or felt into the cracks, and then use sealant.
The restoration procedure itself is simple and therefore requires little effort. First you will need to prepare the gap itself, clearing it of dust and other debris. Then a special primer suitable for this type of wall is applied to the wet surface. When the soil is dry, apply the appropriate putty solution.
Technology for local repair of self-leveling coatings
Based on the type of defects, the scope of work is determined. This can be surface treatment, removal of a layer, or complete dismantling along with part of the concrete base. Any operations to restore the coating are carried out in stages. Grinding and milling machines are used to level the exposed base and begin to eliminate the problem.
Leaky, weak areas must be removed; messing around with their restoration will cost you more if the result is dubious
Cosmetic restoration
You can eliminate visible scratches and give the surface the original gloss of self-leveling floors using polishing technologies. The operation is carried out using a rotary polishing machine. The working body is felt circles. Special emulsions are used for the work. The number of approaches depends on the actual condition of the coating and the required degree of gloss.
If the polyurethane coating is damaged, restoration is carried out by applying a layer of protective varnish. Any surface treatment is carried out after thorough cleaning, degreasing and dust removal.
Repair with removal of polymer coating
If a coating with surface discoloration, sagging, or bubbles is subject to renovation, you can get by by removing the top layer of the polymer coating by grinding with diamond wheels. After the operation, a new finishing layer is poured onto the surface.
For local processing, angle grinders are used, and for large volumes of work, a rotary industrial unit is used. Repairing peeling requires complete removal of the polymer coating.
If the quality of the concrete base does not raise questions, proceed as follows:
- on coatings with weak adhesion, perforators with special scraper attachments are used;
- in areas with good adhesion, grinders and chisel-type hammer drill attachments are used;
- the resulting surface of the concrete screed is polished;
- the base is dust-free, degreased, and primed;
- a polymer coating is applied.
If work is carried out in a limited area, you should first determine the perimeter of the repair area. The covering is cut to the depth of the concrete base, according to the designated perimeter. Further work is carried out in the manner indicated above, with the difference that the joints with the old coating are sanded and covered with mastic.
Elimination of bloating:
- all defects are removed, the formed craters are cleaned with a spatula or using a grinding machine;
- the surface is freed from dust, debris, and small particles. Use an industrial vacuum cleaner and damp rags;
- the base is dried with compressed air from compressors;
- places of defects are covered with primer in 1-2 layers;
- The defect area is filled with a filling mixture. Instead, you can use putty (cement or polymer).
If the resulting surface is not the front layer, the repair can be considered complete. Otherwise, fill in the finishing self-leveling floor.
If the naive floor contains a network of cracks, major repairs are carried out. Inspection of the condition of the concrete base is mandatory
Repairing cracks:
- if the width of the defect does not exceed 10 mm, it is expanded to 20 mm along its entire length. They work with grinders or metal brushes;
- remove dirt and dust from the excavation using an industrial vacuum cleaner;
- The walls of the defect are covered with primer, using brushes, and the layer is allowed to dry. If necessary, the operation is repeated;
- Filling is carried out with cement or polymer putties. The material is leveled flush with the surface.
Elimination of bouncing:
- the damaged area of the coating is removed;
- the base and edges of the defect are freed from dirt and dust, for which they take a damp rag;
- waterproofing impregnation is applied to the base in 2-3 working approaches;
- the defect is filled with a self-leveling mixture so that it is flush with the rest of the coating.
Elimination of depressions and bumps:
- To remove bumps, the surface is treated with a grinding machine. Next, the finishing filling layer is arranged;
- depressions are repaired with cement-based or epoxy-based putties after the priming operation. It is permissible to use a self-leveling mixture that is applied to the entire coating. After drying, apply the finishing layer.
Main causes of damage to foundations
Conventionally, all factors that lead to cracks in the foundation can be divided into the following groups:
- Natural. This is the action of soil swelling, the impact of surface and groundwater, as well as seasonal freezing.
- Anthropogenic. Through exposure to groundwater contaminated with pesticides, acids and alkalis. There is also the possibility of exposure to acid rain through an improperly installed drainage system.
- Technological. These include incorrect calculation of the permissible load on the foundation, selection of the wrong type of cement and poor connection of reinforcement. Also, the human factor cannot be excluded, especially when calculating the load on individual supports.
Therefore, to make it easier to select the optimal technology for repairing the base and supports, all possible reasons are grouped into the following main groups:
- Unauthorized increase in loads on the foundation;
- Incorrect foundation calculation;
- Deformation of masonry due to violation of the waterproofing layer;
- Displacement of supports due to seasonal soil movements;
- Damage to the base and water ingress;
- Movement of structures due to improper fixation of supports on quicksands;
- Accidents on utilities;
- Incorrect proportions for concrete or poor building materials were used.
If there is a violation of the waterproofing layer, then eliminating the cause will not be difficult. To do this, you just need to punch a hole a couple of bricks deep in the base, level the surface and lay out a couple of waterproofing balls. The remaining reasons are not so easy to eliminate; you will have to spend a lot of time and money.
Reasons for the formation of defects on the coating
As already mentioned, to the question of why the self-leveling floor cracked, there is a very specific answer - a violation of technology with all the ensuing consequences.
The photo shows the most common type of crack due to incorrect temperature conditions
Insufficiently prepared base
Improper preparation of the base for pouring the floor of an apartment or house will most likely cause deformation of the finished surface. The concrete screed on which the polymer mixture will be poured must be well dried and cleaned of all possible contaminants.
Do not allow grease and oil stains, dust accumulations or dirt fragments to remain on the subfloor. Moreover, the screed must be sanded to the optimum degree of smoothness so that there are no depressions or protrusions. Pouring the polymer mixture should be done exclusively on a dry base.
The instructions for pouring polymer coatings onto a concrete screed indicate that the concrete must dry for at least 20 days. If the finished floor is poured before this time, moisture will be released from the concrete, which will lead to cracks or swelling of the vinyl covering.
Temperature mismatch
If the self-leveling floor is poured in a room with a high or, conversely, too low temperature, surface defects are inevitable. The optimal room temperature for working with polymer coating is from +15°C to +25°C.
Use of contraindicated detergents
When preparing a concrete floor screed for pouring a polymer composition, in addition to using a wet rag and a vacuum cleaner, it is advisable to use properly selected special detergents.
To achieve optimal results, concrete floors must be cleaned with acid - a special cleaner for cement deposits. Sanding should be done with a grinding wheel and then with a metal round brush mounted on a sander.
Concrete screed not properly primed
It happens that builders, due to insufficient experience or to save money, do not prime the floor screed or do it insufficiently well. As a result of uneven adhesion, the polymer composition adheres differently to the concrete in different areas.
Primer screed
The instructions for preparing a concrete screed for pouring polymers include applying two or three words of primer to a previously cleaned and sanded surface. Of course, after sanding, all dust must be removed from the floor.
Incorrectly filled polymer composition
Installation of self-leveling floors must be carried out in accordance with generally accepted technology.
Following technology, we ensure optimal results
When preparing the mixture and spreading it over the entire coating area, you must adhere to the requirements prescribed by the manufacturers of the polymer material you purchased. Only if the installation requirements are met can the likelihood of cracks and blisters appear on the polymer floor can be eliminated.
Insufficient screed strength
If the concrete screed is not strong enough (according to SNiP 2.03.13-88, the compressive strength of the screed is 15 MPa or more), it will gradually collapse during operation of the finished polymer floor.
The screed needs leveling and strengthening
As a result, the appearance of cracks cannot be avoided and the cost of repair work will be high. In order to prevent undesirable developments, the old and fragile subfloor must be properly repaired.
Types of education outside
After renovation work, minor cracks may appear in the house, which resemble a “cobweb”. They can appear even on high-quality putty. It's not scary! What are the types of cracks and what are the causes of their appearance?
Horizontal
Horizontal cracks in the building mixture are considered less dangerous, and the walls can last longer than during repair. The main cause of horizontal cracks is shrinkage of the foundation or the proximity of groundwater.
If the width of the cracks is up to 5 mm, you should not tighten the house around the perimeter, this would be a mistake
Shrinkage
This type of crack is called hairline. They not only deform the fundamental foundation, but also the entire structure as a whole. To prevent this from happening, the correct cement composition must be selected in the foundation. And most importantly, it must withstand a uniform load.
Vertical
Cracks can occur due to builders’ failure to observe expansion joints during construction. And also when the lintels, partitions are overloaded and the quality of the concrete is poor. Foundation deformation occurs mainly in winter. At this time, the soil freezes, which clamps the foundation, as a result, defects appear on the walls of the house.
Through slot
A cleft through and through is the most dangerous phenomenon. In this case, the house may be considered unsafe. The appearance of through cracks is affected by the deformation of the foundation if an extension is added to the house or construction work is underway in the neighborhood. Breaks in the wall can appear in the most unexpected situations - a falling tree, earthquake or other natural disasters. Shrinkage of building elements occurs over several years.
Is the crack expanding or not?
So, the reasons for the appearance of cracks and defects on the surface and in the structure of the concrete screed are clear. It is worth noting that not only the reasons are important, but also the dynamics of their increase. Typically, an increase in cracks in the concrete screed is observed in apartments of houses in which the floors have low strength. How to check whether a crack is static or dynamic?
To ensure further deformation or its absence, you need to do the following:
- Apply masking tape to the area with the crack.
- Do not touch the left sample for a month.
- If during this time the paper breaks under the influence of the movement of concrete, then this will indicate the dynamics of the increase.
Once the nature of the cracks has been determined, and if they do not increase, you can begin to seal them. In this case, the choice of sealing method will depend on the size of the gaps.
Sealing small cracks
To return the screed to a flat surface, you will need to do the following:
- Increase clearances. To do this, you need to use a grinder with a diamond blade.
- Clean debris and concrete debris from the crevice.
- Apply primer.
- Seal the gap with special tile adhesive.
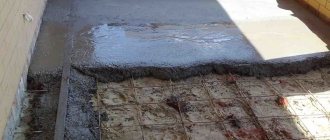
Repairing large cracks
If the damage to the coating is more serious, then you will have to use a method that is not much different from that already discussed. But there is still a difference in the product used: the filler is a mixture of cement and epoxy. Tile adhesive cannot be used for the reason that low adhesion will not allow for effective restoration.
Reinforcing the seams will protect them from expansion or at least reduce the dynamicsTo seal large cracks, do the following:
- The first step is to cut the crevice.
- The edges on both sides should be made as even as possible.
- Make cross cuts with a diamond-coated grinder. This will relieve stress on the seams.
- Remove remaining debris, dust and anything else that may cause poor adhesion.
- Prime the prepared cavities.
- Apply the prepared mixture of epoxy and cement.
If the cracks are deep, it is unlikely that you will be able to fix it yourself. You will have to seek help from specialists so that they can assess the condition of the floor and determine whether it is advisable to seal the cracks.
When the defects are minor, you can ignore them. This is done when ceramic tiles act as the finishing coating. The tile adhesive will fill any cracks. In addition, if the cracks in the heated floor screed open, the tiles can be replaced.
In case of significant defects (thin layer of concrete, a lot of water in the solution), when the coating needs to be used under serious mechanical loads, you will have to dismantle the screed and do the work from the beginning. In this case, you need to make sure that the foundation is reliable. If this is the reason, then even if you follow the technology for pouring a new screed, the problem may arise again.
Floor screed is the layer between the base and the finishing coating. The higher its quality, the longer the floor covering will last. Some consider this to be menial work that does not require special knowledge, but this is not entirely true. Economy, haste, or basic ignorance of physics can contribute to surface cracking.
We repair the screed
How to repair cracks in a floor screed depends on the degree of deformation of the subfloor.
Sealing microcracks
Shallow, small cracks usually do not cause problems. They arise due to improper concrete drying conditions. If they begin to appear soon after pouring, the floors should be wetted and covered with film.
Very thin microcracks can be left untouched or covered with liquid cement mortar or tile adhesive. If the width reaches several millimeters, it is better to play it safe and seal such cracks to the full depth.
- The crack is opened by cutting off the concrete on both sides of it with a grinder with a diamond blade, which is set at an angle to the crack.
If the amount of work is small, you can get by with a chisel and a hammer Source wp.com
- Pieces of concrete and cement dust are removed from the resulting triangular furrow.
- Its walls are well impregnated with a deep penetration primer.
- After the primer has dried, fill the recesses with the solution, applying it with a small slide.
- As soon as the solution sets, but does not completely harden, the excess is removed from the surface with a spatula.
If you immediately level the repair mixture over the surface, then during the drying process it will shrink and a depression will form.
Conclusion
To avoid repair work after drying, you just need to follow the technology for laying the screed. Let's summarize: First of all, we observe the proportions of the mixture. Excess water 100% will give us cracks on the dry floor. Preparation of the base also plays a big role. If it absorbs moisture, the screed will need to be reinforced in any case.
And the most important thing! There is no need to speed up the drying of the solution by artificial drafts or heating the room. With such actions, moisture evaporates unevenly and quickly, which will also cause cracks.
By following these simple rules when pouring screed, you will never have cracks on your floor.
Tools
To carry out work on sealing cracks, a novice plasterer will need the following construction tools:
- container for preparing the plaster mixture;
- grater and grater;
- steel smoother;
- Master OK;
- brush and brush;
- small trowel for filling small depressions.
You can make the solution yourself, or stores sell ready-made dry plaster mixtures that are diluted with water.
According to the advice of experts, for better sealing of wall surface cracks, it is recommended to use reinforced tape, thanks to which the cracks do not spread further.
To summarize, it can be noted that if cracks are identified, first you need to decide on the correct selection of options for sealing the cracks. And then the surface will be repaired quickly and efficiently, and you will not have to resort to repair work for a long time.
Poor quality raw materials
Cracks may open due to the cement not meeting the declared quality. Individual developers are looking for cheap prices and often do not pay attention to packaging. The bags of a manufacturer that values its reputation must include:
- details - you can conduct an examination, file a complaint, at least partially compensate for the damage;
- packaging period - cement retains its properties under storage conditions for 3 months, after which it begins to “lose” its strength quite sharply;
- ratio of water and filler - for mortars and concretes;
- composition - addition of slag, grinding size significantly influence the hydration process, which is important for the thermal regime of massive structures intended for use in the ground and aggressive environments.
Concrete cracks on the surface immediately after pouring, including due to plastic shrinkage. The principle of this defect is determined by the process of formation of cement stone:
- the volume of the mixture increases with the release of heat as a result of a chemical reaction;
- the surface cools and dries faster and begins to shrink;
- in the core the process lasts more slowly and prevents surface compression;
- the result is cracks across the entire surface or individual sections of concrete.
There is no clear direction, everything depends on the circumstances. Or longitudinal cracks 1–3 mm thick and of insignificant depth appear. A wet compress made from periodically moistened sawdust, sand, and rags completely saves you from these troubles in the first three days.