- Necessary materials and tools for work
- Features of the formation of attached slabs and tapes
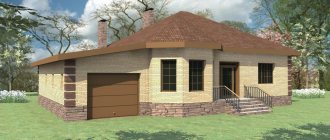
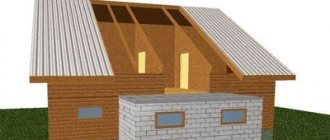
With the advent of new family members, its head certainly faces the problem of obtaining additional living space. Having a house, you can solve it radically and quite economically in several ways: make a residential attic under the roof, or, if the size of the plot allows, attach a full-fledged room to the house (summer kitchen, veranda, workshop, garage). The second option is easier to implement and requires less expense - the main thing is to properly build the foundation for the extension to the house.
How to make a foundation for a house extension
The decision to increase the area of a country house or apartment comes due to the current circumstances. I would like to complete a kitchen, bedroom, bathroom or separate area. And the first thing you encounter is the foundation. I would, of course, want to make it high quality and reliable.
If the future building is a separate zone, it will be possible to use the construction of a separate base, which makes such a building easier to work with and a more reliable design. You should decide on the type of base and make the right choice so that additional problems are not created in the future.
Features of the layout of the attached room
The main factor that influences the strength of the entire structure is the connection of the attached room, or rather its base, with the existing one. For this purpose, reinforcement is used, which is driven into the old foundation, and its protruding ends (about half a meter long) connect the foundation for an extension to a wooden house. This ensures simultaneous shrinkage and a strong connection to the house.
The second, no less important point is to determine the location of the junction with the wall of the main building. To reduce financial costs, it is better to choose a window opening in this place, which is enlarged and a door is made. This simplifies dismantling work and at the same time ensures the strength of the entire structure.
Choosing the type of foundation for an extension
There are several types of foundations, according to the principle of which you can build an extension:
- Tape.
- Columnar.
- Pile.
The most universal is the first type. When choosing a strip base, you can use any type of structure, from light buildings to heavy frames. To avoid subsidence, a closed-loop base pattern is used.
The columnar base is used in lightweight structures. It is distinguished by its reliability and affordable price. The only downside is that you can't build a basement. Here the basis is pillars, which should be installed at a distance of 1.5-3 meters. The material for them can be very different: larch beams, brick, reinforced concrete. But the first option is used extremely rarely, since it has a high cost and a short service life.
In case of weak soil and the use of a massive structure, a pile foundation can be made. These can be steel, reinforced concrete, wood or asbestos supports, which are connected with a strapping beam.
Complete replacement or restoration: what determines the choice
Work with the old foundation begins with an analysis of its type and assessment of its condition. There are three options for structures erected previously for the installation of wooden log houses.
Columnar. They were mainly made of red brick, which is not resistant to moisture. The masonry quickly collapses, the building erected on it sags and warps. In such cases, the lower crown often rots, which must be changed simultaneously with the restoration of the base.
Columnar supports cannot be restored; they have to be replaced with piles, or a strip foundation must be placed under the house.
Chairs (wooden decks). These types of bases were used in many regions. The columns were made of oak: it is strong, but not eternal, so over time it completely rots. Wooden posts need to be replaced.
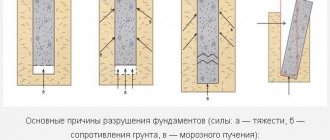
Tape. On such a base, cracks, destruction of corners, and chipping of individual areas often form. After assessing the condition and monitoring the rate of crack expansion, the foundation can be strengthened by adding cement mortar.
Watch the video:
If the percentage of destruction is large, or the cracks are increasing at a high rate, and the building is warped, it is also advisable to completely replace the strip base.
General Design Guidelines
The main recommendation should definitely be taken into account. It consists, according to experts, in choosing a foundation that is related to the old building. If there are different foundations, different shrinkages will be observed - this can lead to cracks in the foundation. After all, the interaction of the base with the ground is different for everyone.
No less important information is the level of the foundation. Here you should also choose the same depth of the building and the old building.
A good option for “strong” soil would be to choose a columnar base; in others, a pile or strip base.
Hard connection
This method is used in the following cases:
- on non-heaving and slightly heaving soils;
- if there is a shallow strip foundation, the base part of which forms a single whole with it;
- when the shrinkage of the building is predictable;
- when building an extension of several floors under one roof with the main house.
In the case of a columnar version, the reinforcement is mounted on the base, if it is of sufficient size. When the length is not enough, it is more logical to choose another method. Violation of this rule is fraught with cracks and instability.
Where to start connecting tape samples:
- A ditch is dug to the required size. A layer of sand is poured onto the bottom to ensure stability.
- Holes are drilled in the foundation. Each next row is drilled offset from the previous one.
- Metal rods with a longitudinal slot at the end are driven into the holes, into which wedging wooden inserts are inserted.
- Using protruding sections of reinforcement, the foundation for the extension is formed.
- After the frame is ready, concrete is poured.
- Further work can continue only after the structure has settled. This standard is observed for all filling options.
A slab foundation is connected in this way only if its thickness is more than 400 mm. The possibility remains the same when the slab protrudes beyond the base of the house. The protrusion must be more than 300 mm. The reinforcement is stripped and welded to the metal frame of the base of the extension. Such protrusions are often found in buildings made of foam blocks.
Methods for pairing foundations
There are two ways to pair bases:
- Using technology with rigid reinforcement. This method is acceptable if the building has been standing for at least 15 years and the foundation is stable. And in the presence of non-heaving soils. Other cases are considered inappropriate.
- Use of expansion joint technology. The option is the simplest and most economical. All three types of foundations can be used: strip, column and pile. Roofing felt is mainly used as an insulating material.
Fastening the racks and lower trim
After the foundation is poured, it is given the opportunity to gain at least 50 percent strength. Generally, concrete or cement mortar is used in either case. After this, you can begin installing the frame. At least a couple of layers of waterproofing should be laid on top of the foundation. Roofing felt or roofing felt, folded in half, is used as waterproofing. It is acceptable to use other, more modern waterproofing materials, including in liquid form.
After this you can do this:
- First, the racks are secured, after which the harness is formed.
- First of all, the strapping is done, and then the racks are attached.
In the case of the first option, when pouring the foundation, special fasteners are poured in the places where the racks are installed. In the photo below you can see what these fastening elements are. It can also be a metal plate in the shape of the letter “P”; in this case, it is poured upside down, and it is better to weld a rod at the bottom of the plate. A stand is inserted inside this letter “P” and secured with screws or self-tapping screws. Naturally, before installing it, all holes for fasteners must be drilled, and the dimensions of the plate must correspond to the cross-sectional dimensions of the racks. It is permissible to fasten with ordinary nails, which will not affect the reliability of the entire structure.
How to attach posts to the foundation
After installing and fastening all the racks, the strapping bars are attached between them.
If another option is used, the strapping beam is first installed. If, at the stage of pouring concrete, the studs are bricked up at a certain step, the task is greatly simplified. In the places where the beam is attached, it is enough to drill holes, after which the beam is placed on the studs and securely tightened with nuts to the base. After this, they begin to install the racks, armed with one of the methods presented in the image below.
Options for attaching racks to strapping beams
In any case, it is better to use metal corners, which will make the structure stronger and more reliable, especially since these racks are loaded with a roof, and this is very important
Reinforced connection
- You should decide on the type of base. An identical option with a finished house is selected.
- The parameters are determined: depth and width, if it is a strip base. With the pile option, the depth and thickness of the pile are determined. The width is determined by an ordinary metal rod, which will have a right angle bend at the end. You should push it under the base to its end. Then turn the hook vertically and pull it back until it stops. This will be the thickness of the base. A notch is made and the rod is pulled out in the same order. The depth of the additional structure is slightly higher - this is given for future shrinkage.
- Holes of the same diameter as reinforcement strands are prepared in the base of the house. The length of the rod is calculated as follows: you need to multiply the diameter of the bundle by 35. Their number is taken at the rate of 20 pieces per 1 sq. m. The rods are driven in half the width of the base, leaving the same length on top. You can cut them with a grinder or an emery machine. The harness is equipped at the end with a longitudinal cut for a wedging liner. The method used will make the connection of the two bases reliable and durable.
- Next, the formwork is installed , where the rods are laid, and filled with concrete mortar. After the concrete has completely dried, the formwork is removed and the base is ready.
Preparatory work before pouring
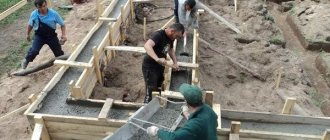
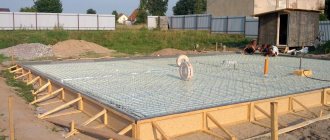
Work on pouring the foundation is preceded by a preparatory stage, which includes the following operations:
- Clearing the built-up area from vegetation or hard surfaces.
- Drilling wells, digging an earthen trough or trenches (depending on the design of the foundation).
- Construction of an anti-heaving sand cushion.
- Installation of formwork (possibly with polystyrene foam as an insulating layer).
- Assembling and laying the frame into the formwork.
Necessary materials and tools for work
Before starting work, you must stock up on the required materials, tools and equipment. The specific set depends on what type of foundation will be poured, but general construction tools should be at hand in any case.
- If the foundation is formed in a monolithic form, first of all you will have to think about what to make the formwork from. To assemble the panels, edged pine or spruce boards are usually used. With small dimensions of the extension, it can have a thickness of 25 mm; the width is usually selected for the convenience of assembling a shield of the required height, but not more than 150 mm.
- So that later the shields can be disassembled and the board used for other needs, you should immediately think about how to cover them from the inside. It is important not only not to cement the wood, but also to prevent moisture from the concrete from seeping into the ground, which will reduce the strength of the monolith. For this purpose, technical polyethylene, roofing felt, and geotextiles are used.
Formwork covered with technical polyethylene - You don’t have to try to look for well-dried boards, but, on the contrary, take wood with a humidity of 25%. This will not swell even if it rains, and will be resistant to cracking in hot weather. The grade of lumber may not be high, but due to the curvature of the boards it is difficult to assemble formwork with exact geometric dimensions. It’s better to take grade 2 – it has fewer defects and a lower price.
Expert opinion Vitaly Kudryashov builder, aspiring authorAsk a Question
It is very convenient to assemble formwork using OSB sheets with a thickness of 16-18 mm, but it will cost a little more.
- To assemble the shields, and then install them in a vertical position and secure them to the ground, you need racks and supports in the form of bars with a cross-section of 50*50 mm or boards 50*25 mm. On average, the number of fixing elements is 40% of the volume of the boards, plus 10% of the margin for cutting. Supports are mounted every 70-80 cm, with the extension of the stops up to 100-120 cm.
Formwork support option - Each post is attached to the shield in two places, plus the spacers and slopes are also connected to each other. Having decided on the design of the fastenings, calculate how many hardware will be needed. If these are nails, you need to take them 100-120 mm long - so that the ends can be bent from the outside to resist tearing. It’s easier to work with self-tapping screws; you need a size of 5*50 mm.
To reinforce the foundation, working profile reinforcement made of A400 steel with a diameter of 12 mm is used. For the transverse ligament of working rods, you can take reinforcement of a lower class (A240), with a diameter of 8 mm. If you use composite rods, the diameter can be taken one step smaller.
In addition to general construction tools: a screwdriver, an angle grinder, a water and bubble level, a marking cord, a square, a tape measure, a hammer and shovels, three issues need to be resolved:
- How to compact the sand cushion (you can rent a vibrating plate or use a hand tamper).
- How to compact concrete (ideally, have a deep vibrator, but you can get by with a T-shaped bayonet welded from reinforcement).
- How to mix concrete (it is better to use a concrete mixer, but with such a small amount of work, you can do the mixing on a steel sheet laid on the ground).
Preparation of concrete mixture
It is best to pour the foundation from class B20 (M250) concrete - it is not only durable, but also has a fairly high water resistance. The mass composition of such concrete on M400 cement has the following proportions: 2.1 parts sand and 3.9 parts crushed stone per 1 part cement. When the grade of binder increases to M500, the proportion of fillers in the concrete mixture increases (1: 2.6: 4.5). The water-cement ratio for concrete of this brand is 60-65%.
If you have a concrete mixer at your disposal, in order to avoid tipping over, it must be installed on a level area, provide access and a convenient arrangement of components for loading into the drum. The bookmark order is usually as follows:
- some water is poured in;
- add cement and mix until smooth;
- add sand and add a little water;
- large filler is introduced;
- add the rest of the water.
Mixing takes no more than 2.5 minutes, depending on the power of the motor and the design of the concrete mixer.
Construction of an expansion joint
An expansion joint is made from the base base and along the entire wall. The pitch between the seams can be determined using certain calculations. Which are influenced by such parameters as: the functional purpose of the room, wall material, type of soil, the magnitude of the influencing load.
For example, for wooden structures the step is 70 m, for brick ones - 15-30 m. If parts of the building have different purposes, then there are compensating gaps at their boundaries. After all, it is in these places that the greatest tension occurs.
The expansion joint in the base slab can be called a gap that divides the blocks. It is filled with resin impregnated with tow, but the main component of the base is the blind area. Compensating seams are also made in it, which will protect it from cracks due to uneven subsidence and movement of the soil.
Then the functions it performs will be lost. Seams are placed at a distance of 2 meters and covered with wooden slats. Next, waterproofing is done with various polymers or, for example, hot bitumen. Due to the waterproofing finish of the outer wall, the seam between the bases and the blind area is movable, which prevents any damage.
Technology for connecting buildings
- Preparation.
- Marking.
- Excavation.
- Pillow.
- Formwork.
- Waterproofing.
If a separate base is being built, a gap of 5 cm is maintained. To maintain it correctly, several layers of roofing felt or a board wrapped in film should be applied to the constructed wall. In the future, all this can be left there and covered with decorative trim.
For an additional building of one floor, a gap of 2 cm between buildings will be sufficient.
Step-by-step guide to laying the foundation for an extension
Let's look at the example of a columnar base of an additional structure:
- Preparation and cleaning of the area followed by leveling.
- The marking is done according to calculations and plan.
- Wells are being prepared whose depth is below the soil freezing threshold.
- Sand is placed at the bottom of the hole, filled with water and compacted to form a cushion.
- Installing reinforcement or fiberglass to strengthen the base 20 cm above the soil level.
- The formwork of the above-ground part is constructed.
- Pouring with concrete mortar. Climatic conditions and soil characteristics of a given region affect its composition and must be included in the project.
- Waterproofing is done in four layers alternately: bitumen, roofing felt, etc. in the same way.
The finished base should be moistened with water or sprinkled with wet sawdust. The moistening process begins 8-10 hours after pouring. This procedure will help the base dry evenly without cracks, and should be continued for 3 days.
Video description
The video shows 14 mistakes that you should not make:
Installation of a columnar foundation
Before pouring a columnar foundation for an extension to a house, you need to form a seat. Wells must be deep below the groundwater flow level. Sand and gravel are compacted at the bottom in layers. The reinforcement for the reinforcing frame can be made of metal or fiberglass. The formwork is assembled and dismantled, concrete is poured by analogy with the construction of a monolithic foundation.
Installation of a pile-screw foundation
Before attaching a pile foundation to an existing foundation, to simplify the process, you can dig a seat up to 30 cm deep. Next, it is enough to find an assistant to screw the piles into the ground to the required level. In this case, the deviation from the vertical can be no more than two degrees. Concrete is poured into the cavity to ensure reliable anti-corrosion protection of the inside of the piles.
DIY pile installation Source wp.com

