Finishing: work process
Aerated concrete, although it has a concrete base, is a very porous material. The size of the porous cell is about 1 mm. Thanks to this, in a house built from such building material, a completely healthy “breathing” microclimate is created - almost the same as in a house made of wooden beams.
Aerated concrete has high vapor permeability, which means that, like wood, it is able to absorb and accumulate moisture. Therefore, the interior decoration of walls made of aerated concrete blocks should take this feature into account.
Let's consider how to choose the right materials, what methods and technologies to use, and what work needs to be done based on this.
Requirements for interior decoration
Finished room with finishing
When choosing a material for wall cladding from aerated block, you need to remember its high hygroscopicity.
Therefore, two problems arise simultaneously:
- Increase the comfort level of staying indoors. To do this, you need to ensure that there is no increase in humidity in the room. This can be ensured by a vapor-permeable finish and ventilation system.
- Reliably protect aerated block walls from moisture accumulation. Increased humidity inside the house will lead to the accumulation of moisture in aerated concrete and its rapid destruction. In this case, vapor-tight materials are used.
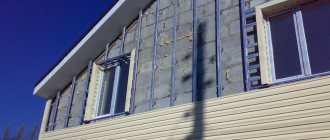
External wall insulation in section
The interior decoration of walls built from aerated block, no matter what material option is chosen, must comply with building codes.
If it is a vapor-permeable cladding, then it should not lead to the slightest retention of liquid in the aerated concrete, and if it is vapor-tight, it should not lead to the accumulation of dampness under a layer of finishing material on the wall surface. These problems can be solved by the correct choice of materials and their high-quality installation.
Cladding option
Comparison of the properties of vapor-permeable and vapor-tight finishes:
| Vapor permeable | Vapor-tight |
| Many professional builders choose this option. However, extremely strict requirements are imposed on the choice of material. It must have a high degree of vapor permeability. These are, first of all, materials such as:
Vapor-permeable properties prevent moisture from accumulating in the aerated concrete wall if condensation forms. This significantly extends its strength properties and durability of the entire structure. Vapor permeable is suitable for residential premises with normal humidity levels, in which it is necessary to maintain a healthy microclimate. | The vapor-tight finish allows for a greater variety of materials to be used. The main thing is that during operation the strength of the cladding and its vapor-tight properties are maintained.
Vapor-tight cladding is used in residential premises with high atmospheric humidity, for example, in the kitchen, bathroom, sauna, swimming pool, toilet, as well as for the interior decoration of non-residential warehouse or industrial premises. |
Attention! In general, the vapor permeability of the interior finish depends on the exterior version. If the facade, for example, is faced with brick without a ventilation gap, or with ceramic tiles, then the inside must have a vapor-tight finish, since there will be nowhere for steam to escape.
Cement plaster applied from the inside
What types of finishing of aerated block walls are there?
The most popular options:
- Creation of frame-hinged finishing with plasterboard or plastic/wood panels.
- Plastering.
- Block masonry (decorative brick, tile, artificial stone).
- Final putty.
- Painting/wallpapering.
Ceramic tile cladding
Review of comparative characteristics of various types of aerated concrete facade finishing
Finishing the external walls of a house made of aerated concrete is not an easy task. The list of materials suitable for this is extremely large. Let us present a comparative table that will help you make a choice in favor of one material or another and answer the question: “how to clad a house made of aerated concrete?”
Table 1. Finishing the facade of a house made of aerated concrete blocks: comparative characteristics:
| Type of finish | Positive sides | Negative sides | Cost of services for performing work (on a 10-point scale) | Price category of material |
| Plastering with insulation and subsequent painting |
| Seasonality of work Reduced strength and dependence on mechanical influences Requirement to strictly adhere to the order of work, otherwise it is almost impossible to correct errors | 8 | average |
| Siding installation |
|
| 6 | Below the average |
| Laying porcelain tiles |
| High price | 9 | High |
| Painting with textured paints | Weather resistance Color retention Ability to hide minor wall imperfections | Costly due to the large volume of required material Service life is lower than that of other types of finishing | 5 | Average |
| Finishing the facade with block house material |
|
| 8 | Above average |
| Decorative plaster |
|
| 9, some application technologies – 10 | Above average, some types - high |
| Brick cladding |
|
| 9 | Above average, and for some types of brick – high |
| "Wet facade" technology |
| Very high level of sensitivity to temperature conditions Seasonality of work | 6 | Below the average |
How to cover a house made of aerated concrete
The most popular methods of interior finishing
Progress of finishing work
Let's consider the most popular finishing methods, their features, characteristics, performance, advantages, disadvantages and scope of application.
| Type of finish | Features/Specifications | Scope/advantages/disadvantages |
| Drywall
| Installation of drywall is carried out on a pre-mounted wooden, plastic or metal frame and has the following features:
There are at least three types of drywall:
As an option for finishing a gas-block wall, you can use plastic or wooden panels. Their installation is carried out according to the same rules. | Advantages:
Flaws:
Wooden and plastic panels are best suited for rooms with a high degree of air humidity. These can be kitchen premises, baths, bathrooms, swimming pools. Depending on the type, drywall is used in all types of premises. |
| Plaster
| The plastering process is necessarily preceded by the application of a waterproofing primer to the surface. In the future, the plastering process consists of the following stages:
If the plaster is vapor-permeable, the finishing material should have the same property. As a material for plaster, it is best to use special dry mixtures with high adhesive properties. Instructions with photos (pictures) on how to properly dilute the mixture and use it are usually included with the package. | The basis of plaster mixtures is cement or gypsum/lime as a binding component.
However, to prevent aerated concrete from absorbing moisture, it can be plastered only where the level of atmospheric humidity is at an acceptable level. Advantages of plastering:
Flaws:
|
| Block decorative masonry (tiles, brick, stone)
| Exterior finishing is often done in the form of decorative brick/stone/tile masonry. However, recently this method has begun to be used for interior cladding work. The only difference is the choice of material. For interior decoration, it is preferable to use vapor-permeable materials:
Naturally, the use of products for interior decorative block masonry from such materials is aimed at maintaining a healthy microclimate in the room. If the main task is to create maximum waterproofing, then it is better to use the same materials that are used for external cladding.
Today, finishing is done using so-called artificial stone. It can be based on a variety of components, but most often gypsum, lime and sand of various modifications. In general, the technology of internal block masonry is similar to the plastering process: preliminary preparation and priming are also required. | Decorative block masonry is used in the interior decoration of premises for various purposes - from residential/office to industrial and warehouse. For bathrooms, kitchens, toilets, swimming pools, saunas and baths, it is better to use tiles or blocks made of waterproof materials. Advantage:
Flaws:
|
| Final putty
| Finishing putty, as one of the final finishing options and as preparation before painting or gluing wallpaper. The material used is a special industrially produced gypsum-based finishing putty. Paint and wallpaper applied to the finishing coating must be made exclusively from vapor-permeable materials. Paints must have a silicate or silicone base, and wallpaper must have a paper base. | Used for leveling walls. The putty material is vapor-permeable, so it can be used in rooms with normal air humidity. The putty has the following advantages:
Flaws:
|
| Painting and wallpapering.
| Painting and applying wallpaper not only has a decorative function, but also a way to create a vapor barrier. Wallpaper, like paint, can have both vapor-permeable and vapor-proof properties. Before applying wallpaper or paint, the surface must be prepared:
Wallpaper can be:
All dyes are divided into waterproof and vapor-permeable. Waterproof ones are mainly acrylic, and vapor permeable ones are silicate or mineral. | Depending on the type of room, its purpose, ventilation system and humidity level, a waterproof or, conversely, vapor-permeable base of paints and wallpapers is selected. Advantages:
Flaws:
|
Drywall installation
Plaster
The plaster layer can be created not only as the basis for a ventilated facade or clinker tiles. With proper selection of the mixture and competent execution of the work, it will become an attractive design solution in itself. It is recommended to use only specialized facade plasters. When working with acrylic compounds, you can count on long-term preservation of beneficial qualities, but you should be wary of open flame (the material can easily ignite).
Silicone plaster, which absorbs little water and is relatively inexpensive, demonstrates a wide variety of textures, but a meager range of colors. It should not be used where a significant amount of dust and dirt will fall on the walls. The gypsum composition dries quickly and is not subject to shrinkage, and only one layer is enough for decoration. But we have to take into account a low level of vapor permeability and accelerated wetting under the influence of precipitation. In addition, the surface of the plaster is often covered with stains, they will have to be painted over immediately - there is simply no other way to deal with it.
Criteria for choosing a finishing method
Rough finish
When choosing a method of interior finishing of a gas-construction structure for a particular room, it is necessary to proceed primarily from its purpose and climatic parameters, as well as the possibility of changing them, budget and personal preferences or design ideas.
For those who are just starting to master this difficult skill, the video in this article shows where to start, how to choose materials and make the cladding with your own hands.
DIY plastering
A private house
Finishing an aerated concrete house inside
In your own house made of gas blocks, there are at least three types of premises:
- With a normal level of humidity (halls, bedrooms, living rooms, children's rooms, hallways). For finishing, it is better to use ordinary drywall, wood panels, paper wallpaper, water-permeable paint and vapor-permeable plaster or decorative blocks of gypsum, sand and lime.
- With a high level of humidity (kitchens, bathrooms, saunas, swimming pool, door area facing the street). It is better to use waterproof drywall, plastic panels and tiles.
- For household purposes, in which the humidity level may fluctuate (storerooms, plinths, boiler rooms). Ideally, cement-sand plaster should be used here; fire-resistant materials are suitable for combustion rooms.
Internal finishing of aerated concrete house
Office premises, public institutions
Priming office walls
The decoration of the interior walls of public premises should be based on those types of materials that ensure maximum durability of the building structure and, naturally, meet the design ideas in interior design.
It is better to line rooms located far from entrances/exits with vapor-permeable materials, while those located nearby and in contact with the street atmosphere should be lined with waterproof materials.
Office decoration
Is it necessary to finish a house from aerated block?
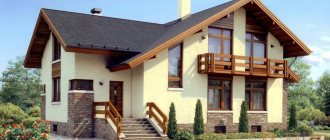
After the structure of the future Twin Block house is ready: the walls are built, the roof and utilities are installed, windows and doors are installed, the owners begin to “dress” their house, i.e. start finishing work outside and inside the house.
You can live perfectly well in houses built from aerated concrete even without exterior finishing, but modern trends in construction leave masonry without finishing with a very limited scope of application.
Exposed masonry, which was the aesthetic norm 20-30 years ago, is today covered with various facades. For example, in the village. Reftinsky, Sverdlovsk region, since the early 1980s (about 40 years), buildings built from aerated ash concrete blocks, without any external finishing, have been successfully operated.
Fig.1 Multi-apartment residential building in the village. Reftinsky, Sverdlovsk region
Therefore, it is believed that the main function of finishing, especially in low-rise construction, is a decorative function. It is the customer’s wishes for the appearance of the house that determine the choice of finishing method and materials and are primary.
The technical characteristics of the selected finish are designed to ensure the most favorable operation of the wall, with a given appearance. Finishing coatings should not interfere with the removal of moisture from the walls, and, if possible, protect the masonry from re-moistening, i.e. precipitation (rain and snow).
Exterior decoration gives the house a beautiful, designed look, and also protects the house from the effects of precipitation, sun and wind. Interior decoration, in addition to decorative and protective functions, creates a comfortable and cozy environment for human life in the house.
Let's see what options for exterior and interior finishing can be used for aerated concrete walls?
The procedure for finishing work
The external and internal appearance of a building made of aerated concrete, the durability of the finishing and the frequency of necessary cosmetic repairs are determined by the correct selection of finishing materials, the general design of the building, the qualifications of workers and the procedure for carrying out all work. Design features of the building that extend the life of plastered surfaces include creating a roof that protrudes as much as possible, which protects the walls from getting wet during slanting rains. As for the procedure for carrying out the work, firstly, all external finishing work should be completed in the warm season, allowing the aerated concrete box to stand for at least 6 months to complete mainly the processes of shrinkage and drying of the aerated concrete blocks, and secondly, carry out external finishing work only after completion of the interior (including pouring the floors), and not vice versa! This is due to thermophysical processes involving the transfer of steam from the interior to the external environment and to the drying processes of the aerated concrete itself. We have repeatedly observed the appearance of microcracks on the surface of external plaster even when using the most skilled labor, but in violation of the specified sequence. However, with correctly selected external plaster, even such microcracks do not lead to peeling of the protective coating, although the durability of the entire structure, of course, decreases. Thus, in the case of using the façade plaster mixture “Egida X-1 S-42” as external plaster, during the entire period of operation (up to 5 years!) at none of the objects where it was used, peeling of the external coverings from aerated concrete walls. Let us now move on to presenting possible finishing options for the erected structures, based on the assumption that these structures were erected in compliance with the technological principles listed in sections 1 and 2, i.e. the walls have been erected, the roof of the building protrudes significantly above the walls, the customer has chosen proven finishing compounds, the construction team is sufficiently qualified, the time intervals between the construction of the walls and their finishing have been observed, and the correct order of work has been chosen.
Wall-mounted cladding
The principle of its operation is the same as that of brick cladding, that is, it assumes a ventilation gap between the load-bearing wall and the facade material (this design is also called a “ventilated facade”). There are many types of curtain cladding, but the most commonly used are:
- Decorative (artificial) concrete stone
- Wooden plank
- Fiber cement or other siding
- Clinker tiles
- Porcelain tiles
- Roofing metal - corrugated sheeting or seam covering (for barnhouse style houses)
- Facade bitumen tiles
The facade material is attached to the wall made of aerated concrete using a substructure - guides, most often in combination with a sheathing installed on them (sometimes - a solid flooring). For wooden sheathing, roofing metal, and some sidings, guides and sheathing made of wooden blocks 40-50 mm wide and 10-40 mm thick are used. The bars are fixed to the wall with nails or self-tapping screws for aerated concrete. Often, before installing such cladding, the facade is covered with a vapor-permeable, waterproof and windproof membrane.
In other cases, the guides and sheathing are thin-walled profiles made of galvanized steel. They are attached to the blocks with one or another fastener for aerated concrete (expansion dowels, dowel-nails, anchors, etc.), providing gaskets made of waterproofing material, for example, butyl rubber tapes, at the point where the profiles adjoin the wall. Some substructures suggest that steel brackets are first mounted to the blocks, and then guides are installed to them. Steel elements are usually connected to each other using self-tapping screws.
In fact, the main difficulty is to choose the right fasteners for the guides, whose pull-out load will correspond to the aerated concrete and cladding. The pitch of the guides and sheathing depends on the size and weight of the facing elements, that is, they are selected individually for the type and model of material. It should be noted that manufacturers of facade cladding give clear recommendations on the construction of the substructure, and often offer all the necessary components for its installation. Especially if the facing element has a specific shape, and to secure it you need, for example, a lathing with special fasteners.
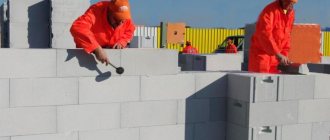
Myth one: “laying blocks with glue is more expensive than with cement mortar”
Well, this is not so much a myth as a simple delusion stemming from laziness. It’s too lazy to spend a couple of minutes on a comparative calculation. Let's look at the “simplicity and cheapness” of mortar masonry. First, regarding the ease of laying with mortar compared to glue. Perhaps, for “builders” whose youth was spent in student construction brigades, and simply for masons who have lived for a long time, mortar masonry is more familiar. And retraining to work with thin-layer glue will require some effort and time from them. But for a person starting from scratch, as well as for someone who has spent time on retraining, masonry with glue requires less time and effort. There is an objective reduction in labor costs when laying blocks with glue (compared to laying with mortar), which is even reflected in the reduction in estimated prices for such masonry.
Now about the cheapness of the solution compared to glue.
Back in the 80s, masonry with thin layers of “mastic” and “glue” was considered as a way to reduce the consumption of binder during masonry work. The consumption of c/p solution (seam thickness 10-12 mm) is 5-6 times greater than the consumption of glue. Despite the fact that aerated concrete adhesive is one of the cheapest dry construction mixtures. Glue costs about 2 times more than a simple cement-sand mixture and costs 5-6 times less. Yes, there are individual manufacturers of dry mixes who manage to sell adhesive for cellular concrete at relatively high prices. Well, that’s why they are separate, so that with their exception they set off the general rule: adhesive for aerated concrete is a cheap replacement for mortar (with good accuracy of the geometric dimensions of the blocks). Thin-layer adhesive should always be used for laying aerated concrete blocks. To improve the economic, thermal and strength characteristics of masonry.
Facade cladding made of aerated concrete, aerated silicate blocks and bricks
If in the future it is planned to line walls made of blocks with bricks, then the conditions for this must be created at the stage of laying the foundation. The width of the foundation should be such that bricks and blocks can rest on it at the same time. The overhang of half-brick facing masonry from the foundation should not be more than 30 mm.
The vapor permeability of brickwork with jointing is significantly less than that of a wall made of aerated concrete blocks. Therefore, condensation should be prevented from forming at the boundary of the brick cladding and the wall made of aerated concrete blocks.
To do this, an air gap of 30-50 mm must be left between the brickwork and the aerated concrete wall.
The width of the gap is selected based on the height of the building and the convenience of its arrangement.
To prevent the gap from becoming clogged with masonry mortar when laying the facing layer, an adjustable sheet of foam plastic should be inserted into the gap between the brick and aerated concrete in the masonry work area. The thickness of this sheet will determine the width of the gap.
Ventilation must also be provided in the gap.
. To do this, leave ventilation ducts in the brickwork with a total area of at least 1% of the cladding area. Vents are made at the top under the eaves overhang and at the level of the base, leaving the vertical seams between the bricks unfilled with mortar.
On the inner surface of the brick cladding, water may appear in the gap and flow down. Water can penetrate when the wall gets wet from the outside or appear as a result of vapor condensation if the ventilation of the gap is insufficient. To protect aerated concrete walls from moisture, it is necessary to properly waterproof the base for walls with brick cladding.
There is no need to create a gap between the brick cladding and the aerated concrete wall.
In this option, it is imperative to finish the interior walls with materials with low vapor permeability, especially in wet rooms.
Such cladding without a gap inevitably leads to
to an increase in the operational humidity of the wall and, as a consequence,
to a decrease in the thermal resistance of the wall.
The indoor microclimate is deteriorating, and energy costs for heating are increasing.
Brick cladding without a gap is quite acceptable for buildings that are not intended for year-round use (not heated in winter).
The brick cladding is attached to the wall using ties. There must be at least four connections between bricks and blocks per square meter of wall.
Window and door openings in the cladding are covered with steel corners supported on the edges of the openings by 250 mm. from each side.
Options for attaching brick cladding to an aerated concrete wall:
Through embedded parts left during the construction of aerated concrete masonry.
When laying on glue, stainless steel bandage tape 19.1x1.1 mm can serve as embeddings. or ordinary galvanized perforated strip 20x1.5 mm, used for electrical installation work. For a more durable fastening, the strip can be additionally nailed to aerated concrete.
When laying blocks on the mortar, the following is used to fasten the cladding:
- Special flexible basalt-plastic connections that are placed in the masonry seams. The flexible basalt connection must extend into the load-bearing and facing walls at least 90 mm.
- Masonry galvanized steel mesh, which is laid in the seams of masonry blocks and cladding. The masonry mesh can serve as a convenient support for slabs of mineral wool insulation, which are laid between the wall and the cladding.
Fastening the cladding layer to the wall with stainless steel rods (left) or spiral nails for aerated concrete (right)
In addition, the brick cladding is connected to the wall with special spiral nails for aerated concrete, which are driven into the body of the aerated concrete with a hammer;
or stainless steel nails with a length of at least 120 mm, hammered into aerated concrete in pairs at an angle of at least 45° to each other, or rods that can be cut from stainless or galvanized wire with a diameter of 3-6 mm.
For cladding it is best to use clinker bricks. The article “Cladding the walls of a house with clinker bricks” describes the advantages of clinker, as well as other secrets of cladding walls with brick.
In low-rise construction, the design of an external three-layer wall is very popular: load-bearing wall - insulation - brick cladding.
If you want to insulate an aerated concrete wall, then read on: How to insulate a wall with brick cladding.
Finishing a house with plasterboard inside the house - the secrets of high-quality and durable cladding
If the humidity level in the room may be elevated, then it is necessary to use special moisture-resistant drywall (green) . These rooms include the kitchen and bathroom.
- Get started by preparing your profiles. Cut NP profiles along the length of the walls, and SP - along the height;
- then attach the guide profiles to the ceiling and floor, aligning them with the markings. As a rule, their installation is carried out using dowels and nails. If the floor or floor beams are wooden, you can use self-tapping screws;
When covering the ceiling frame, it is necessary to take into account all the points that I have already mentioned above. In addition, the difficulty lies in the fact that the sheets are quite large in size and relatively heavy. Therefore, call one or two assistants to attach them to the ceiling. The first step is to mark the walls so that the plane of the frame is smooth and vertical.
This procedure is performed manually as follows:
To make a round hole in the sheet for a socket or, for example, a switch, use an electric drill with a crown of a suitable diameter.