Beton-House.com
Website about concrete: construction, characteristics, design. We combine the experience of professionals and private craftsmen in one place
Masonry work
When the masonry material has already been purchased and the foundation is ready, it’s worth thinking about the process of building walls. The easiest way, of course, is to trust the specialists. However, in order to save budget, many developers decide to carry out the work themselves.
In this article we will talk about how to properly build the walls of a house from aerated blocks with your own hands. So, what is aerated concrete masonry technology?
- Calculation of the required number of blocks
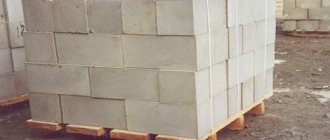
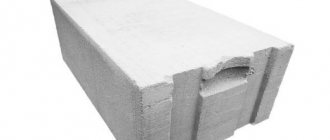
Walls made of aerated concrete and gas silicate blocks
Aerated concrete and gas silicate blocks for laying the external walls of buildings can be used for construction in almost any climatic region of the country.
For stone materials of external walls of buildings, with an expected service life of 100 years or more, it is necessary to use blocks with the frost resistance grade:
- For the walls of rooms with dry and normal conditions, a frost resistance grade of blocks of at least F25 is required.
- Brand F35, no less, for walls of rooms with wet conditions.
- For northern regions, a frost resistance grade for stone materials of at least F35 is required.
Wall blocks made of autoclaved aerated concrete are intended for laying external and internal walls (including partitions) of residential buildings with a relative indoor air humidity of no more than 75%. When the air humidity is more than 60%, the walls must be protected from getting wet by installing vapor barrier coatings on their inner surface.
For buildings up to 2 floors, it is recommended to use autoclaved concrete blocks with a compressive strength class for load-bearing walls of B2 and masonry with glue or mortar of a grade not lower than M50. For a house with three floors - with strength class B2.5, with masonry using glue or mortar of a grade not lower than M75. For self-supporting walls, blocks with a strength class of at least B2 should be used for buildings up to 3 floors inclusive.
For non-load-bearing walls (partitions), the block class must be at least B1.5.
Read: Load-bearing, self-supporting and non-load-bearing walls - what's the difference!?
It is recommended to lay the external walls of buildings made of aerated concrete blocks using adhesive compositions that ensure a masonry joint thickness of 2±1 mm. Laying the internal walls of buildings can be done both with glue and with regular mortar. Blocks with a deviation from the given height of ±1 mm are suitable for laying on glue
The thickness of the walls should be assigned both on the basis of the required resistance to heat transfer, and taking into account the provision of the necessary load-bearing capacity of the walls to compressive and lateral loads. The seismicity of the construction area should also be taken into account.
The load-bearing capacity of walls depends not only on the strength of the wall materials, but also to a large extent on the design features of the building's load-bearing frame - the joint resistance to the loads of external and internal walls, foundation and ceilings, as well as on the reinforcement of the masonry, the location and size of window and door openings.
The minimum thickness of external and internal load-bearing walls with floor loads should be 200 mm (20 cm). The permissible width of walls and pillars made of aerated concrete blocks is determined by calculation, but not less than 600 mm in load-bearing walls and not less than 300 mm in self-supporting ones (minus the recesses for supporting lintels above the openings).
In case of foundation deformations exceeding the maximum standard values:
- according to the relative difference in elevations - 0.002;
- according to the foundation roll - 0.005;
- average draft - 10 cm
walls should be strengthened, for example, by installing monolithic belts , the necessity and sufficiency of which is established by calculation.
As a rule, longitudinal reinforcement of aerated concrete walls to prevent the appearance of microcracks in the masonry.
Brief characteristics of the material
Let's start with a brief description of the products. After all, in order to understand the essence of the work process, it is worth thoroughly studying the material itself. This will help determine why you need to do it this way and not some other way.
Basic properties and types
Aerated concrete is one of the varieties of cellular concrete. It has a special porous structure, which is achieved during the production process. The cells are formed as a result of a chemical reaction between lime and aluminum powder.
Thanks to their special composition, manufacturing technology and some other factors, the blocks are endowed with properties that differ from other materials, which largely also depend on the type and scope of the product.
Let's consider what aerated concrete can be. In accordance with GOST 21520-89 “Cellular concrete wall blocks”, the material is divided into several types, depending on the characteristics of the material.
According to density, the material can be:
- Thermal insulation. Such products have a density of 300-400 kg/m3. They are used as a material for insulation, since they cannot withstand any loads other than their own weight.
- Structural and thermal insulation. This type of product is characterized by a higher density - 400-800 kg/m3. It is used in the construction of walls and partitions.
- Structural. The most durable material of all types. Its density varies from 900 to 1200 kg/m3. It can withstand significant loads and is used in the construction of buildings up to 12 meters high.
Thermal insulating and structural thermal insulating aerated concrete, photo
Depending on the type of binder component, the material is distinguished:
- On a cement binder;
- On limestone;
- On slag;
- On ash;
- On mixed.
This means that the concentration of the main component is from 15 to 50%. The content of the silica component also determines the special varieties.
Products can be manufactured:
- On sand, most often quartz;
- On the ashes;
- On other secondary industrial components.
Also, the gas block is divided depending on the type of hardening.
Products can be:
- Autoclave;
- Non-autoclave.
Autoclaved and non-autoclaved aerated concrete
- Autoclaved aerated concrete, or synthetically hardened aerated concrete, is processed using special machines - autoclaves, in which it is exposed to high temperature and pressure.
- When producing a non-autoclaved product, hardening of the product occurs naturally. Sometimes they are dried in special machines in which the temperature does not exceed 100 degrees and the pressure is below atmospheric.
- These two types of products differ from each other: non-autoclave is grayer in color, fragile, less durable and inexpensive.
Gas blocks can have different accuracy categories.
Depending on the deviations established by GOST, products are:
- The first category of accuracy, when possible deviations in size cannot exceed 1.5 mm;
- Second category of accuracy. Such products may differ by 2 mm in size and 3 mm diagonally.
- The third category of accuracy may differ by 2-4 mm in size and diagonal, and chips of up to 1 cm are allowed.
Products of categories 1 and 2 are laid mainly on glue, category 3 - on mortar. In the latter case, of course, there will be much more cold bridges. Therefore, such gas blocks are usually used in the construction of various outbuildings. Their prices are much lower.
Now it’s worth paying attention to the main indicators of the quality of the material. Let’s use the table and at the same time, for clarity, compare the material of the autoclave and non-autoclave curing methods.
Characteristics:
| Characteristic name | Its meaning for a representative of cellular concrete of synthetic hardening | Its meaning for hydration hardening material |
| Frost resistance, cycles | 35-150 | 15-35 |
| Thermal conductivity | 0,096-0,155 | 0,17-0,25 |
| Strength in accordance with GOST | B 1.5-B5 | B1-B2.5 |
| Shrinkage | 0.3 mm/m2 | 0.4-0.5 mm/m2 |
| External wall thickness | From 0.4 m | From 0.6 m |
| Durability | Up to 200 years | Up to 50 years |
As you can see, the performance is quite good for both types, but the autoclave still wins.
Strengths and weaknesses of buildings
Let's figure out what positive and negative characteristics the products have and what the future structure may have.
Let's start with the advantages:
- Aerated block is a lightweight material; it does not place a large load on the foundation.
- It is large in size, so the laying speed is quite high. If you compare the product with the size of a brick, it will replace up to 12-14 units of it. Agree, it will be much faster to lay 1 gas block than such a quantity of ceramics.
- The material has a low thermal conductivity coefficient. It is able to maintain the temperature in the room.
- Decent density, which is quite enough to build a house of several floors.
- Frost resistance adds competitiveness to products. Manufacturers guarantee that the material can withstand up to 150 freezing and thawing cycles.
- Environmental friendliness. The material does not harm the environment and people.
- Fire resistance.
- Large selection of sizes and manufacturers. Possibility of producing standard sizes to order.
- Easy to process. The material is cut, sawn, polished. Almost anyone can build walls with their own hands, and all they need is instructions.
- High resistance, in part, to atmospheric and biological influences. Mold and mildew do not tend to form on aerated concrete.
Advantages
There are also disadvantages, let’s analyze them:
- Fragility. Transportation is recommended to be carried out with extreme caution.
- The main disadvantage is the ability to absorb water. The material absorbs moisture quite strongly, up to 20-25%.
If it crystallizes at subzero air temperatures, irreparable damage will be caused to the products. The crystals will begin to destroy the structure of the block from the inside. Here it is also worth paying attention to the fact that its pore structure is open, and, therefore, more vulnerable in this regard.
- Shrinkage. This is typical for this material. It is not uncommon for cracks to form on finished walls.
- Minor difficulties encountered when fixing the fasteners. It is necessary to use specialized hardware suitable for products made of cellular concrete.
You can also note a minor disadvantage related to products using a non-autoclave curing method. The fact is that the simple manufacturing process and low requirements for equipment and premises provoked the organization of a large number of handicraft industries. As a result, purchasing a low-quality product is quite possible.
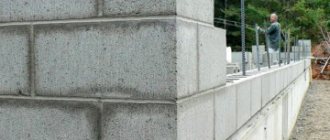
Construction of walls made of aerated blocks
| Fig.1. The wall is two aerated concrete blocks thick. On the left - from blocks of different widths; On the right - from blocks of the same width. |
External walls made of aerated concrete, gas silicate blocks, depending on the thickness of the masonry, can be single-layer or multi-layer.
Single-layer natural walls
- homogeneous, one block thick.
Double-layer walls
– the thickness of two blocks of different or equal widths (Fig. 1).
When laying walls one block thick, “chain” ligation of small blocks is used with overlapping seams of at least 100 mm.
| Fig.2. Conjugation of the outer wall masonry in two blocks with the inner wall. |
When laying walls two blocks thick, it is necessary to ensure that the vertical joints of the external blocks are displaced relative to the vertical joints of the internal blocks by at least 100 mm (Fig. 2).
It is recommended to connect external and internal load-bearing and self-supporting walls by ligating the blocks (Fig. 2).
| Fig.3. The junction is rigid (at the top) and flexible. 2 - masonry finishing; 4 - solution; 5 - sealant; 6 - mineral wool |
| Fig.4. Anchor connections. 3 - solution; 4 - sealant; 5 - fittings; 6 - mineral wool; 7 - corner metal plate; 8 - nail; 9 — anchor for aerated concrete; 11 - block; |
| Fig.5. Compound. 2 - finishing; 9 — anchor for aerated concrete; 10 — metal profile; |
| Fig.6. Connecting walls with embedded elements. 3 — metal tape; 5 - sealant; 6 - mineral wool; |
Non-load-bearing walls and partitions are connected to load-bearing and self-supporting walls by joining - rigid or flexible (Fig. 3), anchor connections (Fig. 4 and 5) or using metal embedded elements (Fig. 6), which are installed in the wall at the level of horizontal seams partitions and walls.
Connections between the connected walls (Fig. 4,6) must be established at least in two levels within one floor. All metal brackets, anchors, and linings must be made of stainless steel or ordinary steel with an anti-corrosion coating.
When laying walls on glue (masonry category 1), the thickness of horizontal and vertical joints should be within the range: 2±1 mm. In this case, the anchors and linings must be recessed into the cellular concrete by cutting grooves (grooves)
When laying walls from blocks on mortar (masonry category 2), the thickness of horizontal joints is taken to be no less than 10 mm and no more than 15 mm, on average 12 mm within the height of the floor.
When laying out load-bearing wall blocks, in order to avoid the use of additional non-standard blocks, it is allowed to thicken the horizontal seams.
For glued masonry, thickened joints from masonry mortar are made at the points of contact with the floors of the floors below and above. If the leveling mortar joint is thicker than 30 mm (up to 45 mm), then it is necessary to embed a masonry mesh into it along the entire length of the wall made of wire with a diameter of 4-5 mm with a cell of 70 mm.
Construction of a box at home
Then you can begin to carry out the main masonry of the house, strictly following the sequence of operations and controlling the levels of the building:
- after laying the next row , its horizontal and vertical levels are checked;
- to control the vertical level, special plumb lines are installed at the corners of the masonry;
- Before starting to lay the next row , the surface of the previous one is leveled horizontally, thoroughly cleaned of any remaining glue and construction dust that has fallen on it; it should be taken into account that the glue should not be rubbed, but must be waited for it to set and removed by trimming.
Laying aerated concrete blocks with glue
Aerated concrete blocks are laid in the wall using special glue or on a heat-saving masonry mortar.
It is recommended to lay external walls using glue.
Laying masonry with glue has many advantages:
- First of all, using glue is cheaper than using masonry mortar. Glue consumption is six times less, and the price is only two to two and a half times higher.
- The use of fine-grained glue eliminates the formation of so-called “cold bridges” - layers of material with high thermal conductivity, leading to a decrease in the uniformity of the masonry and an increase in heat loss.
- A thick layer of mortar increases the risk of making the masonry uneven, and the glue only emphasizes the evenness of the aerated concrete blocks.
- Aerated concrete masonry with a thin-layer adhesive mortar is stronger than masonry with thick seams. Both the compressive strength and flexural strength of such masonry will be higher due to the cohesive nature of the adhesion between concrete and glue.
The thickness of the adhesive seam is only 2-3 mm. A necessary condition for masonry with glue is the stability of the block sizes. For laying on glue, deviations in the linear dimensions of the block should not exceed plus or minus 1 mm in height. Not all manufacturers produce such blocks.
When laying blocks whose dimensional deviation in height exceeds the specified value, heat-saving masonry mortars are used. Read more about this in the article Laying aerated concrete and gas silicate blocks with mortar.
How to get the job done faster?
To speed up the work, use a solution template . You can buy it at a hardware store or make it yourself from wooden boards and an 8 mm trowel. A rectangle is created from the boards with a width 2 mm greater than the thickness of the row, and a length of ½ the length of the block is sufficient. A trowel is attached to the smaller left part.
During operation, this unit is installed on the masonry, a solution is placed inside and used to level the seam. The process with it is much faster, the glue goes on straight away, which is convenient for beginners.
Find out how to quickly lay a gas block in this video:
Features of masonry walls made of aerated concrete blocks
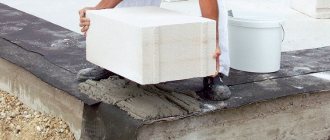
Maximum attention is paid to laying the first row of blocks. By setting the first row to a flat horizontal surface, you can make laying subsequent rows as easy as possible.
The interface between the first row of masonry blocks, the foundation and the basement floor: 1 - gas block; 2 - overlap; 3 — additional gas block; 4 - waterproofing; 5 - waterproof plaster on a mesh; 7—EPS insulation; 8 — masonry mortar M35; 9 - masonry glue.
In order to protect against moisture, it is recommended that external walls have an overhang relative to the foundation strip of at least 50 mm. The width of the overhang can be increased, but not more than 1/3 of the width of the block.
With a strip foundation, it is recommended to lay the outer walls of aerated concrete blocks on a base with a height of at least 500 mm (from the level of the blind area) in order to prevent the masonry from getting wet with snow when it thaws.
Interface unit of the first row of blocks with the foundation - slab: 3 - reinforced concrete foundation slab; 4—EPS insulation; 6 - waterproofing; 8 - plaster on a mesh; 9 - waterproofing on plaster to a height of 0.5-0.8 meters from the blind area; 10 — interior decoration; 12 - finishing of the base.
In order to reduce heat loss, it is recommended to insulate the end of the foundation slab located under the overhang of the masonry. The thickness of the insulation is determined by calculation, but in any case should be at least 50 mm.
The insulation can be located either under the overhang of the masonry (as shown in the figure) or protrude beyond its limits (if the thickness of the insulation is greater than the width of the overhang). It is recommended to use products made of extruded polystyrene foam (EPS) as insulation.
The junction of the masonry with the foundation and the floor on the ground: 2 - waterproofing; 3 - foundation strip; 4.5 - waterproof plaster on a mesh to a height of 0.5-0.8 meters from the blind area; 9 - floor on the ground.
Walls made of aerated concrete blocks must additionally be waterproofed from capillary suction of water from heavy concrete - reinforced concrete, prefabricated or monolithic, floors and (or) reinforced concrete foundations. Rolled bitumen materials or special waterproofing polymer-cement mortars based on dry mixtures can be used as waterproofing.
From the outside, it is recommended to protect the basement part of the aerated concrete wall from moisture with a layer of vertical waterproofing to a height of 0.5 - 0.8 meters from the blind area. To do this, it is enough to use hydrophobic primers and waterproof plasters when finishing the wall. It is better, but more expensive, to line the base and lower part of the walls with a material with low water absorption, for example, base siding , clinker tiles.
Laying the first row of gas blocks
By setting the first row to a flat horizontal surface, you can make laying subsequent rows as easy as possible. It is recommended to lay the first row of masonry on waterproofing over a layer of cement-sand mortar (not glue) with a thickness of at least 20 mm.
If the leveling seam from cement-sand mortar is thicker than 30 mm (up to 45 mm), then it is necessary to embed a masonry mesh into it along the entire length of the wall made of wire with a diameter of 4-5 mm with a cell of 50 mm.
Mortar for laying blocks can be laid in two strips, with a gap in the middle. This will reduce heat loss through the masonry joint
If the surface of the foundation plinth is not ideal, the first row of blocks should be laid on a leveling layer of cement-sand mortar. If the bearing capacity of the blocks, according to calculations, is used by no more than 2/3, it makes sense to make the leveling layer of mortar not continuous, but with a gap - this will reduce heat loss through the masonry joint.
The installation of each block is controlled by level and mooring cord. Adjustment of the installation is carried out with a rubber mallet.
| Fig.2. The laying of each row of blocks is leveled with a float |
IMPORTANT!
After laying the next row of blocks, be sure to level the surface of the masonry using a trowel,
Fig. 2
. There should be no level differences between adjacent blocks. If this operation is not performed, local vertical cracks may form in the masonry in places of stress concentration. The dust formed after leveling is removed with a sweeping brush.
The second and subsequent rows of masonry should be carried out with ligation of blocks. The displacement of the next row relative to the previous one should be at least 8-12 cm.
To apply the adhesive to the surface of the blocks, you can use a carriage made to fit the width of the masonry, a ladle with a serrated edge, or a simple notched trowel used in tile work.
Filling vertical masonry joints
A very important point is what to do with the end tongue-and-groove surface of the blocks during laying. In general, the recommendations are as follows: if it is assumed that the walls will be plastered on both sides, then the vertical seam is made dry, without filling with glue - this will improve the thermal uniformity of the masonry.
If it is assumed that there will be no wet finishing on at least one side of the outer wall, then the vertical seam should be partially filled to prevent blowing through the masonry.
Products for construction and repair
⇆
And one more limitation: when making walls buried in the ground from blocks, when installing stiffening diaphragms and when the design load is more than 70% of the design load-bearing capacity of the masonry, the entire vertical seam must be filled with glue.
The vertical seam is also filled completely for blocks that do not have tongue-and-groove ends.
If a wall made of aerated concrete blocks is left for a long time without finishing the facade, then the laying of the blocks must be carried out with careful filling of all masonry joints, including vertical ones, with mortar. through carelessly filled seams with mortar , and the wall’s airflow will also increase .
When the next row of masonry comes to an end, the need arises for an additional (incomplete, cut from a whole) block. Its size is determined by local measurements. The sawn additional block is coated with glue on both sides and installed in the remaining space for it.
During the masonry process, do not forget about the reinforcement of the walls.
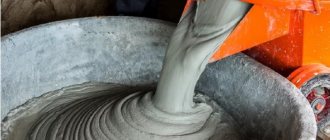
Preparation of the solution
A high-quality solution can be prepared provided that the proportions of water and glue indicated on the bag are observed, as well as the rules for preparing the mixture.
They are very simple and do not require much intellectual effort:
- pour a bag of glue (25 kg) into a clean container and fill it with 7-8 liters of water;
- using a drill-mixer set at low speed, the mixture is mixed with water until a homogeneous thick (creamy) state;
- After allowing the mixture to mature for 5 minutes, it can be used for masonry.
The standard test for the plasticity of an adhesive mixture is the absence of spreading after application to a block with a notched trowel. If the glue begins to thicken, you can mix it with a mixer. The maximum “lifetime” of the finished solution is 2.5 hours.
Preparing a solution with winter glue has several significant differences from mixing summer glue:
- the dry mixture is diluted not with warm, but with hot water (50-60 degrees);
- the temperature of the working solution should not fall below +10 degrees;
- if the masonry is carried out at sub-zero temperatures, the solution must be produced no later than 30 minutes after preparation;
- Do not apply glue to blocks covered with ice or snow.
Laying the foam block on the glue is done using a notched trowel or trowel of a suitable width. A spatula has an advantage over a trowel. It allows you to lay the mortar more economically and achieve the optimal joint thickness.
If the work uses blocks with a tongue-and-groove connection system, then there is no need to apply an adhesive solution to their vertical ends. When laying standard foam and gas blocks, glue must be spread not only on horizontal, but also on vertical edges. If there is a need to correct the unit, this can be done no later than 15 minutes after its installation.
Before laying, blocks must be prepared by cleaning them from dust and cutting them, if necessary, to the required size (if there is not a whole number of stones in a row).
Video on the topic:
https://youtube.com/watch?v=UUpflmHlmOQ
Reinforcement of masonry walls made of aerated concrete and gas silicate blocks
Aerated concrete and aerated silicate, unlike, for example, brick, are quite fragile structural materials. Walls made of aerated concrete and gas silicate blocks are quite sensitive to bending loads. Cracks appear on them easily.
Reinforcement of masonry from aerated concrete and gas silicate blocks does not increase the bearing capacity of the masonry to compressive loads. Reinforcement increases the resistance of walls to bending moments and reduces the risk of cracks. Therefore, the feasibility of reinforcement must be assessed in relation to each specific object.
| Fig.1. Scheme of reinforcement of a wall made of aerated concrete blocks. |
The places where reinforcement is most appropriate are shown in the diagram, Fig. 1.
This is the first row of masonry, then every fourth row. These are the support zones of the lintels and the zones under the window openings. Almost always, a reinforced ring beam should be installed at the level of each floor and under the roof truss system.
To reinforce masonry walls made of aerated concrete and gas silicate blocks, special flat elements are used - “ladders”, made of galvanized or stainless steel. The reinforcing “ladders” have a small thickness, which allows them to be laid in masonry joints made of adhesive mortar with a thickness of 2-3 mm.
Reinforcement of masonry can also be done from ordinary round reinforcement. To lay bar reinforcement in the surface of the masonry, grooves should be cut. This can be done with a hand wall chaser. You can use a power tool for cutting grooves.
| Fig.2. Laying reinforcement in the wall. |
At the corners of the wall, the grooves should be connected with a smooth curve, suitable for laying a bent reinforcement bar into it. The cut grooves must be free of dust. This can be done with a broom brush or a hair dryer.
For laying in grooves, it is best to use periodic profile reinforcement with a diameter of 8 mm. To bend individual rods, you can use either a special tool or improvised devices.
Before laying the reinforcement, the grooves should be filled with glue or cement-sand mortar. This will ensure the joint work of the reinforcement with the masonry and protect the reinforcement from corrosion, Fig. 2
.
Press the reinforcement into the filled grooves. Remove excess glue (solution). The laid reinforcement must be completely covered with a layer of mortar. The distance from the axis of the reinforcing bars to the outer surface of the blocks should be about 60 mm.
Selecting Tools
In order for the laying of aerated concrete to be correct and durable, it is impossible to do without the use of special tools. To prepare a concrete solution you will need an industrial mixer and a mixing container. In order to apply the mixture, you will need several trowels of different sizes. To fit aerated concrete blocks together, use a special hammer and a measuring level. If you plan to process an aerated concrete block, then it would be a good idea to stock up on tools such as a marking ruler, a plane, a saw, a grout, equipment for forming grooves, drill attachments, a drill, and a brush.
Return to contents
Monolithic reinforced concrete belt at floor level
Monolithic reinforced concrete belt of aerated concrete wall.
As formwork, it is convenient to use the masonry of the top row of the wall with U-shaped blocks of aerated concrete. Due to the fragility of the material, it is dangerous to lay heavy reinforced concrete floors on masonry made of aerated concrete or aerated silicate blocks. This applies to all types of reinforced concrete floors: prefabricated slabs, prefabricated monolithic and monolithic.
The floors are supported by a monolithic reinforced concrete belt, which is placed on top of the masonry on all load-bearing walls of the house. Such a belt evenly distributes the load from the weight of the floors and the overlying parts of the house over the cross-section of the wall and, in addition, creates a load-bearing frame that increases the resistance of the building walls to lateral loads.
The design of a monolithic belt at the floor level is shown in detail in this video:
Why is it important to correctly lay out 1 row of aerated concrete blocks?
During the construction of a building, the foundation is first laid out: it must be strong enough to withstand the entire load from the walls, finishing and roof. A properly laid foundation is already part of success, but that’s not everything. The first row of aerated concrete must also be laid out correctly. Proper masonry affects:
- evenness of the walls;
- normal conditions for arranging openings;
- the ability to install high-quality floors and roofing;
- subsequent finishing;
- load on the foundation.
If the walls are laid without following the technology, then in the future the master or owner of the house will have to face problems such as uneven walls. When finishing the surface of the walls, you will have to additionally level them using plaster or putty, despite the fact that the aerated concrete block itself has an ideal geometry.
Subsequently, the horizon will be littered
Reinforced concrete belt for supporting the roof truss system
Approximately half of private houses are built with an attic. To increase the volume of attic rooms, a house structure with attic walls is often used, which are a continuation of the load-bearing walls of the house on the attic floor. The height of attic walls is usually in the range of 0.7 - 1.2 m.
The roof truss system of a house with an attic rests on attic walls. To ensure the stability of the attic walls of the attic when exposed to roof loads, along the top of all load-bearing walls
perform a monolithic reinforced concrete belt. The Mauerlat of the roof truss system of a private house rests on a monolithic belt of the attic wall.
| Monolithic reinforced concrete belt of the attic wall of the attic. The Mauerlat and roof truss system are attached to the belt |
The design of a monolithic belt for supporting a roof is in many ways similar to a monolithic belt at the floor level.
The height of the monolithic belt is not less than 15 cm. The minimum cross-sectional area of the monolithic belt is not less than 250 cm2. A monolithic belt is often made across the entire width of the outer wall if the wall is insulated from the outside. If the wall is without insulation, then on the outside there is space left for laying a layer of insulation, which eliminates the cold bridge through the concrete belt.
For a hipped roof, the belt along the outer walls is made a continuous ring, as in the figure. If the roof is gable, then in the belt you can leave gaps in the gable walls for installing windows.
Preparation of mortar for aerated concrete
The technology for preparing an adhesive solution with your own hands is quite simple. Water is poured into the preparation container in the required volume and the dry mixture is gradually poured in with constant stirring. The required proportions can be found on the packaging.
Kneading must be done in small portions, since the glue sets quickly enough. During operation, the mass is periodically mixed, while adding water to the finished solution is strictly prohibited. The finished solution begins to be applied to the second row, since the sand mixture is laid on the first to achieve initial leveling.
Reinforcement of reinforced concrete monolithic belt
Reinforcement is placed in a monolithic belt.
| Reinforcement of a monolithic reinforced concrete belt |
To reinforce the belt, working reinforcement with a diameter of 10-12 mm is used. The reinforcement bars are connected (anchored) along their length, placing the ends on top of each other over a length of 40-50 bar diameters.
To fasten the roof Mauerlat, anchors are embedded into the concrete of the belt. It is also possible to secure the Mauerlat to the belt using spacer dowels.
Useful tips
All the steps listed above can be completed independently without any problems. However, if you do not have the skills to work with building materials, as well as tools for laying aerated concrete with your own hands, it is recommended to entrust the laying of at least the first row to professionals. This will avoid the most serious problems, which are the hardest to fix. Also, to simplify the process of constructing a building from a similar material, it is worth:
- Use blocks that have clear and uniform dimensions;
- Mix the glue using electronic tools. This will reduce the likelihood of lumps and uneven consistency;
- Place blocks on each subsequent row according to a clearly chosen pattern. Start doing this from the corners, and then lay out each wall level;
- It is worth reinforcing not only external walls, but also joints with internal ones;
- Using a plane, grind the blocks in order to achieve their maximum compaction.
Location of windows and doors in the outer wall
In single-layer walls without insulation, windows and doors should be placed exactly in the middle of the width of the wall.
If the wall is two- or three-layer, that is, insulated from the outside, then the window and door frames are moved closer to the insulation. In some designs, the box can even protrude completely or partially beyond the plane of the outer wall into the insulation layer.
When choosing the installation depth of a window along the width of the wall, you should, if possible, adhere to the condition that the heat transfer resistance of the wall layers before and after the window are approximately the same.
This arrangement of the window and door along the width of the wall will ensure minimal heat loss through the slopes, bypassing the frame.
Price
The developer must be very careful when choosing a masonry mixture, which will affect not only the overall reliability of wall structures, but also the economic indicators of the cost of construction. Before purchasing a ready-made CPR, you will need to familiarize yourself with its scope and technological characteristics.
Popular modifications of adhesive for gas blocks:
- Professional Quick Block, thermal protection, seam thickness 5 mm, temperature range from -10 C to 25 C, production time 2.5 hours, norm 25 kg/1m3, frost resistance F150, 170 RUR/bag;
- TOILER TL 400, thermal protection, seam thickness 4 mm, temperature range from -10 C to 30 C, application time 4 hours, norm 25 kg/1m3, F50, 160 rub./bag;
- Ytong, winter, thermal protection, seam thickness 3 mm, temperature range from -10 C to 30 C, use time 5 hours, norm 25 kg/1m3, F150, 350 rub./bag;
- Cleber K32, thermal protection, seam thickness 10 mm, permissible temperatures from -50 C to 50 C, application time 3 hours, norm 25 kg/1m3, F50, 350 RUR/bag; 25kg.
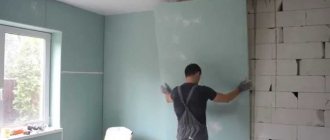
Internal walls made of aerated concrete and gas silicate blocks
Fig. 1. Arrangement of a doorway in a partition.
2 - additional blocks; 3 — reinforced concrete lintels; 4 - overlap; 5 — fasteners; 6 — corner metal profile (clamp); 7 — polyurethane foam; 8 - cement-sand mortar grade M35 Internal walls made of aerated concrete blocks can be load-bearing, self-supporting and non-load-bearing
- partitions.
Load-bearing internal walls, as a rule, are made single-layer in one block with a thickness of 20 to 40 centimeters.
The thickness of the internal walls, in addition to strength, must provide standard indicators of sound insulation from airborne noise. For homogeneous single-layer walls, the following rule applies: the greater the density of the masonry, the higher the level of sound insulation of airborne noise.
Therefore, to improve the sound insulation of internal walls, it is recommended to use blocks of a higher density than for external walls, and to lay the blocks using heavy mortar. I note that the noise-proof properties of the walls will be even better if sand-lime brick is used for masonry .
Read: “Sound insulation - sound insulation of a house, apartment”
Window and door lintels for covering window and door openings in walls can be load-bearing or non-load-bearing. More durable load-bearing lintels are designed for installation over openings in load-bearing and self-supporting walls.
All jumpers are reinforced depending on their purpose. It is recommended to use factory-made lintels from reinforced or aerated concrete. It is possible to manufacture lintels on site from special U-shaped aerated concrete blocks - permanent formwork, as well as by pouring concrete into removable formwork on site.
The length of the lintels must be greater than the width of the opening by at least 250 mm on each side. For the construction of a doorway in an internal non-load-bearing wall (partition) made of aerated concrete blocks, see Fig. 1.
When installing window and door frames, they are attached to the walls using screw anchors.
Device for connecting internal and external walls, as well as partitions made of aerated concrete blocks to the walls.
Vertically flexible connection between the partition and the wall: 1 - wall;
2 - wall decoration; At the top - in the groove: 5 - sealant; 6 - mineral wool. Below - on the key: 4 - sealant;
6 - mineral wool; 9 — anchor for aerated concrete; 11 - wooden block. Partitions installed on the floor on the ground must have a flexible connection with the walls in the vertical plane .
Types of floats for aerated concrete
According to the principle of operation, tools for grinding aerated concrete blocks are divided into two groups: manual and electric. The first type is used both in private housing construction and on large construction projects. Electric tools have not found widespread use due to their energy dependence, low return on investment and inconvenience of use. It is worth noting that by power tools we mean grinders and grinders, on which a circle of the required hardness is installed - for concrete. There are no specialized electric floats for aerated concrete yet.
But hand tools are not only used everywhere, but also have several variations:
- Grater-plane. It is a tool with rows of sharp metal teeth. Serves for rough grinding, removing chips, grinding off ridges and adjusting the height of gas blocks.
- Sandpaper grater. A device with sandpaper (sandpaper) with a grain size of 1 mm, marked 25-N...80-N. Used to smooth out uneven surfaces and remove dust. It is used during masonry, as well as before puttying and finishing aerated concrete.
Expert opinion Vitaly Kudryashov builder, aspiring author
Ask a Question
You can buy both types of graters separately or as a set. The cost of a grinding tool is from 200 rubles, a plane – from 800 rubles, and a kit will cost 1500-3000 rubles. You don’t have to spend money; you can quickly make the tool yourself.
Laying walls from aerated concrete and gas silicate blocks - video
It's better to see it once! An interesting video from which you can learn how to properly lay and reinforce walls made of aerated concrete blocks. Watch and learn!
Articles on this topic:
⇒ What is good about aerated concrete. Pros and cons ⇒ Thickness of the walls of a house made of aerated concrete - gas silicate ⇒ Interior decoration of the walls of a house made of aerated concrete, gas silicate ⇒ Exterior decoration of the walls of a house made of aerated concrete, gas silicate blocks
More articles on this topic
- House with monolithic walls made of large-porous expanded clay concrete
- Do-it-yourself soundproofing frame partitions made of plasterboard
- Prefabricated monolithic frequently ribbed floors made of light stone blocks
- Clinker cladding of the facade of a house with bricks
- There is formaldehyde in the house, the source is chipboard, OSB, plywood, mineral wool
- Exterior decoration of house walls made of aerated concrete and gas silicate blocks
- Flanged check valve: application, types, advantages and disadvantages
- Norms and rules for planning a private house, cottage
Flaws
The main disadvantage of the device is the fragile attachment of the handle to the body of the bucket.
During operation, this unit is subjected to multiple loads, which loosen the connection, causing breakdowns. This deficiency is observed in almost all types of trowels, both steel and plastic. The main method of troubleshooting is a rivet connection using an additional plate, which increases the connection area and makes it possible to install several rivets. A repaired instrument will last for a very long time, so such modernization makes sense.
Expansion joints
Like reinforcement, expansion joints are designed to protect aerated concrete walls from cracks. The locations for expansion joints are determined in each case individually. As a rule, expansion joints are placed in places where the height and thickness of walls change, between warm and cold walls, in unreinforced walls whose length exceeds 6 meters, also in places where aerated concrete blocks are connected with other materials, columns, and in places where long load-bearing beams intersect walls Let us remind you that expansion joints should be sealed with mineral wool or polyethylene foam. The inside of the seams is treated with a special vapor-proof sealant, and the outside with a weather-resistant sealant.