The task of preparing the material, how to perform a semi-dry floor screed with my own hands, oh..., feet, has been in my portfolio of orders for a long time. But everything didn’t work out. And not because there was no time or the soul was not in the mood for work. Everything became more prosaic: I was not sure that I would correctly grasp all the nuances of the technology. The articles on this topic are completely inconsistent.
Okay, a theory where mistakes are not fatal. So the practice is covered in contradictory ways. For example, some experts categorically assert that technology cannot be mastered without small-scale mechanization, but rumors among builders refuted this point of view. They say that there are a couple of teams that perform high-quality work without any mechanisms. This inspired optimism, but did not solve the problem.
There was no consensus in the articles reviewed on the amount of water used when stirring the solution. For example, this is a recommendation: pour 3 buckets of water into the dry mixture. What kind of buckets: 5 l, 8 l, 10, or maybe 12? What consistency should I bring the solution to? Some argue that when the ball rolls, water should come out, others are categorically against such advice. The series can be continued ad infinitum, there are so many incomprehensible nuances.
The StroyGuru website team decided that until someone has real experience working with semi-dry screed technology, they will not return to the article. Chance helped, twice. During the week, the author managed to ask to be present and help a little with the work of two teams at once laying semi-dry floor screed in an apartment. I helped for free, but the experience gained was priceless. After all, experts are not born. They become one after gaining the necessary knowledge and experience. Before this, I had to sit down with the theory again, so as not to look like a black sheep among the workers.
Features of semi-dry screed, its pros and cons
Theoretical research began with the elementary: trying to figure out what a semi-dry screed is. The screed is understandable. This is a durable, even layer between the subfloor and the finishing coating. But why is it semi-dry? Wikipedia to the rescue. And here the first surprise awaited me. The encyclopedia says that a semi-dry screed is a combination of a dry and a wet screed. The bottom layer is expanded clay, the top layer is CPR (concrete). We've arrived.
Some explanations were given by articles on construction sites. But sometimes they write things that make you don’t know whether to laugh or cry. Therefore, there is no complete trust. Moreover, on forums some visitors claim that such technology is impossible in principle. They refer to studies of the effect of the amount of water on the strength of concrete. In their opinion: if there is a lack of moisture, the process of formation of cement stone (in scientific terms - hydration) will stop halfway.
I had to look for other sources. As a result, the following emerged. Scientists and practitioners did not even think that CPS could turn into stone with a small amount of water. But in the former Yugoslavia they noticed that the almost dry cement mixture turns into a solid material similar to concrete.
We started experimenting. The result was a new technology called semi-dry. Scientists clarified: semi-dry unbound cement-sand screed. Its difference from “wet” is in the amount of water: three times less than the classic one. That's all.
Surface preparation
- Carefully inspect the floor: tap with a hammer to find loose areas of cement, remove them using a hammer drill, and fill the resulting voids with cement mixture. Expand and restore cracks, knock down noticeable bulges.
- The interface lines between the floor and walls must be treated with cement mortar, even if there are no cracks in these places.
- After this, remove stains of oil paint and grease from the base and vacuum it thoroughly.
Advantages and disadvantages
About two years ago, I already prepared a material where I considered the strengths and weaknesses of semi-dry technology (you can see it here). Practice has made its own adjustments: something had to be removed, something had to be added.
The advantages include:
- strength. A number of experts claim that it is higher than that of concrete due to the absence of cavities (voids) that remain after the evaporation of excess, unbound water. This point of view is refuted by the density of the material: it is higher in concrete. And at school they taught that the higher the density, the stronger the material. You can easily check: stand on a thick layer of foam rubber and 2-3 mm metal. What is deformed? That's it. Therefore, such statements can be explained by advertising of semi-dry technology. However, a little less strength is enough for residential premises. The exception is a fireplace (not all types) and a stove;
- durability. Experts talk about an operational life of 50 years or more. It has not yet been possible to test it in practice - the technology found application in the mid-90s of the last century (not even 30 years ago);
- a smooth surface after the solution has set - obtained after grouting by machine or manually;
- the ability to walk directly on the screed. You can walk, but only in special shoes: concrete shoes;
- there is no risk of spilling water on neighbors below. It simply isn't here;
- The installation process does not leave any dirt. After the completion of the work, literally in 10 minutes the auxiliary premises were restored to their original condition;
- high speed of work completion - the three of us, although what kind of assistant am I, in a room with an area of just over 24 m2, the work was completed in about 6 hours;
- installation can be done on any floor surface: be it concrete, rough wooden floor or soil. My doubts about the soil (as it subsides, concrete collapses) were dispelled by the foreman. Concrete is brittle, which is why it cracks under low bending loads, while cement stone has much higher bending strength. Tested in practice. I understood this in my own way: a thicker, yet reinforced screed is naturally more stable. Analogy with reinforced concrete floors;
- There is no shrinkage or cracking of the surface. I agree about shrinkage, there is practically no shrinkage (at least I haven’t seen it) if the solution is well trampled (compacted), but cracks appear in the absence of fiber reinforcement. The mesh doesn't help either. By the way, she has completely different tasks;
- compatibility with “warm floors” - all operational characteristics allow this;
- You can hide communications in the leveling layer. No problem;
- repairs can be continued after 72 hours - ceramic tiles and porcelain tiles can be installed with glue without any questions; other types of flooring will have to wait. In some cases, laminate, up to a month.
disadvantages , but they are contradictory:
- Experts unanimously say that without knowledge, experience and the presence of small-scale mechanization, laying a semi-dry screed with your own hands is extremely difficult, or rather, impossible. I wrote about this too. I repent. From personal experience I was convinced that, if desired, everything lends itself to skillful hands and a bright head;
- Another expert statement: the slightest errors in the amount of water in any direction negatively affect the strength of the solution. But what do we mean by the slightest mistake? In one team, 17 liters of water were poured onto a bag of cement, in another - 20. The result was the same. In passing, I note that with the mechanized method of preparing the solution, 15 liters of water are taken per 25 kg of cement;
- continuity of the technological process. This applies only to mechanized pouring - you need to have time to distribute the supplied solution throughout the room within an hour, tamp it down and rub it in at the same time. When working manually, you can smoke, but only between batches;
- strict requirements for sand - it must be of a certain fraction (therefore river sand is not suitable) without clay and stones.
Leveling and grouting
At this stage it is necessary to carry out final alignment. To do this, the rule is pressed against the beacons and passed along them, making zigzag movements. The solution from the blade can be put into a bucket; it will be useful for filling small depressions. After this, go through the vibrating plate again. Finally, you need to sand the surface with a machine or sandpaper.
Arranging semi-dry screeds is a process that requires special equipment. Even if you rent it, the amount can turn out to be quite large, so home craftsmen should calculate the budget and weigh the pros and cons.
Types of semi-dry screed
The second surprise awaited me when I started to find out what types of semi-dry screed there are. It turned out that the authors’ fantasies are off the charts—they counted more than a dozen options. There are actually three:
- bound - this is when a semi-dry mortar is poured directly onto the floor slab and adheres to it;
- floating - the formed cement stone does not have direct contact with either the ceiling or the walls. At the bottom there is foam plastic (insulation) or soundproofing material, and a damper tape is attached to the walls;
- on the separating layer - something intermediate between the first and second types: with overlapping contact there is no - a thin polyethylene film (waterproofing) is laid, and damper tape is placed on the walls. In passing, we note that when laying rolled waterproofing with a thickness of more than 1 mm, the screed is already floating.
But this is a theory. The classification has no practical significance, although many experts argue that the bound screed need not be reinforced. I saw a slightly different difference - the concrete base must be carefully treated with a primer so that it does not draw out the last water from the solution.
I did not find any difference between the floating screed and the separating layer. In both cases, the technology of semi-dry floor screed is one to one.
What other materials will be needed for the job?
In addition to the materials listed above, a semi-dry screed also requires a special insulating material. It comes in several types :
polyethylene film;- soundproofing substrate;
- damper tape;
- penoplex;
- isolon.
A polyethylene film will help protect the semi-dry screed from moisture. For this purpose, durable material with a thickness of at least 200 microns is used. A thinner film will not provide adequate protection against water.
Isolon is sometimes used - it protects against both moisture and excess noise. This material can be used indoors and outdoors; it must withstand a temperature range from -60 to +100 degrees.
The damper tape will help compensate for the expansion of the floor during the hardening process. This is a 5 mm polyethylene foam backing. It isolates walls, columns and other protruding structures from the deforming effects of the solution.
Materials and tools
The third surprise awaited me when I studied the need for materials and tools. Almost every article about semi-dry screed talks about a concrete mixer and a trowel. I naively believed that teams that do the work manually rent these machines. Imagine my surprise when, upon arriving at the site, I saw:
- several bags of M500 cement;
- a pile of sand;
- large sieve;
- several packs of fiberglass;
- plastic film;
- a stack of metal reinforcing mesh;
- a screwdriver with an incomprehensible hook;
- underlay for laminate;
- construction gun with hot glue;
- twisting copper wire;
- laser level;
- rule;
- roulette;
- construction pencil;
- bucket;
- plastic cup;
- two plaster floats;
- shovel;
- several metal pipes about 3 meters long;
- metal hook about 1.5 m long;
- construction knife;
- two pairs of concrete shoes.
These are concrete shoes.
No concrete mixers or trowels.
The presence of some tools and devices was surprising. I could not understand their role in the technological process. Even while changing into work clothes, I bombarded the builders with questions. I received detailed answers.
Cement. To get a solid base, it must be in a semi-dry mixture of the M500 brand. As a last resort, M400, but with a shelf life of no more than 2 months. No M300 brands. I knew why the foreman focused on the shelf life - every 6 months of being in the warehouse, the grade of Portland cement drops by 100 units. Was M500, sat for six months, became M400.
Sand. You need quarry sand - only it has a fineness modulus of up to 2.5 units. A little clarification is needed here: according to GOST, such sand must first be sifted through a sieve with a hole diameter of 25 mm, and then 14 mm. Everything that did not pass through the last sieve must be used. There should be no clay in the sand, or rather, no more than 3% of fine clay inclusions are allowed; accidentally introduced plant debris is completely excluded. The humidity is natural, which means any.
For information: the teams, as if by agreement, sifted the sand only once, through a fine sieve. Large pebbles rolled off the mound of cement as it was mixed. They were constantly being removed. It’s faster, but it doesn’t affect the quality of the work.
Fiber fiber. The reinforcing mesh does not prevent the appearance of cracks on the surface, but rather prevents their growth. Therefore, polypropylene fiber is introduced into the solution, which ensures the integrity of the surface.
Screwdriver. The hook inserted into the cartridge allows you to quickly twist the copper wire when tying the reinforcing mesh. This is the first time I have encountered this, although I was assured that this method has been used for quite a long time.
Pipes. Used as beacons. Only they do not deform when driven into an already laid solution.
Shovel. There are several types of shovels. There must be a scoop (popularly known as a shufel, hence the name “shufel”).
Substrate - used instead of damper tape. I cut it into strips and attached it to the wall. It's much cheaper that way.
Hook. SNiP recommends laying the reinforcing mesh on the screed layer and covering it with a second layer on top. The team works differently - they place a mesh on the base of the floor, pour a bucket of mortar onto it and use a hook to lift it up a little so that it is inside the screed, in its lower part. Simple and fast. A beautiful solution to a technological problem.
Hot-melt adhesive - glue the cut backing to the wall.
Glass - pour water into the solution, or rather onto a hill of sand and cement.
Copper wire - needed to bind the metal mesh.
Plastic film - the solution is first prepared on it, and then the screed is covered with it.
The purpose of the remaining tools is self-explanatory.
Calculation of material requirements
The required amount of materials is calculated using the following algorithm: the thickness of the screed is multiplied by the area of the room in square meters. This gives the volume of fill in m3. Next, look at the table, which shows the amount of cement per 1 m3 of mortar grades M150 and M200 and multiply by volume. We divide the results obtained by the weight of the material in the package and determine the number of bags of cement and sand after rounding up.
Table 1. Consumption of cement and sand per 1 m3 of solution.
| Cement brand | Material consumption per 1 m3 of solution | |||
| Solution grade M150 | Solution brand M200 | |||
| Cement, kg | Sand, kg | Cement, kg | Sand, kg | |
| M400 | Z90 | 1310 | 490 | 1350 |
| M500 | 370 | 1350 | 410 | 1400 |
What is a semi-dry mixture?
During the preparation of the mixture, a small amount of liquid is added, which is necessary to hydrate the cement.
Semi-dry mixtures are made on the basis of cement and are diluted according to the same principle as traditional cement-sand mortar. But there are differences in the technology for preparing the liquid solution, and they are due to the specific composition of the semi-dry mixture itself. Due to the presence of synthetic and plasticizing substances, a small amount of water is added to the powder mass, but the technical characteristics of the resulting coating do not suffer at all from this.
During the preparation of the mixture, a small amount of liquid is added, which is necessary to hydrate the cement. By observing the proportions, they achieve the formation of very stable crystalline bonds. They play a decisive role in the formation of the structure of the hardened coating, as well as the timing of its complete drying.
Preparatory work
Among professional builders who carry out the installation of dry screed using a mechanized method, the work is carried out step by step a little differently, which was seen when teams worked without small-scale mechanization. There is no point in completely copying the experience of one of them. Each has its own discoveries in performing individual works, which greatly simplify the entire process. So I took the best from each of them and combined them into one. As a result, the technology for a semi-dry screed looks like this:
- preparatory work - includes foundation repair, waterproofing and insulation;
- gluing damper tape;
- finding the screed line;
- laying reinforcing mesh;
- preparing the solution;
- installation of beacons;
- laying the screed;
- care of the surface of the solution.
Once again, may site visitors forgive me, about the base of the floor: it must be solid. It could be:
- rough floor made of unedged boards with minimal gaps on wooden joists or on 2-T metal beams (“Stalinist” houses, cottages with lightweight ceilings);
- well-compacted soil with bedding (sand or expanded clay) in the basements and first floors of private houses;
- any monolithic ceiling.
To describe the technology, a floating screed is taken - the most complex. It will be poured onto a reinforced concrete floor. When pouring onto a wooden floor, ventilation must be provided. Otherwise everything will rot and fail. But more on that another time.
Any preparatory work begins with a thorough cleaning of the work surface. Construction waste is collected in bags, tools are taken to another room, the base is swept, and even better, use a construction vacuum cleaner instead of a broom.
The surface of the slabs, if there are cracks, chips, or pits, is sealed with classic TsPR or the cheapest tile adhesive. Cracked seams are also subjected to the same procedure. Using special repair solutions is expensive, but the results are the same. The main thing in this process is to obtain a surface that is fairly even, even to the eye (small waves do not interfere with making a screed). It's not worth working to the point of fanaticism. Anyway, the leveling layer will hide all the imperfections.
There is no point in describing in more detail the technology for preparing the subfloor for screed. There is a separate article on the site. You can find it at this link.
And again everything is carefully swept.
In this form, the base is in principle ready for laying the screed. But there are important nuances:
- 1. Concrete, like a pump, will pull out the small amount of water from the semi-dry screed composition, as a result of which the bottom will turn into small granules that are not connected to each other. It is also not possible to simply wet the surface to saturate the ceiling with moisture - the water ratio of the screed components will be disrupted. No one can predict how the hydration process will go in this case. Therefore, waterproofing of the ceiling or repeated treatment with a deep penetration primer is necessary. You can also use “Betonokontakt”, but this is an expensive pleasure.
- Semi-dry screed has an unusual property: by itself, it dampens noise quite well. But when laid directly on reinforced concrete, on the contrary, it increases noise. Therefore, a layer of noise-insulating material is needed, unless, of course, the owners of the apartment want to put their family life on public display. Sorry, bugging. Insulation with soundproofing properties, for example, basalt wool “Rockwool” TF-Board, will help solve the problem. You can also use expanded polystyrene (foamed PSB-S-35 or, better yet, PSB-S-50; extruded grade 35) - it dampens impact noise well, but not in combination with laminate.
A small note: that’s why the floating screed.
One more clarification: waterproofing, as a rule, is not carried out in living rooms (living room, children's room, bedroom) in apartments, starting from the second floor and above, if insulation or soundproofing material is installed. People say that “you can’t spoil porridge with butter.” Therefore, the site team recommends that waterproofing work be carried out there as well. God forbid there is flooding with water escaping beyond the bathroom or kitchen.
One team made the waterproofing with bitumen mastic and laid basalt wool slabs on top, the other with roll materials (they used elastic roll material from the TECHNONICOL company - “UNIFLEX EPP”), and PSB-35 foam was chosen as insulation and noise absorber. By the way, this team discovered an interesting thing: when using rolled materials, it is recommended to roll them with rollers. The workers did not roll in, but rather trampled on the floor. It takes a little more time, but the adhesion to the base is much better.
Each option has its pros and cons. Links to articles will help you choose exactly what to choose and how to carry out the work:
- “Waterproofing the floor before the screed”;
- “What and how to waterproof a bathroom floor?”;
- “Which insulation is better to choose for the floor?”
As a result of properly carried out preparatory work, you should get something like this cake (see photo):
1 - reinforced concrete floor cleared of debris and restored; 2 — bitumen primer for roll waterproofing; 3 - rolled waterproofing material; 4 - insulation; 5 - reinforcing mesh.
Features of the technological process
Its fundamental difference is the most accurate dosage of water in the concrete solution, ensuring hydration of the cement in the mixture and not remaining free in the concrete stone.
The purpose of installing a leveling screed in this form is to reduce construction or repair time by minimizing the drying time of the laid layer.
Great option for home and apartment
This type of screed has many advantages, but the main one is that you don’t have to wait long for the solution to dry completely. Unlike “wet” screed, semi-dry screed is ready for use almost immediately.
The peculiarity of installation is the need to control the density of installation in places where the screed adjoins walls and lighthouses, where the mixture is prone to the formation of voids due to reduced ductility. An additional technological technique to avoid this effect is the introduction of a special composition into the mixture - a plasticizer, which increases the fluidity of the solution. An indication of this on the packaging of the dry mixture or in the recipe for preparing the composition yourself will help you choose the right additive.
Private questions
There are many questions on the forums with conflicting answers. I will answer some of them using my experience.
How long does it take for a semi-dry 7 cm screed to dry? A semi-dry screed dries according to slightly different rules than a regular CPR. In the latter, with increasing thickness of the poured layer, the amount of time for full strength gains increases. A semi-dry mortar has one standard: it takes about 10 days to gain 70% strength, and 28-30 days for maximum strength.
Minimum and maximum thickness. The minimum thickness is 4 cm. With a smaller layer, the water will leave faster than the solution gains strength. The maximum is limited by the following factors:
- weight - must withstand the ceiling;
- speed of pouring - the entire thickness must be laid and compacted in several layers within one day;
- financial capabilities of the owners - a screed thicker than 7-8 cm is ruinous.
In fact, the maximum thickness is 10-15 cm. The most common is 7 cm.
Does it need to be reinforced? A mesh on a floating screed is a must. Fiber fiber - optional. In extreme cases, it can be replaced with a “helicopter” (iron coating of the surface with cement dust).
In what cases is a semi-dry screed not suitable? Weak floors are not suitable for semi-dry screeds due to their high specific gravity.
How long will it take to dry? Full strength gain lasts 28-30 days. But you can start working much earlier:
- walk after 12 hours;
- lay the tiles after 3 days;
- lay linoleum every other week;
- Laminate and parquet work in a month. Previously this was not possible due to the high humidity of the screed.
Semi-dry or regular screed. Semi-dry and “wet” screeds have their own strengths and weaknesses. It is difficult to give preference to any method. Even the comparative analysis carried out (can be viewed here) did not allow us to give an unambiguous answer. Recommendations only.
Procedure for installing a leveling screed
The technology for forming the desired layer is simple, but requires attention and diligence.
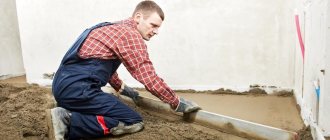
For this work you will need at least 2 performers. One of them prepares a solution of sand concrete and delivers it to the work site. The second one carries out laying, compacting in the required places and smoothing the mass according to the level of the beacons. The volume of a single portion of the solution must be laid within one hour.
For small rooms, the solution is often prepared directly on the floor, laying out the components in the required ratio. They are stirred with a shovel until the mixture is homogeneous and formed into a slide with a small crater on top, where water is added. Stirring is done with a shovel and a portion of water added. The consistency is controlled as indicated above; if necessary, components can be added during cooking.
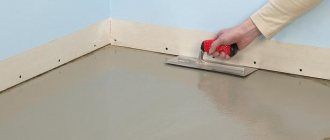
The solution is supplied to the floor using a shovel and leveled with a trowel. Along the wall and beacons, you need to tamp the mixture with the end end of a wooden block. Then, if necessary, the solution is added and leveled with a trowel. The formed surface is leveled by pulling the correct board along the beacons, and all irregularities are removed. Work continues until the next batch is ready.
About an hour after the start of work, another operation begins - grouting. A wooden grater is used for this. The task is to finally level out all, even the smallest, irregularities in the screed. High-quality implementation of this technological operation can subsequently eliminate the need to perform a leveling screed.
Drying of such screed is carried out for at least five days. It is very important to protect the surface from drying out with plastic film, and in hot weather to re-moisten it with periodic irrigation with water.
It should be noted that this type of screed is quite suitable for heated floors, especially for water or cable ones. Its thickness allows you to freely place the heater circuit from pipes, most often used in size 20 mm. And the reinforcement used to fix the wiring only helps to increase its strength characteristics.
Grouting screed joints
To increase the efficiency of work, it is preferable to use a special trowel, which not only efficiently levels the floor surface, but also helps to further strengthen its surface layer. Grouting is done no earlier than 10-15 minutes after leveling, but until the solution “sets.” As a result, you need to get a flat surface for subsequent laying of the floor covering.
Leveling the surface
To prevent shrinkage cracks from appearing in the floor, special shrinkage joints should be cut, which will prevent deep cracks from appearing in the finished surface. The depth of these seams should be no less than a third of the depth of the laid layer. These seams are also made using the mentioned lath rule.
Modern semi-dry screed requires special care after installation. For optimal setting over a large area, the screed is covered with polyethylene, creating an optimal microclimate and thus preventing the appearance of cracks from uneven drying. You can also gently pour water over the screed, but do not leave a layer of liquid on the surface.
After 12 hours, the screed can already support the weight of an adult, and after 96 hours the flooring can be laid. At the same time, it is important to control the condition of the screed throughout the entire setting period - cracks and other defects should not appear on the surface, since they can lead to a deterioration in the quality of the surface, jeopardizing the future floor covering.
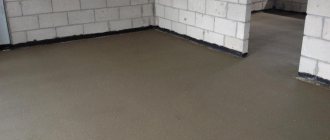
A modern semi-dry screed is one of the most effective and optimal ways to create a high-quality base for flooring, be it ordinary tiles or modern parquet boards or laminate. The technology of this type of screed itself is quite simple, and anyone can do it, even without special education and experience.
When to use semi-dry concrete
It is more economical to order semi-dry concrete in cases where time-consuming work is required. This material has a longer shelf life and is less demanding on conditions. Often semi-dry concrete is chosen for work at sites where it is impossible for special equipment to reach.
When installing curbs and curbs, semi-dry concrete is almost irreplaceable: it has a long service life, strength, and resistance to intense impact.
Areas of application of semi-dry concrete
Semi-dry concrete is mainly used for landscaping and road work. You can make slabs and blocks from it, which become a sidewalk, curb, or decorative element. Semi-dry concrete is popular due to its optimal plasticity: it is easy to fix elements, the material is pliable, and hardens neither too quickly nor too slowly, and is also stored for quite a long time - specialists can work at a pace that suits them.
But besides these works, semi-dry concrete can be used in other areas. For example, screed can be made from it, as well as other construction work. The material can change its properties as water is added, which expands the area of use of semi-dry concrete.
Main Ingredients
The proportions of the ingredients are determined depending on the brand strength of the cement from 1 to 4.5 to 1 to 6.
The cement-sand mixture is the main component of the semi-dry screed. The composition differs from the solution for wet screed in the smaller amount of water. When choosing sand, preference is given to river and sea sand without a large number of clay inclusions. Sea sand is less available in some regions, so river sand is the most common option. It is recommended to use cement grade M500 so that the finished mortar corresponds to grade M300 or M200. Less strength is undesirable, as this threatens cracking of the surface of the subfloor.
Reinforcement prevents the screed from cracking and increases the strength of the coating. For semi-dry screeds, frame and local reinforcement are used. Fiber is used as local material, which is added at the rate of 40 grams per 1 square meter with a mortar layer thickness of 50 cm. Reinforcement is also used by placing metal or plastic mesh in the body of the screed.
We insulate the floor
An important element of the screed is the insulating layer; it is made of a substance with low thermal conductivity. Various types of materials are used as such elements: polystyrene foam, expanded clay, mineral wool or gravel-sand backfill.
Thermal conductivity is a physical and technical property of a material, which is characterized by the ability to conduct thermal energy. Accordingly, the lower the thermal conductivity, the better the substance retains heat in the room.
Extruded polystyrene foam - the material has low thermal conductivity. The plate consists of granules that are filled with carbon dioxide. Expanded polystyrene is divided into grades depending on density. To insulate the floor under the screed, the PSB-S35 or PSB-S50 brand is usually used.
An important advantage of expanded polystyrene is the light weight of the material, so it is advantageous to use it to raise the floor level. The weight of one square meter of polystyrene foam 20 cm thick will be only 7.5 kg, so with its help you can significantly raise the level of the base without a critical increase in the load on the load-bearing elements of the floors. The material is also easy to work with, it is easy to cut, the surface can be scratched (creating grooves for wires, pipes and other communications.)
Brands of expanded polystyrene are designated by the letter combination PSB, PSB-S35 corresponds to a density from 25.1 kg/m3 to 35 kg/m3, PSB-S50 - from 35 kg/m3 to 50 kg/m3.
Mineral wool is an insulating fibrous substance; the concept usually includes several varieties (stone wool, glass wool and slag wool). In most cases, stone wool (basalt) is used for semi-dry screed; it is produced from the melt of volcanic rocks. Provides a high degree of sound and heat insulation. To be used as a semi-dry screed, the material must have a certain level of density in order to withstand mechanical loads. The density of the material must be above 125 kg/sq.m.
Mineral wool, when exposed to water, loses its thermal insulation properties, so a prerequisite for using the material under the screed is the installation of a waterproofing layer between the cement-sand layer and the insulation.
Expanded clay is an environmentally friendly insulation option. Fine-grained expanded clay backfill is used. The porous structure of the granules ensures low thermal conductivity and good sound insulation. The material is made from baked clay - it does not contain formaldehyde resins and other harmful impurities. When choosing expanded clay backfill, it is important to pay attention to the size of the granules. Usually a fraction of 1-5 mm is used.
Alternative dry backfill options include vermiculite and perlite. Both materials are also natural and made from mineral raw materials.
The sand and gravel mixture is 20% sand and 80% gravel. The material is extracted by quarrying and serves as backfill. It cannot be used to greatly increase the height of the floor due to its significant weight. Per square meter with a layer height of 20 cm there will be 320 kg of material.
