Hello readers of my blog! Today we will talk about how to properly lay a self-leveling concrete floor with your own hands. It would seem that the matter is not tricky, but when you are faced with this problem, you have to think about how to do it correctly, what preparation to do, what materials to choose. Thus, I decided that this article would be useful to someone, and I am devoting my efforts to this subject. In it I will answer a number of questions that will arise immediately before How to properly lay a self-leveling concrete floor with your own hands, and some even after that. This topic is quite broad, because before work, thorough preparation is necessary, but how to do this? And this is a separate topic. You can learn about all this in great detail in the article below.
How to make a self-leveling floor
The technology for pouring a self-leveling floor may seem complicated and incomprehensible, but in fact this covering is no more difficult to install than laminate, linoleum or carpet. If you are interested in how to make a self-leveling floor at home, you just need to familiarize yourself with the basic technological rules.
If you follow these rules, without skipping a single stage of work, you can easily install a polymer coating in your home, and subsequently enjoy its outstanding performance and decorative qualities.
The first rule of laying a self-leveling floor is the preparation of a high-quality base, which must meet two requirements: dryness and strength. Ready-made materials for self-leveling floors can be purchased today at any hardware store. A huge range of rough self-leveling self-leveling floors and decorative final coatings for residential premises are present in the catalogs of almost all dry mix manufacturers.
Most often, in everyday life, people are interested in how to make a self-leveling floor for the final decorative coating in order to perfectly level the concrete or cement base.
For this purpose, a self-leveling screed is most often used, designed for small differences in the height of the base. The thickness of such a coating should not exceed 4-5 centimeters. Such screeds are a good choice if you want to install a heated self-leveling floor in a room, as they can be applied without problems to heating elements previously covered with insulating material.
Installation technology
At this stage you will need edging tape for the self-leveling floor.
It must be laid around the perimeter of the room, secured to the walls at the points of contact with the future polymer screed. The presence of tape will help to avoid deformations and cracks after the coating dries, as it compensates for the shrinkage and expansion of the material. The thickness of the damper tape must correspond to the thickness of the coating.
If you choose a thin self-hardening self-leveling floor, then the thickness of the tape should be small.
Ideally, it should not be visible after the coating has dried. If part of the tape is visible above the floor surface, you will have to cover it with baseboards.
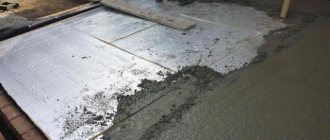
After applying the tape and thoroughly cleaning and preparing the concrete base, you need to apply a primer to it. It is best to choose a deeply penetrating primer for self-leveling floors; it reduces the absorbency of concrete, removes dust and increases adhesion. Use a wide roller to apply the primer.
Before the next stage, you need to wait until the primer layer has completely dried. If the screed is old and porous, for reliability it is necessary to apply a primer in two or three layers. The new screed can become stronger after just one application.
We install beacons
At this stage, you need to install beacons for the self-leveling floor. To do this, you need to prepare a certain amount of cement mixture, with which you will secure the beacons to the base.
It is convenient to use aluminum profiles as beacons, suitable for correcting various height differences. The installation of beacons must be done with a liquid or laser level.
In this case, the surface uniformity will be most accurate, and this directly affects the quality of the final coating.
If you are leveling the floor in the bathroom and plan to lay porcelain tiles or floor tiles on it, it is especially important to make the base level.
On a screed that is not too level, the tiles may subsequently begin to crack, break and peel off. After installing the beacons, level the cement mortar with a spatula, filling all the voids between the beacons and the base. Wait for the cement mortar to dry, and then begin preparing the dry polymer mixture for pouring.
Work progress
Primer
At the first stage, the surface should be thoroughly cleaned and dust-free. Poor cleaning may lead to cracks in the future.
Apply primer to the cleaned coating. Preference should be given to special floor products. The soil should strengthen the surface and reduce moisture absorption by the base. If a universal product is used, then the dry residue in it should be at least 14%.
There are two approaches to applying primer; you can use a roller with a long handle and a ditch; you can pour the product over the floor and distribute it with a brush. In the first case, it is important to additionally cover certain areas with a brush or brush (near walls, corners, recesses, etc.), since they cannot be processed properly with a roller. If a brush is used, primer should not leak through the ceilings.
Carefully read the instructions on the primer; the indoor conditions must meet the manufacturer's requirements. Air humidity should be 60%, optimal temperature 10 - 20 degrees. Avoid direct sunlight and close the windows to prevent drafts.
We wait for the primer composition to dry (see the instructions for the time) and begin placing the beacons.
Display of beacons
This is the most difficult stage of the work; here it is important not to make a mistake so that the floors in all rooms have the same height.
Search for the "zero mark". In this place the floor will have the smallest thickness. There are many methods to accomplish this task. In small rooms (toilet, shower) you can use a long bubble level. By applying it in different directions, you can determine which corner is more tilted relative to the horizon.
Now let's consider a more complex situation, when the floor is leveled in a large room or in an entire apartment. In this case, we place the laser level in the center of the room and project a horizontal beam onto the walls at an arbitrary height.
It is better to choose the installation height of the laser level so that you do not have to bend when taking measurements. In this case, it is advisable to select an integer height value: 50 or 100 cm.
We walk around the room and measure the distance from the beam to the floor at different points. The place with the smallest value will be the “zero mark” or the highest point.
You can use improvised means as beacons or buy ready-made plastic ones. They are made in the form of small vertical posts with markings and adhesive soles.
We install a beacon at the highest point. If we use plastic, then it is cut to the thickness of the future floor. We measure the distance from the beacon to the laser. If the level was initially set at 50 cm, then with a floor thickness of 3 cm, the distance to the beam will be 47 cm.
At other points we cut the beacons so that the distance to the laser is the same as at the “zero mark”, in our case 47 cm. For example, if from the beacon to the beam is 51 cm, then we need to cut 4 cm from it. Stands every square meter should be installed.
In order not to check each beacon with a tape measure after installation, it is convenient to make a template. To do this, let's take a rule that matches in length. In order not to spoil the instrument, stick a piece of masking tape and make a mark with a marker or pencil.
A self-leveling floor in a separate room can be poured without beacons; in this case, the desired floor height is marked using a laser level on the wall.
Damper tape. A damper tape made of foam material is glued around the perimeter of the room. If the floor thickness is less than 1.5 cm, it is not required, but in other cases it is mandatory.
Preparing the mixture
- We open the bags with the leveler and prepare the water. To ensure accurate proportions, we use scales. Avoid mixing by eye.
- To mix, use a construction mixer or a drill with a whisk at low speed.
- It is recommended to work together, so that one person kneads and the other pours. In this case, you need to prepare two containers for the solution in advance.
Do not mix a large amount of solution at once, as it will be impossible to lift a heavy bucket.
- After mixing, it is advisable to check the spread. We wrote above about how to do this.
Fill
Filling the surface with the solution itself usually does not cause difficulties. You should move from the far corner to the exit. The leveler will not always flow, so you can spread it using a wide spatula. The mixture is then spread using a needle roller.
After pouring, the window should be closed and the curtains drawn. After a day, the windows can be opened to remove excess moisture from the room. It is necessary to apply the topcoat within 3 weeks so that moisture does not have time to leave the solution.
Preparing the mixture
In order for the installation of the self-leveling floor to be successful, you need to properly prepare the mixture.
To do this, it is important to carefully study the instructions for the specific dry mixture that you purchased in the store. The amount of water must clearly correspond to the amount indicated by the manufacturer on the packaging. Excess liquid will cause the coating to become fragile, and the finished self-leveling floor may crack.
Measure out the required amount of water and add it to a large container. It is convenient to use a large bucket with a lid for this. After this, add the mixture from the bag to the water, stirring.
The resulting solution must be thoroughly mixed with a mixer attachment attached to a drill or hammer drill.
Mix the solution at low speed with the drill as long as necessary until it becomes homogeneous. Leave the solution for 3-5 minutes and then mix it again with a mixer. Do not leave the mixture for a long time, as this will simply harden it and become unusable for application.
Then the self-leveling floor is poured.
Carefully pour the solution from the container onto the floor, carefully leveling it with a wide spatula. A small bathroom can be filled in one go without the help of a second person, but if you are pouring a large area you will need a helper.
The layer of mortar on the floor must be rolled with a toothed roller to get rid of small air bubbles that impair the strength of the final coating.
If the room is large, do not prepare the entire portion of the solution at once.
It is best to knead the dry mixture in parts, filling the room with fragments. This will help prevent the solution from drying out, since after mixing it must be applied to the floor within 30 minutes. You should work quickly, because otherwise there will be visible seams between the fragments of the fill, and the self-leveling floors must be seamless.
After the entire floor area has been filled and leveled using a needle roller, you must wait for the coating to dry completely. You can walk on a fresh screed after a day, but complete drying will not occur earlier than after 5-7 days. Further repair work can be carried out only after the screed has completely dried and hardened.
Laying linoleum on a concrete floor
Linoleum is used very widely as a floor covering. And this is explained by the wide variety of all kinds of it, which differ in the degree of wear resistance, reliability, color scheme, texture, price and other indicators.
Advantages and disadvantages
Concrete floors are valued primarily
for an affordable price. This durable, budget-friendly flooring option:
- durable;
- durable to use;
- good waterproofing from groundwater;
- environmentally friendly;
- resistant to mechanical and chemical influences;
- has a simple installation technology;
- not demanding in care;
- fireproof.
Among the disadvantages, experts point out the complexity of dismantling and the preparatory period. To provide many of the quality characteristics of a concrete floor, it requires a protective topcoat.
Cost of self-leveling floors per m2 turnkey
Rough concrete base from 1200 rub./sq. m. Installation of concrete floors from 1200 rub./sq. m. Cement floor from 1200 rub./sq. m. Reinforced concrete floor from 1200 rub./sq. m. Topping floors from 1400 rub./sq. m. Polymer floor coverings Polyurethane floors from 1100 rub./sq. m. Epoxy floors from 1100 rub./sq. m. Methyl methacrylate floors from 1750 rub./sq. m. Conductive floors from 1600 rub./sq. m. Antistatic floors from 1600 rub./sq. m.
Prices for work are indicated without discounts. If the application area is large, prices are lower; to clarify the cost and discount conditions, you must contact our manager.
Selection of the “right” linoleum
According to technical characteristics, it is customary to distinguish between household, commercial and semi-commercial linoleum.
Household linoleum, as you might guess from the name, is laid in residential premises. Commercial – used in offices, shops, and various institutions.
Semi-commercial linoleum is an average option in quality and price between these two types.
Calculating the required amount of linoleum is not difficult.
You need to calculate the area of the room and add approximately 10 cm of margin on each side. When buying linoleum, it is very desirable to calculate everything in such a way as to avoid seams, but sometimes this is impossible, then you will have to resort to gluing the panels.
When buying linoleum with a pattern, the stock should be larger, since you will have to join the pattern, which means waste will appear. It is imperative to pay attention to the fact that the linoleum rolls are from the same batch (this can be seen on the labels).
Preparing the concrete base
Whatever type of linoleum you choose, before you start laying it, you need to prepare the base.
The quality of the base directly affects the service life of linoleum. The slightest depressions and protrusions on the surface will cause the new linoleum to wear out quite quickly. It must be smooth, free of debris and old coating, have sound insulation and thermal insulation.
Since we are interested in a concrete floor, we will consider its preparation in more detail. If the differences in the heights of the base do not exceed 2 mm per square meter, then you can simply putty the depressions and eliminate the protrusions.
For larger differences, it is worth performing a new floor screed. For these purposes, both traditional screed (concrete or cement) and self-leveling mixtures are suitable.
The advantage of the latter option is that they make it easy to obtain a perfectly flat surface and, even with a fairly large thickness, they dry much faster than a regular screed. But even in this case, this process will last several days depending on humidity, air temperature and other factors. After the base has completely dried, if necessary, carry out thermal and waterproofing of the floor.
Leveling the floor
If you decide to install self-leveling concrete floors, then, first of all, you should understand that this procedure will take a lot of time. There is an absolute plus: the process does not require special construction skills, and all work can be done independently.
Preparation
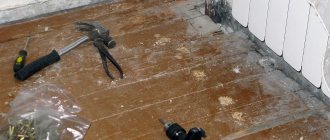
As with any screed, the procedure begins with inspecting and cleaning the old floor. Not only will the topcoat have to be removed, everything will be removed, including the previous fill. If the old concrete covering is of poor quality, it should be dismantled to the level of the slabs.
Such careful dismantling is done not only for the high-quality installation of a new self-leveling floor, but also for the reason that self-leveling floors over old concrete will eat up the height of the ceilings in the room: the minimum thickness of a concrete floor is 7 cm.
Attention! Even in a situation with a new apartment, purchased in a state of complete renovation, evaluate the quality of the fill: if the screed is soft and loose (the builders did not maintain the proportions in the mortar), it is best to dismantle such a fill.
The base must be repaired and cleaned before pouring.
Pouring concrete screed
After the base has been prepared and cleared of dirt and dust, a self-leveling concrete floor is installed.
The sequence of work is as follows:
- Base primer. Deep penetration solutions should be used. Before priming, it is necessary to repair any existing cracks or depressions. After the solution is absorbed into the surface, usually after 2-3 hours, further work can be done.
- Waterproofing. Depending on what your base will be, the film can be laid in different ways. The main requirement for rolled material is overlapping laying with the seams secured with construction tape.
- Thermal insulation. Even if in the future a horizontal heating system is installed in this area, it is necessary to lay insulation material. This will eliminate significant energy losses, which is a very significant factor at current energy prices. Before you start laying, position the slabs without fixing them to determine the best cutting. Laying the material begins from the far corner, fix the insulation, glue the joining seams and the perimeter near the walls.
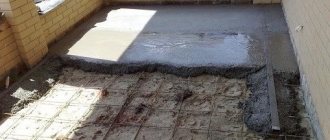
- Installation of beacons. Focusing on the zero mark, fix the aluminum guides to the cement mortar. When installing, use a building level to avoid deviations from the horizon. Beacons should be located at a distance not exceeding the size of the rule. The first line is fixed 0.3-0.5 m from the wall. After making sure that the guides are horizontal, we leave the solution underneath them to harden.
Installed aluminum beacons on cement mortar
- Pouring concrete. The solution is mixed in small portions so that it does not have time to set while you are working with the previous volume. The solution is applied from the far corner and pulled out using the rule along the beacons. Do not lean on the beacons, otherwise there is a danger of shifting the level.
- Roller work. The poured screed must be passed over with a needle roller.
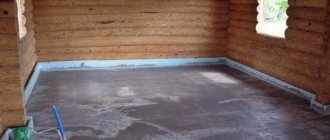
- The screed is covered with plastic film and left to gain strength.
Ready poured concrete
- The process of pouring the concrete screed will take at least 4 weeks.
- If you try to save time by placing beacons on plaster mortar, you will only add more work to yourself.
- The guides will set faster, but after pouring the gypsum will have to be removed from the screed, which will significantly add hassle and will take a lot of time.
In addition to the main rough screed, other pours can be made using concrete mortar.
Technology for laying linoleum on concrete
In the room where linoleum will be laid on a concrete floor, a constant temperature of at least +18 degrees Celsius must be maintained. Humidity should not exceed 68%. Before laying, linoleum is spread in the room and allowed to level out and “rest.”
Next, the linoleum is cut, taking into account the location of the canvases in the room.
Be sure to carefully combine the pattern and leave a margin of about 10 cm on each side. In rooms that have complex floor contours, it is worth taking a particularly responsible approach to cutting the panels. Sometimes it’s better to do an approximate cut with allowances, and then do the final cut after gluing.
Seams, if any, should be placed in the direction of light from the windows, so they are less noticeable.
For styling you may need a knife, ruler, rollers or brush. For gluing, you need to prepare special glue, mastic or double-sided tape, depending on the chosen laying method. To seal joints tightly, you can prepare special glue.
There are several ways to lay linoleum. Let's look at the most popular options:
No gluing. The fastest way.
It is used for small rooms where there is no significant load on the floor. However, there is still a risk of wrinkles and waves forming. Gluing with tape. When using this method, linoleum does not wear out so quickly. Gluing with mastics or glue.
The last installation method is the most labor-intensive, but effective. For large premises it is mandatory.
What is the best way to proceed: whether to glue the linoleum completely or use the free-spreading method will depend on the size of the room and the loads. In living rooms, hallways, corridors, of course, it is better to glue it.
Nuances of technology
Despite knowing the instructions and strictly following the filling recommendations, there are a number of nuances that professionals advise you to pay attention to:
- If possible, install the screed in one go to avoid the formation of joints between the compounds. It is better to involve more people in the work than to receive poor-quality coverage later.
- Before starting work, check the strength of the beacons.
- Always strictly follow the recipe for preparing the concrete mixture. Deviation reduces the quality of the future floor and shortens its service life.
- Evenly distribute the concrete mixture over the surface with the required layer thickness.
- To increase the density and strength of the coating, it is recommended to use a vibrator.
If dismantling is required
The recommendations listed concerned pouring a concrete screed onto the ground. In old buildings one has to face the need to remove the old foundation. If it was a concrete screed that cannot be used for further work, it should be dismantled.
To solve this problem, several technologies are used. The first two: diamond drilling and diamond cutting are carried out using special equipment. In the first case, holes are drilled in the concrete to allow the screed to be removed. In the second, the concrete is cut at the seams and removed from the base. The methods are fast, but there are nuances that limit their scope of application. There should be no reinforcement in an old concrete floor.
The third method is shock. It is labor-intensive and time-consuming, but it is the cheapest in terms of costs and has no restrictions. To perform the work, hammer drills or jackhammers are required (depending on the thickness of the coating). The downside of this technology is possible damage to the base. After removing construction debris, the surface is carefully examined, and any defects identified are repaired.
Option #1 - mastics
As a rule, mastics are most often used for laying linoleum. They are characterized by high strength and moisture resistance, which allows them to act as waterproofing.
To glue fabric-based linoleum, dispersion adhesives or synthetic bitumen mastics are used. They are applied to the floor in a layer of about 0.5 mm. Linoleum on a heat-insulating base is glued using dispersion adhesives.
The thickness of the adhesive layer on the surface is 0.7 mm. For baseless linoleum, mastics made from resins and rubber of synthetic origin are used. They are applied in a layer of no more than 0.4 mm.
There are many recipes for making linoleum glue at home. But it should be noted that store-bought adhesive is more reliable, since if you prepare it yourself there is a risk of making mistakes or doing something wrong.
Option #2 - special glue
A good glue for linoleum is quite elastic, which does not allow it to peel off under load. According to the method of gluing linoleum, compositions are divided into two types: for fixation and continuous gluing.
There are five types of adhesives for continuous bonding: one-component, two-component, water-dispersed, polyurethane and solvent-based adhesive. Water-dispersed compositions are environmentally friendly and popular. At the same time, they are quite elastic and fix linoleum with high quality.
As a more economical option, use adhesive for fixation - a special composition that has moderate adhesive ability and constant stickiness. This glue is easy to apply and the consumption is not high. It is best to buy glue together with linoleum, which will allow the seller to give full advice and offer the best option.
Having chosen the adhesive composition, you can proceed directly to the procedure for laying linoleum.
The adhesive composition is evenly applied to the floor surface with a notched trowel, sequentially spreading the linoleum and pressing it to the floor surface with a roller or brush.
Drying times vary; to find out exactly, you need to read the label and instructions on it.
Strengthening concrete floors, topping.
Concrete floors are traditionally used in areas with high loads. Often their quality characteristics are not enough, and additional methods have to be used to increase their strength. Usually these are special impregnations or toppings.
Impregnations
Impregnating compounds have a penetrating effect. To achieve greater effect, work is carried out on concrete that has not yet matured. After 1-2 weeks, when the surface can already be stepped on, the impregnating composition is applied to the concrete surface and evenly distributed with a squeegee. Excess is washed off with water, and the concrete surface is left until completely hardened.
Toppings
Fillers made from high-strength materials: quartz, corundum, metal can be used as reinforcers for topping The use of toppings is planned at the pouring stage, since they are applied to the surface several hours after pouring. Fillers are applied in several stages, each layer is treated with a sealant. Several more hours must pass before the finishing treatment is carried out so that the surface of the concrete can be stepped on without leaving marks.
Additionally, after applying the topping compositions, the concrete floors are coated with epoxy or polyurethane varnish or paint.
How to properly glue linoleum?
When gluing linoleum with double-sided tape, the procedure looks like this: first, the adhesive tape is glued to the floor, but the protective film is left. The linoleum is spread on top, then one half of the panel is folded back, the protective film is removed, spread again and smoothed thoroughly, moving in the direction from the center. Do the same with the other half of the cloth.
When laying linoleum with glue, the procedure becomes more complicated. After the panel has been folded back, glue is applied to the floor using a notched trowel (sometimes it is better to use a roller, depending on the type of glue), then the linoleum is spread and leveled. Same on the other side.
In a situation where strips need to be joined, they are laid overlapping. Bend the edges at the junction and apply glue to both panels.
At the place of application, use a sharp knife to cut through both layers and remove the trimmings, both edges are glued. This way you get an almost invisible joint. After drying, the joints are glued with a special glue for cold welding of seams, which gives them additional tightness and reliability.
We looked at various ways to lay linoleum on a concrete base. Each of them has its advantages, but the most reliable is gluing, which is carried out using special adhesives and mastics.
By following simple recommendations, you can lay linoleum yourself and get a reliable and aesthetic floor covering, which, moreover, is quite practical and does not require complex maintenance.
How to level the floor
We begin the renovation and look at the ceiling, walls and floor for a long time, and then, with a wave of our hand, we glue paper wallpaper and admire the new interior, stepping on the uneven surfaces that appear through the linoleum.
However, in our time of advanced technology, a wonderful material has appeared - self-leveling flooring. It allows you to perfectly level the surface. All that remains is to study the step-by-step technology for installing self-leveling floors with your own hands.
For modern floor coverings, and simply for the eye spoiled by today's realities, it is often necessary not just a flat floor, but a perfectly flat one.
Self-leveling is a dry mixture consisting of special components that provide good fluidity and viscosity.
In addition, self-leveling floors have extraordinary strength and durability, environmental safety and water-repellent properties. In other words, as soon as you pour the self-leveling floor solution onto the surface, it will take on the desired shape and horizontal position due to its unique components.
Also, unlike cement-sand and concrete screeds, it is enough to fill the self-leveling floor with even a minimal layer, which is usually equal to two to three centimeters. This layer will not crack and will be quite durable.
Both base and finish
Self-leveling floor is a type of screed that forms a monolithic, seamless coating on the surface, the creation of which uses self-leveling (self-leveling) mixtures. According to its purpose, it is divided into two categories - leveling base and finishing decorative coating.
Leveler
Available in the form of dry mixtures mixed with water. The presence of fine-grained fillers (up to 250 microns), mineral binders and modifiers in the composition ensures plasticity and uniformity of the solution. Depending on the manufacturer and scope of application, sub-level self-leveling floors may have a cement or gypsum base.
After hardening, a strong, wear-resistant, smooth, even surface is formed, designed for subsequent cladding.
Unlike cement-sand screed, the result is an elastic coating that is not subject to cracking and shrinkage. In addition, bulk leveling mixtures gain brand strength faster - on average, in 15 days. There are also special compositions that harden within a few hours.
The thickness of the poured layer depends on the parameters of the base, the lower limit is 5 mm. Some brands can be filled with a layer of up to 60 mm. Leveling mixtures are used as a rough coating for facing laminate, linoleum, tiles, parquet, decorative self-leveling flooring and others that require a perfectly flat base. The difference allowed according to SNiP is 2 mm/m², and levelers allow you to quickly and efficiently prepare the base.
The mixture is selected based not only on the data of the base for pouring and the required thickness, but also on the compressive strength of the screed, since different cladding requires different strengths. For example, almost any self-leveling floor is suitable for a laminate, and the most durable one is suitable for a decorative self-leveling floor based on epoxy. For technical rooms where finishing is not always carried out, it is worth using industrial-grade “fillers” with a strength of 35 MPa or more, our forum members are aware of this.
Palych R34 FORUMHOUSE Member
For laminate flooring, a floor strength of 8-10 MPa is sufficient; almost any self-leveling material will do. And for epoxy you need a strength of 25 MPa. Here only high-strength bulk liquids can cope.
Finishing
Decorative self-leveling floors have all the advantages of levelers - they provide a strong, durable, wear-resistant and perfectly smooth coating. But at the same time, in addition to an impressive set of characteristics, they also have an attractive appearance - imitation marble, ornate patterns, combinations of contrasting tones, fancy multi-colored mixes, seabed, with a three-dimensional effect (3D) and many others.
Although polymer-cement floors, intended for leveling the base for finishing, are sometimes used as a finishing coating, special decorative self-leveling mixtures are polymer, which greatly expands the possibilities of decoration. The composition of polymer floors is one-component or two-component, based on polyurethane or epoxy resin, with modifying additives. Both levelers and finishing self-leveling floors tolerate temperature changes and heating well, so they can be used in a heated floor system. But the maximum temperature of the compositions is different; when choosing, you should pay attention to this indicator.
The thickness of the poured layer varies from 1 to 8 mm, so to create decor you can use not only flat, but also convex elements - coins, shells, pebbles.
“Nivaikas” are especially relevant in high-traffic areas, technical rooms, bathrooms and kitchens. However, a decorative coating with a three-dimensional effect can decorate a living room, a bedroom, or a children's room, whether it is branded or homemade. Self-leveling floor 3D is a multi-layer coating, including:
- base layer – prepared base;
- the decorative coating itself - a three-dimensional photograph on special paper or fabric, homemade posters, pictures, drawings, fabric, small decorations and the like;
- finishing layer – transparent polymer;
- protective layer - varnish.
A self-leveling floor with a three-dimensional effect is an expensive pleasure, even if you install it yourself, and if you hire professionals, the price doubles. Simpler polymer floors, plain, imitating marble or with colored “blots”, will cost less, but still not the most affordable material. However, the decorativeness of the coating and its durability, subject to the technological process, compensate for the costs.
Pouring self-leveling floor with your own hands
When working, be sure to use crampons (attachments for boots with steel spikes, see the picture on the left).
On the surface that you are pouring, move exclusively on them; only amateurs do not do this. Using crampons, your surface will be smooth. If you don’t have professional ones, then make something similar from scrap materials.
First add water to the entire volume of the dry mixture. To do this, you can run a bath.
When you start using the bath water, turn on the water to refill. This way, you will have enough water throughout the work and there is no need to wait for the bucket to fill. If there is no bathtub, prepare other large containers, such as barrels.
Pour water into the construction container according to the instructions on the package. Pour the dry mixture into the water and mix thoroughly with an electric mixer. The container should hold the entire bag of dry mixture at once in order to work as quickly and efficiently as possible. Wet the surface with water. Pour the resulting mixture onto the floor. Stir another volume of the mixture and pour it next to it again.
Mix and pour the solution quickly until you fill the entire area. The self-leveling agent sets quite quickly, so work with two people and at maximum speed. Then level the solution over the entire surface using a squeegee. Roll the entire surface with a needle roller to expel any air bubbles that have formed. Leave the self-leveling floor to dry. After the pot life period, the solution begins to set (polymerize and cement).
This process lasts from 3 hours to a day and ends with the solution hardening to such an extent that it can be walked on. It must be dried very slowly. Avoid direct sunlight, drafts and low temperatures. Full acquisition of working properties (strength, hardness, resistance to deformation, shock, friction, exposure to water, etc.) occurs within a month.
After a couple of days, you can lay the boards on the set mortar for indoor work. After a month, when it dries and gains the necessary strength, you can fully walk on it and lay floor coverings.
Under the influence of special components, the level levels the surface and becomes glossy. To do this, you need to make a high-quality mixture and fill the self-leveling floor correctly!
The ideal solution for your interior will be 3D decorative self-leveling floors.
Making a self-leveling floor with your own hands
The goal of developing self-leveling floors was to reduce the labor costs and installation time associated with outdated leveling and finishing schemes.
A wide range of compositions are excellent in solving both problems, allowing in a short time to create a durable, perfectly smooth, monolithic surface, pleasing with tightness and the absence of seams.
Technological priorities are justifiably added to the list of operational advantages, thanks to which a home craftsman who does not have a construction specialty on his track record can fill the self-leveling floor with his own hands, subject to scrupulous observance of the rules.
Types of polymer self-leveling floors
During renovation work, it often becomes necessary to level the concrete base of a room. The best option for obtaining a perfectly smooth, environmentally friendly surface and high-quality coating is the use of polymer self-leveling floors.
Only during a detailed study and acquisition of the composition, several types are presented to the consumer, with different characteristics, properties and qualities.
Polyurethane
In everyday life, polyurethane floors are found in rooms for various purposes. A number of advantages allow the widespread use of self-leveling flooring:
- durability;
- resistance to physical stress and mechanical damage;
- the release of harmful substances is excluded;
- there is no dust formation from the composition during operation;
- the ability to apply design solutions.
The polyurethane coating is not destroyed by wet cleaning and does not deform due to temperature changes. The distinctive features of the composition allow for the pouring of floors from residential premises to warehouse hangars, even if they do not have a covered roof.
Epoxy
They are characterized by increased resistance to abrasive and chemical substances that fall on the floor surface. The choice of epoxy self-leveling floors is stopped when arranging laboratories, workshops, or working with various chemical compositions.
The stability of the coating is ensured by the resins and epoxy hardeners included in the composition. A smooth, durable coating acts as a protective barrier for the concrete base, leaving foreign compounds on its surface.
Epoxy-polyurethane
They have a composition of two components: polyurethane and epoxy. In some compositions, the presence of fine crumbs of rubber and sand is allowed. Epoxy-polyurethane mixtures are suitable for pouring bases from:
- concrete;
- wood;
- metal
The versatility of use on various substrates does not require preliminary dismantling of the existing floor covering in adjacent rooms or the decorative covering of one room.
Properties:
- waterproof;
- resistance to various loads;
- no destruction by chemical compounds;
- elasticity;
- is not affected by UV, expanding the possibilities of using the composition for covering the floors of residential, public and industrial premises.
Methyl methacrylate
Methyl methacrylate mixtures allow you to level the entire screed, which is excellent for large areas. The mixtures increase the wear resistance of the floor covering to the maximum level, expanding the possibilities of use on surfaces intended for storing various cargoes, moving passenger and freight vehicles.
The quality of the coating is several times higher than polyurethane and epoxy compounds, adding the following advantages:
- strength;
- rigidity;
- moisture resistance;
- resistance to chemical and abrasive compounds.
Rapid hardening of the composition on the concrete surface speeds up the process of repair and finishing work, without requiring additional drying. Despite the existing advantages, the liquid composition has a predominant unpleasant odor.
Specific features of self-leveling floors
With some degree of misconception, we include the following in the family of self-leveling floors, popularly called self-leveling mortars:
Despite the fact that they work predominantly in a well-coordinated tandem, are produced by the same manufacturers, and have a similar base, they are different materials, both in purpose and in installation methods. Levelers, which differ from old cement-sand mortars in their optimized spreadability and plasticity, are applied to the floor in the usual way with leveling along the beacons. They do not have the ability to independently form a flat plane under the influence of gravity.
The class of finishing mixtures is called leveling mixtures for a reason. In fact, they are self-leveling floors, colloquially referred to as liquid linoleum.
It is not prohibited to use them to eliminate large base defects, but due to the impressive cost there are few takers.
The liquid consistency and the presence of plasticizers in the finishing options ensure the spontaneous formation of a perfectly flat surface without the use of levels or placement of beacons. Their advantages are less work with incomparably higher results.
How to avoid mistakes when laying concrete
In order to save money or because of unprofessionalism, serious mistakes are sometimes made when pouring a concrete floor:
- lime cannot be added to the composition (it is used to increase plasticity and simplify the leveling process), it reduces strength;
- for the same reason, it is not recommended to use cement-lime mortars used to plaster walls;
- the liquid composition is easier to level, but it also loses strength;
- When concrete hardens, you cannot refuse to wet the surface (it will crack).
If you are not confident in your abilities, then entrust the work to professionals. The LLC PolyTek System company in Moscow provides services for pouring concrete floors. The work is performed by experienced craftsmen who guarantee impeccable results. After our work, you can be sure that your floor is in perfect order. Thank you very much for visiting our site, don’t rush to leave, read the menu, maybe you’ll find something else interesting for you.
Functions of self-leveling levelers
Levelers are needed to fill the base subfloor. However, their use as a rough basis is completely optional.
A double-primed cement-sand screed, plywood flooring or a plank floor covered with insulation would serve as a perfect base for the finishing polymer coating. It’s just that when paired, materials of the same brand work better, and there are no problems with compatibility. In addition, the polymerization of the leveler occurs 4 or more times faster than the hardening of a screed made of sand and cement.
In terms of thermal conductivity, progressive and outdated leveling materials differ slightly. Therefore, in order to increase the thermal insulation qualities of the floor, they are laid over the same insulation materials. And they are also used as a heat-conducting element in underfloor heating systems, if the manufacturer has indicated this possibility in the labeling.
Note. The “underground” water heating system is filled with leveling agent layer by layer, in at least two stages. The pipes are pre-filled with liquid at room temperature.
Where is concrete self-leveling floor used?
Loading systems, due to their wide range of operational advantages, are used in a variety of fields. Such floors are chosen where intense mechanical loads and/or aggressive environmental influences are planned. Polymer surfaces are an ideal option for beautiful and durable industrial floors, the cost of installation of which compares favorably with other floor coverings.
Where it is recommended to use floors made of polyurethane, epoxy and other compounds:
- production workshops and technical premises of factories (food, woodworking, metallurgical, chemical, pharmaceutical industries);
- warehouses of different classes (A+, A, B, CD);
- garages, service stations, auto repair shops, car washes;
- parking, indoor and outdoor parking for cars and trucks, special vehicles;
- trading floors of supermarkets, shops, boutiques;
- exhibition halls;
- lobbies of government institutions;
- apartments, private houses, made in modern styles (loft and others).
Secrets of using finishing mixtures
Thin-layer final fill mixtures can be applied over virtually any substrate. You just need to select products in accordance with the manufacturer's instructions regarding compatibility. The priority is still cement and polymer bases.
Leveling proudly appears among the functions of finishing compositions, but since they are mainly filled with a layer of up to 5 mm, it is advisable to exclude gross flaws in the “relief”. Even if the bumps and depressions can be smoothed out with a leveling mass, there is a strong argument in favor of first eliminating the defects.
Self-leveling floors of different thicknesses will harden unevenly, and strength indicators will vary significantly.
If previously the colorful range of finishing self-leveling compounds was dominated by dull gray and cream tones, now home craftsmen figuring out how to make a self-leveling floor can actively fantasize about their future decor.
The result can be a monochromatic color coating with the color specified by the manufacturer, or a 3D version with a unique pattern, covered with an epoxy transparent layer on top.
Why is composition information needed?
Regardless of the basic or final purpose, the mixtures include a similar set of components, these are:
The binding components of foreign mixtures are polymers, due to which the characteristics are improved along with a parallel increase in prices.
The formulas of dry mixtures also include dyes that determine the color of the future floor or base background for applying stencils, hand painting, banner images, etc. To increase the bonds between the hardening components of the self-leveling floor, microfibers are included in a number of self-leveling mixtures. Their chaotic direction firmly connects the ingredients in all possible directions, eliminating the possibility of cracks.
The main component that influences the choice of a mixture suitable for arrangement is its base.
Owners who want to install a self-leveling floor with their own hands need to deal with this issue before purchasing the material:
To install heated floors, you will need a leveling mass with increased elasticity, capable of expanding and contracting without forming a network of cracks.
If you want to complete finishing at an extremely high pace, you need to pay attention to fast-hardening products. There are also universal dry materials suitable for rough and final leveling; you can buy a mixture labeled “extra strong” for laying coatings without first strengthening the base. Information about specific properties is available on the packaging.
Light inside the plane
If you need to create the feeling of a podium, lighting or a flying surface, consider the option of a self-leveling glossy floor in light shades. Milk, brie, champagne - these and other neutral tones create perspective.
It’s as if light is hidden inside such a covering. This is an optical effect that is convenient to use and play with in different ways. You can reinforce it with furnishings in light, soft natural tones and velvety textures. For example, textiles: carpets, rugs. As well as natural materials and unusual finishes: wooden doors, light-colored plaster moldings, light Wainscot.
If the room has panoramic glazing or streams of light enter the room through the roof or veranda, the idea can be implemented in a minimalist manner. For example, leave the brickwork, make a light-colored self-leveling floor, and include only the necessary interior items in the design. In the evening, you can maintain the effect with spot lighting. For example, garlands or track lights.
Turquoise and stucco together with self-leveling floor and brick wall
Options for installing self-leveling floors
The layout of the floor using self-leveling solutions depends on the planned thickness of the fill, on the degree of destruction and on the material from which the base is made:
A thin finishing layer of up to 0.5 mm is poured into a fresh screed, the surface of which complies with technical regulations.
Thin-layer liquid linoleum must adhere firmly to the base. To increase adhesion, the rough base is coated with primer. Often, to improve adhesion, the underlying cement floor is pre-treated with a coarse abrasive or scraper, and then coated with a primer.
The self-leveling floor, cut off from the base by a separating layer, is placed above the wooden base and above any type of screed with a layer of 1.0-2.0 cm.
To form a separating layer between the wooden floor and the fill, oiled paper is laid with an overlap. The boundary between the screed and the self-leveling floor is created by treating the surface with waterproofing impregnation. In this case, the poured layer does not adhere to the surface of the rough base.
Thanks to the separator, the eternal movements of wood will not cause damage to the floor, and the cement screed will not draw out moisture, creating unwanted cavities and sinks in the body of the fill. By the way, according to this principle, 3D floors with a volumetric effect are arranged, only the separator is a banner with a pattern, a sticker or an original image made with acrylic paint. Floating type self-leveling floors are installed in the case of subsequent installation of laminate, linoleum, parquet flooring blocks - i.e.
coatings that tend to change in a linear direction with temperature fluctuations and unstable humidity levels. The reason for the preference for a floating floor may also be a thickness of 2.5 cm or more, which does not allow the self-leveling floor to harden without defects. The separating layer is created from polyethylene, rolled waterproofing or parchment, laid in strips with an 8-10 cm overlap.
It is necessary to lay the divider with 10-15 cm allowances on the walls. The floating layer is cut off from the walls with a damper tape used to ensure floor movement and for sound insulation.
The separator and damping material, which rises above the floor plane, is cut off before installing the baseboard and the seam is covered with it.
These are only the basic schemes for constructing self-leveling floors, which, if necessary, require modification and modernization taking into account specific conditions. In reality, there are many more options, but the principles are general.
A brief overview of popular compositions for self-leveling self-leveling floors
The table below will present several popular brands of self-leveling compounds, which can rightfully be classified as “top-end”. They have been tested both by application practice and by the operation of finished floor coverings.
For consistency, the consumption will be indicated in kg/m² for a layer of 1 mm. Hardening time – taking into account the possibility of walking on the floor.
For greater clarity, in the cost column, in addition to the approximate price per package, the specific price will also be indicated, that is, per unit area, also with a layer of 1 mm. The price level is given for informational purposes, as it can vary quite significantly by region.
Prices for parquet boards
parquet board
| Name of composition, illustration | Short description | Cost of the composition: for standard packaging, rub. / specific, rub./m² with a layer of 1 mm |
| Self-leveling floors requiring subsequent finishing with a topcoat | ||
| "Prospectors Tolstoy" | The cement-based composition is intended for leveling surfaces with large level differences. Thickness range – from 30 to 100 mm. Can be used in any room without exception and even outdoors under a canopy. Durable, crack-resistant coating with low hygroscopicity. The pot life of the solution is 40 minutes. Hardening – 48 hours. Consumption – 1.7 kg/m². Compressive strength at full maturity – 20 MPa (203 kg/cm²). Packaging – 25 kg. | 250 rub. 17 RUR/m² -1 mm |
| "Prospectors Fast Hardening" | Universal mixture with gypsum binder. For indoor use, for rooms with normal humidity levels. Suitable for underfloor heating systems, suitable for any type of finishing coating. The thickness of the layer is from 5 to 100 mm, that is, it can serve as a leveling screed. The pot life of the solution is 40 minutes. Hardening – 4 hours. Consumption – 1.45 kg/m². Compressive strength at full maturity – 15 MPa (153 kg/cm²). Packaging – 25 kg. | 290 rub. 17 RUR/m² – 1 mm. |
| "Unis Horizon universal quick-hardening" | Despite the fact that cement is used as a binder, the composition hardens very quickly due to special additives. For interior work, in rooms with any level of humidity. Fits well on any stable base. The layer thickness is from 2 to 100 mm, that is, suitable for both roughing and finishing surface leveling. The pot life of the solution is 30 minutes. Hardening – 3 hours. Consumption – 1.6 kg/m². Compressive strength at full maturity – 15 MPa (153 kg/cm²). Packaging – 20 kg. | 260 rub. 21 RUR/m² – 1 mm. |
| "Volma-Nivelir Express" | Composition based on a complex (cement + gypsum) binder. For rooms with any level of humidity. There is excellent mobility of the solution when pouring, and a long pot life - up to 60 minutes. Layer thickness – from 5 to 100 mm. Hardening – up to 6 hours. Economical consumption – 1.25 kg/m². Compressive strength at full maturity – 15 MPa (153 kg/cm²). Packaging – 20 kg. | 245 rub. 15.3 RUR/m² – 1 mm |
| "Bergauf Easy Boden" | High-quality composition of a famous German brand. Cement-based, for interior work in any premises. Suitable for any finishing coating for “warm floor” systems. The manufacturer focuses on the ease of filling, which even an untrained person should be able to handle. Layer thickness – from 6 to 50 mm. The pot life of the solution is 30 minutes. Hardening – up to 8 hours. Consumption – 1.5 kg/m². Compressive strength at full maturity is 12.5 MPa (127 kg/cm²). Packaging – 25 kg. | 325 rub. 19.5 rub/m² – 1 mm |
| "Knauf Tribon" | Top mixture of a famous German manufacturer. The binder is a complex cement-gypsum binder. Suitable for all types of finishing, for rooms with any level of humidity. Feature - the frozen layer has a certain elasticity, which allows it to be poured onto a solid wooden base. Layer thickness – from 10 to 60 mm. The pot life of the solution is 60 minutes. Hardening – up to 6 hours. Consumption – 1.7 kg/m². Compressive strength at full maturity – 15 MPa (153 kg/cm²). Packaging – 30 kg. | 340 rub. 19.3 RUR/m² – 1 mm |
| "Osnovit Skorline FK45R" | A mixture based on a complex binder, allowing for both rough and final leveling of floors with a large initial level difference. For rooms with any level of humidity, under any covering, suitable for “warm floors”. Acceptable thicknesses are from 2 to 100 mm. The pot life of the solution is 40 minutes. Hardening – 2 hours. Consumption – 1.3 kg/m². Compressive strength at full maturity – 15 MPa (153 kg/cm²). Packaging – 20 kg. | 300 rub. 19.5 RUR/m² – 1 mm |
| "Perfekta Light layer reinforced" | The composition is based on a complex cement-gypsum binder, suitable for floors in rooms with moderate load (at home - for any). A distinctive feature is the presence of reinforcing fibers in the composition, which gives even a thin layer excellent strength. Acceptable thicknesses are from 1 to 100 mm. The pot life of the solution is 60 minutes. Hardening – 2 hours. Economical consumption – 1.2 kg/m². Compressive strength at full maturity – 15 MPa (153 kg/cm²). Packaging – 20 kg. | 290 rub. 13.5 RUR/m² – 1 mm |
| "BOLARS Finish SV-1010" | Cement self-leveling composition for thin-layer finishing filling of the surface. Suitable for exterior and interior use. Even with a minimal layer (almost “scraping”) a durable coating is created, although in any case it requires subsequent finishing. Acceptable thicknesses are from 0.1 to 10 mm. The pot life of the solution is 30 minutes. Hardening – up to 2 hours. Consumption – 1.6 kg/m². Compressive strength at full maturity – 20 MPa (203 kg/cm²). Packaging – 20 kg. | 345 rub. 27.2 RUR/m² – 1 mm |
| "Weber.Vetonit 3000" | The composition of a well-known German company allows for ultra-precise leveling of the surface with a range of pouring thicknesses from 0 to 5 mm. Cement base, that is, suitable for any premises. Highest strength, reliability and durability. The pot life of the solution is 30 minutes. Hardening – up to 4 hours. Consumption – 1.5 kg/m². Compressive strength at full maturity – 20 MPa (203 kg/cm²). Packaging – 20 kg. | 622 rub. 46.7 RUR/m² – 1 mm |
| Self-leveling compounds for technical floors of increased strength that do not require subsequent finishing | ||
| "GLIMS HEAVY DUTY HD drymix" | An excellent solution for a garage or workshop is a heavy-duty cement-based self-leveling floor. Two-component - the kit includes dry mixture in a 25 kg bag and liquid hardener “Hd disp” in a 4.5 liter bucket. Color – gray, but with the possibility of tinting in the selected shade. Requires a professional approach to filling. Acceptable thicknesses are from 5 to 12 mm. The pot life of the solution is no more than 20÷25 minutes. Hardening - within 24 hours. Consumption – 2 kg/m². Compressive strength at full maturity – 55 MPa (560 kg/cm²). | Set: 1500 + 1000 = 2500 rub. 170 rub./m² – 1 mm |
| "Weber.Vetonit 4655 Industry Flow Rapid" | High-strength self-leveling industrial floor on a cement base. Perfect for a garage or workshop, as the surface retains its characteristics at any temperature and is not afraid of aggressive chemical influences. The formation of dust is completely eliminated. Acceptable thicknesses are from 2 to 20 mm. The pot life of the solution is no more than 15 minutes, which means that considerable experience is required during installation. Hardening – up to 4 hours. Consumption – 1.7 kg/m². Compressive strength at full maturity – 40 MPa (408 kg/cm²). Packaging – 25 kg. | 2200 rub. 150 RUR/m² – 1 mm |
| Self-leveling compounds for decorative finishing of indoor floors | ||
| "Krasko Polymerstone-2" | A two-component polyurethane composition that allows you to create a high-strength glossy floor covering (often called “liquid linoleum”). The original color is light gray, but it can be tinted to the selected shade. Acceptable thicknesses are from 2 to 3 mm. The pot life of the solution is no more than 40 minutes. Hardening – a day. Consumption – 1.5 kg/m². Compressive strength at full maturity – 60 MPa (610 kg/cm²). Packaging – 20 kg bucket (bucket with component B is included in the kit) | 7750 rub. 580 RUR/m² – 1 mm |
| "Elakor-ED" | Two-component clear epoxy self-leveling floor coating. Opens up wide possibilities for artistic decoration - from the simplest inserts (coins, chips, sand, pebbles) to photo compositions. Acceptable thicknesses are from 1.5 mm. There is no upper limit as such, but it is usually limited to 3, maximum 5 mm - from an operational point of view, increasing the thickness does not entail any advantages, and costs increase. The pot life of the solution is no more than 30 minutes. Hardening – three days. Consumption – 1.6 kg/m². Compressive strength at full maturity – 60 ÷ 80 MPa (610 ÷ 815 kg/cm²). Packaging may vary depending on the required quantity. Always sold as a set (components A and B). | On average, based on 720 rubles per kg of finished mixture. 1150 RUR/m² – 1 mm |
The table did not mention the compositions of the known one - and this is a clear omission. To compensate for it, we suggest watching a presentation video about a similar product line from this manufacturer:
Rules for pouring self-leveling mortars
You can pour the sealed leveling mixture onto the floor in rooms with equipped window and door openings. There should be no drafts; you should forget about ventilation using natural and forced ventilation while the floor is hardening.
The solution, without external coercion, needs to lose moisture during the ripening process. The temperature during this period should be stable without readings below 5º C and without rises above 20º C. Priority humidity is 60%.
We will assume that the leveling and climb to the planned altitude have already been completed, i.e. We have already created the base layer or we use an existing tiled, cement or plank floor as it. Next, we find out how to make self-leveling floors with our own hands and say the magic word “so.”
Preparing the surface for the upcoming treatment:
We repair a concrete or cement subfloor, widen the cracks to the width of a centimeter and fill them with a repair compound, cement-sand or a mixture intended for future filling. We cut off noticeable raised bulges with a puncher and remove unreliable segments. The cavities and small depressions remaining after removal are filled with mortar and leveled flush with the plane of the rough base.
We check the floor tiles for strength of fixation.
We treat unreliable elements like concrete hills. We fill seams and recesses with mortar. Wooden floors are repaired according to the rules for their restoration. We replace questionable elements, renew fasteners, foam the cracks, fill them with wood glue with sawdust or sealant.
We remove oil paint, grease stains, and residual detergents using solvents, then carefully remove dust and dirt from the floor with a damp cloth and a vacuum cleaner.
Depending on the chosen scheme for pouring the leveling mixture, we prime or cover the insulation layer. We place a damper tape around the perimeter if a floating floor is to be constructed.
Filling process step by step
The solution must be mixed strictly following the instructions of the material manufacturer. Violations of proportions and deviations from instructions, entailing a deterioration in technological qualities and operational characteristics, are not allowed.
Important. Polymerization of the mixture for manual pouring occurs after 35-40 minutes. after cooking. Accurate data on the life of the solution must be indicated on the packaging.
Due to the short period of time when the solution is suitable for pouring, attempts to install a self-leveling floor without an assistant must be nipped in the bud. It is better to enlist two pairs of friendly hands and initially distribute responsibilities. One prepares the mass, the second pours it, the third distributes it with a spatula or a long-handled iron.
All that remains is to list the actions, following the sequence:
We install a limiter in the doorway - a rail, a piece of drywall or profile. We will do the same if it is not possible to fill in one step in a room that is too large or if you plan to install combined floors. We fill the mass prepared according to all the rules in strips no more than 50 cm wide.
The first lane runs along the wall opposite the entrance.
Avoiding any breaks, fill in the second strip, at the same time evenly distributing the solution with a spatula or iron. And we continue like this until the end of the work.
We treat the filled layer with an aeration roller, due to which the self-leveling floor will be free of air bubbles. During processing, we move along the surface in paint shoes - shoes with support spikes on the sole.
We cover the filling with polyethylene and wait the time required according to the instructions for the self-leveling mass to mature.
If the surface needs to be given anti-slip properties, the poured floor is sprinkled with washed sand or not too zealous, expelling air from the mixture with an aeration roller. The “craters” left from the bursting bubbles will interfere with sliding.
It’s not difficult to understand the technology of applying self-leveling flooring, and it’s also easy to do it with skill. You just need to find out all the important points in advance, take into account the technological specifics and plan your actions correctly. Knowing the nuances of pouring will not harm those who decide to entrust it to workers.
Well, now it's time to finish the article. All the material I wanted to share has been reviewed. I hope it will be useful to you, and you will use it if you need to lay a self-leveling concrete floor with your own hands. Improve your own practical skills and gain new knowledge, as they say: “It’s never too late to learn!” That's all, thank you for your attention, successful and easy repair!
Materials and tools for self-filling
When starting to pour a concrete floor yourself, you need to select and prepare the necessary materials and tools in advance, so that during the work you will not be distracted by a trip to the shops.
Since the floors are concrete, you will need:
- concrete solution (you can make it yourself or buy ready-made);
- crushed stone for the damping layer;
- reinforcement and wire (must be soft) for making mesh and forming a reinforcing frame;
- heat-insulating and waterproofing materials.
For high-quality and quick pouring, the following tools are needed:
- a concrete mixer or container for mixing components, if you decide to prepare the solution yourself;
- shovels (bayonet and scoop) and buckets;
- rule and trowel (for hard-to-reach areas);
- level;
- vibrating rammer for compacting floors;
- needle roller (if we are talking about pouring a self-leveling concrete floor).
How to make a concrete floor with your own hands - step-by-step instructions for pouring a concrete floor
Compliance with the technology of laying a concrete floor is one of the main conditions for obtaining a good result. The second component of success is quality materials. If you should worry about the second at the procurement stage, then it is recommended that you familiarize yourself with the procedure for performing the work before they begin. It is important to remember that there are no unimportant moments in this process. Any inaccuracy leads to a decrease in quality and possibly a reduction in service life.
Preparatory work
Before you start pouring concrete, it is necessary to carry out a number of actions that will allow you to lay a strong, flat surface that will not absorb moisture and cause discomfort from the cold.
- Determine the quality characteristics of the soil.
- Remove soil to a depth of 30 cm.
- Level the surface.
- Remove construction waste;
- Compact the base.
- Fill in layers of sand and clay (each layer is watered and compacted).
The next stage of preparatory work is arranging markings for pouring. It is important to take into account that it is recommended to carry out concrete work at positive temperatures (at least 5 C).
Bedding, waterproofing, insulation
To evenly distribute the load on the ground, a special damping cushion is installed. For it, a crushed stone-sand mixture is used, which is poured onto the prepared surface, leveled and compacted.
Next, hydro- and thermal insulation is laid. For the first (waterproofing the floor of the room), a film is used, which is secured with tape for tightness. For the second (to get a warm floor) sheet and granular insulation: expanded clay, expanded polystyrene, polystyrene foam, mineral wool.
Floor reinforcement
A reinforced load-bearing frame is used to increase the strength of the coating and helps to avoid cracking during operation. For its manufacture, fittings are used. It is definitely worth performing the mesh reinforcement process, as it is quite simple, and such concrete floors are the most durable and will last longer, especially in those areas. premises. The rods are cut into pieces of the required length and tied together with wire. The result should be a grid with a large square cell. The smaller it is, the stronger the frame.
Installation of guides is the most crucial moment
The mixture for concrete screed does not have a liquid consistency. To get a flat surface, especially in large areas, it is necessary to install beacons. In order for the work to be done correctly, it is necessary to make the necessary markings. For convenience of pouring the screed, the interval of the drawn lines should not exceed one and a half meters.
Metal guides are installed according to the completed markings To prevent them from moving, they are secured with cement mortar by placing it near them.
How to properly prepare concrete mortar
If you have decided to prepare the concrete solution yourself rather than buy a ready-made one (it is usually used in large areas of production workshops), then it is important to study the rules for mixing the composition. Particular attention should be paid to the nuances when laying screeds with expanded clay or extruded polystyrene foam.
- Prepare the necessary list of materials: crushed stone (it can be replaced with gravel), sand, cement (recommended grade M 400), water.
- First, mix the dry components: cement, sand and crushed stone in a ratio of 1x3x5. If some part of the crushed stone or sand is more necessary, it needs to be reduced or cement added.
- The ingredients are thoroughly mixed.
- Then water is gradually poured in until the desired consistency is obtained. The liquid is poured in stages, thoroughly mixing each time.
- For small volumes, work can be done manually, using shovels. For large quantities and faster work, it is recommended to use a concrete mixer.
Pouring a concrete floor
After the exposed beacons are fixed, you can prepare the solution and begin pouring the screed.
- The solution is placed between the exposed beacons.
- The mixture is leveled over the entire surface area using the rule; in corners and hard-to-reach places it is recommended to use a trowel.
- Removing air bubbles. It inevitably gets into the composition during mixing. A needle roller is used for this.
- A final leveling is carried out to remove marks from the needle roller. When pouring self-leveling floors with self-leveling mixtures, this step can be omitted.
What needs to be done to ensure the flatness of the screed
to obtain a perfectly horizontal surface with concrete mortar. Despite the presence of beacons, the following rules must be followed:
- start pouring from the far corners of opposite walls and level the mixture towards the exit;
- Filling should be done in strips between the beacons installed from the level;
- when voids form, fill them with additional portions of solution;
- after this, it is imperative to remove the air in stages, immediately after distributing the mixture over a small area using a needle roller;
- To speed up the work, it is recommended to work in a team of 2-3 people.
Hardening and final stage of screed installation
After pouring the concrete floor, it is necessary to create conditions for high-quality hardening. This is especially important in the first two days. Rapid evaporation of moisture from the composition leads to cracking of the surface after drying. To avoid this, the surface is periodically sprayed with water. If this is not enough, it is recommended to cover the floor with film. The condensation formed under such conditions will protect the floor from cracks.
The curing time of the concrete solution must be at least four weeks. Previously, further work is not recommended. The filling technology may be broken. Concrete has not yet acquired the necessary moisture content; its water content is higher than necessary. Exceeding the required standards will lead to reduced adhesion when laying the following types of coatings.
Before continuing work, the concrete floor is processed with a grinding machine, which allows you to obtain a perfectly flat surface. Sanding allows you to give the surface an attractive appearance.