Production of embedded parts for foundations
The products are plates of various shapes with welded anchor rods made of rolled metal: channels, reinforcement, strips. Rolled metal products for the technological process are selected according to GOST. The grade determines the statistical loads of embedded parts for the foundation and reinforced concrete supports.
To produce structures, the plant uses steel sheets 5-70 mm thick, which can withstand repeated dynamic loads. Hard-melting bases, straight and curved rods with nominal diameters of 6-40 mm are made from polished and corrugated reinforcement of classes: A240 / A400 / A500C / B500C, ST Z, 10 HSND.
Treatment of cracks
When repairing cracks, you need to understand whether they are active. In many cases, the appearance of fine cracks indicates that the structure is changing shape due to temperature fluctuations, seismic activity or due to changes in soil properties. Such deformations, as a rule, are reversible, that is, the cracks close after restoration of the original shape. If, at the moment of opening, they are filled with incompressible material, after reverse deformation of the structure, an even wider crack will appear on the back side of the product.
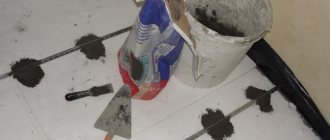
It is customary to eliminate active cracks with compounds that retain the ability to stretch and contract at least 50% of the original dimensions. It is good to treat cracks up to 0.3 mm by surface sealing using epoxy resins ELD-283, ELD-552. Wider cracks are filled to their full depth using injection: holes are drilled along the entire length of the crack in increments of 10–15 cm, through which epoxy resin is injected using a syringe. This repair method helps to significantly reduce the water absorption of concrete, eliminate the penetration of moisture and atmospheric oxygen to the reinforcement.
Concrete injection
To distinguish active cracks from inactive ones, beacons made of thickly mixed building gypsum are attached to them. On an inactive crack, the beacon will not crack or fall off. If the beacon has burst, and the crack on it is smooth, without chips, and there is a visible gap, this indicates that the fault is currently expanding. If the edges of a broken lighthouse are torn and crumbled, or one part of the lighthouse has fallen off, the crack is currently shrinking.
If a beacon inspection within a year shows that the crack is inactive, it can be sealed with an incompressible material, such as fine sand concrete of the same grade from which the structure was cast. First you need to open the crack - remove chips and crumbling particles at the edges, blow with compressed air. Depending on the width, an inactive crack can also be treated either by surface sealing with a trowel or by injecting cement mortar.
Connection methods
Anchor rods of various types of fastening of the 1.400-6/76 series are chosen for through installation of prefabricated and monolithic structures, elevator wells, strengthening of masonry, foundations, supports, floors. They reliably fix individual segments, technological channels, and impart strength.
The base is installed on concrete, the anchors are connected by overlap welding or in t-welds under a flux layer in accordance with GOST 14098-91 using automatic machines for a gas environment. The arc method is effective for countersinking holes. It is used provided that the plate thickness is 0.75% of the anchor diameter. Welding by hand welding according to GOST is not permissible.
The embedded parts MN 501-522 of groups 3, 5, 6 are overlapped by manual arc welding according to CH393-78. For the rest, except for products with vibration loads, in addition they use the relief-point hot method in accordance with GOST 19292-73, type 15.
For structures of group 2 (frames and formwork), anchor rods are not welded to the base, unless the customer, under the contract, requires the manufacture of a monolith. Products of group 6 are manufactured separately at the factory and supplied complete with rings and hooks.
When fastening fragments along the edges and under light loads, welding of embedded parts is ineffective. For this purpose, stamped blanks marked MH from rolled strip produced by cold pressing are suitable. Monolithic plates and anchors are cut out with a stamp from one strip and then folded on a special machine.
POOLS
Everything you were afraid to ask about installing mortgages
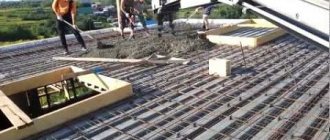
Installation of embedded elements (parts), hereinafter referred to as embedded parts, into the concrete body of the pool bowl is the first stage in the engineering work for the construction of the pool.
In this article we consider the installation of embedded concrete for a swimming pool with a bypass and a bowl suspended from supports. For other types of bowls, there are features in the installation of mortgages. As a stage, it is the totality of the work of a carpenter, mechanic and a little designer. Sometimes the bosses, as an exception, in the absence of finishers, ask to fill the openings with mortgages. A necessary and mandatory condition for the implementation of all work on the installation of mortgages is: 1. The presence of the mortgages themselves at the site. In 100% of cases, all mortgages are delivered and punctures do not happen only because they are indicated in the Equipment Specification (hereinafter referred to as the Specification), and with the article numbers. 2. Providing mortgages with appropriate fittings and pipes. The most painful place in the logistics of most swimming pool companies. The non-standardized variety of all kinds of mortgages requires the indication of the attached fittings in the Specification or the presence of a Fittings Specification as a separate application in the Water Treatment Project. The latter is also a rare occurrence in pool life. Two more solutions are a competent manager or the installer himself. The installer himself is more common than a competent manager. One “but”: the installer does not participate in the logistics process and does not receive money for this, and therefore tries not to give in to the director’s requests to help the transport department. Of course, there is a dependence of the installer’s workload on his payment system. This is a separate conversation. 3. It is good to have glue and cleaner present. Having spent all the power of his efforts on selecting transitions and angles for the embedded parts, the manager forgets about the intermediary between the fitting and the pipe - PVC glue and its assistant - the cleaner, or in common parlance - the solvent. 4. Availability of a sufficient amount of plywood 10mm thick. Having reached the site, the installation forces of the pool company discover the absence of basic plywood. After a radio message back to the “center”, they receive recommendations with the following content: - go to the nearest hardware store, market and stock up on plywood; - find plywood at a site dump, this is a construction site, after all, everything is in the waste and garbage there. 5. Providing working conditions: heat, light, electricity. Frequently occurring conditions: cold, dark and an accessible socket without an RCD is 50 meters from the pool bowl, and you have a 25-meter extension cord. However, in the morning the Sun will help you, but not in the basement. While the bowl is being plastered, they try to insulate the room with some kind of device, then nothing, you can work right on the bottom of the pool. About the socket. Suddenly, there is an outlet within the accessible radius of your extension cord, but bad luck, the construction site is in full swing and there is no free outlet. Two options: either de-energize someone with your connection or have a short, double, triple socket. 6. There is one more condition that is never specified in any Technical Conditions for installation (Appendix to the contract). This is where the vehicle is parked during installation work. It is very psychologically uncomfortable to arrive at a site and not be able to park your car properly. In addition to the fact that the parking place should be closer to the place of work, it should not cause concern. Just like the soldier who has to wrap his footcloths around his fresh head every morning, the installer should work and not worry: how is his vehicle? Has it been sucked into the swamp, since there is no asphalt or hard surface; whether a tractor or garbage truck drove into it; Did a concrete block or metal channel fall from the crane? Installing embeds requires special attention during the work, because redoing them after pouring is impossible or problematic. 7. The availability of tools, appropriate hardware and fasteners is, as it were, kept silent, since this depends only on the installer. A list of all this can be seen here. 8. Compliance with safety precautions in all its manifestations is a necessary thing, but “not mandatory”, as they say - “at the discretion of the master.” Good wording! Hence the message: hire craftsmen. Preparing the workplace Back in ancient Rome they used to say: every installer deserves the workplace that he has created for himself. The times of Ancient Rome have sunk into oblivion and we have what we have. Ideally, it would be nice to work on a table with folding legs, but even that won’t fit in every car. Therefore, everyone decides for himself how to get settled. Some people manage to do everything on a dirty floor, while others, having run around the entire construction site, find capital platforms five meters long by lunchtime and manage to teleport them to their work area. In addition to the table, you need tools, equipment and fasteners. Let's look here. When installing the embedded parts, the reinforced concrete basin of the pool itself is included in the workplace. Most embeds are installed with the installer at the bottom of the pool, which means going down to the bottom. The fastest way is to jump from the side. But in the absence of water, it is available only to young legs and then only two or three times, further depending on the athlete’s state of physical training. The average installer jumps headlong from the side to the bottom of the pool in very rare cases, and even then, in these cases, while he is flying, he does not respect himself at all. And what if after this there is also a “forceful exit” to the top of the pool? No, we don’t need this kind of sport. All movements downwards - to the bottom of the bowl and up - to the side of the pool, must be carried out using stairs. During the whole day of work you are so busy up and down the stairs that in the evening you move along the steps like a sloth on a tree. Sequence of actions when installing mortgages The description will begin from the moment of arrival at the site. The previous overcoming of the space between the house and the object, the office (warehouse) and the object has already been described earlier . The first thing to do is look for the pool itself. By interviewing workers encountered along the way on the site. The presence and location of communal amenities are also determined: water, toilet, trash can. On objects with a large territory they can be located quite remotely. As an exception, some amenities may not be available or may be located on another construction site. Regarding garbage, rarely, but it happens, they are guided by the principle: the problems of the Indians do not concern the sheriff. Embedded elements are always installed in the presence of finishers, who fill them. And then waterproofing and finishing. From them we will find out where the plywood is located, where the mortgages themselves, pipes and fittings are located. Finishers provide us with prepared openings, without metal mesh and not cluttered with foreign objects, excess plaster and pieces of concrete. The next step is to change into work clothes and carry - transport the tool and everything that is needed to the workplace. About work clothes Cheap work suits are only good if you don't work in them. When working, they immediately tear. The crotches of overalls and pants are torn, the pockets of jackets are torn, and suspenders are torn off. Experience suggests that you won’t find better work clothes than old jeans and a denim jacket, and purchasing an expensive and good pair of work kit is wasted money. This is because after installing the hydraulic circuit of an average-sized pool, your work clothes will be so stained with glue and torn that you can safely throw them away. You can call an installer a slob who wipes his dirty hands on himself, but to justify him, let’s say that the technology for gluing PVC fittings and pipes does not allow you to put the gluing elements with applied glue aside and politely wipe your hands on a special clean cloth. Everything happens quickly: glue is applied and the fitting and pipe are joined; slow down a little and the glue dries immediately. Excess glue flows wherever it needs to. The lack of laboratory conditions in the workplace makes everything worse. About tool storage Installation of embedded parts requires the largest number of tools of all types of installation work. If you immediately provide your workplace with everything you need, then during the working day you will save a lot of time on numerous transitions for something forgotten. Here, installers have two approaches. Some believe that everyone should store power tools in their own suitcase case, others that one large box on wheels is enough. The former have a bunch of all-size suitcases in the trunk, while the latter have only one large tool box. We are, of course, exaggerating, the installer’s car is completely and completely filled with all kinds of materials. And the larger the car, the more space there is. Direct dependence, however, is also a paradox. I want the car to have everything for all occasions. The lack of one transition when installing mortgages entails an additional working day and an additional trip to the site. You will also be asked to obtain this transition yourself. We agree to bear the costs for the purchase of the missing passage. And this is on a piecework basis (On financial relations with the employer). The list mentioned above will ensure that you don’t forget anything when you start work. I can't keep everything in my head. In general, it’s better to stick a step-by-step list in the trunk. You are just carrying the instrument, but you are already thinking ahead, about the next actions, and along the way you miss little things. It’s as if everything is ready for work: there is a table or its likeness, tools, fasteners, plywood, mortgages, pipes and fittings, let’s get to work. We also pull the extension cord to the workplace. What is in the project and what actually is The first step is to assess the correspondence of the number of openings in the bowl to the number in the project. It is important to take measurements of the geometric location of the openings on the sides of the bowl, whether they stand as in the project or are shifted in some direction. A large difference in the location of openings of the same type can lead to the fact that the mortgages do not line up and become uneven horizontally. The vertical difference in the installation of mortgages of 1 - 1.5 cm is insignificant. More than that, it also “does not affect the speed” if the finishing is with mosaics or film, but if it is tiles and large formats, the departure from the horizontal line is noticeable with close attention. A large discrepancy with the project, when shifting the mortgage fails to achieve the desired result, requires approval from management. Options for solving the issue by management: - put it as is, closer to the project; - hammer it with a hammer drill on your own or by the finishers; - radically - hollow out, drill with a machine in the right place. This option is rarely used, mainly in the subjunctive mood, when after laying the finish it is noticed visually. Each individual basin company resolves these conflicts differently. When working for several companies, it is necessary in each case to clarify approaches to solving problematic issues. Measuring the required size of plywood panels for embedded parts. Openings for embedded parts can be limited on all sides by concrete or free of it on top. Let's start with the first case. The size of the plywood is determined by the frontal size of the opening with the addition of margins from all of them of 5 - 7 cm. With poorly formed edges of the opening, the margins are increased to cover the flaws and there are no holes for pouring out the potting mixture. For small openings, for example for nozzles, the top margin can be omitted. This makes pouring easier, because with margins on all sides you need to make a cutout on top of the plywood and a corresponding groove for the pouring funnel. For openings with an open top, the plywood panel can have a top margin of derived dimensions, but not lower than the side level. Openings in the bottom of the pool bowl require plywood with a width equal to the dimensions of the mortgage, and a length of 10-15 cm beyond the edges of the opening on each side. We write down all the required dimensions of the plywood panels with a marking pencil on some kind of embed cut from the cardboard packaging. Cutting plywood panels The plywood sheet has a size of 153x153cm. Other formats are not used or very rarely. Plywood is cut starting from larger sizes. Small shields are also made from leftovers. Poor cutting markings may result in running out of plywood. They try not to bring in extra plywood, apparently considering it wasteful. And it is right. What to cut with? Using a hacksaw is not just yesterday, but the day before yesterday. Jigsaw or circular saw? If there is no space in the trunk of the car or for the sake of economy, then a jigsaw. If we talk about increasing labor productivity and saving time and effort, then a circular. A small-format circular tool, the so-called “parquet”, which allows you to operate it with one hand, speeds up the process by 2-3 times without tiring the worker. Marking cross To center the embed on the shield, a marking cross is drawn on it. The marking cross is applied immediately, even before cutting when marking, or after fastening the shields on the side of the bowl. What to choose? When should I draw this cross? If the openings for the mortgages are located geometrically exactly according to the project, then they can be done right away. If the openings run in different directions, both horizontally and vertically, then when installing the same type of mortgages, you will have to move the plywood to the sides, up and down, to bring it into one line and make the intermediate distances approximately the same. In this case, the plywood panel no longer covers the opening and the mortgage needs to be reinstalled. The marking cross after installing the plywood on the board simplifies the positioning of the embedded parts. Fastening plywood boards on the sides of the bowl Plywood boards for subsequent marking of positioning of embedded parts are made with black self-tapping screws 3.2 x 55mm and dowels 6 x 30mm. After installing the shields, we apply a marking cross using a laser level, making sure that the embedding fits into the opening and does not go into the concrete. We remove the shields to install mortgages on them. Fastening the embedded part on a plywood panel The embedded part is attached to the plywood using screws 20 mm long. More often M6, less often M5. The mountings of some circulation, hydromassage nozzles and vacuum cleaner nozzles can be placed on plywood in the hole, attracted by the front part or specially designed transitions. Drilling holes for mounting screws requires skill when marking. If the embed is intended for film, then we drill holes along the clamping flange, determining only the top and bottom of the embed. When there is no such flange, we screw the required number of screws into the mortgage, position the mortgage as needed on the panel, applying pressure to the screws, determining the drilling location. One note: the markup is mirrored. Attaching a PVC pipe The PVC pipe is attached to the embedded part by transitioning from a thread to an adhesive connection. The internal thread in the mortgage corresponds to the external thread of the transition and vice versa. About sealing materials (see) Threads are sealed using FUM tape, PVC thread, flax, if the embed is metal - with special glue for threads.
The latter, of course, is great, low-labor, but has not yet been tested over years of use. With the connections of metal fittings everything is clear, there is metal on both sides, and the glue sets upon contact with the metal. How PVC will affect the condition of the glue in the future is not yet 100% clear. The launch of a 25 meter pool showed that sealing with thread glue has the right to life. The use of flax for PVC transitions is only permissible for the external thread of the transition itself. The reason is that when flax is moistened, it swells and can tear the transition. With an external thread, since it is screwed into the mortgage, this does not happen. Some young installers, believing in modern progress in the production of building materials, use silicone for sealing. And it would be okay if there was some kind of special one for waterproofing, or even the simplest plumbing equipment. Basically, FUM tape is used to seal threads in connecting PVC transitions to embedded parts. A short instruction on using FUM tape FUM tape is always wound on an external thread. The threads on PVC inserts and transitions are always smooth, and in the process of screwing one onto the other, the wound tape is driven off the thread to the end. Such a threaded connection without a seal will definitely leak. The solution is to apply a homemade notch, which can be made with an ordinary mounting knife or some other sharp object. You should pay attention that the thread after applying the notch does not have too large burrs. You can't overdo it in this matter. We take the external thread in our left hand, it looks horizontally to the right. We put a spool of FUM tape on the thumb of the right hand so that by rotating the spool around the thread the tape unwinds freely. To wind tightly, we slow down the rotation of the reel with the remaining fingers. On the first turn, again, with the thumb of your left hand, press the end of the FUM tape onto the beginning of the 2nd turn of the thread or the middle of the 1st turn, make a full turn away from you clockwise and press the end of the FUM tape with the next turn. Further, the tape should not break and is wound with a force that does not allow it to break. After winding, you can seal the winding with your hand, while be careful - burrs can remain on the thread, you can get hurt. Even plastic burrs can dissect the skin. An important question about the number of turns. The question has a practical, not the theoretical solution. It all depends on the glorification of the threads of the embedded and the transition. In order to find out, it is necessary to twist the embedded and the transition, feeling the degree of glorification, the transition dangles on the thread or sits tightly. Such transitions come across that they do not completely wrap it completely, only by three turns, and then they wedge. It turned out that these Chinese transitions have conical threads and are not at all suitable. In accordance with trial trials, we use the FUM tone. They forgot to say that the FUM-Lent has a different thickness and width, the length is not critical of us. For mortgages, wide and thick fum-tapes are used: 16.5 m x 19 mm x 0.2 mm. Unipak Jumbotape is good, but there are other manufacturers. For a thread 1 1/2 ″ requires 6 - 8 turns, and sometimes up to 10 - 12. Here you need to focus on the tightening force. We twist the thread of 1 1/2 ″ with the right hand, for right -handedness, with effort to feel it, we begin to twist it with one right, then move into two hands and end with a key, the thread of 2 1/2 ″ is twisted with the key in the key The very beginning. The scientific approach in determining the moment of tightening of the transition thread does not exist because of different manufacturers of embedded and PVC fittings. If the number of mortgages is large, then everything is twisted by the key in order to maintain strength and health. At the same time, for the same mortgage, the number of turns of the fum-tapes is determined on the first mortgage. Pipe glowing into wrapped laying diameter of the pipe is determined by the diameter of the transition. The length of the pipe is taken depending on the thickness of the concrete side, so that after the side after filling the laying of the mortgage pipe it comes out by 20 - 30 cm. We cut the pipes in the number of mortgages, remove the chamfer, preferably and burrs from the hacksaw, degrease the seats of the gluing, apply, not spare, without sparing, glue on both surfaces and immediately combine one with the other. Excess glue is removed with a brush. There are two approaches to the amount of glue during gluing. At the first, the glue is applied in such quantities that the excesses are not formed, a neat boiled-slide made of glue is obtained. In the second, the glue is applied in a “fair” quantity, so that the supplanted excess glue can drip from the outer place of the gluing. The first approach is good, but fraught with non -stingy. Changing sensations for psychological, physiological reasons can contribute to an error in the amount of adhesive. The second approach entails excessive glue consumption. Two approaches can be compared during the repair process to eliminate the detected leakage. The time for this elimination can be spent 20 minutes, or half a day can be. Given the exit to the Obvyk is a whole working day. To withdraw pipes to technical interference in some embedded, angles of 90 and 45 degrees are used. Grounding metal embedded metal embedded (stainless steel, brass, bronze) makes sense to ground for several reasons. The first, the flow of water helps to accumulate static electricity, the second - wandering currents into the Earth surrounding the pool building can cause the wrapping of metal metal metal. Wandering currents of high intensity are close to the railway, power lines, pipelines. Together with disinfection, these currents, if they are not diverted through grounding, can eat metal not only of mortgages, but also flasks of heat exchangers, ultraviolets, metal pumps, etc. Almost all metal embedded spins or bolts M5 or M6 with washers and a nut for connection of grounding wires. However, some mortgages do not have such a device. For example, the Pahlen 300 W mortgage lantern has no grounding, and the Hugo Lahme has a 300 W bronze lamp. All grounding wires of the entire pool equipment, including mortgages, should be connected to the grounding bus, a metal tape, which is attached everywhere where there are conclusions of grounding wires. As a rule, for grounding, the PV-3 wire with a cross section of 6 mm, less often 4 mm, is yellow-green is used. For high -quality contact, crimping tips are used. In the absence of a thread to join the grounding wire, the contact of the wire core with the metal of the embedded housing is carried out using special clamps, tape clamps. Ready -made mortgages are installed in previously made mounts. Pour the mortgages pour the openings - the matter is simple, but first should be put on the back of the bowl of the pool of the formwork and have an appropriate baying mixture. Typically, formwork is made from the same plywood x10mm as the embedded. It is also placed on self-tapping screws, the only thing that happens with pieces due to the structural configuration and with a hole for the pipe and grounding wires. The plywood shield of a large opening of a large opening is enhanced by a board or bar, so as not to squeeze it out when filling. Small openings as a reverse formwork are laid before pouring with pieces of insulation foam. The cracks are poured with sealing foam. If a small bedtime does not allow you to use a perforator to fasten the formwork, the plywood is simply bursting with the segments of the board. After solidifying the cameline solution, the finishing fines are dismantled. The filling of the embedded opening is made by a special unsuccessful mixture. In order to reduce the amount of expensive, unsaturated composition, small granite crushed stone is added. The peculiarity of the use of granite crushed stone is that it is necessary to act quickly: crushed stone is heavy and in a liquid mixture is besieged at the bottom of the mixer capacity. When delaying it in the fill, there is no remaining. In addition, a large filling hole is required to fill with crushed stone. The remaining features are known in practice. To save, confident pool builders use ordinary sand concrete as a filling, which, upon formation, gives a shrinkage, forming the cracks. It requires, to some extent, vibration (realized by the method of tapping with a heavy object along the plywood of the mortgage). Tools and devices for pouring embedded openings:-extension wire; - container for the preparation of the mixture; - Special mixer or punch with a mixer nozzle; - plastering bucket; - Home -made funnel from tin, plastic bottle or other safety precautions during work.
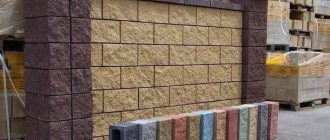
Range
The plant produces the following types of embedded parts:
- “uniforks” with angular and spherical rods;
- open/closed with anchors on one or both sides;
- single and double “tables” with six mounting points;
- structures of complex shape with a slope;
- round with flat parts;
- embedded parts of the support foundation in the form of flat bases for reinforced concrete products.
In the design documentation, the elements are designated: MS, MN, ZD, MI with the addition of serial numbers.
Causes and types of damage to be repaired
Almost all concrete products are deformable and can change shape when the operating loads change. The concrete mixture itself has extremely low tensile strength, which is compensated by the reinforcement of the structure. However, this does not completely solve the problem: cracks still form in the concrete, but they are microscopic in size and much more numerous.
Thanks to reinforcement ties, concrete gains durability: small cracks do not affect the strength characteristics in any way, and the limit of permissible crack opening is determined by the technical standards for the product. However, over time, even small cracks expand due to friction and erosion, and it is also possible that the operating conditions of reinforced concrete will change to less favorable ones, which will cause accelerated wear of the structure.
Externally, such phenomena manifest themselves as the opening of wide and deep cracks, as well as in the form of detachment of parts of concrete, up to the exposure of the reinforcement frame. The main reason is water, which saturates the pores and, expanding when freezing, destroys the concrete shell from the inside. If water reaches the reinforcement, the latter intensively corrodes, while the swelling rust prevents the adhesion of concrete to metal and tears the structure from the inside.
There are 5 degrees of damage in total:
- Dirt, pitting and shrinkage cracks.
- Chips, peeling and deterioration of the surface.
- Solid punctures, rust spots, inactive cracks up to 0.2 mm.
- Cracks larger than 0.2 mm, formation of stalactites.
- Breaking off of large pieces with exposed reinforcement, formation of voids and delaminations.
The types of damage are divided into:
- not affecting the properties of the structure;
- shortening the service life (thinning of the protective layer);
- reducing load-bearing capacity (excluding part of the reinforcement from work due to exposure).
In general, we can say that if, due to the exposure of the protective layers of concrete, there is no deformation of the reinforcement frame, the product can be restored relatively easily. The exception is cases of deep corrosion - when, when trying to get to the reinforcement undamaged by rust, it is discovered that the entire frame is affected by it. Then the product is considered unsuitable for use and must be replaced.
Manufacturing cost calculation
The price of embedded parts per ton depends on the shape, batch size, steel grade, and production technology. The cost is calculated on the plant’s website for a specific order by specialists who know the specifics of the process. Price for embedded parts from the price list:
| Series | Price |
| MN for fastening metal structures | From 1000 rub./per ton |
| M and MS for heavy concrete | From 60 rub./kg |
| MI 1-45 for equipment installation | From t 70 rub. / kg |
| Unified POs | From 80 rub. / kg |
Elimination of major defects
If the repair of cracks was not carried out in a timely manner, destructive phenomena affect the protective layer of concrete, which leads to the spalling and shedding of large fragments. The surface of the concrete is dotted with wide but shallow cracks and pits; when you tap with a hammer, a booming sound is heard - voids have formed under the surface.
In such cases, the protective layer of concrete is restored, having previously removed all remains that have been destroyed. Quite often it is necessary to clean off rather thick layers of loose and crumbling concrete from the surface of gouges and holes. It cannot be left, because the strength of damaged concrete is significantly lower than the design strength.
The cleaned surface is subjected to texture - with the help of embossing, many small notches are left, which contribute to better adhesion of the new layer to the old one. The edges of the restored area are trimmed with a chisel, forming a smooth edge with a depth of at least 10 mm.
The concrete mass is applied either with a trowel in layers, or by spraying under pressure - this method is the most technologically advanced and effective. After restoring the protective layer, the concrete requires maintenance for 7–10 days, which consists of periodically moistening the surface and monitoring the boundaries of the sealed areas.
When the reinforcement frame is exposed
If concrete destruction occurs to the depth of the reinforcement, repairs must be carried out immediately. Further weakening of the mass can lead to the reinforcing rods bending and the structure irreversibly losing its properties.
First of all, it is necessary to cut the concrete deep into the reinforcement and make sure that corrosion has not affected the metal at a depth of more than 50–60 mm. If the damage is deeper, the frame should be exposed until areas unaffected by corrosion appear. If, due to rust, the diameter of the reinforcement has decreased by more than 10%, the frame must be strengthened. To do this, a new one is tied to the existing rod; the length of the overlap with intact reinforcement must be at least 40 diameters.
Also, when eliminating defects with exposed reinforcement, it is practiced to tie a reinforcing mesh to the frame. It allows you to avoid sliding of a thick layer of fresh concrete and at the same time prevents the opening of new cracks in the problem area.
Steel elements must be thoroughly cleaned of rust, efflorescence and other contaminants. The reinforcement must be thoroughly washed with an acid-free rust converter and then coated with thick cement laitance using a brush. Without waiting for it to dry, the damaged area is filled with fresh concrete. The procedure for preparing the edges and surface of large gouges was described above.
Repair of reinforced concrete structures
Modern buildings are made of reinforced concrete slabs, as they are durable, and such structures are stable and durable. Under the influence of unfavorable external factors, destruction can begin much earlier, which leads to consequences that threaten the integrity of the building and even the lives of people nearby. Timely maintenance, detection of the first signs of destruction and their elimination will protect against emergency situations and save money spent on repair work.
At risk of destruction, first of all, are structures where there is constantly high humidity or where chemicals are present. A prerequisite for the destruction of the reinforced concrete structure can be sudden temperature changes and significant load on the tiers of the structure.
Rules to be followed
There are three main requirements for repairing reinforced concrete products. The main one is that the repair composition must be identical, or at least compatible, with that which was used in the construction of a specific part of the concrete structure. There are no special problems with polymer materials in terms of compatibility, however, mixtures based on a cement binder should be selected carefully, taking into account the type and brand of cement, the type and fraction of the filler, the water-cement ratio and the presence of additives. If the repair area turns out to be heterogeneous, due to the difference in physical properties, the fresh composition will quickly break off from the surface.
The second rule is to observe the temperature regime. Repair work is prohibited if the temperature in the local area exceeds 10 °C or below +5 °C. In addition, there are requirements for structures that are subject to increased influence of thermal expansion - building frames, supports, floor beams, reinforced concrete products operating in direct sunlight. Their average temperature at the time of repair should not exceed 20 °C.
Rule three: at the time of repair, the concrete should not be saturated with water. It is only allowed to wet the surface and wash out the cracks before applying the repair compound, but you should wait until the moisture is completely absorbed. If it is not possible to dry the concrete structure, a modifier should be added to the repair mixture to ensure adhesion to wet concrete.
Types of damage to reinforced concrete structures
Despite the fact that the service life of reinforced concrete structures reaches 30 years, after some time the first elements of destruction begin to appear. If surface defects are found, it is necessary to classify them in accordance with regulatory documents to determine a method for their elimination. Based on the following recommendations, after a visual inspection of the surface, you can determine the degree of destruction:
- Inspect the concrete for discoloration - a slightly pinkish tint is a sign that the surface has begun to wear. If sections of the structure become reddish or yellow-brown, the structure must not be used.
- Protrusion of reinforcement up to 40 cm in length does not affect the properties of the structure and can be eliminated using normal repairs.
- Peeling of layers on a surface with an area of more than 50 square cm. and up to 5 cm deep - a defect that can be eliminated and subject to repair.
- Small cracks - up to 1 mm - can also be repaired without interrupting the operation of the structure.
Return to contents