How and with what to grout a concrete floor: a complete guide
Concrete flooring is a popular solution that is often used in garages, shopping centers, warehouses, utility rooms and residential areas. The final stage of creating a high-quality concrete screed is its grouting. This can be done manually, but the work is done much faster and more efficiently using a special trowel, popularly called a helicopter. After pouring concrete, traces of the rule and small pores remain on its surface, and in order to properly level it, you cannot do without grouting. In a garage or warehouse, after grouting, you can leave everything as it is, but in the house, laminate, parquet, tiles or other flooring are laid on a leveled concrete surface.
Scope of application
Leveling the concrete screed is necessary when pouring cement mortar into the screed:
in parking lots; in warehouses, hangars, production workshops; in shopping centers; inside social facilities and public places; in industrial buildings; in areas with high vibration exposure; in places where heavy vehicles are stored.
However, it is not recommended to trowel concrete in:
residential and domestic premises; premises where aggressive chemicals are stored; laboratories; premises where sterility is required.
What is grouting a concrete floor, is it necessary to do it?
The process of creating a concrete floor consists of several operations, and in order to obtain a high-quality, durable and durable coating, it is necessary to follow the technology of performing the work at each stage.
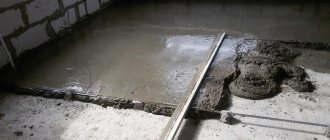
After the required layer of concrete has been applied to the floor and leveled over the surface using a rule, a stage called grouting begins. To understand the role of this stage of work, you need to understand what happens to the concrete after it is applied and leveled.
After applying concrete, the large particles of sand and crushed stone included in its composition are lowered into the lower layers, while the fine fraction and concrete laitance are squeezed up. After the moisture dries, small voids, cracks and irregularities remain on the surface, all of which significantly reduces the strength of the screed and worsens its appearance.
We can only see external imperfections of the surface, but in addition to them, microvoids also appear in the upper layers of concrete, which leads to a decrease in the adhesion strength of sand and crushed stone particles to each other, and this causes peeling of the top layer. As a result of this, significant depressions and potholes soon appear on the surface. Such a floor not only loses its appearance, but also needs to be repaired, which costs additional money and time.
To avoid the described disadvantages, it is necessary to grout the concrete floor; this can be done manually or using special troweling machines.
Additional processing
For additional protection of the floor surface from moisture, special polymer impregnating compounds are applied to the concrete surface. Impregnation clogs the smallest pores, binds microscopic particles of the top layer, which protects the concrete from dust and accidentally spilled aggressive liquids. Impregnation can be easily done with your own hands using a velor roller or brush, as shown in the video.
After completing all of the above technological operations, all that remains is to cut the expansion joints and seal them with special sealing materials. A high-quality concrete floor that can withstand significant loads is ready for use.
How to grout concrete floors
Depending on the surface area of the concrete floor, its grouting can be done manually or using special trowels (helicopter). This operation allows for forced additional compaction of the top layer of the concrete floor, which leads to an improvement in its characteristics. To harden the surface of a concrete screed, grout mixtures called toppings are used.
Regardless of whether grouting will be done by hand or by helicopter, in order to obtain a high-quality surface, this process must consist of the following operations:
- rough grout, it is necessary to compact the top layer and squeeze out the cement laitance;
- finishing grout;
- coating with liquid polymer, this allows you to close small pores;
- cutting expansion joints.
In order to correctly complete all the stages of creating a concrete floor, you must be able to determine the moment when each operation begins. If you don’t know how to do this, then it’s better to invite specialists.
Grouting by hand
If the area of the concrete floor is small, then it can be grouted manually. To get the maximum effect from this operation, you need to correctly determine the time when you can begin the work. If you put a board on a concrete screed and step on it, and after that there is no mark left on the floor, then it is too late to grout. If the depth of the mark is 2–3 mm, then this means that it is time to start grouting the surface.
Required Tools
To grout a concrete screed manually, you will need a minimum set of tools:
- spatula or trowel;
- grater;
- grater;
- a trolley for applying the topping, but you can also do it manually;
- knee pads
What mixtures are used and how to prepare the composition
When the work is being done on a small surface, then you should not buy ready-made toppings, since they are usually sold in large packaging, and you will not have time to use it up. Most home craftsmen use regular dry cement when grouting concrete screeds.
You can use cement and sand in a 1:1 ratio. The main condition is that the mixture should not have any foreign inclusions; the sand is taken of a fine fraction. After preparing such a topping, it is necessary to sift the composition through a fine sieve again, since the presence of large particles will negatively affect the result of grouting the floor and its appearance.
Some home craftsmen like to experiment and add quartz, liquid glass and other components to the topping composition. Their proportion is determined experimentally. If you want to give the floor higher characteristics, then you need to purchase ready-made toppings. They can be quartz, metallized, corundum and give the surface different characteristics.
Depending on what load is expected on the concrete floor, the amount of topping that needs to be applied per 1 m2 will depend:
- if the load is small and medium, then 5 kg is enough;
- if the load is medium and high, then 5–8 kg;
- when using colored compounds, they must be at least 5 kg.
Sequence of work
You can begin this stage of creating a concrete floor after the moisture has evaporated from the mixture. Before you begin to trowel the concrete screed, if there are beacons in it, they must be pulled out and the grooves sealed with mortar.
Concrete should be grouted immediately after the water evaporates. To perform the work, polyurethane floats are used, which are pressed tightly to the surface. In order not to damage the screed, you need to use special knee pads, which you can purchase or make yourself.
Depending on the ambient temperature and air humidity, grouting can begin in 6–8 hours. This technological process consists of the following operations:
- The prepared topping is evenly distributed onto the surface to be treated. The prepared mixture can be applied to a small area by hand, and for a more even distribution, it is better to use a sieve. You need to wait a little until the applied mixture begins to absorb moisture. The fact that you can start grouting will be indicated by darkening of the applied composition.
Preparing the coating solution
Before starting work, do the following:
- The surface is moistened with a sprayer. It should be uniform. To do this carefully, the surface of the wall is divided into square sections.
- After 18-20 minutes, you can start preparing the coating solution. It is applied with a trowel, then leveled with a wide spatula.
- After the covering has set, the main part of the processing begins.
When working with a spatula, you need to press firmly. This will allow you to evenly fill the unevenness of the wall. The thickness of the coating should be no more than 2 mm.
To prepare cement mortar for covering, take 1 part cement and 3 parts sand. For lime-cement you will need 1 part cement, 1 part slaked lime and 3 parts clean sand.
To prepare the solution, carefully select sand. It should be fine-grained and very clean. It is necessary that the size of the grains of sand does not exceed one and a half millimeters. Coarse sand is used if the surface is being prepared for tiles.
The effectiveness of leveling depends on the consistency of the mixture - too thin will not provide the required surface strength, and too dense will be difficult to level properly.
Two methods of grouting concrete - consider them step by step
When creating concrete screeds on the floor, the key step is grouting using special machines or manually. Grouting concrete allows the floor covering to acquire certain operational and aesthetic properties, which significantly extend its useful life and make it able to withstand high mechanical and abrasive loads. After laying the concrete screed, small roughness, unevenness, and pores remain on the surface, which can be eliminated by high-quality grouting of the coating.
Mixtures used
Most grout mixtures have Portland cement as their main component. The composition contains various components with a high degree of hardness, modified additives and polymer fibers that increase strength. Different compositions have their own advantages and disadvantages; it is necessary to choose a substance depending on the requirements for its wear resistance and strength.
There are the following types of strengthening mixtures:
- Quartz, which are used for working with concrete floors with expected light loads.
- Corundum - suitable for treating concrete floors designed for high loads. The cost of such hardeners is much higher than that of the previous group, but they are more durable.
The polymer fibers included in concrete grouting mixtures can provide additional strength and reinforcement to the substance. The grout mixture may also contain coloring pigments that perform a decorative function.
Grouting concrete is the key to perfectly smooth and wear-resistant floors
For mechanical smoothing and grouting of freshly laid concrete floors, special smoothing machines are used, which are also called “helicopters” for their peculiar appearance, somewhat reminiscent of rotating helicopter blades. It is no secret that concrete floors are usually laid in parking lots, garages, warehouses and industrial premises, i.e. where great wear resistance of floor coverings and unpretentiousness during their operation are of great importance. Of course, a concrete floor is practical, but not everyone is satisfied with just practicality, some want variety, and in this case, troweling machines are used for smoothing gypsum and cement-sand screeds, under floor coverings such as PVC tiles, linoleum, carpet, etc.
Smoothing and troweling are two sequential concrete finishing processes performed by one tool - a troweling machine - and both processes are used to produce a smooth surface at the final stage of concrete processing to make the top layer of the concrete floor smooth and wear-resistant. Moreover, a trowel is necessary when using the technology of rubbing special dry compacting mixtures (toppings) into the surface of freshly laid concrete, which increase strength, wear resistance, impact resistance and can give the coating an aesthetic appearance.
Treating the concrete surface with a trowel, an excellent option is the Tremix G Combi E855 concrete trowel, is carried out after the work of laying, compacting and leveling the concrete mixture has already been completed.
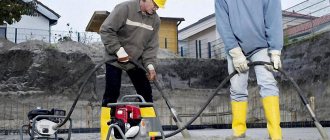
Safety regulations
When working with a smoothing machine, the operator must strictly follow safety regulations that provide protection from various hazardous production factors. Among them may be burns from alkalis present in the concrete mixture, toxic fumes from fuel, the possibility of ignition of this fuel, exhaust gases emitted by the power plant, and noise during operation of the machine. Therefore, an operator who knows the instructions and safety rules well is allowed to work on a helicopter .
The operator must be dressed in a special work suit made of thick fabric, closed comfortable shoes and have personal protective equipment such as glasses and earplugs. The machine body must be protected with special guards, and the operator must maintain a safe distance from moving parts of the equipment. It is also necessary to carefully ensure that legs, arms or hanging items of clothing do not fall into the danger zone. It is also prohibited to operate the equipment if there are malfunctions in the operation of its engine.
Features of concrete screed for grouting by helicopter and manually
The question of how to make a concrete screed for grouting by helicopter or by hand worries many businessmen. Concrete floors and coverings are found in almost every building. The concrete screed acts as the base of the floor. Laying a fresh screed can be divided into several stages: reinforcement, pouring, vibrating, leveling with a lath or rule. Even a person with no experience can do this.
Scheme of concrete screed.
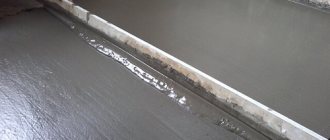
Making a concrete surface perfectly flat and smooth is quite problematic: small defects and irregularities, marks from the rule, small pores, and filler (crushed stone) may still appear on the surface. The final stage of the screed installation is its grouting. Grouting a concrete floor by hand can be done independently for small amounts of work. For the same purposes, a concrete helicopter was created. Using it, a smooth and beautiful concrete floor is created without much labor.
Grouting concrete by hand
This procedure helps to compact the concrete, helping to make it strong, dust-free and non-crumbling. When grouting concrete, the main thing is not to miss the moment when the screed is ready for this procedure. You can check it by stepping on a board placed on the floor. If there are no marks, it is too late to grout.
Tools for grouting concrete by hand.
If it leaves a mark more than 2 cm deep, it is too early to start work. If you can smooth out this mark, the screed is ready for grouting. The screed will reach its final readiness within a month, going through several stages. First, the surface dries, then a quarter of the layer, then the entire layer. It is important to prolong this process, and to prevent cracking of the top layer, the surface must be constantly moistened.
Concrete should be grouted immediately after the water evaporates. Before grouting, it is necessary to remove the beacons and seal the grooves left behind by them. If the surface is dry, it must be moistened generously with water. The screed is grouted using polyurethane floats in a circular motion. In this case, the grater must be pressed tightly to the surface. You need to place knee pads under your feet.
Grouting a concrete surface by helicopter
When concrete surfaces are grouted, the ceiling and floor treated with a helicopter acquire special decorative and performance properties. They not only become smooth and even, but are significantly compacted, eliminating the appearance of “cement laitance.”
Stages of pouring and grouting concrete mixture.
Grouting of the screed should be done over the entire surface area. The surface, as with manual grouting, must be moistened with water. The junction areas of the screeds should be rubbed down manually. The most favorable period for the procedure is the next day after installation. During the day, the top layer of the screed may not yet gain strength, so all the shortcomings can be corrected quite easily.
What is a concrete helicopter?
Grouting machines are mainly used in large-scale construction. Working with them requires compliance with certain safety regulations.
They can run on either fuel or electricity, but have a common operating principle. The engine rotates a mechanism on which special attachments in the form of blades with replaceable disks, metal or chipboard, are mounted.
Helicopters (or fans) can be single-rotor or double-rotor. They differ in the position of the operator during the grouting process. A single-rotor helicopter is controlled by an operator who stands on his feet and controls the machine using a long handle. The single-rotor mechanism is portable and weighs 30-70 kilograms.
Diagram of a helicopter for grouting/
It performs rough scraping and trowelling of concrete and is used to work on any concrete surface. Its advantages include maneuverability, ease of use and efficiency.
A two-rotor trowel can already be compared to a small car. It weighs a lot. On a twin-rotor helicopter, the operator sits and controls the operation using a steering wheel and several buttons. This mechanism is designed for grouting large areas. This eliminates human contact with the surface being smoothed. The disadvantages of such a machine include excessive cost and poor maneuverability.
Wall machines are designed for grouting doorways, sharp corners and various areas of the floor. In most cases, they operate on small electric motors and have a limited working surface diameter. A semi-dry screed trowel cannot always be classified as a separate mechanism. It is characterized by relatively small dimensions and working coverage. Designed for indoor work, its weight does not exceed 40 kg. It is maneuverable, convenient and consumes little energy.
Some features of plastering other ceilings
Wooden ceilings
Mesh for ceiling plaster
Plaster on a wooden ceiling
Before applying the plaster mixture, a metal mesh with cell sizes of 100x100 mm is attached to the ceiling, or two-layer shingles are filled so that the nail heads do not extend beyond the slats. This is done to avoid cracking and shedding of the plaster, especially if the house has a residential attic or second floor. The plaster is applied in two layers, each of which is carefully leveled with a spatula and dried.
Plasterboard ceilings
Ceiling plaster from plasterboard
The process of plastering plasterboard sheets involves filling dents and joints with a building mixture. In cases where the gaps between the drywall blocks are significant, experts advise using serpyanka in the necessary areas. However, it should be remembered that the maximum layer thickness in areas not covered by the mesh cannot exceed 15 mm.
Application of decorative plaster
Decorative plaster
Decorative plaster
There is also a so-called decorative finishing of ceilings, in which the surface treated with plaster is not further puttied. This finishing method allows you to get an interesting texture and unusual design solutions, especially when combining different application techniques.
Ceiling decorated with decorative plaster
PlasterRelief texture of decorative plaster for the ceiling
The ceiling, plastered and treated with P150-170 grit sandpaper, is ready for further work. As a rule, it is impossible to level the surface “to zero” without using putty.
Applying topping and grouting by helicopter
Concrete adjacent to doorways, walls and other structures must be rubbed down first, since it hardens here faster than in the rest of the area.
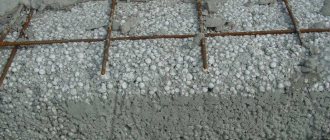
If a surface hardener (topping) is used, it should be carefully scattered over the surface of the screed, trying to distribute it evenly.
Topping is a strengthening concrete mixture that is used to treat the top layer of concrete.
Topping floor installation.
Topping floors have found their application in industrial and warehouse premises. They do not generate dust and are easy to care for. They are also affordable, especially when compared to coatings made from polymers or water-based hardeners.
Depending on which topping you choose, the floors in the production area will be prepared for certain loads. Concrete topping is most often distinguished by the type of fillers:
- Quartz.
- Corundum material.
- Metal particles.
Quartz topping for floor screed is more budget-friendly, the corundum version is more expensive, but is more durable. Topping can be of different colors. In addition, the choice of strengthening mixture depends on the operating conditions of the concrete floor. The topping, in which the concrete is supplemented with stainless metal fillers, will protect from significant mechanical loads. A mixture with quartz or corundum is intended for floors that are not subject to aggressive physical and chemical influences.
Concrete topping has a number of advantages. Among them:
The color of the grout should be as close as possible to the color of the finishing material.
- Impact-resistant and dust-free.
- Wear resistance. If you apply topping to concrete grade M 350, the strength in the top layer will be comparable to grade M 800; the operational life of the concrete floor is extended at least five times.
- Chemical inertness. Concrete topping can withstand the effects of gasoline, diesel fuel, and oils.
- Decorative. Topping can give a concrete surface a grainy, smooth, or mirror-like appearance.
- Hygiene. Concrete topping is easy to keep clean and simple to use.
- Insulation. After processing, the hardened top layer acquires antistatic properties.
According to the technology, topping should be introduced into freshly laid concrete immediately after it has been leveled with a vibrating screed and first leveled by a helicopter using a special trolley for introducing topping. The dry mixture must be spread evenly over the surface of the screed and rubbed into the base with a trowel.
When adding topping for the first time, add 2/3 of the total volume of the mixture. Next, the first rough grouting is carried out by helicopter. It must be done after the surface has darkened, which means that the topping has absorbed moisture from the concrete.
The remaining part is introduced immediately after the completion of the first rough grouting. This is done so that the concrete has time to become saturated with moisture from the cement laitance before the water evaporates. The degree of required impregnation is also determined by the darkening of the surface. After this, you need to start the second rough grouting. After two rough grouts, the strength of the concrete will increase.
Consumption depends on the expected load on the floor and is:
- for light and medium loads - less than 5 kg/sq.m.;
- for medium and heavy loads - from 5-8 kg/sq.m.;
- minimum consumption for colored compounds is more than 5 kg/m2.
At the stage when a person’s foot leaves a mark about 1 mm deep, it is necessary to finish grouting the floor screed. It should be carried out using the finishing blades of the helicopter.
Tools for work
A classic solution is a grater made of wood. But there are sponge, foam, and metal varieties. Each of them has its own varieties. To moisten the layer, be sure to purchase a spray bottle. There is also expensive automatic equipment for mechanical processing, which allows you to go through every square meter.
To moisten the layer, be sure to purchase a spray bottle.
Sanding block
This is the base to which handles with clamps are added. Separately attach sandpaper or sanding mesh. Worn sheets of sandpaper require periodic replacement, so it is recommended to take care of some supply in advance. Mesh is preferred in most cases because it does not wear out as quickly. After this, normal painting is carried out.
This is the base to which handles with clamps are added.
Grout sander
Saving effort and time are the main advantages for this material. They also note the absence of dust. Thanks to modern technology, you can work for a long time without feeling tired. The mechanized method is always more convenient and faster.
Saving effort and time are the main advantages for this material.
What type of sandpaper is needed for grouting?
This is most often determined experimentally. It is enough to try several pieces of different grain size on small sections of the wall. Papers that are too smooth will fail quickly. But a rough surface will not give such a quality finish.
Sometimes different grain sizes are used sequentially. This depends on what the walls will be covered with in the future; the same rule applies to the floor.
It is enough to try several pieces of different grain size on small sections of the wall.
Graters for grinding
The disadvantage of foam soles is that they wear out too quickly. But low prices make the tool affordable, including for replacement as needed. A sponge grater can be called a universal tool that is used for wet leveling. One of the models has a stainless steel base. This grater will last a long time.
A sponge grater can be called a universal tool that is used for wet leveling.
How is a concrete floor screed rubbed?
Concrete is rubbed manually or using special equipment. At the same time, automation of processing allows reducing labor costs and ensuring effective results. There are two ways to remove irregularities:
It is worth noting that such work is carried out in stages, in order to ensure increased operational benefits of horizontal coating. When grouting, a topping consisting of sealants is rubbed into the surface, which increases the wear resistance and aesthetics of concrete. Each stage has its own characteristics.
Key differences between the rough grouting stage
The process of the rough stage of grouting the coating is carried out after the concrete has gained initial strength (approximately 3-7 hours after laying the mortar). When processing, it is recommended to use special grinding equipment equipped with blades (“helicopters”) or a disk.
First you need to treat areas near doorways and columns, since in these places the mixture sets quickly. The concrete surface is evenly covered with sealant (two thirds of the total amount). As soon as the solution is sufficiently moistened (the coating darkens), you can begin rough grouting. After sanding the coating, spread the remaining topping mixture so that it has time to absorb the remaining moisture.
Features of finishing grout
The final stage of work is carried out approximately half a day after rough grouting. For this purpose, the machines are equipped with polishing blades, which allow you to achieve an almost mirror-like shine with the proper experience and dexterity. After finishing, the floor screed is protected with polymer coatings that seal the pores, then expansion joints are cut.