Many people are faced with the need to attach a wooden block to a wall made of foam block or brick materials. For example, in the construction of a rafter structure, timber is often used in the form of a mauerlat. If you take any catalog collection, you will find in it projects of residential buildings in which the first floor is made of blocks, and the second is in the form of a wooden attic. So how to attach the beam to the foam block so that the structure is reliable? There are several ways to do this, which we will consider today.
Correct use of fasteners
To begin with, it is worth considering the above-mentioned disadvantages of the foam block:
- Hygroscopicity . This interesting property of the foam block can be considered both an advantage and a disadvantage when the material becomes saturated with moisture;
- Low density . There are also two opinions here: the advantage is that the weight on the foundation is reduced, and the disadvantage is that choosing a fastening for foam concrete becomes an exciting task.
Now let’s talk in more detail about the last point.
How to choose fasteners for foam blocks
When using any building material, it is necessary to use consumables that will correspond to its physical properties and qualities. This is determined by a simple definition: The consumable matches the material and enhances the fastening capabilities.
In accordance with this definition, a similar consumable element and fastening is available for the foam block. Taking into account the low density of the block, the fastening will not only easily fit into it, but will also create additional support, and this, in turn, makes it possible to count on increased loads.
Types of extensions to a wooden house
Depending on the type of building material used, the attached structure can have several options:
From timber
The material has low thermal conductivity. The walls are smooth, installation does not cause any problems. The light weight of the structure allows for a light foundation and it is much easier to “tie” (make a pairing) two wooden buildings - and this allows you to reduce costs.
Brick
The main difficulty of this option is the combination of foundations. If during the construction of the house the owner did not provide for an additional structure, problems may arise, since the foundations of the extension and the house must be of the same type.
It is not recommended to rigidly tie two buildings; it is better to use an expansion joint (technological gap) so that when the foundation shrinks, the new building does not pull the entire structure with it. Particular attention should be paid to the choice of brick and waterproofing of wood.
Frame
Here, the basis of the entire structure is the frame, which is built from timber (edged). Prefabricated and economical type of extension. It is distinguished by convenience and comfort.
From foam blocks
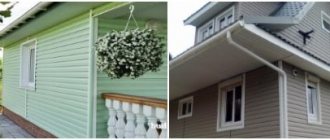
The building material has an increased level of thermal protection, sound insulation and fire resistance. It is highly environmentally friendly, as it consists of natural ingredients: sand, water, a little lime, special additives. An extension made of foam blocks to a wooden house is lightweight, does not overload the foundation, is quite durable and compatible with main buildings built from any materials. Wood cladding is possible: siding, panels, block house, etc.
Types of fastenings to foam blocks
Before moving directly to the consideration of products and their features, let's look at what it will be possible to work with:
- Simple dowel;
- Dowel nail;
- Simple and chemical anchor;
- M4 screw;
- Self-tapping screws.
Each of the listed fastenings for foam concrete can be used at various stages of construction. Of course, these are mainly fasteners used in finishing.
Dowel for foam block
First of all, we will consider a dowel as a fastener for a foam block. The characteristic technical effect of a dowel is that it expands inside the wall. As a result, it compacts the material and creates internal supports.
An important point is that the thread of the dowel easily passes through all the pores of the foam concrete and does not violate its structure. Dowels are produced either nylon or metal, and you will choose from your needs.
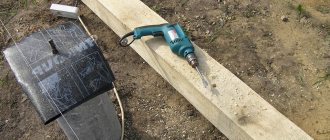
To install the dowel, you will need a spacer for a screwdriver or drill. But taking into account the composition and density of the block, a screwdriver will be more suitable. By the way, we can help you choose a good screwdriver or choose a drill for your home.
You can also note that nylon (plastic) dowels are designed to work with metal screws or self-tapping screws. In addition, they will be a more economical option among others. So, for example, 100 similar dowels will cost up to 6 times less than the same number of metal ones.
Dowel nail
Options for fastening to foam concrete will depend not only on their purpose, but also on the density of the material. The thing is that the blocks are not always homogeneous. Therefore, it is recommended to choose fasteners for different material densities, for example, for interior partitions.
Dowel nails, like fasteners in a foam block, will be perfect for dense wall foam blocks. In the case of this fastener, you can also pay attention to external work. This is because the dowel nail is perfect for through and quick fixation of wood, aluminum and metal profiles to an aerated concrete base.
You probably imagine how important it is to make a strong sheathing, for example, for siding. Even seemingly lightweight vinyl siding carries additional loads on the supported wall. And after that, think about what load the foam concrete should withstand at the point of installation of the fastening and not be subject to deformation.
It is worth noting here that fasteners for foam blocks in the form of dowel nails can also be used for installing ventilated facades, as well as facade canopies. They can also be successfully used in the installation of suspended ceilings, as well as in fixing cable routes.
Anchors
It’s worth saying right away that the anchor for foam blocks will be different from those that everyone is used to using in dense walls. The thing is that conventional anchors in less dense foam concrete will not withstand the necessary loads.
The anchors we need have the following features:
- They have either a spacer part or a plastic dowel;
- Can also be used by gluing.
The technology for working with such anchors is simple and consists of the following:
- Drilling is in progress;
- An anchor is inserted;
- We unclamp and the element falls into the thread.
According to a similar scheme, the most durable fastening to foam concrete used today in construction is made.
In addition, there is a chemical anchor . This is also a very modern and progressive installation method, which can be characterized by the following points:
- Ability to bear high loads;
- Versatility;
- Frost resistance.
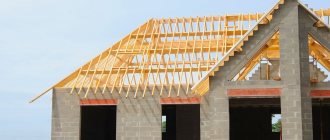
An example of the work can be called the implementation of fastening the Mauerlat to foam concrete. In such work, only one option is used - anchors with threads and nuts.
The principle of operation will not be fundamentally different from working in brickwork. The only difference will be that in the case of foam blocks you will have to make a concrete reinforced belt, because separately, foam concrete cannot withstand the high load of the roof.
What is the difficulty of installing fasteners in loose materials?
How does aerated concrete differ from foam concrete and is there a difference in the fasteners used? Perhaps this is the question we most often encounter on forums where they discuss options for attaching something to bases made of loose materials. Of course, these materials have fundamental differences, but they mainly relate to manufacturing technology. For the purposes of this article, it is important for us to know only what affects strength.
In aerated blocks, the pores are almost the same size and distributed more evenly. In foam blocks they are located chaotically and have different sizes. Therefore, it is believed that aerated concrete is stronger. However, it is better to look at the labeling of the building material and base it on the density of the exact batch that you purchased.
When thinking about how to secure a self-tapping screw or dowel in a foam block, the master must immediately take into account the difficulties that arise when installing fasteners in loose foundations.
- The element is not fixed in the wall, it rotates immediately after installation.
- The fastener cannot withstand the load and falls out of the wall.
- The attachment point becomes loose over time.
- A thin fastener under load spoils the structure, leaving a groove.
- When the fastener falls out under load, a piece of the foam block also falls off.
Let's face it, there are no 100% effective ways to solve all these problems. After all, often even the most modern technologies are powerless against frankly low-quality material, which crumbles almost at the touch. But we have collected options that have helped many users. You may have to test several and find the method that works best for you.
M4 screw
Along with other fasteners, screws combined with metal expansion elements can be used for fastening into a gas block. They are also suitable for dense gas and foam concrete. The installation process is simple. A hole is drilled. The fastener is inserted and tightened. At the moment of tightening, the metal part expands the material. This allows the hardware to be securely fixed in the wall.
Self-tapping screws
You may be surprised, but you can use a regular wood screw in a porous gas block. However, it is advisable to use them in denser versions. So, they will not stay in a porous foam block. But for fastening elements that will not create significant loads on the fasteners, they are quite suitable.
For example, if you need to hang a picture, frame or something similar, then such fasteners are quite suitable. For example, you can take a self-tapping screw measuring 3.5x55. However, it is worth estimating the load that will be placed on it. If in doubt, it is better to use a plastic dowel.
Verdict
Various types of fasteners allow you to carry out all the finishing work on the facade of the house, as well as safely install various equipment - air conditioners, heating devices, shelves, etc.
But for each type of mounted equipment, it is necessary to select its own mount, designed for its load. This will be the main feature of working with foam block walls.
Foam block and gas block are not very expensive materials. Mounts for it are also not expensive. And if you also choose plastic fasteners, you will get serious savings and the cost will be generally minimal.
How to attach timber to a foam block: features of various options
Many people are faced with the need to attach a wooden block to a wall made of foam block or brick materials. For example, in the construction of a rafter structure, timber is often used in the form of a mauerlat. If you take any catalog collection, you will find in it projects of residential buildings in which the first floor is made of blocks, and the second is in the form of a wooden attic. So how to attach the beam to the foam block so that the structure is reliable? There are several ways to do this, which we will consider today.
What you need to know before starting construction with foam blocks
Before starting any construction, it is necessary to draw up a project. When compiling it, it is important to take into account the type of soil: whether it is heaving or not, what is the depth of groundwater. It is important to determine on which side of the house the extension will be made and what its foundation will be.
The foundation of the extension should be the same as that of the house itself: columnar, pile, strip.
Strip foundation of an extension in slightly heaving sandy soils
The dimensions of the extension are included in the drawings, and a cost estimate is drawn up, in which the costs of materials and tools are recorded. When designing, it is important to take into account the purpose of the object, determine the location of utilities, and note where the door and window openings will be located.
Various mounting methods
So, how to attach timber to a foam block? It is recommended to use one of the options:
- tie with metal wire;
- secure with anchors;
- top view of the installation of the harness using metal studs.
Foam block is considered a fragile material and has a porous structure, so it is recommended to use two methods simultaneously to increase the percentage of reliability.
Metal wire
If this method of fixing the timber is chosen, then a thick knitting wire is used. Any stainless steel will do as long as it has sufficient strength and flexibility.
For proper installation, you should place wire on one or two rows after finishing the masonry work. Laying is carried out in such a way that multi-layer wire tails remain on each side of the wall being built. Their length should be sufficient to completely cover the beam through the remaining block rows and twist.
It is recommended to leave the tails longer so that they are sure to be enough. Fastening is carried out in two-meter increments.
The positive features of this method are:
- ease of installation work;
- there is no need to make holes in the blocks;
- wire can be found on the building materials market.
There are also negative points:
- the wire may break while twisting;
- unattractive fixtures remain that can only be hidden with a ventilated façade;
- After some time, the material may change its position, because this method of fastening does not have sufficient rigidity.
In this way, timber is fastened during the construction of small residential buildings and bathhouses. When building a large house, you should not use this type of fastening as an independent one.
Anchors
When constructing a combined object, the question arises of how to secure the timber to the foam block. Along the outer block row, special reinforcement is made, which further strengthens the walls and gives rigidity to the entire structure. Let us add that after the reinforcement, the upper edge of the box is leveled. Foam block is considered a soft material, so it is best to fix the timber with anchor bolts. To simplify the process, the top row is laid out in V-shaped blocks. Their placement forms a trench into which the block is placed.
To ensure that the gutter is not interrupted at the corner joints, the blocks must be sawn to the required width.
After this, a frame base for reinforcement is made from reinforcement rods, the diameter of which is 1.2 cm. Six-millimeter pieces of reinforcement are used as transverse elements. The frame structure can be made directly in the wall gutter, but to facilitate the process, such work is performed on the ground in parts, which rise to the top and are connected to each other at the corners. The frame is poured with concrete mixture at one time and left for several days.
Anchors are attached every one and a half meters until the solution is poured. They are fixed at the same level, because the timber is distinguished by the evenness of its geometric parameters. It is necessary to ensure that the anchor bolts are positioned vertically.
When installing anchors, take into account one feature - they should not be located in places where roof beams are laid or rafters are installed.
As soon as the poured screed sets, the anchors will be firmly fixed and will not be able to move. Holes are made in the wooden beam, and with the help of tightening washers it is screwed to the wall.
By the way, it is not necessary to perform reinforcement, but then you will have to arrange monolithic type plugs or a pillow, the thickness of which will be at least forty millimeters. This type of fastening is recommended for brickwork, as it is more durable compared to blocks.
The advantages of fastening timber with anchors include:
- strength of the entire structure;
- long operational period;
- the rigidity of the connection of the timber to the wall.
There is one big drawback - significant labor costs await.
Chemical anchors
How else to secure the block to the foam block? Chemical anchor bolts are considered one of the most durable and reliable fasteners. If you study the instructions for use, it will instill confidence that the connection with the material will be strong, will withstand significant loads, and will not create stress in the foam block.
The binding mortar mixture used for installing anchors consists of two components:
- cement mass - due to this inorganic mixture, maximum adhesion to the base is created;
- highly reactive resins - organic components characterized by rapid hardening.
A can of this composition has two chambers. During extrusion, the two components enter a static mixer, where they are mixed in the required proportion. The mixing part ensures a continuous supply of the finished solution to the fastening unit. For ease of working with the cylinder, use a simple pressing gun, which is used when applying adhesives and sealants.
The advantages of a chemical anchor are:
- excellent load-bearing and loading capabilities;
- safety of operation, environmental friendliness of the fastening composition;
- resistance to changes in temperature conditions;
- versatility;
- ease of use.
As a disadvantage, many cite the high cost, but the strength and durability of the resulting connection fully compensates for all monetary costs. Such anchors do not become loose over time.
stiletto heels
How to lay timber on a foam block using studs? Let us immediately note that for combined construction this fastening option is not recommended. It is best to use it when installing a mauerlat or a small attic.
The studs must be embedded in the blockwork. Externally, such fasteners look like a bent bolt. For fixing, use nuts onto which 6 x 6 cm metal squares are welded. The studs must be secured to the wall in one remaining pass. The length of each element must be sufficient and equal to the total width of the block and bar. Fastening is done with a lock nut.
There are pins in the shape of the letter “P” with two pointed ends. They are simply driven into the wall and block.
This fixation has its positive aspects:
- work is completed quickly;
- The cost of consumables is reasonable.
But there are also negative points:
- the fixation is not very strong, the fragility of the blocks leads to the fact that the staples begin to loosen;
- The structure turns out to be insufficiently rigid and does not withstand the load from a full upper floor.
Extension made of foam blocks to a house made of timber
Question:
Good afternoon, Semenych. We are going to build an extension to a house made of timber (the house is already 5 years old). The size of the house is 6*7.5, the size of the planned extension is 4 or 5 by 7.5, the planned material is foam blocks. Naturally, there is no pre-poured foundation. Tell me how to properly make a foundation of 3 walls or 4. If 3, then how to tie the foam block to the timber, if 4, then how to insulate the space between the house and the extension so that it does not freeze. The extension will include a kitchen, a bathroom and a boiler room.
Sergey, Naro-Fominsk.
Answer:
Hello, Sergey from Naro-Fominsk!
The fact that the timber frame has stood for 5 years is good. This means that it has completely settled down and is not in danger of further shrinkage.
The number of walls of the extension made of foam concrete blocks can be either 4 or 3; they are made according to both the first and second options.
The longer the foundation, the more perfect the design, since the ceiling joists, also known as rafter bases, will be supported everywhere by the same structural material - foam concrete. Or rather, not on the foam concrete itself, but on the armored belt recommended on top of it. But such a foundation is also more material-intensive.
If you make a shorter foundation of three walls, then it will be cheaper, but then the structure at the junction of the extension with the main log house will be more complex.
The main problem usually in such cases is the compatibility of the foundation of the old one under the log house and the new one under the extension. Since one is already established and should not have any vertical movement, and the newly poured one will still need some time to settle.
In any case, it is advisable to make the new foundation exactly the same as the old one according to its characteristics. Then he will behave similarly.
If the first option (4-sided) of the foundation is chosen, then the connection of foam concrete blocks with log wood may not be carried out at all. Each part of the building will behave autonomously. The roof of the extension is placed under the overhang of the log house roof, the doorway connecting the two parts of the building is closed with decorative layouts. All gaps and cracks both on the roof and on the doorway are laid with a layer of insulation of sufficient thickness.
The partition between the wooden wall of the log house and the foam concrete wall is protected from freezing by laying the same insulation, with thermal film installed on both its surfaces. What is done simultaneously with the raising of walls made of foam concrete blocks. Then you won’t be able to put in either film or insulation when the wall is completely laid.
It is also advisable to insulate the foundation base from the inside into the underground with at least sheets of foam plastic. You can also fill it with expanded clay, making a kind of filling from the inside to the entire height of the base. Why do not exclude the installation of antiseptic formwork.
In the same case, if a cheaper option of a three-sided foundation is chosen, then the gap between the foam concrete blocks and the log wood is often filled with mineral insulation to the full thickness of the blocks. And so that it is not visible, it is covered both outside and inside with vertical decorative strips or boards. Which are attached to the timber of the log house. Then, with a theoretically possible vertical displacement of the log house and the building relative to each other, no deformations will be visible.
The roofing of the extension with this option is done as follows. A longitudinal support beam is attached to the wall of the log house along its entire length. It should lie at the same level as the top of the wall of the extension (taking into account the armored belt). That is, you must have an edging crown made of timber or edged boards.
And a single-pitched rafter system, sheathing, and roofing materials are already mounted on it.
Of course, it is advisable to wait a little time for the device to “settle down,” that is, to settle. Although the settlement may be quite insignificant and it largely depends not on the settlement of the walls themselves, but on the shrinkage of the foundation under the weight of the walls. Settlement time is unpredictable and depends on many characteristics, ranging from soil conditions, foundation depth and other factors.
But in most cases, it still rarely has significant parameters.
The main unit that you should pay attention to is the apron that connects the roof of the extension to the wall of the log house. It is usually made from a wide sheet of galvanized steel, bent approximately in half along its entire length. The shelves are approximately 20 centimeters. The bend angle is more than 90 degrees and is equal to the angle between the vertical plane of the wall and the plane of the roof slope.
Fastening with self-tapping screws to the wall of the log house. It wouldn’t hurt to look at the fit angles a couple of times over time and, if necessary, make appropriate adjustments.
Here is a very short answer, although all sorts of nuances are possible, which are resolved during installation, because you can’t provide for everything in detail.
Good luck!
Construction in Moscow and Moscow region
We work with a guarantee! Wide range of construction services. Foundation, walls, ceilings, roofing, turnkey! +7 (905) 797-20-34
luxurykomfort.ru
Other questions on the topic of extensions to premises:
- Extension to an adobe house for a bathroom and toilet
- Frame extension and attic for the bathhouse
- How to fill the space between the house and the extension
- Second floor extension on pillars
- Common diagonal for house and outbuilding
- Cantilever terrace
- Increase the ceilings in the extension to the house from sleepers
- Extension of attached garage
- Attach a garage with an attic to the house
- Extension of a garage made of blocks to a house made of timber
- Frame extension to a timber house
- House floor made of timber, second floor made of frame
- Extension from blocks to a panel house
- Porch with a canopy made of wood
- Extension of a veranda with a gable roof
- Shrinkage of the log veranda and vertical supports
- Extension to a one-story panel house
- Foam block extension to the log house
- Extension to an old brick house
- Connecting a house with a new extension (log-log)
- Timber extension to a block house
- Add a veranda to a house made of timber in a swamp
- The junction between the house and the extension
- Block or brick extension to a log house
- Extension of a terrace to an old house
- Attaching a timber veranda to a timber house
- Extension to the slag-fill house
- Attic on pillars or extension
- Extension to a brick house on stilts
- Block extension to a wooden house
- Attic extension to an adobe house
- Extension made of timber to a house made of logs
- Protecting a wooden terrace from sun and rain
- Construction of a foundation for a bathhouse from slabs fl 6-12
- Distance between canopy supports to shed
- Attach a second floor to a brick house
- Attic extension for permanent residence
- What to use to make an addition to an old log house
- Log house and frame under one ceiling
- Extension between log houses
- Extension to a house made of rounded logs
- Brick or timber for an extension
- Add a second floor to a cinder block house
- Frame extension to a concrete wall
- Extension of a veranda to a house made of timber
- Extension made of wood or brick
- Frame extension to a log house
- Extension to a log house on a strip foundation
- How to fill the gap between slag and timber walls
- Extension on screw piles to a house on a strip
- Extension to a wooden house
- How to attach an ice cellar to your house
- Three-walled house - how to add a second floor
- Construction of a veranda for the bathhouse
- Frame extension to a brick house
- Extension from a block to a house made of timber
- Extension project for a panel house
- Timber extension to a timber house
- Wooden extension to log steam room
- Second floor made of logs on gas silicate
- Add an attic from blocks to a brick house
- Attach an attic to an old log house
- Joining the foundations of a house and an extension
- Extension between two houses
- Build an extension to a house with an attic
- Expansion joint between the house and the extension
- Enlarging the house - an extension or a second floor?
- Insulation of an extension to an adobe house
- Extension made of foam blocks to a frame house on stilts
- Timber extension on a house made of foam blocks
- Extension from foam blocks to a timber house
- Extension to the house for rooms
- How to properly re-roof an extension
- Foundation for a frame extension
- Estimate for an extension made of blocks
- Which foundation to choose for an extension?
- How to attach a veranda and attic to a bathhouse
- Sealing the junction of the wall of the house and the extension
- Support pillars for the second floor
- Attach a second floor to a block house
- Material for the construction of an attachment
- Extension to a dump house
- Extension to a house on a screw pile foundation
- How to attach a bathhouse to a house on screw piles
- Brick extension to a log house
- Extension to a log house made of timber
- Calculation of the price of an extension to a house
- Calculation of the roof for an extension made of aerated concrete
- U-shaped extension made of blocks to an old log house
- Timber veranda for a round timber house
- Designing a foundation for a frame extension
- Step foundation for an extension
- External vernade cladding and polycarbonate instead of windows
- Size of beam for extension
- Common roof or separate for an extension to the house
- Attaching the canopy to the wall of the house
- Attach a second floor to a log house
- Connecting the roof of the timber building and the house
- Skid foundation for frame extension
- Extension to a sloping roof
- What to make an extension to a cinder concrete house from
- Attaching a porch to a log house
- Foam block extensions to a brick house
- How to make a roof and cornice for an extension
- Foundation for an extension to a cinder block house
- An extension to the main house - how to fill the holes?
- How to attach a timber bathhouse to a brick house
- Foundation for an extension
- Extension from dead wood to a house made of timber
- Insulation of a room attached to the house
- Common roof for a new log house and its extension
- When and how to pour the foundation for an extension
- Extension made of foam blocks to a house made of timber
- One roof per house and new extension
- Insulation of an extension to a slag-filled house
- Extension to a log house
- Extension and sewerage
- Renovation of an old log house, lining and extension
- Joining the roof of the house and the extension
- How to attach a room attached to a house
- How to add an attic floor
- Extension to an adobe house
- How to fill the gaps between the log house and the outbuilding
- How to build a roof on an extension and insulate it
- The extension to the house is lopsided
- How to add a room to a log house
- How to insulate a frame extension
- How to make a roof on an extension to a house
- How to choose a foundation for a brick extension
- How to attach a timber extension to a log house
- Extension to the store
- Extension to an adobe house
- Frame extension to a timber house
- Extension to a house made of timber
- How to attach a canopy to a wall
- How to add a room to your house
- Extension to the house on supports made of asbestos cement pipes
- Timber extension to a log house
- Attach a veranda to the house using old windows on an aluminum profile.
Extensions
Construction in Moscow and Moscow region
We work with a guarantee! Wide range of construction services. Foundation, walls, ceilings, roofing, turnkey! +7 (905) 797-20-34
luxurykomfort.ru
Other questions on the topic of log houses:
- All about log houses
- Replacing logs in log houses
- About caulking log houses
Replacing logs in log houses
- Cost of replacing the top rims of a log house
- Replacing a cut-off wall with foam blocks
- Replace half a wall in a log house
- Replacing a rotten wall of a timber house
- Replacement of lower crowns and cracks in logs
- Replacing the lower logs of an already sheathed house
- Rotten places in logs
- Vertical log house made of round timber
- What to do with rotten logs from a log house
- Rotten crowns in the middle of the wall
- Replacing a log frame with a brick or block
- Replacing the lower crowns of a log house
- Replacing rotten crowns with bricks
- How to strengthen a corner in a log house
- When you need a fifth wall in a log house
- Vibrations in the log house
- Remove the three lower crowns of a log house
- Replacing a wall in a log house
- Replacing the lower crown with brick or foam blocks
- Joining logs of different diameters
- Replace the corner of a log frame with sleepers
- Replacing the lower crowns of a log house with a concrete wall
- Rotten log in a log house
- Restoration and cladding of a timber frame
- Reconstruction of an old log house
- Replacing a rotten corner of a house
- Repair of rotten beams in a log house
- Replacing the lower crowns of a log house with blocks
- Replacing rotten logs of a log house
- Replacement of the lower crown of the house
- Replacement of a main wall made of timber
- Transfer of logs in height in a log house
- Alignment and replacement of the lower crown of the log house
- Replacing rotten logs under the window with blocks
- 2 corners rotted at the level of the log house windows
- Cost of work to replace the top rims of a log house
- The log house is rotting next to the vent
- The wall near the log house in the five-wall building has rotted
- Repair of old logs
- Replacing a log house wall with a foam block
- Replacing the lower crown in a wooden house
- Replacing logs in a log house
- Replacing logs eaten by insects
- Replacing the lower crown of a timber frame
- Replacing the lower crowns in the house
- Replacing the top rotted crown of a log house
- Replacement of the lower crowns of the bath
About caulking log houses
- Caulking log corners
- Rules for caulking a log house
- Caulking of an old log house
- Cold corners in a log house
- Caulking and insulation of a log house
- Caulking a log bathhouse over old moss
- How to caulk a log house covered with clapboard
- Should tow for a log house smell?
- How to fix a chopped pediment
- Re-caulking of a log house
- Caulking and log processing
- Re-caulking the bathhouse with moss
- Calculation of the amount of jute for caulking a log house
- Caulking of a log house lined with bricks
- Caulking tight logs
- Dismantling inter-crown insulation
- Log caulking
- Log house for three years in the open air without a roof
- Re-caulking of a log house
- The basics of caulking a log house
- Caulking and sanding of a log house
- Caulk of a log house from the inside
- Do-it-yourself log caulk
- Caulking of a log house made of rounded logs
- Sanding timber
All about log houses
- Log house made of logs or timber?
- Estimate for finishing the log house
- Is it possible to sand a raw round log?
- Strengthen the corner of the log frame from the gun carriage
- The wall of the log house is collapsing
- Forced shrinkage of the log house
- How to fix a crooked timber frame
- The lower crowns of the log house are getting wet
- Correction of a 9-year-old log house
- Rot between the crowns of a bathhouse log
- The frame sank and the window jammed
- Led walls made of profiled timber
- The crown of the log house was turned out
- The dovetail insert moves apart
- Construction of a log house in the South of Russia
- Painting the outside of the log house
- Is casing necessary for small log windows?
- What to do to prevent the log house from twisting during shrinkage
- The quality of the log after 5 years of settling
- Protection of the sauna frame
- Rebuilding an old log house
- Strengthening the fifth wall of the log house
- Bathhouse gables made of rounded logs
- The top crown of the frame was torn out
- How to cut large arches in a log house
- Remaking door and window openings in a log house
- The partition made of logs was torn out
- Repair of an old log house
- Finishing the log bathhouse immediately after installation
- Which interventional insulation to choose
- Lining crowns made of logs with natural stone
- How to beautifully seal shrinkage window openings in a log house
- Tiles and laminate for log floors
- Ceramic tile floors in a log house
- Strengthening the log house
- Align the crown for installation of ceilings
- How to coat a log house after sanding
- Editing the geometry of a log house
- How to install profiled timber in a log house
- Installation of crossbars in a timber house
- New doorway in an old log house
- Reconstruction of a log house
- The bottom beam on the plinth gets wet from the inside
- Treatment of the log house before cladding the outside
- The walls of the log house got wet through and through
- The first crown of a log house made of oak
- Insulation of the stone base of a log bathhouse
- Overcut in the house
- Basement and blind area for an old shrunken log house
- Uneven shrinkage of the frame
- Repair of an old 2-story log house
- What kind of foundation for a 6 by 8 log house?
- How long does it take for a log house to shrink on a pile foundation?
- Increase the height of the log house without removing the roof
- Wind protection between the foundation and the log house
- Problems when lifting an old log house
- Insulation of a log house with sawdust and lime
- How to lay a log house from timber of poor geometry
- Pouring a concrete floor in a log house
- Interfloor ceiling in a log house
- Waterproofing the log house from the foundation
- Renovation of an old log house
- Repair of an old brick-lined log house
- How to strengthen a log house
- When to put a roof on a freshly assembled timber frame
- When to cover a log house with natural humidity
- Support under the log and shrinkage of the log house
- Beetles in logs
- Door in the end wall of a log house
- A team for the construction of a log bathhouse
- The cut of the log on the outriggers of the log house darkens
- Rot on the lower crown of a log house
- Vertical log house
- Which finishing plaster for clay to choose
- Mushrooms on a log house
- Log house without frame and floor beams on slab
- Dry rot of the lower crown of a timber house
- The upper corner of the frame has been removed
- Demolition of a log house wall
- Displacement of profiled timber in a log house
- How to build up log extensions of a log house for a veranda
- The log house was mowed down
- Installing a shrinkage compensator in a finished log house
- Twisted the logs of the log house before assembly
- Log house with nails instead of dowels
- How to protect a log house without a roof from rain
- A set of works on the external finishing of a log house made from central fiber boards
- Repair of a log house after a fire
- Is it possible to put a roof on a log house for the next year?
- Warm joint with sealant for log house
- Insulation and cladding of a log house made of corrugated timber
- Insulation of a log house from the inside
- Concrete floors in a log house
- Shrinkage of log walls old and new
- The procedure for finishing a log house
- How to preserve timber from spring to winter
- What comes first: flooring or door casing
- Dismantling half of an old log house
- Types of beam connections
- Sealing the joint between the roof and the frame from OCB
- Cleaning a log house from old paint
- Connection of two log houses
- Support column in a log house on stilts
- The difference in the shrinkage of a log house between winter and summer felling
- Dismantling and moving a house made of profiled timber
- Supporting floor beams in a log house
- Preparing a log house for winter
- Guarantees when cutting a log house on a plot
- Chop into a bowl or warm corner
- How to lower the ceiling in a log house
- The timber turned blue in the rain
- Preservation of the log house in a non-temporary gathering place
- Consultations on a timber house
- Sheathing of a house made of cylinders without insulation
- Scheme of a log house with outlets and a ridge roof
- How to lay a carriage while lying down
- Reinforced concrete slab on a log frame
- How to assemble a log house from twisted timber
- Repair of a cut in a log house
- Installation of a log house on a columnar foundation
- The chopped gables of the log house are shaking
- Fastening beams in a log house
- The top beam in the log house was driven into the screw
- How to cover a timber façade
- Waterproofing the frame of an old house from the foundation
- A log house without nails is being pulled apart
- Sheathing a log house
- Cutting the lower crown in the log house
- Settlement of a log house made of used timber
- The log house rotted in the castles
- The corners of the log house are rotting
- How to strengthen a log house
- Work plan for interior finishing of the log house
- Log processing procedure
- How to lay a log house in the rain
- Cut the lower crowns of the log house
- Sheathing a log house immediately after construction
- Heating and windows in a new log house
- Processing the crown of an already built house
- Painting a timber house
- Blind area and shrinkage of the log house
- How to enlarge a house made of timber
- Connecting a timber house with a brick extension
- Finishing a timber frame with jute rope
- Diameter of a log for a permanent home
- Treating the log house with an antiseptic during assembly
- Reconstruction of a wooden house
- Connecting timber in cuttings
- Protection of the ends of the timber at the corners of the log house
- How to connect two log houses together
- Cutting a balcony doorway in a log house
- When to casing a newly assembled log house
- Insulation of gables made of lining
- Gaps between the logs of the log house pediment
- How to preserve logs before cutting a log house
- Raise the frame to increase the ceiling height
- Methods for joining timber in the walls of a log house
- Raise a log house to increase the underground floor
- Cladding a log house with clapboard before shrinking in winter
- When to remove the compensating jacks of a log house
- Log house for three years in the open air without a roof
- How to make a cut in a log house
- Make a house from an old bathhouse (timber)
- Moving the log house to another location
- Log house hanging on dowels
- The fifth wall in a log house made of smaller timber
- Should I paint the backing board in a log house?
- Remove mats to increase log ceilings
- The log house does not match the foundation
- Ceiling mats in the log house
- Construction from fire monitors
- How to remove bark from an already assembled aspen log house
- Transporting an old log house
- Connecting internal timber walls with external ones
- How to repair cracks in a log
- Gap between log and foundation
- Alignment of the first crown of the log house
- Stages of arrangement of the assembled log house
- Treatment of the log house after installation in the summer
- Processing the ends of the frame from the outside
- The log house floated - the walls moved
- An old wooden house sank
- Leveling the crowns when assembling a log house
- How to close the opening between the log house and the foundation
- How to straighten a log house
- Sheathe a log house with protrusions with corrugated sheets
- How to process the ends of a log house
- Collecting the first crowns of a timber frame
- Riser frame
- Preservation of the log house during assembly in rainy times
- Forgot to waterproof the log house from the foundation
- Installation of log shrinkage compensators
- Interventional gaps in a house made of profiled timber
- Gaps between logs in a house
- Communications and finishing in a timber house
- Precision when cutting log houses
- Which log house will be warmer?
- Log house made of timber 200 by 120
- Old log house - reconstruction or demolition
- Partitions in a log house
- Internal partition in a log house
- Beginning of finishing of shrunken timber frame
- Double timber construction technology
- Processing the log house from the outside
- Log shrinkage process
- The walls of the log house collapse during shrinkage
- Insulation of a log house from the inside
- How to build a house from sleepers
- The logs were kicked out of the log house
- Supports (pillars) instead of crosscuts in a 9x10 house
- Do-it-yourself timber log house without experience
- Preservation of a house made of rounded logs for the winter
- Embed additional beams into the frame
- Backing crown - installation tricks
- Log house on brick walls
- Sequence of work in the log house
- How to make a load-bearing partition in a log house
- The log house got wet during assembly
- How to seal cracks in a log house
- Align the vertical wall of a log house
- Vents in timber on foundation
- Timber 200 by 200 construction nuances
- The log house turned blue, what should I do?
- How to seal cracks in cutouts from the outside
- You can live on the second floor of a log house for shrinkage
- Replace rotten logs with mortar
- A non-load-bearing log has shrunk
- Replacing logs with boards in a house project
- Vertical supports in a log house for shrinkage
- Does a large log house need recutting?
- Metal tiles on a non-shrunken log house
- Permissible gaps between timber crowns
- Gaps in log beams
- Replacing parts of rotten logs in a log house
- The logs of the log house are shaking
- The log house was poorly assembled
- The gap between the log log and the foundation
- Protect an unfinished log house for the winter
- How to save a log house without a roof
- Log finishing service
- Assembling a profiled log house in the rain
- Gaps when fastening profiled timber
- Sealing cracks in a bathhouse
- Processing timber with a blowtorch
- Butt beam - is it reliable?
- The wall of the log house is littered
- How to align protruding ends in a built timber house
- Transferring beams in a log house in height
- The corners of the log house disappear from the timber during assembly
- The log house is wet, what should I do?
- Does a log house need a fifth wall?
- How to assemble a log house 10 by 11
- Restoring a log house after a fire
- Processing of a log house made of rounded logs
- Extension of a log house when replacing the roof
- Sand under the crowns for insulation
- Methods for lifting a bath to replace the crowns
- Impregnation of the log house inside and out
- The façade of the log house leaned
- Log shrinkage - problems
- Treatment of timber against bugs
- The smell in the house is from sleepers
- How to preserve the light color of a fresh log house
- Estimate for a house made of timber 7 to 9
- Treatment of exposed ceiling beams
- Strengthening the corner of a log house
- What is the dowel pitch?
- Protection of the lower crown of the log house
- How to check the diagonals of a log house
- Which timber to choose, square or rectangular?
- Spruce and pine log house
- Sequence of work when finishing a timber house
- Insulate an aspen log house from the outside
- How to install a casing on a log house
- What to put between the crowns
- Should I trim the paws of a log house?
- What is the best way to impregnate a log house?
- Window opening in a log house - how to seal it
- Gaps in the assembled frame
- Support pillars in a timber house
- How to move the 5th wall in a log house
- Ants and the lower crown of the house
- Sanding and processing of the log house after installation
- Barked or planed log for log house
- Repairing the corner of a log house of an old wooden house
- Should window openings in a log house be closed when it is in storage?
- Consultation on the size and shape of the log house
- Questions about construction from profiled timber
- Log house and foam block on a single slab
- Preparing an unfinished log house for winter
- Longitudinal cuts in a log house
- Cracks in the ends of logs
- Should I paint a log house with tikuril?
- Strengthening the corners of the log house
- How to secure a cross beam in a log house
- Ventilation gap between insulation and frame
- Moss or tow for building a log house
- Shrinkage of a timber house
- Fifth wall in the log house
- How to raise a 6 by 6 log house
- Distance from the corner of the frame to the windows or doors
- How to cut off the protrusions of the corners of a log house
- Log house without nails
- How to clean a linden bathhouse from darkening
- Impregnation of a log house with fire-bioprotection
- Velo log house
- Questions about cutting a bathhouse after installation
- Painting a log house
- Blackness between the crowns of the log house
- Types of cutting corners of half beams or carriages
- Attaching beam supports to a log wall
- Strengthening logs in a log house 7 meters long
- How to sort through the log gables of a log house
- The beam was squeezed out of the wall
- Is a matitsa needed in a 3 by 3 m bathhouse?
- Priority work after installing the log house
- Entrance door in a log house
- Maintaining the level when assembling the log house
- The corner of the log house and the lower log have rotted
- The sequence of finishing a timber frame
- Insulation of a settled log house
- Restoring a burnt larch frame
- Quality of a 40-year-old oak log
- Permanent roof on a newly assembled log house
- Cracks in logs
- What time of year is it better to cut a log house for a bathhouse?
- What and how to make partitions inside a log house
- Ceiling beams in a timber frame
- Installation of a metal door in a log house
- The crown molding of a log house
- Questions about assembling a log house at home
- Turnkey log house for a season - is it possible?
- Arrangement of the subfloor in a rounded log house
- Common roof for a new log house and its extension
- Ventilation system in the log house underground
- How much does it cost to change the lower crowns of a house?
- Finishing the log house after shrinkage
- Reinforcement as a dowel for a log house
- What to rest the floor joists on in a log house
- Attaching timber to a log frame
- Cover an old house with a new frame
- Extension made of foam blocks to a house made of timber
- Wet lower rims of a new timber frame
- House made of sleepers
- How to cover a log house on screw piles with bricks
- How to strengthen the motherboard in a log house
- Birch log house
- Sauna log - pine or aspen
- The lower crowns of a larch frame as a plinth
- Adjusting anchors for shrinkage of the log house
- How to properly assemble a log house
- Octagonal timber frame
- Is a fifth wall needed in a log house?
- An alternative to dowels when assembling a log house
- Problems after shrinkage of the log house
- What to make partitions from in a log house
- Tongue-and-groove slabs as walls in a log house
- Insulation of the log house inside
- How to strengthen floor joists in a timber frame
- Log houses in Kolomna
- House made of timber or frame house
- Insulation of a log house from the inside
- Work plan after shrinkage of the log house
- Squeezed logs out of the log house
- Where to start after installing a log bathhouse
- Rounded log with Finnish profile
- The timber frame is spreading
- How to align the geometry of a log house
- Large gaps between logs
- Are dowels needed for profiled timber?
- Is it worth overpaying for profiled timber?
- Repairing the corners of a log house
- How to cover an unfinished log house for the winter
- The beam bends out of the log house
- Construction of a log house in the rain
- Processing and insulation of external walls of a log house made of timber
- How far can the outer ends of the logs be trimmed?
- Ceiling beams 7.5 m in a house made of timber
- How to attach a room attached to a house
- Technology for assembling a log house from timber
- Waterproofing log walls outside
- Replacement of the lower crown of an old house
- Interior finishing of the corners of the log house in the paw
- Dry brown rot in log timber
- Shrinkage of timber frame
- Roof on only installed log house
- How to fill the gaps between the log house and the outbuilding
- When to install a log house for a house
- How far can the ends of logs be trimmed?
- When should a log house be treated with impregnation?
- Cutting the end corners of the log house
- Leveling timber in a log house
- Protection of the log frame from the outside
- Replacing log walls with stone
- How to seal the gaps between the foundation and the log house
- How to cover a timber house
- How and with what to seal the gap between the foundation and the log house
- Bark on logs - to remove or not?
- Sandwich panel or log house?
- Preservation of log wood
- How to change the lower crown
- Settlement of a log house made of laminated veneer lumber
- Log house repair
- What kind of foundation is needed for a log house made of 9 by 12 m timber?
- How much timber is needed for a log house 9 by 12 meters
- Foundation for a log house with chopped gables
- When to put a roof on a log house
- How to seal cracks in a timber frame
- Log house on the spring
- Preparing a log house for winter
- Oak backing for the lower crown of the log house
- Log house repair
- Photo of a chopped log house
Construction in Moscow and Moscow region
We work with a guarantee! Wide range of construction services. Foundation, walls, ceilings, roofing, turnkey! +7 (905) 797-20-34
luxurykomfort.ru
Construction in Moscow and Moscow region
We work with a guarantee! Wide range of construction services. Foundation, walls, ceilings, roofing, turnkey! +7 (905) 797-20-34
luxurykomfort.ru
Construction in Moscow and Moscow region
We work with a guarantee! Wide range of construction services. Foundation, walls, ceilings, roofing, turnkey! +7 (905) 797-20-34
luxurykomfort.ru
Log houses and their maintenance
All questions to Semenych about construction
Semenych (author of materials)
Our site is regularly updated with interesting and unique materials and articles on the topics of lumber, building materials and works, the author's opinion and knowledge of a real coven with more than 15 years of experience are provided. There is a section - funny stories of shabashniks. If you would like to receive information about this, subscribe to our website's newsletter. We guarantee that your address will not be shared with third parties.
Apartment renovation in Moscow and Moscow region
We work with a guarantee!
Wide range of repair work. Professional craftsmen.
+7 (905) 797-20-34
luxurycomfort.ru
| Country house | Bath |
| For the dacha | Tool |
| Materials | Tales |
| Foundation | Log houses |
| Roofs | Insulation |
| Walls | Siding |
| Floors | Cellars |
| Attics | Doors windows |
| Stairs | Extensions |
| Wells | Toilets |
| Balconies | Loggias |
| Condensate | Flooding |
| Fences | Kennels |
| Sidewalk | Birdhouse |
| Adobe | Carts |
| Garages | Barn |
| Greenhouses | Bath |
| Swing | Brazier |
| Shower | Horizontal bar |
Fastening timber to the wall
You should not only select the appropriate fasteners, but also lay the timber on the masonry. Wood is afraid of moisture, for this reason it is treated in advance with an antiseptic.
First, a layer of waterproofing is created. Ruberoid material or polyethylene film are suitable for this.
When fastening to anchors or studs, holes are made in the wood material in advance. At first glance, the work may seem simple, but everything can be complicated by incorrect placement of anchors. To calculate their location, a simple flat board will do. It must be applied and the tops of the fasteners must be marked and holes made in these places. Then insert the fasteners and tighten the nuts.
It's easier with wire fastening. Markings are applied, holes are made in the block, the size of which should allow wire ends to be threaded into them.
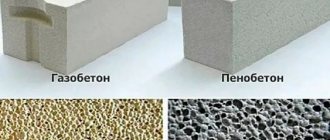
Foam block
Foam block is a material used in construction. It has a durable structure that has porous cells. A foam block is made from sand, cement and water using a foaming agent.
The building material has many advantages:
- lasting;
- durable;
- construction happens much faster.
Since the foam block has high-strength properties, the fastening must be selected accordingly. From the article you will learn what fasteners are used when working with foam blocks.
Types of fastenings for foam blocks
Fastenings when working with foam blocks are divided into two categories:
Using internal fastening, you can install various parts indoors. For example, lamps, sockets, paintings, etc.
Fixing to the outside of a building, larger jobs that require special attention and knowledge. Outside, work is being done to install drains, pipes, awnings, etc.
Foam block fastening can be used in several options:
- plastic mount;
- metal mount.
Such fasteners come in different compositions, and the price is different; better ones will be a little more expensive.
Before installing the mount into the foam block wall, you need to drill a hole. Then fasten the parts using one of the following methods:
All methods are good without exception, they are just used in different ways and for different levels of strength.
Selection of fasteners
In 99% of cases, craftsmen use a simple method of selecting fasteners for a part. What material is the part made of, and what type of fasteners should be selected. This does not mean that they should be identical, at least 70% close to each other. But, it is best to choose a fastener that is denser in material than the part itself.
Types of fasteners for cellular materials
When carrying out work on the facade finishing of a house or interior design of premises, it is necessary to perform various types of fastening. Conventional fasteners cannot provide reliable fixation of various materials to foam concrete. Fastening can only be done using specially designed hardware intended for cellular building products.
Due to the porous structure of lightweight concrete, a good connection is achieved in the following ways:
- Large contact area between hardware and block.
- Increased friction force between materials.
- Good adhesion when gluing surfaces.
Reliable fastening to the foam block can be achieved using mechanical or chemical hardware, and below we will talk about them in more detail.
Mechanical fastenings
Hardware of the mechanical method of fastening to foam concrete are various kinds of metal screws, bolts or studs with dowels made of metal or plastic. They are fixed in the material according to the principle of expansion or wedging.
At the moment, the most common types of mechanical fasteners for lightweight concrete products include the following groups of hardware:
- Dowels - can be made of plastic or metal. They have a special design with external threads and additional projections. They are mounted into a foam block in a pre-drilled hole, or screwed in using a screwdriver.
Advice: you should not use a hammer drill to drill holes in foam blocks. It will destroy the cavity of the cellular material.
- Dowel-nails are intended for working with materials of dissimilar structures. With their help, you can install wood, metal, and plastic to foam concrete.
- Mechanical anchors make it possible not only to fix various elements in foam blocks, but also to hold structures made of foam concrete. They are inserted into specially drilled holes and unclenched into them.
Application of fasteners for foam blocks
It is not easy to overcome foam block walls, but it is possible if you skillfully select the fastening. They are used for finishing and exterior work.
Dowels for foam block
Let's take a closer look at which dowels are most often used for fastening. And also how to use them.
Screw-in dowel
Most often, a screw-on dowel is used for foam blocks; many consider it more reliable and convenient for fastening. It consists of two dowels:
Fastening occurs using a drill or hammer drill, a hole is drilled in the wall, then a plastic dowel is screwed into it, and a metal dowel is screwed into it. It is securely and firmly fixed inside the wall. Such dowels can be used to fasten parts with heavy loads. There is practically no-thrust anchorage here.
Depending on how heavy the fastening is, select a screw-on dowel. Studs or bolts with M6-M10 threads are used. Having purchased a nylon dowel model, it is better to use bolts, screws or wood studs with M4-M10 threads.
Before drilling a hole in the wall, select the required drill size for the plastic dowel. Usually its size is indicated on the packaging. You can screw in the metal dowel manually or using a screwdriver. When using a screwdriver, do not start screwing at maximum speed, it is better to screw in lightly, jerkily, so as not to curl the plastic.
Using a screw-in dowel, the part can be screwed tightly (completely) or leave space for hanging cabinets, mirrors, brackets, etc.
Of course, you should not use dowels intended for large and bulky parts when fastening small installation decorative elements.
More famous manufacturers:
The price of nylon dowels is from 16-22 rubles, metal dowels up to 220-260 rubles.
Drive-in dowel
Unlike hardware designed for working with hard concrete, driven dowels are made with large teeth. They are designed for fastening in porous material and are securely fixed. The minimum anchoring depth is 32-38 mm. Due to the shape of the teeth on the plastic and metal dowel, it is almost impossible to pull it back out.
The driven dowel is attached using a drill of a suitable diameter. Having made a hole in the wall, first hammer in a plastic dowel, and then you need to install the part on top, then secure the metal dowel.
The approximate cost of one dowel is from 11 rubles.
Fastening thermal insulation with dowels
Metal thermal insulation dowel
At the initial stage of construction, everyone is faced with the question of how to install thermal insulation in a foam block room. In this difficult task, elongated dowel nails, designed specifically for facade work, come to the rescue; they are perfect for attaching thermal insulation.
Plastic thermal insulation dowel
The kit consists of a plastic dowel and a wedging dowel. The standard dimensions of a plastic dowel are 8-10 mm, its rounded limb is 45-90 mm in diameter.
These two dowels are used in two versions:
- Heavy types of thermal insulation are fastened using a wedging dowel, which consists of impact-resistant plastic and galvanized steel.
- A plastic dowel is used for light thermal insulation.
- the largest is 200-300 mm;
- average 90-180 mm;
- minimum 50-55 mm.
Depending on the type of thermal insulation, a dowel is selected. Initially, using a drill and a hammer drill, a hole is drilled in the wall, then a plastic dowel is inserted. Then the nail is driven in, at this moment the dowel in the wall expands at the end and a tight fixation occurs.
The price for one set ranges from 2.4-7.5 rubles.
Which fastener do you prefer?
I would like to immediately note that fasteners in foam concrete are not equally effective. This “usefulness” depends on the density of the block itself from which the wall is built.
The less density it has, the more difficult the task becomes - accordingly, the faster the fasteners will become loose in the wall. Therefore, we will consider the most acceptable options for a fragile foam concrete wall.
Foam concrete dowel
The most common fastener for cellular concrete is a special dowel. Its peculiarity is that when screwed in, its spacer elements come off, blocking the fastening from falling out and the destruction of the block structure. An example of such a connection is clearly shown in the photo below.
In addition, dowels are produced not with a spacer part, but with a wide thread. The latter, due to the larger area of the “curls,” also prevents the coloring of the cellular foam concrete structure.
You can also find a dowel nail for foam concrete. It doesn't need to be screwed in. It is mounted like other nails. Only at its end are there spacer elements, which make such hardware suitable for cellular concrete.
Dowels for foam concrete are a rather general concept. They can be more narrowly classified according to the material of manufacture.
It is this feature that is decisive when choosing hardware:
- Nylon has recently been most often used for the manufacture of foam concrete dowels. It is lightweight and durable. In addition, the price for it is, one might say, ridiculous. Such dowels are used in pairs with screws or screws of a suitable diameter. Nylon tolerates low and high temperatures well and is resistant to vibration. However, it can burn and melt. But it all depends on the manufacturer and the quality of the product itself.
Also, despite all their “strength”, it is best to use nylon hardware for attaching any lightweight structure, for example, shelves for books, paintings and other interior beauty. It is rarely used for street work, again, only for minor fasteners, some trifle, for example, a flower pot holder.
- Polypropylene and polyethylene are used extremely rarely for the manufacture of foam concrete dowels and it is almost impossible to find such specialized fasteners. However, in any narrow-profile store you can always get universal dowels with spacers. They are suitable for bricks, chipboard and solid cellular material.
There are a number of different designs of such hardware - square and round, short and long. Not all of them will adhere equally well to a foam concrete wall.
Therefore, when choosing just such a mount, choose the path of an experimenter - buy various dowels and try to install them in the wall (or better yet, in the remaining block). This is the only way to know which type is best.
Attention! Keep in mind that universal dowels have smaller parameters than expansion dowels. Therefore, if you need to “drive” something thoroughly into the wall, look for high-quality specialized hardware.
- A metal dowel for foam concrete is the most durable fastener than polymer dowels for foam concrete; their load-bearing capacity is many times greater. As a rule, they are used to hang heavy cabinets on walls and carry out façade fastenings. For the latter, it is preferable to purchase galvanized products.
What else can be said about the foam concrete dowel, except that it is the most popular fastener? It’s probably that in its environment – like, in principle, any other material – low-quality products can be found.
It is best not to save on such important “units” of your home, and purchase branded hardware, which have a higher price level.
Self-tapping screws
There is such a thing as self-tapping screws for foam concrete. But, as such, specialized hardware simply does not exist. Typically, this “talking” name refers to either conventional ones for wood, or in combination with a horn foam concrete anchor.
Regarding the wood screws for foam concrete walls: they screw in perfectly, one might say like clockwork. But soon they become loose, and the hole around it crumbles. Therefore, do not complicate your life, do not just screw in self-tapping screws, but only with an expansion anchor.
Chemical anchors
Such anchors are used for large and serious loads. Their installation is not difficult, but this will require a suitable tool and correct sizing.
- Initially, you need to drill a hole slightly larger than the diameter of the chemical anchor.
- The hole must be cleaned and blown out so that there is no dust inside.
- Next, take the adhesive composition, they need to fill the hole by about 70-75%.
- Then a metal pin is screwed in.
- When the glue is completely dry, you can continue working. Depending on the type of stud, different loads are applied.
Mauerlat fastening with chemical anchors
When erecting the roof of a house, it is necessary to arrange the rafters; for this you need to erect a wooden frame - a mauerlat.
It is most reliable to use steel studs that are installed on chemical anchors.
There are quite a few manufacturers, because the cost of chemical anchors is not small. One of the more famous suppliers is Tytan Professional EV-1.
Chemical anchors are also used for other fastenings, for example, poles, frames, etc.
Before you begin installing anchors, it is worth studying the information on the packaging in order to more accurately calculate the dimensions and center of gravity.
Construction stages
Before construction, you need a recommendation (project) from a specialist who will assess the condition of the house: log frame, foundation, roof and offer the best option. There you will receive calculations (estimates) for the work being carried out.
First, determine the location, dimensions and height of the structure. Its roof should not reach the level of the roof of the house.
At the design stage it is planned:
- places for laying communications;
- coordinates of the doorway - it is better to arrange it instead of a window; if you have to cut a new one, then this is done after calculating the load.
Stage 1. Foundation
An extension made of foam concrete does not require a very strong foundation, but it must meet several criteria:
- same design as the main building;
- the same burial depth;
- the same value of shrinkage of foundations during soil heaving - this is determined by calculation.
On non-heaving soils, a rigid connection of foundations is used with the help of reinforcement, the dimensions of which are determined after strength calculations (this should be done by specialists). When an extension to a wooden house made of foam blocks is built with your own hands, it is easier and more economical to leave a deformation gap between the buildings, filled with insulation. In this case, the foundations may differ in design, and the floor level in the extension is made lower than in the house - by the amount of calculated distortions.
Stage 2. Laying walls.
When the base hardens, it is treated with waterproofing mastic, insulated and filled with bitumen.
It is easy to add a house extension even without skills - just like a regular building made of foam concrete. The foundation is lined with roofing felt on top and the first row of blocks is placed on a regular cement-sand mortar, starting from the corner. Subsequent blocks are mounted with special glue (select its summer or winter variety). The upper plane of the laid row is moistened with water, and the adhesive composition is applied to the bottom and sides of the assembled foam block. The thickness of the seam does not exceed 3 mm - this reduces the risk of cold bridges.
If a decision is made to rigidly connect parts of the building, this is done using metal brackets made from reinforcement or a rod with a diameter of 10–15 mm and a length of approximately 300 cm. The rods are driven into the wall to the middle, the remaining part is placed in the seam between the blocks.
How to make an extension to a house made of foam concrete more rigid and protect it from deformation?
To do this, reinforcing belts are laid every 4–5 rows and in the corners. Using a circular saw, cut 3 x 3 cm grooves with a depth of 5 cm in the stacked blocks, and remove the middle from them. The welded reinforcement is fixed in the grooves and filled with glue.
Stage 3. Installing jumpers
.
They are mounted on foam blocks if the width of the opening (door, window) is no more than 1.75 m. If the size is larger, sand-lime brick is used for reinforcement.
Jumpers are made in two ways:
- with removable formwork made of bars - they are lined with sawn foam blocks from the inside, reinforcement is installed, then the blocks are treated with water and concrete is poured (with compaction);
- with permanent formwork - using U-shaped blocks.
Stage 4. Overlapping
An extension made of cellular blocks is covered with foam or aerated concrete slabs; pine timber is also popular. Wooden beams must be dry, planed and impregnated with an antiseptic. The sheathing is made of plywood, boards or OSB.
Stage 5. Roof.
When constructing the roof, be sure to maintain the correct angle of inclination for complete moisture removal.
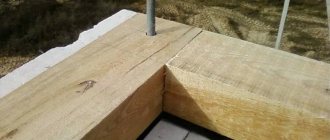
How to attach timber to a foam block: all the methods and their advantages
Top frame beam on a foam concrete wall
Foam concrete is a modern material with a lot of advantages that are increasingly attracting individual developers. However, it also has some disadvantages, one of which is insufficient rigidity and strength. Therefore, when it comes to adding a second floor made of wood or installing a mauerlat, the question arises: how to attach the timber to the foam block?
In this article we will look at two mounting methods, each of which has its own advantages.
What houses can be attached to?
An extension made of foam blocks can be built on any house: frame, wooden, block, brick. The main thing is that the old building is not dilapidated, and that the foundation is intact.
An extension made of foam blocks can be made to an old rustic log house.
The extension is made on an independent foundation or is rigidly connected to the structure of the house. An extension on an independent foundation is erected on heaving soils with high groundwater levels. The joint between the main building and the extension is filled with waterproofing material. If the soils are slightly heaving and groundwater lies deeper than 2-2.5 m, then both buildings are rigidly fastened with reinforcement.
When the need arises
When building country houses, it is impossible to do without wooden structures. And they have to be somehow fastened with other materials. In some cases this action does not cause any difficulties, but in others it can become a problem.
For example, when wood comes into contact with concrete, it can begin to rot, so a waterproofing layer must be made between these materials. But in the case of foam concrete, there is also a risk of destruction of fragile blocks under the weight of a massive wooden structure.
Laying timber on a foam block and fixing it on it is necessary if:
- The project provides for a second floor made of timber or a wooden frame. Such combined buildings are very popular, as they save money and time spent on construction;
To erect a wooden second floor, the first beam must be rigidly fixed to the wall made of foam blocks
- It is necessary to secure the roof rafter system to the box;
- It was decided to make the floors wooden, on beams made of timber or logs. This option is most often chosen for foam concrete houses, so as not to create an increased load on the walls from reinforced concrete floor slabs.
In all these cases, the fastening must be reliable so that neither hurricane winds, nor seasonal soil movements, nor any other factors can damage the integrity of the building.
Advice. The timber must be dry. During the drying process, raw wood can be greatly deformed and, if fastened tightly, destroy the walls. If there is any doubt about the dryness of the log house, the fasteners should be made sufficiently loose in the horizontal plane.
Why does foam concrete need special fasteners?
The unique structure of foam concrete blocks has been discussed more than once on the Internet. Closed pores filled with air are an excellent insulation and sound insulator. And the more there are, the better.
But when mentioning this advantage, they often forget that with such a minimum density, a problem with nailability arises. After all, fasteners cannot reliably stay in the air, and thin pore walls are extremely unreliable.
Therefore, mounting an object to such a wall causes some caution. Anyone who has ever tried to fasten it into foam concrete knows that one awkward movement can lead to the block crumbling.
Even if ordinary hardware - for example: a self-tapping screw for wood - was secured in a fragile foam concrete body, under constant or variable loads it will gradually crumble, which can lead to extremely negative consequences. Again repairs, again rigmarole.
It is for this reason that when foam concrete fasteners began to appear on our shelves, it gained wild popularity in narrow circles, even despite its high cost. And there are all kinds of hardware, each type for each individual case. How can the average person understand such subtleties and purchase the necessary fasteners?
Mounting methods
You can fix the timber frame on foam concrete walls with your own hands in different ways. But some of them are not highly reliable, others require large expenses and labor costs. We will describe the most popular mounting options, and you can decide which ones are right for you.
Fastening with threaded rods
To give the building frame rigidity and further strengthen the walls, an armored belt is installed along the upper perimeter. Another of its functions is to create a rigid base for installing a second floor, floors or roof.
In addition, the instructions do not allow the installation of metal fasteners into porous and fragile foam concrete - they will not hold securely in it. Therefore, most fastening methods are designed for the presence of a concrete reinforcing belt.
We will not ignore its structure, talking about how to secure a beam to a foam block using threaded rods.
Stud mounting diagram
| Image | Description |
| Instead of the last row of foam blocks, formwork is installed along the perimeter of the wall or special U-shaped blocks are laid in the form of a tray. At the corners and joints, part of the side walls is cut off so that the tray for the armored belt is continuous around the entire perimeter. | |
| Manufacturing of reinforcing frame | Then, according to the internal dimensions of the formwork, a metal frame is knitted from reinforcement bars with a diameter of 12 mm. They are connected with thick knitting wire. |
Installation of the frame in the formwork | The finished frame fragments are installed in a tray or formwork and connected to each other. |
| A cord is pulled over this structure, the position of which should coincide with the axis of the bar, which will be attached around the perimeter. At this level, studs with 12 mm threads are installed strictly vertically. Their length should be such that the studs pass through the beam. The step between the attachment points is about 1 meter. | |
| Concrete solution is poured into the tray with the studs installed, being careful not to disturb their position. If this happens, the studs are immediately leveled until the solution sets. | |
| After a few days required for the solution to dry, the installation of the strapping beam or mauerlat begins. A waterproofing barrier made of roofing felt or roofing felt sheets must be laid underneath it. | |
| The points where the studs exit the armored belt are marked on the bars and through holes are drilled at these points. Then they are placed on the fasteners and pressed to the base. In the corners and places where the timber is extended along its length, joining cuts are made on it. | |
| Wide washers are placed on the protruding ends of the studs and the beam is tightened with nuts. |
This is the most reliable method that must be used for attaching heavy and bulky structures to walls made of foam blocks.
Fastening with anchors
There are two ways of such fastening. The first one is no different from the previous one, just instead of studs, expansion anchor bolts are embedded in the armored belt.
The second is used in cases where the armored belt is already ready, but no thought was given to the embedded parts during its manufacture. It is more labor-intensive, but no less reliable.
| Image | Description |
| As in the previous example, before attaching the block to the foam block, it must be protected from contact with concrete by a layer of waterproofing. | |
| The timber is laid on the base, tried on, adjusted in the corners and cut. | |
Marking of fastening points | Attachment points are marked on it in 1 meter increments. If the beam will serve as a support for rafters or floor beams, the places of their installation are first marked on it, and the attachment points are located between them - they should not coincide. |
| Drilling a hole in wood | Using a drill with a wood drill corresponding to the diameter of the anchor, you need to drill through the beam all the way to the concrete. |
| Drilling a hole in concrete | Then the work continues with a hammer drill. Using a concrete drill, you need to drill a hole in the armored belt directly through the hole in the beam. Their total depth must correspond to the length of the anchor. |
| The final stage is driving the anchor through the beam into the concrete and tightening the head. |
Advice. If the timber is not dry enough, the hole in it should be made slightly larger than the diameter of the anchor or pin and covered with a wide washer. This will allow the wood to move in a horizontal plane without causing tension in the fastener.
The positive features of fastening with anchors are durability and reliability. The negative ones are the rather high price of anchors (as well as studs) and increased labor costs.
Fastening with dowels
If you want to save on fastening, expensive anchors can be replaced with wooden dowels. The installation technology is exactly the same as in the previous case.
The dowel is driven into the pre-drilled hole
Advice. You can also use scraps of reinforcement bars with a diameter of 12 mm. They are cut slightly larger than the depth of the hole, then they are inserted into the beam and armored belt, and the end is bent and driven into the wood using a sledgehammer.
Fastening with steel wire
This method is not the most reliable; it is used in the absence of a concrete armored belt along the upper perimeter of the walls. In general, it is always recommended to reinforce buildings made of foam and aerated concrete blocks.
Exceptions are allowed only in the following cases:
- For small outbuildings - bathhouses, sheds, outbuildings, etc.;
- If the roof structure is simple and does not have a lot of weight. For example, a gable roof, covered with corrugated sheets along the sheathing;
The photo shows an example of a simple roof
- If the climate in the region is mild enough and there is no strong wind pressure or snow load on the building.
This fastening method is often used for brick buildings. To do this, strong and flexible wire (preferably made of stainless steel) is cut into long pieces and twisted into 4-5 whips.
They are walled into the masonry several rows before the top level so that the ends hang on each side of the wall. In the case of foam blocks, this is done two rows before the end of the laying, with a step of no more than 2 meters between bookmarks.
In this case, the length of the wire is calculated in such a way that it is enough for the thickness of the masonry and timber and there are ends sufficient for the connection. After waterproofing the top of the walls and laying the timber, the ends of the wire rise up, wrap around the lumber and twist and tighten.
This method has one advantage - ease of installation. But there are many disadvantages:
- When tightening, the wire may break;
- Since the foam block is a soft material, it can crash into it, violating its integrity and leading to the appearance of cracks;
- The ends of the wire will interfere with the finishing of the walls;
- The fastening is not rigid enough and weakens over time.
If you still decide to make an armored belt, the wire for attaching the beam can be used as follows:
Scheme of fastening with wire to a concrete belt
As can be seen from the figure, when knitting the reinforcement cage, the ends of the wire are not cut off, but are brought out outside the formwork. After pouring the armored belt and laying the timber on it, these ends wrap around it on both sides and twist.
Facade wall cladding made of foam blocks
Building a house from foam blocks is quite inexpensive. Therefore, the facade decoration of a building is often also made from inexpensive materials. The most common option is siding.
- It will protect the walls well from external adverse influences.
- Will make the house aesthetically pleasing and modern in appearance.
- Wall cladding can be done quite easily with your own hands.
House made of foam blocks, finished with siding
But in order for such a finish to be of high quality and last a long time, it is necessary to ensure reliable fastening of the siding to the foam block. This can only be achieved by following cladding technology.
Sequence of cladding work
First of all, it is necessary to complete all the preparatory work:
- If a house that was built earlier is being sheathed, then it is necessary to remove all protruding parts, for example, window and door frames, grilles.
- Next, all cracks and crevices are sealed.
- The surface of the blocks can be treated with a primer.
After preparing the wall structures, it is necessary to attach the frame to them. This can be a wooden sheathing or special metal profiles.
The use of a frame for cladding the facade with various finishing materials is necessary for several reasons:
- This ensures good ventilation, which prevents the formation of mold and mildew.
- Unevenness in the masonry of wall structures is eliminated.
- There are no deformations of finishing elements.
If the frame of foam blocks is made of wood, then it is necessary to take into account some points:
- For wooden lathing, you need to choose well-dried wood.
- All wooden elements must be carefully treated with protective solutions against insects and rodents.
- For fire safety purposes, the bars must be impregnated with fire retardants.
- To protect wood from moisture, you should use special impregnations or simply paint it.
- The recommended lathing pitch is 20 - 40 cm. The lathing is attached to the foam block using mechanical or chemical hardware. The most commonly used are dowel nails.
- The thickness of the bars and slats is selected depending on the covering option: with or without additional insulation.
Wooden lathing of wall structures allows for high-quality wall cladding
The price for a wooden frame will be significantly lower than for a metal one. Much can be done from scrap materials. But the use of special profiles will significantly simplify and speed up the process of wall cladding.
The most optimal would be to install a metal frame for covering wall structures.
The metal frame is more convenient to use
The belts for the frame are made of galvanized profile, which has sufficient strength and a long service life.
Construction of a frame made of profiles:
- First of all, the guides are fixed. Next, the main profiles are installed in increments of 40 cm.
- The profile is fastened to the foam block using dowel-nails, mechanical anchors with spacers, or chemically.
- There must be at least four fastenings to blocks per meter of profile.
- In order for the frame to be installed correctly, constant monitoring of the position of the elements using a building level is required.
- If additional insulation of wall structures made of foam blocks is provided, then thermal insulation materials are laid in the frame. The insulation is fixed to the foam concrete using façade dowel-nails.
- For heavy types of thermal insulation material, such as mineral or stone wool, steel nails are used. If light thermal insulation is used - polystyrene foam, expanded polystyrene, then you can get by with plastic hardware.
- The minimum depth of insertion of the dowel into the foam block is 5 cm.
After completing this work, you can attach the siding elements to the frame.
Foam concrete is very convenient for building a house. But only special types of hardware can provide reliable fastening to the foam block. They are selected depending on the load that the hung materials or equipment will create. More information on this topic can be found by watching the video in this article: “How to properly attach profiles to a foam block.”