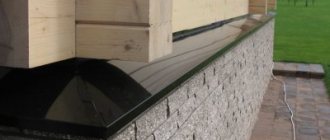
Siding is an excellent solution for cladding a house made of aerated concrete, and there are several reasons for this.
Firstly, the siding looks quite nice, secondly, it is inexpensive, and thirdly, the siding is durable and can last more than 50 years without problems. In other words, siding is an ideal material for a facade in terms of price/quality ratio.
Moreover, you can do the installation of siding yourself by studying the instructions and watching several instructional videos on YouTube. But if you are not good with construction and tools, then it is better to hire siding installation specialists. Well, since you came to this article, it means you have chosen the path of a home craftsman, and are ready for instructions on attaching siding.
Insulation of walls made of foam blocks under siding: doing it right
Insulation of walls made of foam blocks from the outside
Insulation of walls made of foam blocks from the outside is best done at the initial stage of construction. In this case, everything can be done better, and the price will be lower.
Today we will consider the question: how to insulate external walls made of foam blocks, and how to do it correctly. Also in the video in this article you can watch some moments of this work.
The uniqueness of buildings made of foam blocks
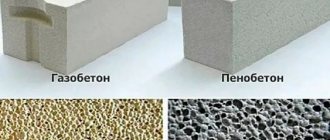
Gas silicate blocks and foam concrete blocks are designed for the construction of single-layer structures without subsequent insulation. Thanks to a special manufacturing technology, such blocks have excellent thermal insulation characteristics.
Their advantages over other building materials are obvious:
- Condensation does not form on the insulation layer, which prevents the development of mold and mildew.
- The porous structure of the walls prevents them from freezing, which increases the service life of such buildings.
- Masonry from foam blocks is cheaper, and the speed of masonry is not commensurately higher than, for example, brick.
Despite this, buildings made of foam blocks have a number of disadvantages:
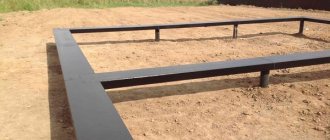
- One of the main ones is the low strength of the structure. In order for such a building to serve for a long time, it is necessary to take special measures to increase its strength.
- As a rule, the laying of foam concrete is accompanied by reinforcement of foam concrete rows, and an armored belt is mounted at the very top to distribute the load.
Attention: The facades of such buildings cannot withstand “wet” and ventilated facades; it is also not recommended to decorate them with natural and decorative stone.
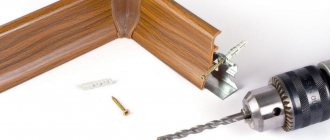
Types of fastenings to foam blocks
Before moving directly to the consideration of products and their features, let's look at what it will be possible to work with:
- Simple dowel;
- Dowel nail;
- Simple and chemical anchor;
- M4 screw;
- Self-tapping screws.
Each of the listed fastenings for foam concrete can be used at various stages of construction. Of course, these are mainly fasteners used in finishing.
Dowel for foam block
First of all, we will consider a dowel as a fastener for a foam block. The characteristic technical effect of a dowel is that it expands inside the wall. As a result, it compacts the material and creates internal supports.
An important point is that the thread of the dowel easily passes through all the pores of the foam concrete and does not violate its structure. Dowels are produced either nylon or metal, and you will choose from your needs.
To install the dowel, you will need a spacer for a screwdriver or drill. But taking into account the composition and density of the block, a screwdriver will be more suitable. By the way, we can help you choose a good screwdriver or choose a drill for your home.
You can also note that nylon (plastic) dowels are designed to work with metal screws or self-tapping screws. In addition, they will be a more economical option among others. So, for example, 100 similar dowels will cost up to 6 times less than the same number of metal ones.
Dowel nail
Options for fastening to foam concrete will depend not only on their purpose, but also on the density of the material. The thing is that the blocks are not always homogeneous. Therefore, it is recommended to choose fasteners for different material densities, for example, for interior partitions.
Dowel nails, like fasteners in a foam block, will be perfect for dense wall foam blocks. In the case of this fastener, you can also pay attention to external work. This is because the dowel nail is perfect for through and quick fixation of wood, aluminum and metal profiles to an aerated concrete base.
You probably imagine how important it is to make a strong sheathing, for example, for siding. Even seemingly lightweight vinyl siding carries additional loads on the supported wall. And after that, think about what load the foam concrete should withstand at the point of installation of the fastening and not be subject to deformation.
It is worth noting here that fasteners for foam blocks in the form of dowel nails can also be used for installing ventilated facades, as well as facade canopies. They can also be successfully used in the installation of suspended ceilings, as well as in fixing cable routes.
Anchors
It’s worth saying right away that the anchor for foam blocks will be different from those that everyone is used to using in dense walls. The thing is that conventional anchors in less dense foam concrete will not withstand the necessary loads.
The anchors we need have the following features:
- They have either a spacer part or a plastic dowel;
- Can also be used by gluing.
The technology for working with such anchors is simple and consists of the following:
- Drilling is in progress;
- An anchor is inserted;
- We unclamp and the element falls into the thread.
According to a similar scheme, the most durable fastening to foam concrete used today in construction is made.
In addition, there is a chemical anchor . This is also a very modern and progressive installation method, which can be characterized by the following points:
- Ability to bear high loads;
- Versatility;
- Frost resistance.
An example of the work can be called the implementation of fastening the Mauerlat to foam concrete. In such work, only one option is used - anchors with threads and nuts.
The principle of operation will not be fundamentally different from working in brickwork. The only difference will be that in the case of foam blocks you will have to make a concrete reinforced belt, because separately, foam concrete cannot withstand the high load of the roof.
We insulate a house from foam blocks
According to some experts, it is not recommended to insulate houses built from foam blocks. But, as practice shows, it is simply necessary to insulate such houses. Unfortunately, the thickness of the walls is not enough to maintain the desired microclimate in the home, especially since the cost of energy resources is growing very quickly.
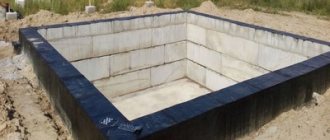
In this case, it is recommended to insulate the house only from the outside, especially since this approach has its advantages:
- Living space is saved.
- If the insulation is placed from the inside, the blocks may freeze, which will negatively affect the durability of the building.
- When insulating from the inside, the dew point shifts and condensation falls inside the blocks, which increases their humidity. This subsequently leads to the destruction of housing.
- Insulation from the outside will create the desired microclimate inside and increase the durability of the entire structure by protecting the building facade from atmospheric influences.
- Insulation of housing should be carried out in accordance with SNiPs, in which you can find out the thickness of the thermal insulation layer, as well as the main technical characteristics of existing thermal insulation materials.
Attention: It is not recommended to insulate walls made of foam blocks inside. They keep warm anyway. And there will be no moisture on the inside.
How much does it cost to cover a house with siding?
The cost of insulating a house depends on several components:
- material prices;
- wall sizes;
- insulation consumption;
- use of additional materials (membranes, fasteners, surface pre-treatment);
- the cost of the master’s work (the higher the qualifications of the specialist, the more expensive you will have to pay).
Various manufacturers set their own prices for insulators. The cheapest is polystyrene foam.
Since there are a lot of variables for determining the price, it is difficult to give an exact figure, even knowing the area of the walls that will be insulated. The price can range from 200 to 800 or more rubles per square meter and any specialist will name the final cost only after inspecting the house and taking measurements. The average cost of insulating a house is 43,500 rubles.
Choosing material
A very good option is to insulate the house using materials such as polystyrene foam, polystyrene foam or mineral wool.
Attention: When choosing a material, you should be guided by the fact that foam blocks are vapor permeable. If a vapor-permeable material is used for insulation, then a layer of waterproofing is needed; if the material is not vapor-permeable, then an air gap must be created between them and the wall.
Mineral wool
Mineral wool is an environmentally friendly thermal insulation material that does not ignite and does not support combustion:
- It has a vapor-permeable effect, but can shrink if not installed correctly. You can work with this insulation only if you have protective equipment. This is especially true for the respiratory system, since when working with it, there may be many tiny particles of this material in the air, which can cause allergies or lead to some respiratory diseases.
- In this regard, I would like to recommend that this type of insulation be securely closed, since under the influence of wind or other external influences it is capable of “dusting” and filling the space around it with such particles.
Attention: When laying this material, the mats must lie tightly, but not be deformed. Otherwise, the insulation loses its properties.
Polystyrene, foam plastic
They are the most effective thermal insulation materials, but do not have vapor-permeable properties.
- In addition, it does not shrink, is not afraid of frost, has a water-repellent effect and has good soundproofing characteristics.
- But these materials are destroyed by direct sunlight, which means that they need to be covered with decorative materials. It would not be amiss to remind you that mice love polystyrene foam very much, and if they climb into this thermal insulation layer, then a restless life is guaranteed.
Features of insulation technology with various materials
When the thermal insulation material is selected, you can proceed to preparation. To do this, you need to make appropriate calculations of the amount of insulation, as well as select tools. In almost every case, it is better to do the work together with a partner, since it is more convenient to attach the dimensional sheets together.
The tools you will need are special dowels with caps; when laying foam plastic, it is also necessary to mount metal profile guides. You will need a drill, screwdriver, hammer drill. When insulating using the “wet” method, specialized glue is useful. Materials for sealing seams are also needed.
How to insulate a house made of foam blocks from the outside with foam plastic?
Before insulating a façade made of foam blocks, it is recommended to make thorough preparations. The walls must be cleaned of excess sand, dirt and debris. If there are deposits of construction mixture on the surface, they are removed using a hammer drill. The process of foam insulation step by step looks like this:
- Applying a primer - it will ensure increased adhesion of the adhesive to the surface of the foam concrete.
- Installing a base profile at the bottom of the wall - it will serve as a support for the insulation.
- Preparation of glue is carried out using a special attachment for a drill, similar to a mixer.
- Preparing foam plastic - the material must be roughened using a needle roller.
- Applying glue to the foam using a spatula.
- Fastening foam plates to foam concrete: carried out from the bottom up, umbrella dowels are attached to the corners and edges.
Insulation with foam plastic from the outside When the process of installing the insulation is completed, you need to wait a little time for the material to shrink, and then begin finishing work.
Insulation of foam concrete with mineral wool: stages of work
When choosing mineral wool as insulation, you must have certain skills in working with it in order to carry out the process in accordance with all the rules. It is better to carry out the procedure together with a partner, according to the following instructions:
- clean the walls, achieving a smooth surface;
- treat the area for insulation with an antiseptic;
- install fastenings for the sheathing;
- attach thermal insulating gaskets;
- place a guide plinth at the bottom of the wall;
- insert the insulation, securing it to the dowels: they must be screwed into the wall to a depth of 40 mm;
- lay a windproof membrane on top of the mineral wool.
Using mineral wool for thermal insulation outside To finish the facade of a house insulated with mineral wool, it is recommended to use plaster and further painting.
Insulation using penoplex: rules
To use penoplex for thermal insulation of a foam concrete house from the outside, it is recommended to follow a number of rules that will help preserve heat inside the room as much as possible without loss. The step-by-step instructions look like this:
- Leveling the surface of the facade, sealing cracks.
- Treatment with soil mixture.
- Making glue.
- Gluing foam boards and then fastening them to dowels.
- Installation of reinforced mesh for finishing.
In this case, the work can be done by one person, since the foam sheets are lightweight and can be quickly installed. There is no need to use additional materials for vapor barrier, because penoplex already has good vapor permeation properties.
Techniques for carrying out external thermal insulation measures
When performing such work, great attention should be paid to fastening elements, since gas silicate and foam concrete blocks have some fragility.
Attention: To fasten thermal insulation elements, you need to abandon standard dowels and self-tapping screws, and fasten the fasteners using special glue or special plastic self-tapping screws.
- And yet, as practice shows, it is possible to use ordinary plastic dowels with self-tapping screws, but of increased length. For reliable fastening, dowels about 100 mm long and black self-tapping screws of the same length are sufficient, but the use of impact screws with dowels is strictly prohibited.
- When attaching to a foam concrete wall, you can only screw in self-tapping screws, and it is advisable to abandon the screwdriver.
Insulation of the outside of walls made of foam blocks is done in several stages. Each of which is quite important.
Preparing the plane
We do everything with our own hands and you don’t need a lot of qualifications here.
- The surface of the foam blocks is cleaned of dust, dirt or grease stains. If the wall has significant unevenness, then they should be leveled; this task is not difficult, since this material is very easy to process.
- We remove everything that gets in the way. These can be different window sills and wall mounting. The plane must be clean.
- Now we stretch the fishing line diagonally and see at what height we should have the sheathing. We need to know the difference of the wall in the plane.
- Primer of foam block surface. The primer will not allow the wall surface to absorb the adhesive. To attach the slabs to the wall surface, only special glue should be used.
Installation of sheathing
Here you can use a metal profile and also use wood blocks. Both options will do.
Scheme for installing sheathing under siding
Attention: If you choose wood, then before starting work it must be treated with antiseptics, then the material will last much longer.
- Now we cut the timber to the required size and fasten it along the perimeter of the plane. We make external piping.
- After this we need to secure the cross beam. But at the same time it is necessary to maintain the installation plane. We stretch the fishing line diagonally and we get the upper edge of the fastening. We cut the timber and make a connection.
Please note: Height may not be the same. Therefore, adjustment is done using shims.
- After fixing the sheathing, it is necessary to apply a layer of vapor barrier. It is simply attached to the tree using a stapler.
Installation of insulation
Installation of slab material begins at the foundation level, with gradual movement upward.
- Foam boards are mounted in a checkerboard pattern. At the same time, the glue must be applied not to the entire surface, but in dots.
- After applying the glue, the slab is pressed against the wall surface and thus it is fixed. For maximum reliability, the slabs are additionally attached to the wall using thermal anchors.
- When drilling holes for thermal dowels, do not use impact drills or hammer drills. Drilling should occur without impact.
Related article: Plastering aerated concrete walls indoors
Installation of insulation on brick walls
There are several options for installing insulation on vertical brick exterior walls of a house.
- In the first option, only roll material is used, which is glued to pre-primed walls. Additionally, the insulation is attached to it using special fasteners. This option for installing insulation is less expensive and faster in time.
- In the second option, a sheathing of slats with a cross-section of at least 4x4 cm is pre-installed on the walls. Insulation boards are placed in the cells of the sheathing and secured with screws to the wall.
On the left, the insulation is attached using a frameless method, on the right - using a wooden frame
We fasten the siding
The insulation of foam block walls from the outside ends with the installation of siding.
Everything is done according to the following rules:
Photo of siding fastening
- We fasten the panels using self-tapping screws . In this case, you should not clamp it tightly, you should leave a gap of about a couple of mm and you will avoid many problems when the material expands.
- The panel has holes for making connections . We place the self-tapping screw in its center. Also, do not make holes in the panel itself.
- Cutting the panels is done with a simple hacksaw. Just take it with a fine tooth, otherwise the material will bite.
Insulation of walls made of foam blocks under siding can be done with your own hands without any problems. And it doesn’t last that long. The instructions will help you do everything correctly and not miss anything.
Installation of guide panels
First, a drainage system is installed along the designated line. It is quite rigid, so it will be easy to attach compared to a flexible starting strip. An initial guide profile is installed on top of the drainage system. Then, using self-tapping screws, the corner profiles are secured.
J-profiles are installed around doors and windows. Only near the windows the planks are installed so that the outside edge is slightly lower than the inside. The corners of these panels can be joined overlapping, one on top of the other, or cut at an angle of 45 degrees.
When installing H-profiles vertically, you need to think in advance about where to use the level. To avoid curvature and deflection of the planks, a gap of 0.5 cm should be left between them and the cornice. The cladding is completed by installing the final panel.
Choice of insulation
Foam block is a fragile material as a supporting structure, so the insulation for it must be selected according to its weight. The best option is basalt or fiberglass mineral wool slabs, dimensions 50×100 or 60×120 cm, thickness from 5 to 15 cm, density 130-160 kg/m3. You can also use cotton wool in the form of mats, but the density of such material is less.
Mineral wool for insulating a house from the outside "TechnoNIKOL".
The advantages of mineral wool include:
- Low thermal conductivity.
- Fire resistance.
- Low cost.
- High vapor permeability.
- Excellent sound absorption characteristics.
- Resistant to mold and mildew.
- Durability.
What is the “dew point” and how does it occur?
Definition: “Dew point” is the temperature threshold at which moisture in the air condenses and turns into droplets of water.
At the everyday level, everyone has observed this phenomenon. Do you remember how glasses fog up when a person comes from the street into a warm room in winter? What about the warning not to turn on electrical appliances immediately after delivery during the cold season, so as not to burn them? The reason is condensation, that is, the transition of water from a gaseous to a liquid state. Moisture from the air condenses on cooler objects. Therefore, a refrigerator brought in from frost, for example, can be turned on after 4-6 hours - the time required for the condensation to evaporate. Well, you can just wipe your glasses.
What does this “interesting physics” have to do with building a house? The most direct thing. The walls form the thermal contour of the house, protect from heat, cold, wind and, of course, water (precipitation)
However, water is always present in the room: it comes with the air. In addition, the person himself evaporates water vapor (a family of three - up to 10 kg of steam per day). Most of the water vapor is removed by ventilation or airing; a smaller part “exits” to the street through the walls, because in winter the air outside is drier than indoors. On its way, moisture in the form of steam encounters a cold front, condenses and falls in the form of liquid droplets - the dew point.
Fact: water condensation always exists, regardless of the wall material
It is important that nothing prevents moisture from escaping: as much as it “goes in” or forms, the same amount comes out
In certain situations (high indoor humidity, low indoor and/or outdoor temperatures), moisture may condense on the surface of indoor walls. This will lead to destruction of the finish, the appearance of mold, mildew, and unpleasant odors.
Insulation of foam block walls - outside or inside?
It is more advisable to insulate the wall of a house made of foam blocks from the outside:
- No usable area is lost.
- The dew point does not shift inside the load-bearing wall.
- Foam blocks are under reliable protection.
Materials and tools
To carry out work on thermal insulation of walls made of foam concrete blocks from the outside, you will need the following tools:
- screwdriver;
- glue container;
- a spatula for applying it (a serrated one or, as it is also called, a “comb” is suitable), as well as a wide spatula for plaster;
- stationery knife (construction knife);
- brush or roller;
- protective clothing, glasses, gloves;
- hammer drill, electric drill, hammer;
- level;
- roulette.
- mineral wool slabs;
- fiberglass mesh;
- perforated base profile;
- umbrella dowels;
- dowels for fastening the profile;
- polymer cement adhesive for mineral wool boards;
- deep penetration primer;
- plastering mixture.
Plaster and paints for exterior finishing
Cladding a foam block country house with plaster is a quick and inexpensive way to protect the facade. The plaster is quickly applied and dries, has a presentable appearance and is perfectly combined with other facing materials (for example, with artificial stone for the base).
Decorative finishing of the facade with plasterSource yandex.ru
If the technology was not violated during the preparation and application of plaster, such a finish will not crack or fade under solar ultraviolet radiation. For most country cottages made of foam blocks, located in areas with a warm climate and mild winters, choose one of the options:
- Plastering. Traditional cement and sand plaster is not suitable. For high-quality protection of foam concrete walls, mixtures with increased vapor permeability and low shrinkage during operation are selected. They contain adhesives that increase adhesion (quality of adhesion) to the foam concrete surface.
- Plastering followed by painting. To paint foam concrete facades, vapor-permeable (silicone) paints are used.
Scheme of exterior finishing with simultaneous insulationSource www.pinterest.ru
Plastering a facade is considered a labor-intensive process that requires certain skills in the work. The plaster is applied in two layers – starting and finishing; work can be carried out at temperatures above +5°C. Finishing the external walls of a house made of foam blocks goes through several stages:
- The façade is prepared (cleaned of dirt and dust).
- The wall is covered with a primer, and a reinforcing mesh is fixed (at load points - at the corners of the facade, above the openings).
- A starting (rough) layer of plaster mixture is applied.
- A primer is applied for the decorative layer of plaster.
- A final layer of paint or plaster is applied to the façade.
Applying a rough layer of plaster with reinforcementSource besplatka.ua
The method has undeniable advantages:
- Plaster for foam concrete is durable and has pronounced hydrophobic properties, which makes it possible to protect the facade from external forces of any nature (mechanical and natural).
- Plaster for foam concrete does not stop diffusion in the walls of the building, allowing steam to freely escape out.
- Many options for execution. Plaster can be simple and decorative, colored and terrazite (with the addition of marble, glass, mica chips).
The disadvantages of plastering a facade made of foam blocks include:
- Necessity of experience. The process has nuances in the preparation and application of the composition. To make a high-quality coating, you need skills, technology and tools.
- Short service life. Over time, the plaster accumulates moisture and loses its protective properties; no more than 10-12 years will pass before the next repair.
- Sensitivity. When walls and bases vibrate, the plaster may crack and crumble.
Types of decorative plasterSource dom.e1.ru
Stages of work execution
Preparing walls for installation.
Before insulation, it is necessary to remove all communication devices, ensure drainage, ebb, and ventilation.
Thoroughly clean the walls from dust and dirt and dry them. It is best to carry out work during the dry period of the year, when you are 100% sure that you have not left foam concrete blocks under the insulation that have absorbed moisture.
Make sure there are no gaps and cracks, and if there are any, you need to repair them, or if the damage is growing, think about strengthening the structure or repairing the foundation.
A wall made of foam blocks prepared for insulation.
Treat the cleaned wall surface with a primer for deep penetration exterior work. It is advisable to do this twice. The primer will ensure high-quality adhesion of the material to the foam blocks.
Fastening the supporting profile.
The profile is necessary to support mineral wool slabs and provides protection from rodents access under the insulation. The profile is attached around the perimeter of the base, strictly level, using dowels or self-tapping screws.
Installation of a starting profile under mineral wool.
Laying slabs.
Prepare polymer cement adhesive according to the instructions on its packaging. Using a spatula, evenly apply the adhesive to the slabs from the back side of the material. The layer should be uniform and thin; after application, the solution should also be applied spotwise over the entire surface of the slab. The slabs are laid from bottom to top in a checkerboard pattern. The protruding parts of the insulation can be sawed off with a regular hacksaw.
Photo of external wall insulation with mineral wool.
Fastening the slabs with “umbrellas”.
About a day after gluing, it is necessary to strengthen the fixation of the mineral wool slabs with umbrella dowels. Holes for dowels are drilled longer than the dowel itself by about 1.5 cm.
Insulation of external walls with mineral wool - installation of slabs.
Plaster on insulation
You can protect the insulation itself and give the house a finished look by plastering the walls using the “wet” facade technology. The reinforcing fiberglass mesh is laid on top of the insulation on the glue, with a layer thickness of 3-5 mm, while the mesh is embedded in the glue almost completely. If overlapping is required, do it at least 10 cm.
Plastering walls over insulation - “wet” facade.
A layer of primer is applied on top of the mesh, after smoothing and drying. After it has dried, you can apply the finishing layer of plaster.
Insulation of walls made of foam blocks with mineral wool followed by plastering - photo.
Thus, with your own hands and without the help of specialists, you can insulate a house made of foam blocks with mineral wool from the outside and plaster it under the “wet” facade.
Related articles:
Let's look at the pros and cons of aerated concrete, its characteristics and purpose, masonry technology and floor construction. What to consider when designing.
Distinctive features of a monolithic frame house. Pros and cons that characterize it during construction and operation. Investment.
The technology of finishing the steps of a house porch with paving slabs and facing bricks using the example from the photo.
The article outlines the sequence of construction of a guest house from glued wooden structures on a strip foundation. Basic rules and.
Types of foundations for frame houses, advice on selection and construction, which foundation is best to choose depending on the soil.
Frameless cladding: pros and cons
Siding is one of the materials used to construct ventilated facades. In this case, the lathing not only allows you to level the surface, it also provides a gap between the decorative and base surfaces.
- The only disadvantage of the frameless installation method is the lack of the required gap. Free air circulation under the cladding reduces the formation of condensation and promotes its rapid outflow, thereby protecting the walls from moisture.
- This is especially true for insulated facades, because thermal insulation material (see Insulation for facades under siding: how to choose), especially of organic origin, quickly becomes unusable due to high humidity. We can safely say that the lathing extends the service life of the entire structure.
Therefore, permanent buildings, even if their walls are quite smooth, are always sheathed with siding along the sheathing. The only exceptions are wooden frame houses, and here's why.
A house made of foam blocks covered with siding is beautiful, reliable and practical
Building a house from foam blocks is a cost-effective option, but requires additional cladding, as it does not have a very presentable appearance. In addition, this building material has another drawback: it does not retain heat well. By deciding to cover the building with finishing material, you immediately eliminate two problems: you get an attractive appearance and solve the issue of insulating the walls from the outside with mineral wool or polystyrene foam. But for this you need to choose the right facing material.
Video description
About facing the facade with stone in the following video:
The main limiting factor when choosing a brick finish is cost - the spectacular appearance of such a house will be quite expensive. A common drawback of low-quality brick is the appearance of efflorescence (salt stains), which significantly worsens the appearance.
Finishing foam concrete walls with stone is carried out only if there is a strong foundation. The house, lined with natural stone, has an unusually attractive appearance. There are many colors and textures of stone finishing, which is not only aesthetically pleasing, but also practical, since it will last as long as possible without much hassle. Poor-quality installation can briefly overshadow the choice of stone cladding - individual stones can lag behind the foam concrete, which, however, can be easily corrected.
Brick finishingSource svarnayasetka.by
To finish a facade made of foam blocks, you can use clinker, ceramic and porcelain tiles, for which you will need to perform the following preparatory work:
- Prime the wall surface
with a waterproofing compound. - If necessary , insulate the walls
(the standard choice is mineral wool or fiberglass). - Install a frame
made of aluminum profiles and secure sheets of drywall to it. Foam concrete walls will be provided with effective ventilation. - Cover the prepared surface
using an adhesive solution.
The tiled facade will be a practical protection of foam blocks from moisture and temperature fluctuations. This finishing option is common due to its good price/quality ratio and aesthetic possibilities - imitation of ceramic brick or natural stone would be ideal. The main disadvantage of tiled cladding is the financial and time costs of preparing the walls.
Artificial stone finishingSource uf.ru
What to choose
When choosing a building material, it is based on the following characteristics:
- Expensive.
- Hydro- and thermal insulation.
- Durability.
- Performance.
- Aesthetic appeal.
- Easy to install.
Taking into account all the requirements, the best option is to finish the house with siding made of foam blocks. At the same time, you get a beautiful, eye-catching home and the opportunity to do this work yourself, without calling in professionals and saving money.
Related article: How to choose lintels for brick walls
Let's consider the advantages of the 3 main types of siding that the modern market offers:
- Vinyl - such panels are easy to work with, they have excellent performance parameters: they are not subject to rotting, insects do not “like” them, and they do not require special care or periodic repairs.
- Basement siding is more durable, it is thicker than vinyl and metal siding. It is used for cladding those areas that are exposed to adverse conditions for a long time.
- Metal – excellent performance: panels of this type do not burn, withstand large temperature changes, are durable, strong, etc.
Once you have decided which decorative panels to cover the outside walls of a foam block house, you can begin preparatory work.
We analyze the theoretical aspects
Insulation of a foam block from the outside is carried out according to the same rules and standards as when working with any other material. But when choosing a material and technology, the characteristics of foam concrete are taken into account.
When insulation from the outside must be carried out:
- If the walls are less than 37.5 centimeters thick.
- Provided that the masonry has a large thickness of mortar, when heat can escape through the seams.
- Use of high-density blocks of grade D500 and higher in the construction of the building.
- If the width of the blocks is less than 30 centimeters.
- When filling load-bearing frames of structures with foam concrete products.
- If the builders made mistakes - if they used cement mortar instead of special glue in the masonry, made thick seams, etc.
In other cases, thermal insulation work is carried out at will, but one way or another provides better heat conservation. In order to accurately determine the need for work, it is advisable to calculate the heat transfer resistance of the walls and compare them with the indicators specified in the standards.
As an example, we can take the construction of a house from D500 brand blocks with a thermal conductivity coefficient of 0.14. The thickness of the building wall is divided by a coefficient - 375 millimeters (0.375 meters) divided by 0.14 and the result is 2.68. SNiP II-3-79 “Construction Heat Engineering” states that the standard value is 3.2 (for Moscow and the surrounding region).
That is, the thickness of the walls is not enough to ensure high-quality thermal insulation of the house and foam concrete requires additional measures. True, you need to remember to take into account the heat transfer resistance of the internal and external cladding. These indicators are added to the resulting value.
Preparatory stage
- First you need to prepare your tools. You will need:
- Measuring tool: ruler or tape measure.
- Plumb or level.
- Saw (for metal) or grinder.
- Screwdriver and screwdrivers.
- Hammer.
- Ladder.
- After this, the working surfaces are freed from all protruding elements: window frames, doors, ebbs, grilles, etc. It is necessary to inspect the walls from the outside, remove dirt and dust, and then eliminate possible cracks. Particular attention should be paid to areas with windows and doors. The cracks are sealed with cement mortar or special foam. When the walls are cleaned and prepared for the next steps, they need to be treated with a primer mixture. The primer saturates the wall, a protective film is formed, and this is necessary for good waterproofing on the outside of the wall.
- Decoration of the sheathing. Finishing slabs are mounted on the sheathing (frame). If you attach the panels directly to the walls, this will interfere with ventilation and then mold and mildew may appear under the cladding. In addition, such a frame will allow the use of insulation and correct the unevenness of the sheathed surface, which in turn will help to avoid deformation of the decorative slabs being laid. As a result, you will get an excellent result: smooth, beautiful walls.
There are two types of frame:
- Metal - in this case, a galvanized metal profile is used. It does not rot, is durable, and with its help it is easy to create the required structures. The frame is installed on foam blocks with a gap (distance from the surface) of 8-16 cm. It is in this gap that the insulation will be placed. The order of design of the frame: first of all, corner profiles are installed. The main profiles are installed every 30-40 cm - horizontal and every 90 cm - vertical. This will ensure the reliability of the frame itself and good fixation of the insulation placed between it and the wall (for example, polystyrene foam). If the profile length is 3 meters, there must be at least 4 hangers. To mount the frame, you can use dowels - such fastening will be reliable. When installing the profile, make sure that they are strictly vertical. To do this, use a level.
- Wooden - dry wooden planks are used for it. This is a fairly economical option, since they are inexpensive. The use of a wet plank is not allowed - this can lead to deformation of the frame during the drying process, which in turn will affect the finishing material after its installation. Before starting construction of the frame, the material must be treated with an antiseptic solution to prevent mold and protect against insects. The procedure for designing the frame is the same. The optimal distance (step) between wooden planks is from 20 to 40 cm. The gap between the foam blocks and the frame depends on whether the house will be insulated or not.
After installing the frame, you can begin to insulate the house; for this, insulation such as mineral wool or polystyrene foam is used. Foam insulation is a cost-effective proposition. Polystyrene foam weighs little, there are no problems with it in the process of insulating a building, it is a cheap way. The main disadvantage of polystyrene foam is that it burns well. Insulation with mineral wool is also a fairly cheap option; besides, it does not burn and absorbs sound well.
Experts recommend that buildings made of foam blocks be insulated without fail - this increases the operational parameters of the foam block and can significantly reduce heating costs in the cold season. After filling the space between the wall and the sheathing with insulation, the preparatory stage is over, the house is insulated, and you can begin the main stage - installing the siding.
Thermal insulator protection
Each insulation requires certain protection. Mineral wool is exposed to the negative influence of wind and moisture, polyurethane foam and polystyrene foam are exposed to sunlight and fire. That is why they require high-quality shelter in order to protect the thermal insulation material and avoid repeated repairs. Various building materials can be used to protect the thermal insulator.
One of the most aesthetic and durable materials is masonry. However, stone is the most expensive and time-consuming. And this is due to the fact that it is necessary to expand the foundation to a thickness that will correspond to the insulation layer, taking into account the plastering used. To save money on gluing the insulation, you can carry out two operations at once - install the insulator and lay the brick in parallel. When using blocks, the use of plaster is additionally required. However, the costs of such work are recouped by the price of foam concrete and operating time.
After finishing the finishing, it is difficult to understand what the house was built from. Source 51.spb.ru
Wet facade technology is widely used for polystyrene foam and basalt insulation. In this case, you need to clear the walls of debris. Seams and irregularities are worked out with mortar. The walls are primed, and thermal insulation is attached to the surface with a special compound. Adhesive compositions can have different compositions, so you need to use those options that are recommended by manufacturers for certain thermal insulation materials. After a certain time, the slabs are fastened with umbrella dowels, and the recesses are leveled with an adhesive solution. Then the mesh is applied to the glue, the entire surface is plastered, and after drying another layer of decorative plaster.
The most labor-intensive option is a ventilated facade. In this case, slats and panels are used
It is very important to think in advance about arranging the future sheathing with special ventilation gaps. The surface must be cleaned and leveled, the boards must be laid vertically, which allows for the creation of air gaps. A vapor barrier membrane is used on top, logs are filled, a thermal insulator is laid in between, and a waterproofing film is placed on top
When the ventilation gap is ready, counter-battens are mounted vertically onto which the facing material is attached
A vapor barrier membrane is used on top, logs are filled, a thermal insulator is laid in between, and a waterproofing film is placed on top. When the ventilation gap is ready, counter-battens are mounted vertically onto which the facing material is attached.
Completing the finishing of the house with sidingSource optimap.ru
The main stage is façade cladding
In principle, you can start covering walls made of foam block with siding at any time: heat or frost in this case only affects the comfort conditions during the cladding of the house.
Although siding plates can withstand low temperatures quite well, they must be handled carefully: when cutting the plates, cracks may appear due to partial loss of flexibility.
First of all, you need to install a drainage system. This is a rather rigid structure that is mounted on the base of the home. After this, work begins on finishing the building from foam blocks. A starting strip is installed above the low tide - it is mounted along the entire perimeter of the house. Then the corner siding slabs are installed using screws or nails. The next step is the design of door and window openings. After the starting strip, the next element is installed using a latch lock: a tenon is inserted into the groove until it clicks. Installation of finishing material is carried out from bottom to top. Typically, the planks are additionally secured with nails or self-tapping screws for greater reliability.
The finishing areas are covered with a finishing strip. When decorating a house with siding, you should consider the following points:
- The spacing of the siding plates should not be more than 45 cm.
- Fastening is carried out strictly according to the slots intended for this purpose.
- When installing the slabs, it is necessary to maintain the rigidity of the fastening, taking into account thermal expansion: the gap between the head of the nail or self-tapping screw and the attached strip should be approximately 1 mm. This is due to the fact that at high temperatures any material tends to expand, and at low temperatures it tends to contract. This gap must be observed when installing any panels.
If your building is located in an area of constant strong winds, you must use nylon washers under the nail heads.
- Nails and screws must be of sufficient length, the nail head must be at least 8mm.
Finishing a building made of foam blocks will not cause any particular difficulties, especially if the sheathing is installed correctly.
Installation procedure
Start siding the house from the lowest point. Using a spirit level, strictly horizontally attach the starting profile to the lower beam of the sheathing. Then install vertical corner profiles of the required length along the edges of the wall. Attach them to the sheathing every quarter meter, moving from top to bottom. Next, proceed to installing the main panels and first of all measure their length. Cut one panel to this size (remember thermal expansion!). Bend the panel a little in the middle and insert its edges into the grooves of the corner profiles, and insert the lower part into the lock of the starting profile
After this, carefully pull the panel up a little and the lock will click into place. Attach the top ridge of the panel to the sheathing, making sure not to miss a single beam - otherwise the cladding may swell. Hook the lower part of the next panel onto the locking protrusion of the previous one, lift it slightly and attach it to the sheathing without any tension. Working from the bottom up and installing all other panels in the same way, cover the entire house with siding.
Proper insulation of walls in a foam concrete house
Foam block is a relatively new building material used for the construction of buildings. It has the correct shape of the stone, does not sink in water, does not deform, and is frost-resistant. Its thermal insulation values are almost 2 times higher than those of bricks.
The material itself breathes, and a favorable microclimate is created in the room. However, there are no ideal building materials; even with the correct installation technology, many cold bridges appear, so additional insulation of the walls made of foam blocks from the outside is required, this will reduce freezing of the walls, as well as save on gas and electricity consumption.
Types of insulation
A structure made of foam concrete retains heat indoors as much as possible. Unfortunately, gusty winds can blow through walls made of foam blocks much more than brickwork, and additional insulation of walls with foam concrete will help avoid this.
Related article: How to properly putty walls for painting
It is better to start insulating a building from the roof of the building. If the attic is cold, then it is important to place the insulation on the floor. If the attic is insulated, then thermal insulation is laid on the inside of the roof. Thanks to this, the heat loss of the building can be reduced by 25-30%.
For better insulation, cover the walls outside and inside
In the absence of insulation, humidity will increase in autumn and winter. It is necessary to insulate the outer walls of the building, thus protecting the foam blocks from rain, moisture, precipitation and temperature changes. To reduce heat transfer indoors, foam block walls can be additionally insulated from the inside.
Today there are four main types of insulating materials:
- mineral wool;
- Styrofoam;
- ecowool;
- polyurethane foam.
Tips for installing insulation
- If you plan to install vinyl siding, you should use galvanized screws and nails. This will protect the metal from rust and the structure will last longer.
- When choosing mineral wool, you should ask whether it is treated with a fire-retardant mixture.
- The joints of the insulator blocks must be sealed to avoid moisture ingress.
- If you plan to use mineral wool, it is better to install blocks on a vertical surface. They have a denser structure and therefore have better insulating qualities.
- Membranes are laid on polystyrene foam and mineral wool. If you do not do this, condensation will begin to accumulate in the house. An additional ventilation gap is created by the sheathing.
- Areas around windows and doorways require additional insulation. The insulator is also reinforced at the corners of the building.
When insulating walls, you need to pay special attention to windows. Source myprofnastil.ru
- To install the heat insulator, no leveling of the walls is required.
- The calculated amount of material should be increased by 5 - 7%, since some will have to be cut off during installation.
- To fix the insulator, dowels with disc-shaped caps are used. At least 5 dowels are used for each block.
Mineral wool
Mineral wool is considered the most ideal insulation. It is a relatively inexpensive building material with excellent insulating characteristics. It is best to use this raw material on buildings on the sunny side, since the material itself absorbs moisture very quickly.
Without the mineral wool drying out, its properties will deteriorate, therefore, it will no longer be able to fulfill its main function as insulation. Mineral wool does not burn, it is safe. In case of fire, it does not emit harmful substances, hence the great demand for this material in construction.
Mineral wool is placed wearing a mask and gloves
Before starting work with mineral wool, you must purchase a respirator and gloves to avoid particles getting into your lungs. After installing the insulation, you need to ventilate the room; after 2-3 hours, all excess insulation particles will be removed.
With the correct technology for laying slabs, shrinkage will be eliminated, and the wool will fully perform its functions. This insulation has a long service life, with proper operation up to 30 years.
Mineral wool perfectly absorbs sound and has low thermal conductivity, so it is an ideal material for insulating roofs and walls made of foam blocks. Cotton wool allows air to pass through well, thanks to this the walls do not accumulate condensation and moisture, which means that mold and mildew will not develop on them.
The process of mineral wool insulation itself is quite simple; no additional specialist skills are required. The packaged building material is made in the form of a rolled-up roll or slabs. Before installing mineral wool, it is necessary to prepare the frame.
The slabs are placed between the guide profiles without gaps. The insulation is attached to the wall using screws or glue. The most optimal would be to install insulation on the walls in two layers. The correct location is in a checkerboard pattern to hide the cold bridges. A vapor barrier needs to be laid on top of the insulation; it will help protect it from precipitation, dirt and dust, and, therefore, increase the service life of the material.
Advantages and disadvantages of materials
- The positive qualities of mineral wool include low cost. It has a low thermal conductivity, good noise insulation properties, but is not resistant to moisture and is easily flammable. To protect the material from getting wet, membranes that absorb liquid are additionally installed.
Cotton wool in rolls is more often used on horizontal surfaces, since it does not protect joints well and must be laid in 2 layers. The wool in the slabs has a denser structure, so it is used to cover the walls in 1 layer.
Mineral wool is produced in slabs and rolls Source legkovmeste.ru
- Polystyrene foam has a porous structure. This material is filled with gas bubbles. It retains heat well. Manufacturers produce slabs of various thicknesses. You can choose the material based on your needs. It is low cost, lightweight, and easy to install. The main disadvantage is that it is spoiled by rodents. It conducts air poorly, so a room with such insulation can accumulate moisture. In addition, polystyrene foam has a short service life - 12-15 years; it burns and at the same time releases toxic substances.
Foam boards of various thicknesses Source gidpokraske.ru
Styrofoam
Polystyrene foam (expanded polystyrene) has excellent performance characteristics, and the cost of the material itself is less than that of mineral wool. Polystyrene foam is an alternative replacement for cotton wool. This insulation is used where the temperature during the day does not rise above 20-25 degrees, as well as at high humidity of 95%.
Expanded polystyrene is resistant to precipitation and will protect the walls of the building from moisture. However, due to high air temperatures and direct sunlight, the insulation itself begins to deteriorate. It is best used in cold climates.
Expanded polystyrene has a high density, therefore, it will perfectly retain heat indoors, just as well as mineral wool.
Before installation, it is important to select the required thickness of polystyrene foam.
In a low-rise building, it is recommended to use material 50 mm thick.
It is durable and frost-resistant, even with frequent freezing and thawing it lasts more than 30 years. It is not afraid of mold, mildew, it does not rot. But this material does not have the best fire resistance. If you use it for foam concrete floors, it will not cause harm. It is not recommended to use it for insulating walls made of timber or logs.
Installation of expanded polystyrene panels is carried out using glue. The corners are attached to the wall using dowel nails. Initially, you should level the surface of the walls, and only after that install the insulation.
This is necessary to ensure that the material fits tightly to the wall. A reinforcing mesh is attached to the top of the insulation; it will give the wall structure additional strength. After this, the surface must be plastered.
Siding is a universal finishing material
Whether to use siding for cladding or choose another material, as a rule, the owner makes the choice independently. However, before making a choice, it is worth understanding that houses built and lined with brick today do not allow the use of additional insulation, which means that it is quite difficult to maintain heat in a dull room. Whereas siding, which today is increasingly used for cladding the facade of a building and its base, is best combined with the insulation materials used.
House finished with siding
What insulation is better for siding? You won’t have to look for the answer to this question for long, since today there is not such a wide variety of insulation materials that can be used for buildings lined with siding. There are only three of them:
- mineral wool;
- Styrofoam;
- ecowool.
Foam plastic, main characteristics
One of the materials that can be used to insulate buildings with siding is polystyrene foam. Its main advantage is ease of installation. The material is very light, its rigidity allows it to be glued to walls without much difficulty. If glue is not applicable, then the foam can be attached using disc-shaped dowels.
Polystyrene foam is not a material that can provide constant air flow and ventilation, since it has low permeability. By installing polystyrene foam as insulation, we voluntarily enclose our home in an airtight shell. It will also be quite difficult to deal with excess moisture, because you will have to ventilate or provide mechanical ventilation, which will in no way help preserve such valuable heat.
Sound insulation, if we talk about polystyrene foam, then its excellent sound insulation is just a smart advertising move to promote the product to the markets, nothing more. Moreover, foam plastic, rigidly fixed to the wall, begins to work as a sound amplifier.
Polystyrene foam is the best material for insulating engineering structures such as water pipelines and sewerage systems. Concrete floor screeds because they do not absorb moisture and have a low level of thermal conductivity.
Foam insulation
Mineral wool, ecowool - main characteristics
Another material that is used as insulation for houses with siding can be mineral wool. This is an ideal material for insulating walls built from natural wood, brick, and large-block walls. Mineral wool has excellent properties when used with plastic sidings and metal sidings.
If your choice fell on mineral wool and you decided to use this particular material as insulation, then it is better to choose mineral wool in the form of molded slabs, the size of which is 0.5x1 meter. You may ask why? Mineral wool formed into slabs is much easier to install; after several years of service, the material does not slip and does not expose individual areas.
To ensure that the material does not become dusty after completion of installation work, before installing the siding it is worth protecting it by installing a vapor barrier film
This precaution not only prevents cotton wool particles from entering the air, but also prevents water vapor from penetrating from the walls of the building into the gaps left for ventilation.
Mineral wool insulation
If you care about the state of the environment, about the environmental friendliness of your home, then you should use ecowool as insulation. The basis of this material is cellulose, to which special additives, boric acid and borax are added. This composition of ecowool makes it not subject to rotting and does not burn.
Today, ecowool is not produced in the usual form of panels, which can be easily attached to the wall using disc-shaped dowels. Therefore, to apply a layer of insulation you will need specialized equipment that allows you to apply layers of material directly to the wall. After processing, the material is firmly attached to the wall and even after several years after installation it does not shrink.
If we compare the qualities of mineral wool and ecowool, such as thermal insulation and sound insulation, then the material is equivalent. Due to their loose fibrous structure, both types of material do an excellent job of absorbing noise.
Ecowool insulation
Ecowool
Also, ecowool is often used to insulate a residential building made of foam blocks, warehouses, and office premises. This insulation is used in places with high humidity. The main disadvantages of ecowool:
- excellent thermal insulation characteristics decrease significantly over time;
- the material shrinks by almost 20%;
- the insulation has an unpleasant odor;
- absorbs moisture, over a year of operation the moisture content of the material increases by 1%. As this indicator increases, the thermal conductivity coefficient increases;
- requires specialized equipment for installation;
- skills for installing insulation are required; it is important to know the installation rules. It is not recommended to install it yourself;
- dry installation generates a lot of dust;
- with wet installation, the material dries up to three days;
- flammable, smoldering. insulation is not recommended for use at close distances from fire sources, fireplaces, chimneys;
- During installation, additional protection of the material from asbestos-cement boards and foil is required.
Installation of ecowool spraying
The advantages of this insulation include:
- excellent sound insulation, a 15 mm layer absorbs noise up to 9 dB;
- for insulation a small amount of material is required (28-65 kg/m3);
- there are no toxic and harmful substances in the insulation composition;
- with the help of ecowool it is possible to fill hard-to-reach places;
- is a seamless material, there are no cold bridges;
- low cost of material.
Insulation options on the cold air side
In general, protecting the walls of a foam block house is the same for all insulation options. Before starting work, you need to make two decisions:
- choice of insulation;
- choice of finishing method.
Insulating a house made of foam blocks with warm plaster
If the house is located in areas that are quite favorable from a climatic point of view, you can combine these two solutions by choosing “warm” plaster. The material simultaneously performs two functions. To increase the strength characteristics, the layer is laid on a reinforcing mesh made of fiberglass. The work is carried out in the following order:
- cleaning hard surfaces from dirt, dust and grease;
- applying a layer of primer;
- first layer of plaster;
- securing the reinforcing mesh;
- Next you need to apply the required number of layers of plaster;
- The finishing layer can be paint based on silicone.
Next, you need to consider more effective types of thermal insulation and more complex finishing options.
Choice of insulation
There are several options here, which are among the most common:
- mineral wool;
- Styrofoam;
- extruded polystyrene foam;
- ecowool;
- polyurethane foam.
It is best to choose a material that will not block the movement of air through the walls of a foam block house.
The most economical material that meets this requirement is mineral wool. It is important to carry out insulation with mineral wool taking into account the characteristics of the material.
Insulating a house made of foam blocks using mineral wool
The following activities are required:
- vapor barrier on the warm air side (the cheapest option is polyethylene film, but it will not allow the walls to “breathe”; it is better to opt for more technologically advanced vapor barrier membranes);
- waterproofing from the cold air side (again, in this case it is worth choosing a waterproofing or vapor diffusion membrane);
- an air-ventilated layer to remove moisture from the surface of the material is placed between the thermal insulation and the sheathing and is assumed to be at least 50 mm thick.
Selection of sheathing material
At this stage you need to choose the appearance of the house. The following materials are suitable for cladding a house made of foam blocks:
- siding;
- lining;
- block house;
- brick.
Siding is the most economical and common option. If you have sufficient funds, it is worth considering other options. The lining will allow you to finish it as a timber, and the block house as a log.
In general, installation of thermal insulation and sheathing is carried out in the following order:
Scheme of covering a house made of foam block with siding
- surface cleaning;
- securing vapor barrier;
- assembly of a frame from wooden blocks (section depending on the thickness of the insulation) or a metal profile;
- installation of insulation with fastening it to disc-shaped dowels;
- fastening the waterproofing (if the frame is made of wood, you can fasten it with a construction stapler with the obligatory gluing of the joints with tape, the same is true for vapor barriers);
- installation of sheathing, method of fastening is selected depending on the selected material.