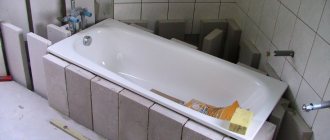
Aerated concrete garage: fast, cheap, practical
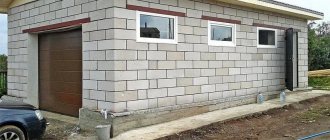
Our topic today is building a garage from aerated concrete. The reader and I will get to know several projects of separate garages and private houses with garages, and also find out what features of the material should be taken into account at different stages of construction. We will study the technology of erecting walls, making armored belts and solutions that can be used for the exterior finishing of buildings made of aerated concrete.
What types of foundations are suitable for a garage made of foam blocks
Foam block is a lightweight building material, the weight of which directly depends on its density.
For the construction of garage walls, structural and thermal insulating blocks with a density of 600-800 kg/m 3 and dimensions of 200x300x600 mm are mainly used. Such building stone weighs 19-22 kg, and 1 m 3 blocks weighs within 460 kg. Thus, a small weight load will be placed on the foundation and foundations with high load-bearing capacity are not required. The following types of foundations are suitable for building a garage made of foam blocks:
- shallow belt (MZL);
- slab (if there will be heavy, large equipment in the garage);
- screw;
- pile
When choosing the type of foundation, in addition to the weight load of the structure, several more parameters are taken into account:
- soil type;
- soil freezing point (SFP);
- groundwater level (GWL).
Foundation on screw piles
On mobile soils with a predominance of sand or sandy loam, it is optimal to build a foundation on screw piles. These supports are immersed 20-30 cm below the TPG, due to which the pile is firmly held in the soil and does not respond to its natural or seasonal (periods of freezing and thawing) movements.
To install a foundation on screw piles, it is not necessary to use expensive equipment: a hole drill, a pile driver, or specialized installations. Craftsmen have long developed the technology for installing metal supports with their own hands. For this purpose, a crowbar or metal pipe is used, which is inserted into the technological holes under the head. The pile is screwed in using the efforts of several people. The number of supports is calculated based on the requirement: the distance between them should be no more than 3 meters.
Advantages of a foundation on screw piles for a foam block garage:
- No labor-intensive and time-consuming excavation work.
- Installation speed.
- Possibility of installation at high groundwater level.
- Ventilation of the lower floor.
- Possibility of installing hollow core concrete slabs on piles, which is optimal for a garage with a passenger car). In this case, the distance between the supports is reduced to 2 m.
Flaws:
- The need to install a ramp to enter the garage, since the building will be raised above ground level.
- If it is not possible to install reinforced concrete slabs, the lower floor is made of wood, which is fraught with other disadvantages and operational difficulties.
A pile foundation has the same pros and cons as a screw foundation. The difference lies only in the material from which the supports are made and the method of their installation.
For the construction of a pile foundation the following can be used:
- narrow and long concrete blocks;
- metal or asbestos-cement pipes with concrete poured into them;
- pillars made by hand using formwork and concrete.
The supports are immersed in the ground 20-30 cm below the TPG. They are fixed in a vertical position using backfilling and concreting.
A slab foundation for a garage made of foam blocks can be installed in two cases:
- if there will be cargo equipment in the building;
- if the construction site has heaving soil and the region has harsh climatic conditions.
In the first case, the slab is buried by analogy with the MZL: by 30-40 cm. In the second, a USP (insulated Swedish slab) is installed, which at the same time is a floating foundation that compensates for all soil movements.
Insulation is necessary to create favorable operating conditions for the garage and its durability in cold climates. Often this decision is made when building a garage next to the house, since the presence of a USP reduces heat loss.
What type of foundation system to choose
The answer sounds quite simple - the one that you can afford. Approximately half of the total funding will have to be allocated for the construction of the foundation. A normal garage should be built of red brick, warm and hard. Then the depth of the foundation system can be made relatively small. A cheap foam block will require a very strong and rigid base, which means that the money saved on the walls will be spent on increasing the depth of the foundation for a garage made of foam blocks.
For a garage made of foam blocks, you can use any of the following foundation schemes, except for the columnar version and the system on bored piles:
- Pile foundation system made of driven reinforced concrete construction piles. The depth of immersion of the supporting elements allows even a two-story brick house to be supported;
- Slab foundation, most suitable for garages where there is heavy equipment and a large number of shelves with parts and tools. The shallow embedding depth allows installation on any soil of a more or less flat area;
- The tape or pile-tape option is well suited if the garage provides for the arrangement of a small inspection hole or basement;
- Shallow option or combination of MZLF with pile supports. The depth of embedding of the foundation structure is very small; excellent rigidity will ensure normal stability for foam block walls.
It is clear that when choosing the type and depth of the foundation system, first of all, you will need to take into account the characteristics of the soil and the terrain.
Step-by-step instructions for construction
Algorithm for building a garage from gas blocks:
Drawing up and approval of a project (drawing), taking into account all the details (inspection pit, possibly the arrangement of a small cellar, the occurrence of groundwater, the nature of the terrain and soil, ventilation, waterproofing, etc.). Calculation of all necessary materials that will be useful at all stages of the construction process, acquisition of tools. Marking the pit, excavation work, backfilling of cavities, arrangement of the foundation (monolith). To do this, you can invite professionals from a construction organization who can do the work manually or using equipment. According to the project, an inspection hole and a small basement are made in the foundation, which are often made monolithic (concrete), using pouring over formwork. Reinforcement is built into the recesses. Pouring and compaction is carried out strictly according to reinforcement markings. It is better to make an inspection hole in advance, as it is much easier than equipping it later. Shrinkage of the foundation within 1 year. It is impossible to erect walls on an unsettled foundation, since the walls of the building may become covered with cracks, and then you will have to correct mistakes or re-install the walls. Purchase of high-grade density gas blocks. The higher the density index D500-D1200, the stronger the building will be. After the foundation has settled, roofing felt is laid on it, and a frame is installed to the marked location of the future gate location, welding the rods. The main feature of the garage arrangement is that the gates are installed before the walls are laid. The gates are attached to welded rods. If roller blinds are made, then these actions do not need to be done. They are made at the end of construction. The walls begin to be erected from the corners using dense structural blocks. Having made markings along the perimeter with a construction cord, they begin to lay the first layer of blocks in a circular manner on a cement-sand mortar. The next layers can be fastened with glue, the dry powder of which is diluted with water until creamy.
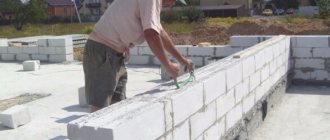
The composition is applied with a notched trowel along the lower surface of the block being laid. The walls are installed in a checkerboard pattern, paying special attention to the corners, periodically measuring them with a level. Excess parts of blocks are removed with a hacksaw
Every 3-4 layer of aerated concrete products is reinforced with steel reinforcement. The blocks themselves are tapped with a rubber mallet when laying. The walls are left to dry, the interblock seams are sealed with sealant. When the first layer of walls has dried, in regions with low temperatures, if desired, you can make an internal thermal insulation layer from blocks, not forgetting about laying roofing felt between the walls. Leave spaces for marked communications and cut them out in advance. The top layer is made in such a way as to form a concrete belt under the roof. When it dries, wooden beams are laid on it, according to the design, as well as waterproofing materials (roofing felt). When installing the roof, the space that is formed between the beams is filled with expanded clay and then poured with concrete. Then the material intended for the roof is laid (slate, metal tiles, etc.). Next, the floor and inspection hole are poured, according to the project (with a strip foundation). If the pit was ready earlier (monolith), then they simply make a screed on the floor. Finishing activities are being carried out. The finished walls and inspection pit can be plastered and finished with any material.
Lighting and communications are carried out before the finishing process. Use openings according to markings in the walls, prepared in advance.
Exterior finishing
Aerated concrete has exceptionally high vapor permeability. If the garage is not heated and is used only for its intended purpose, this factor can be neglected: there are simply no sources of moisture in it. But in a garage with habitable premises, or in a house with a garage made of aerated concrete, the vapor permeability of the exterior finishing should be at least not lower than the vapor permeability of the wall material.
Reference: the humidity in an inhabited heated room is higher in the cold season than outside. If the vapor permeability of the exterior finish is lower than that of the walls, moisture will condense underneath it. Damp walls deteriorate faster and lose more heat.
In order for a wall to be dry, its vapor permeability should not decrease from inside to outside.
That is why, for the exterior decoration of aerated concrete buildings, the following are used:
- Ventilated facades (vinyl and metal siding, corrugated sheets, etc.);
Garage exterior with vinyl siding
- Plasters with increased vapor permeability, designed for gas and foam concrete blocks.
Vapor-permeable plaster for aerated concrete
Floating foundation
Being a type of tape-type base, the floating base compensates for soil vibrations, absorbs loads and is not sensitive to natural vagaries. What is the design of such a foundation for a car? It is a recessed concrete slab reinforced with steel reinforcing mesh.
When arranging a floating foundation, follow the order of work:
- Dig a rectangular pit.
- Cover the base with a sand cushion and compact the surface.
- Install mesh type reinforcement cage for strength.
- Fill the foundation with concrete until it is completely immersed in the reinforcement.
- Plan the surface.
Step-by-step instructions for construction
In order to simplify the work, the construction of the foundation is carried out in stages, starting with preparatory and excavation work and ending with the care of poured concrete and waterproofing of structures that have gained strength. Wherein:
At the initial stage, the main attention is paid to clearing the site, removing roots and debris, marking and transporting a sufficient amount of building materials. During trench digging, the markings must be clarified and, if necessary, the walls are strengthened. At the base preparation stage, the bottom of the trenches is leveled, compacted and covered with layers of sand and crushed stone (also compacted). When constructing on difficult soils, the layers are separated by geotextiles, roll waterproofing is laid under the soles of the supports or a concrete base is poured
The boundaries of the foundation are formed by durable formwork without cracks, lubricated with waste oil or covered with plastic film. A tied frame is lowered inside the formwork, mounted on plastic supports. The concreting stage is carried out under suitable weather conditions, with layer-by-layer but continuous pouring of the solution, forcing out air and leveling each layer to 20 cm. The structures that have gained strength are coated or covered with waterproofing materials, on top and on the sides.
Tape
Marking of this type of base is carried out using long pegs and a cord, with diagonal deviations at the internal and external corners of no more than ±2 cm.
The sand base for the future foundation is filled up only after leveling and compacting the bottom and updating the markings. The formwork and reinforced frame are most often laid simultaneously.
In the case of strip foundations, the frame is made three-dimensional, connected, reinforced with clamps and overlaps at the joints. Taking into account the elevation of the tape above the ground level, it is worth taking care in advance of supports or ties for the protruding parts of the formwork. Concrete pouring begins after eliminating the risk of distortion, and freshly poured structures are covered with film.
How to make a strip foundation for a garage is shown in the video below:
Columnar
Due to the low load-bearing capacity, columnar foundations are built only on dry and dense soils, with a low weight of the structure. The supports are placed in increments of 1 m in the corners and along the perimeter of the load-bearing walls and, if possible, are tied with ready-made reinforced concrete products or metal. By analogy with the previous foundation, sand and crushed stone are poured under their soles and compacted.
Combined designs
If it is necessary to increase the load-bearing capacity of a columnar-strip foundation without significantly increasing its mass and dimensions, the strip is insulated, expanded at the base (T-shaped heel or trapezoidal section) or reinforced with columnar supports at the corners of the load-bearing walls of the garage. The latter option is considered optimal when adding a hole to the plan, conducting construction on difficult soils or uneven areas.
The functions of additional supports are performed by pillars with a cross-section of at least 15 cm, buried 1-2 m into pre-dug holes. The frames of the columnar and strip parts are connected; after the concrete gains strength, the owners receive a monolithic and stable structure that can withstand seasonal soil movements well.
Pile
The order of work depends on the type of piles (bored, driven or screw), in most cases they are carried out using special equipment. An exception is made for TISE supports or metal screw piles of short length, which, if desired, can be laid on their own, using hand drills or levers.
Step-by-step video review of the construction of a pile foundation for a garage:
Slab
The slab foundation for a garage is most often made shallow; the forces of frost heaving are compensated by 10-20 cm of sand and 10 cm of crushed stone. The recommended pit depth is 40 cm, with a height of the slab itself of 20 cm or more, double-row reinforcement (the use of ready-made meshes with cells no more than 20x20 cm is allowed) and protection of structures on the sides.
The surface of the slab is carefully smoothed, and the foundation is watered until the final strength is achieved. When choosing this design in the garage, there is no provision for a pit or basement, but the room itself and vehicles are better protected from moisture.
From the video you will learn how to make a Swedish slab foundation for a garage:
Armopoyas, reinforcement frame
To fill the armored belt (in particular, under the mauerlat - a beam that serves as a support for beams or roof rafters) and install lintels over openings, so-called U-blocks are used. They are placed on the glue with the tray facing up. Since the standard length of the U-block is only 500 mm, the future lintel will have to be fixed in the openings with temporary spacers.
U-blocks. Depending on the size, the price varies from 200 to 380 rubles per piece
Then a reinforcement cage is placed in the tray, and it is filled with concrete with obligatory bayoneting. Excess concrete is removed flush with the edges of the tray.
Please note: an armored belt with U-blocks allows you to avoid the appearance of cold bridges. The low thermal conductivity of aerated concrete prevents freezing of heavy concrete.
The armored belt is made using U-blocks
A reinforced frame will also be needed if we are building a garage from aerated concrete with at least two above-ground floors. Installation of the reinforced frame looks different:
- The walls are laid with gaps in the corners and gaps in long straight walls under reinforced concrete columns;
- On the outside of the corners, on both sides of gaps in the walls, and along the top of the walls, formwork is assembled from boards;
- In the formwork, a frame common to the columns and armored belt is knitted;
- The formwork is poured and bayoneted.
Attention: the columns are concreted with gradual assembly of formwork to a height of no more than a meter and layer-by-layer pouring of concrete with bayoneting of each layer.
Pouring reinforced frame columns during the construction of an aerated concrete cottage with a garage
Construction of an inspection pit
Before installing the gate, but after covering the roof, you will have to perform the following types of work if you decide to make an inspection hole:
- we dig a hole, depth - 1.5 meters, width 0.8 meters, length 1.8, placing it in the center of the room;
- fill the bottom with sand, or better yet, clay and compact it tightly. Then we line it with a layer of roofing felt and fill it with a concrete screed (layer thickness 10 cm);
- in damp regions, it is better to line the pit walls with slag bricks (half a brick width);
- be sure to waterproof the walls and floors with bitumen mastic;
- Next we lay the electrical wiring and plaster the walls;
- outside the pit along the perimeter we place a welded reinforcing frame made of metal corners;
- do not forget to install a metal lid on the pit, or, in extreme cases, a wooden one.
All you have to do is install a removable or stationary ladder and the inspection hole is ready.
Gates
For a garage, gates are selected taking into account the dimensions of the building and the free space near it. If you have a large area, it is convenient and inexpensive to install swing gates. If there is little space, it is better to buy roller, roller shutter or overhead sectional doors.
Swing
Swing gates have been installed for several decades; they are good for many reasons:
- Simplicity of design. The gate is made of 2 leaves and a frame welded from a reliable channel. There are no complex mechanisms, so the device requires almost no maintenance;
- Reliability. They can serve for decades without much maintenance or repair. But the quality of the materials used matters. The strength of the hinges is especially important; they are subject to high loads;
- Any gate size. There are no restrictions on width and height for this design. Swing gates can be installed in an opening of any size; they are made individually;
- Possibility of installing a door. A door can be installed in the door leaf, this creates additional comfort. In addition, in winter heat loss is significantly reduced;
- Low price;
Sectional
Pros:
- Sectional doors are easy to use, they are easy to close or open, they do not have heavy leaves like swing systems;
- Space saving. When opened, the gate moves along the ceiling; it does not require additional space for the leaves. There are models in which sections move along the walls. This mechanism is best suited for wide gate openings;
- Appearance. To finish such gates, different finishing materials are used - from natural wood to metal with different coatings;
- Thermal insulation. Often such gates are made from 40 mm thick sandwich panels installed tightly in guides. This allows you to keep the room warm;
- Suitable for installation in large openings. There are designs that are used in openings up to 7 m wide and up to 6 m high.
Minuses:
- Difficult to install. It is not easy to install this system yourself; for this reason, you will have to hire professionals. During use, you need to monitor the condition of the system and maintain it regularly to avoid breakdowns;
- Attentiveness to the quality of ingredients. Many times there have been cases in which sectional doors, purchased cheaply, broke 1-2 years after installation. Wear of the mechanism, the spread of corrosion processes are the most common troubles with inexpensive products;
- Poor resistance to burglary. This structure is easier to open than sliding or swing structures;
- Expensive. A high-quality product will be expensive, but it is advisable not to save too much - cheap products will not provide you with reliable protection.
Roller shutters
When choosing a suitable garage door, you need to pay attention to this design. Main advantages:
Main advantages:
Compactness. The gate is made of slats connected into one leaf and a shaft placed above the opening
They are easy to place in any garage; this does not require free space along the walls and on the ceiling, it is only important to find 30-40 cm of space above the opening; Versatility. It is permissible to install the drive shaft of roller shutter gates both outside and inside the premises.
When placed outside, the shaft is installed in a closed box that prevents access to the mechanism; Simple automation. It is acceptable to install automatic devices to increase comfort, but this will be expensive; Diversity. During manufacturing, gates are painted in different colors, and copies of the appearance of stone, wood and other materials are created on the surface of the canvas. There are options with small plastic windows that allow you to illuminate the garage without windows; Many sizes. Gates are made up to 7 m wide and up to 6 m high.
The cost of these products depends on the area of the canvas. Among the disadvantages, we should mention poor resistance to burglary. It is easier to pull out the lock on this gate than on other designs. For this reason, it is advisable to use them in a protected area.
Step-by-step instructions for building a garage from foam blocks with your own hands: foundation-finishing
The construction of a building begins with the foundation. Be sure to ensure that a layer of waterproofing is laid, which reduces the likelihood of dampness. Material - monolithic reinforced concrete slabs of strip or slab type.
Strip foundations are used more often, are cheaper and better raise the building above the ground. Tile is used on clay types of soil. The first option is laid on sand-gravel or non-heaving sandy soils, or in buildings where a basement level is needed.
An example of how to assemble a frame for pouring a foundation
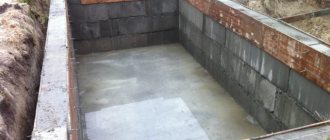
For the foundation, a trench is dug 50 cm wide and 70 cm deep. After this, compact the soil in the trench itself and fill it with sand to a depth of 30 cm, fill it with water and compact it. To strengthen the foundation for the garage, the foundation is reinforced. To do this, you need to weld the frame and insert it into the trench.
Then the trench is covered with roofing felt for waterproofing. Prepare the concrete and pour it over the reinforcement mesh. You can proceed to the next stages only after it has completely hardened.
To install the gate, a reinforced concrete lintel is laid in the wall made of foam blocks. As an option, a double-sided frame made of steel angle is installed. When erecting a building, the craftsman places blocks around the frame. To give them the desired look, a hacksaw is used, and the blocks are cut to height. For a garage, a gate of a design is selected that will suit both an aesthetic and financial point of view.
The jumper is made from a metal corner
At the first stage, weld the reinforcement rods (40 cm in length and 12 mm in diameter), four (or more) in height, to the gate frame. It is desirable that the mesh of reinforcement passes through the joints of the blocks. This will strengthen the structure.
The next stage is priming and painting the gate. This can also be done in advance to speed up the garage construction process. The last stage is to install the gate in the opening strictly vertically. The position is checked according to the building level and fixed on both sides using wooden braces.
The walls are erected on the basis of two types of compositions. This is either ordinary cement mortar or construction adhesive. Using the first material is cheaper, but the joint width reaches up to 1 cm. The second material is consumed less and the joint width is only 2–5 mm. Glue is used only if the exact geometric dimensions of the block are met.
The first thing to do is set the corners. A rope is stretched between them, along which the laying is carried out.
Reinforcing mesh should be laid every two layers, this will prevent the appearance of cracks
We start laying walls. After the first two rows, install a reinforced mesh. Then lay 2 more rows and repeat until the roof.
In order to strengthen the walls of the garage, they should be reinforced. This must be done every two layers of masonry.
The rods, welded to the gate frame during installation, are lined with foam blocks. At the next stage, a lintel is mounted above the gate. In its manufacture, 5 cm angles are used, from which a frame is welded to the size of the gate. It is installed on the inside of the walls and secured with cement. A beam is laid on top and the construction of the wall continues.
First the beam is laid, and only then the laying continues.
The roof is built on a pre-prepared foundation. If it is made of wood, then a mauerlat made of timber is placed on the walls and tightened with anchor bolts. This strengthening distributes the load from the roof to the garage walls made of foam blocks. An armored belt under the Mauerlat increases the reliability of the structure, so its use is desirable, but not necessary.
The roof is built on a pre-prepared base
The first step is to install I-beams at equal distances of 80 cm and embed them into the walls. The protruding part is at least 20 cm. This is done in order to protect the foam blocks from unwanted moisture.
Boards (40 mm thick) are tightly laid along the lower flanges of the beams. For waterproofing, roofing felt is laid, on top of which slag or expanded clay is poured.
At the next stage, a concrete screed is carried out. Prepare the mixture and pour a 2-3 cm layer of insulation. Wait until it dries completely and waterproof it with bitumen mastic. The final stage is the external covering of the roof with roofing felt. The layers are laid from bottom to top with a slight overlap.
Construction
The first step is soil exploration and preparation.
The easiest option would be to ask your neighbors. Perhaps they have already taken measurements and are ready to share information. But if this is not possible, you will have to do the research yourself. To find out the characteristics of the soil, you will need to dig a hole 2.5 meters deep. Then, at every 20 centimeters of the hole, it is necessary to take soil samples to determine the depth of groundwater and the type of soil. If you are not confident in your abilities, you can always resort to the services of specialists.
After conducting the research, you should decide on the number of floors and size of the garage. The more floors a building has, the heavier it is, which means the requirements for the foundation will be higher. For calculations, you need to take into account the density of materials (walls, ceilings) and their volume. By multiplying numbers, you can get the mass of the building and determine the weight distribution.
Please note that a brick building will be significantly heavier than a foam block building; the densities differ by almost two times. To strengthen the foundation, reinforcement is used
For massive (for example, two-story) garages, foundation reinforcement is often the only possible solution.
The last stage is soil preparation and waterproofing. The area must be marked using wooden pegs and nylon thread. The angle must be exactly 90 degrees.
Waterproofing should be installed in both planes - vertical and horizontal. The “walls” and “floor” of the foundation are covered with insulating material.
Waterproofing is made from roofing felt or synthetic film.
Please note that the insulation process depends on the type of foundation, since different construction methods require different structural elements. Let us consider in general terms the construction of foundation types:
Let us consider in general terms the construction of foundation types:
Benefits worth noting
Construction from aerated concrete blocks is very popular. And this is explained by the fact that this building material has a number of advantages in comparison with other building materials. It is recommended to use branded aerated concrete, which has been tested for years and remains the most popular. These are the advantages.
The advantage of aerated concrete is its lightness and ease of installation - special glue is used.
- Ideal geometry from a branded manufacturer.
- Low thermal conductivity.
- Light weight (low load on the foundation).
- Fire resistance.
- Resistance to fungi and mold.
- Wide range of types, sizes.
- Ease of processing.
- Relatively low price.
- Savings on finishing. With the correct geometry, the perfect wall is obtained.
- The use of cement is not required (it is laid with special glue).
- Good vapor permeability.
- Ecologically pure.
- Resistant to pests.
- Speed in construction and ease of work.
- Good thermal insulation.
- Frost resistance.
Options for choosing gas silicate
If you make the right choice of material, the service life of your own aerated garage walls will be 50 years or more. Therefore, beginners do not really delve into the brands of blocks, and, relying on the opinion of sellers, they often buy something that they should not. First of all , you need to concentrate on the brands of aerated concrete (D400, D500 and D600) .
Aerated concrete grades D500 and D600 are more suitable for the construction of one-story houses. Here, the advantage is given to the high density of the material, but the thermal insulation properties are lost. And D300 brand blocks are slightly weaker in strength, but heat loss is low. It is from them that small-sized buildings should be erected, for example, bathhouses and garages. Because gas silicate walls do not need to support a massive roof, unlike large dachas.
We build walls
When laying aerated concrete, ordinary mortar is not used; a special adhesive mixture is required, which ensures smooth and thin seams - from one millimeter. Ordinary cement mortar is used only when laying the first row of garage walls (the ratio of cement and sifted sand is 1 to 3).
The advantages of the adhesive solution are that it reduces heat loss and guarantees high-quality waterproofing of seams.
Sequence of wall construction:
we lay out the first row, taking into account that the masonry seam is at least one centimeter; we start laying from the highest corner
It is easy to check the height of the corners using a water level; We begin to lay out the second row of walls on the second day, after the mortar in the first row has set well; first we lay out the corners and determine the level of the next row of masonry with a stretched twine; every two rows we reinforce with reinforcing mesh, this will ensure better adhesion and stability of the building; do not forget about the ventilation holes, which are important to be located at different heights so that there is unhindered air circulation in the room and the removal of excess moisture in the winter is ensured; We close the ventilation passages on the outside with mesh, and on the inside with plastic ventilation grilles; strapping belts intended for roofing and ceilings can be installed from wood or reinforced concrete; do not forget that metal lintel beams must be installed above the gate opening, which will compensate for the weight of the metal gate and evenly distribute the load on the walls; It’s not difficult to make a jumper with your own hands from two profile metal corners (width 100 mm). We install the corners along the edges of the block and fasten them with metal strips, you can also fasten them with reinforcement if you have welding, the fastening step is 50 cm; the edges of the metal beam on both sides must be embedded in the pier at least 20 cm (calculation for a standard gate width of 2500 cm).
Window openings can also be strengthened with reinforcement or small metal strips.
Required materials and tools
Let's determine exactly what is needed to pour the foundation:
- Shovel;
- Water level;
- Waterproofing film;
- Water container;
- Formwork;
- Reinforcement and wire for the bundle;
- Pipes (if communications will be connected to the garage).
You will also need the following materials:
- Sand;
- Gravel or crushed stone;
- Water;
- Cement.
We have indicated only the basic tools and materials. During the construction process, this list may expand.
Insulation of a pile foundation
Insulation of a pile foundation
Cold air circulates between the ground and the grillage, which cools the garage floor. Insulating the foundation is a top priority.
Main ways to solve the problem:
- Grillage waterproofing.
The waterproofing layer is laid between the base of the load-bearing walls and the grillage. In the same way, the space between the ends of the piles and the ground foundation is isolated. Mastic is applied to the top of the roofing material on open fragments.
Installation of thermal insulation coatings.
A week after the waterproofing measures, the pile foundation is insulated. The cheapest option is to backfill the soil around the perimeter of the foundation. The best insulation can only be achieved by using special materials.
Finishing of insulation on the outside.
The finishing will help protect the insulation from mechanical damage and will carry an aesthetic load. If funds allow, imitation granite, brick, and natural stone are purchased. As an option, you can consider a profiled sheet. A frame is attached to the upper perimeter of the piles, onto which the finishing panels are attached.
Floor arrangement
When the walls have already been erected, the roof has been installed and an inspection hole has been made, you can begin making the garage floor. A durable floor should be installed here, since the car will put a large load on the screed. Therefore, the ideal solution would be to make a concrete base. Wooden flooring can be installed directly in the pedestrian area, this is especially effective if you plan to have a work area and install tables. It will be more comfortable to be on a wooden floor than on a concrete one.
So, the soil is leveled and compacted. Each subsequent layer is also compacted, consisting of:
- crushed stone 100–150 mm;
- sand 50–100 mm;
- gravel 50–100 mm.
Roof view from inside
Finally, a concrete screed is poured in a layer of at least 200 mm. After this, all you have to do is finish the walls, carry out the necessary communications and bring your car into its new, reliable and dry “home”.
Excavation
It is undesirable to leave dug trenches open for a long time, so immediately after the installation of the temporary drainage system is completed, it is necessary to begin excavation work.
Digging a trench is done either manually or using special equipment. When arranging a shallow strip base, it is not advisable to use large equipment; you can do it with a shovel.
Using earthmoving machines, work is carried out in two stages:
- Rough excavation.
- Finishing the trench.
It is recommended to prepare in advance a place to place the layer of soil to be removed.
Is it much cheaper to make an attic floor instead of a full second floor?
To answer this question, we will take one of the popular projects from our catalog 155-001-L. Below is a plan of the second floor, the height of the walls of which will vary at the eaves of the roof (from 0.5 m to 3.0 m).
Let's consider four options for the height of the attic floor:
- Full floor;
- Attic floor, wall height at the eaves 500 mm;
- Attic floor, wall height at the eaves 1000 mm;
- Attic floor, wall height at the eaves 1500 mm;
- Attic floor, wall height at the eaves 2000 mm;
When calculating, we did not take into account the internal partitions; the external walls are made of foam blocks 400 mm thick.
| Height of the wall at the roof overhang | Masonry volume (foam block 400 mm) | Facade area |
| 500 mm | 22.51 m3 | 56.28 m2 |
| 1000 mm | 29.14 m3 | 72.85 m2 |
| 1500 mm | 37.86 m3 | 94.64 m2 |
| 2000 mm | 45.66 m3 | 114.14 m2 |
| 3000 mm (full floor) | 72.84 m3 | 182.10 m2 |
Approximate prices for the specified types of work and materials (the cost of work and materials may vary significantly and depends on the region of construction)
Based on the data provided, you can decide whether to build a house with an attic, and if so, what minimum height of the wall at the roof overhang to choose.
What comes first: the egg or the chicken - the garage or the house?
Of course, a temporary trailer will help out, but it is worth remembering that there is nothing “more permanent” than something that is built for a while. Therefore, some forward-thinking developers begin with the construction of a multifunctional garage, in which you can store inventory and tools, install an electrical panel and meter, connect a pipe from a well to an expansion tank, or install a boiler room.
Of course, this is not the most ideal option, because a garage is, first of all, a “storage room” for the most expensive and in-demand mechanism in everyday life. And such storage requires:
- fire safety;
- convenience for maintenance;
- protection against condensate accumulation;
- protection from groundwater and weather changes.
If you have time to think, then even before laying the foundation, you should decide what your garage will look like, what additional functions you will assign to it, whether you can build it yourself or whether you should entrust the construction to professionals.
Construction of a monolithic foundation
There is also another solution that you may prefer when building a foundation for a garage. It consists of installing a monolithic slab as a base. The material in question is distinguished by its ability to withstand the loads that will be exerted by walls made of foam blocks. It is also worth noting that this type of foundation can be marked as a garage floor. In this case, a concrete slab allows you to easily finish it.
Not only foam block materials, but also other blocks are available for use. So, for example, blocks can be used that are distinguished by the presence of cells and greater porosity. Materials of this kind belong to the group of aerated concrete. This option is also valid.
A garage made of foam blocks, in some cases, needs to increase the rigidity of the foundation base. This is also true when the bearing capacity of the soil is low. In order to carry out work aimed at increasing rigidity indicators, it is necessary to resort to the use of monolithic type ribs, which must be laid in the foundation.
Depth depending on soil type
Before carrying out technical work on installing the foundation for the bathhouse, it is necessary to conduct a geological survey.
Depending on the identification of the exact type of soil, its load-bearing properties, the possibility of changing quantitative parameters as a result of tectonic changes, the best material for the foundation is determined, and most importantly, its depth is calculated. Correct calculation of the burial depth, in some cases, will save the foundation and walls of the bathhouse from subsidence, cracks, distortion, and deformation.
Fine and dusty sandy soils contribute to strong shrinkage of the bathhouse foundation. To reduce or level out this process, the depth of the foundation can be significantly increased. Instead of the planned 50 cm depth, it would be advisable to increase it to 70-100 cm. With increasing foundation depth, the compression resistance increases proportionally. This value in fine sands is approximately two times lower than in coarse sands. In order to make up for the missing load-bearing capacity, the depth of the foundation is doubled.
Gravelly and coarse sandy soils are quite reliable in terms of load-bearing qualities. Sandy soils are not heaving, so regardless of the amount of precipitation per year or the depth of freezing, you can choose any type of foundation for a bathhouse. Coarse sandy soils exhibit insignificant shrinkage compared to fine ones. On them it will be easy to build a shallow foundation, ranging in size from 20 to 50 cm.
Rocky soils have the best load-bearing qualities of all other types of soils. They practically do not shrink, supporting the weight of fairly large-scale structures. Rocky soils are not heaving because they do not retain water in their pores. The depth of soil freezing will not be taken into account when building the foundation. There is no excess moisture in the soil, so they will not expand due to the conversion of water into ice. On rocky soils, foundations can be installed more economically.
Clay soils, unlike most others, have a finely porous structure. The main disadvantage of clay soils is their ability to swell. The proximity of groundwater and abundant rainfall contribute to the rapid accumulation of water in the pores of the soil. With the onset of sub-zero temperatures, water turns into ice. The density of water, after turning into ice, increases, which leads to an expansion of the volume of the entire soil. Changes in soil volume place additional load on the foundation, causing its deformation, cracking, distortion, and lifting of the bathhouse building.
Calculations for deepening the foundation on clay soils are carried out taking into account the freezing depth. It is necessary to build the foundation below the soil freezing level, then the loads will be exerted only on the side walls of the foundation, eliminating pressure on the base of the foundation. For example, the depth of soil freezing is 1.5 m, which means the foundation lies at a distance of 1.6 m. The high level of groundwater will not allow the necessary deepening of the foundation.
The base of the foundation is at an indentation of no lower than 0.5-1 m. Sufficient distance will be required in case of capillary rise of water in the soil and in case of an unexpected increase in water level due to heavy floods or prolonged downpours. To drain excess water from the ground, a drainage system is installed around the foundation. They dig a trench deeper than the base of the foundation. They lay the foundation around the perimeter with a pipe and lead it into the inspection well. Water will not accumulate and freeze in the pores of the soil, and excess water will also be automatically drained in the event of a strong rise in the groundwater level.
And this article talks about metal sauna stoves.

