The technical characteristics of aerated concrete blocks (good thermal insulation properties, reasonable price, light weight and large size compared to traditional bricks) make this building material attractive to private developers. But aerated concrete masonry has its own characteristics, which must be carefully studied in preparation for construction.
Laying gas blocks
How to lay a gas block: a step-by-step guide
The first row of blocks requires increased laying accuracy, since the accuracy and ease of laying subsequent rows and the wall as a whole depends on it.
The installation of waterproofing units between the foundation (basement, plinth) and aerated concrete masonry must be carried out in accordance with the decisions made in the project or in accordance with the album of technical solutions.
A mooring cord is stretched between the lighthouse (outer) blocks.
The blocks are laid on opposite sides of the wall, further laying is carried out from the outer blocks to the center using a cord.
The height of the beacon blocks is selected based on the block located at the highest point.
If it is necessary to obtain a cut block, the cut is made with a hacksaw for aerated concrete using a square. In multi-story construction, the use of a band saw is recommended. After cutting, be sure to clean the surface with a sanding board.
The first row of blocks is laid on a leveling layer of cement-sand mortar.
The height of the first row of blocks is adjusted using a mooring cord stretched between the outer blocks of the wall. The position of the blocks is controlled by a level and adjusted using a rubber mallet.
Existing unevenness in the masonry is eliminated using a sanding board or plane. Small dirt and dust are removed with a brush.
Subsequent rows are laid on a special adhesive solution.
What is the maximum thickness of a seam without insulation?
The main advantage of thin-stitch masonry is the ability to make a warm wall without cold bridges, which does not require insulation. The minimum thickness of the aerated concrete adhesive joint is 1 mm. With such a layer thickness for aerated concrete , the building does not need insulation. The maximum thickness of adhesive for aerated concrete blocks, which does not require thermal insulation in the Moscow region, is 3 mm. In general, the maximum thickness of glue for aerated concrete blocks is 11 mm. The house needs insulation when the thickness of the seam in aerated concrete masonry is from 3 mm.
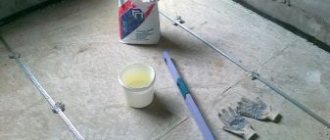
Preparing the adhesive solution
Masonry using adhesive mortar has several advantages over masonry using cement-sand mortar:
- The use of an adhesive solution eliminates the formation of cold bridges.
- Laying in a thin layer reduces the likelihood of uneven installation of blocks.
- In terms of strength characteristics, masonry with adhesive mortar is significantly superior to masonry with cement-sand mortar.
Water is poured into a plastic container in the volume indicated on the packaging. With constant stirring, the dry mixture is gradually added.
The mixture is stirred until a homogeneous plastic mass is obtained, so that when applied the solution does not spread and is not too thick.
15 minutes after the first mixing, the solution must be mixed again.
During the work process, the solution should be stirred to maintain its consistency.
The average pot life of the solution is 2-2.5 hours.
Time to adjust the position of the installed block is 10-15 minutes. The thickness of the applied layer is 2-5mm.
The use of solutions not intended for laying aerated concrete is a violation of construction technology!
What to glue aerated concrete blocks onto
Aerated concrete block is an excellent alternative to brick and is used not only for the construction of load-bearing walls of houses, but also in apartments - for laying out partitions and balcony parapets. When preparing for such work, the question automatically arises of what to glue the aerated concrete blocks onto.
An ordinary cement-sand mixture is not very suitable for this purpose due to the fact that its physical properties are very different from the characteristics of porous concrete. Due to their increased hygroscopicity, gas blocks absorb moisture from the solution, as a result of which the hydration process of cement is disrupted and it loses its adhesive qualities. At the same time, the strength qualities of the masonry are also reduced - and this is already a problem.
Home-grown “professionals” try to protect the solution from loss of cement laitance by moistening the joining surfaces of the blocks. But this measure is ineffective, since moisture quickly disappears into the thickness of the porous concrete. In winter, when in contact with cold street air, it can freeze there and cause the stone to crack.
Pros and cons of laying aerated concrete blocks with glue
Why all these problems with DSP, when there are special adhesive compositions specifically designed for the installation of products made of aerated concrete?
- There is an opinion that laying aerated concrete blocks with glue increases the cost of enclosing structures. But this is nothing more than a myth. If we compare the price for the same volume, for glue it is actually 2-2.5 times higher.
- But you also need to take into account the consumption - and for glue it is 6 times lower. So, the technology of laying aerated concrete blocks with glue turns out to be even less expensive, taking into account, by the way, the higher strength of the structure. And this is the second advantage.
- The third advantage of adhesive installation is the absence of layers with higher thermal conductivity, such as mortar joints. What's the point of using a heat-retaining material if it can escape safely through the joints?
- Well, the last argument in favor of glue is based on finer grinding of its ingredients - and, as a result, a decrease in the thickness of the seams.
Also, when using a solution, there is every chance of making the masonry uneven, despite the excellent geometry of the blocks.
Glue solution
Before laying aerated concrete blocks with glue, you just need to read the instructions on the package and mix the dry mixture with water in the proportion specified by the manufacturer.
- Depending on the specific purpose and conditions of use, the composition of adhesives may vary. In particular, different combinations of modifying additives are used, which each manufacturer keeps secret. Otherwise, the glue consists of finely ground Portland cement and fine-grained quartz sand.
- Adhesive mixtures can be universal, when used, seams can reach 10 mm (for example, non-autoclaved products with unimportant geometry are mounted on them) and thin-layer. The thickness of the seam in the second case cannot exceed 5 mm.
- The working conditions also matter - in particular, the air temperature. Therefore, there are summer mixtures, when they can only be used at +5 degrees and above, and winter (frost-resistant), the temperature range for which is usually -15 +50 degrees.
- In fact, winter compositions are universal, since in this case you can lay aerated concrete blocks on glue at any time of the year - both outdoors and in the apartment. True, the minus limit is not as large as the upper plus one. Therefore, when undertaking winter construction of a house from porous masonry material, be careful.
Expert opinion Vitaly Kudryashov builder, aspiring author
Ask a Question
Note: You can distinguish the compositions by color. Universal ones are made on gray cement, summer ones are most often made on white.
Selection of glue and approximate cost
Before laying aerated concrete blocks on glue with your own hands, you also need to choose the right composition. The simplest thing is to take the mixture from the same manufacturer who made the blocks, but this does not always work out. In this case, you can consider the following options:
| Glue brand | Main characteristics |
| Aerok | A cement-based mixture, made in Russia, intended for thin-seam installation. It is consumed at the rate of 2-5.9 kg per 1 m² of masonry with the maximum possible joint thickness (3 mm). The specific consumption figure depends on the thickness of the masonry.
Price 243 rubles per 25 kg bag. Note: prices are as of early 2022. |
| N+N | This manufacturer offers 3 types of glue: summer and winter based on cement, and polyurethane - in tubes for a mounting gun with a capacity of 1000 ml. A liter of polymer-based foam adhesive replaces a 25-kilogram bag of dry mixture. It is applied with rollers to vertical and horizontal joints, the diagram is shown directly on the glue bottle. With large volumes of work, a person unwittingly becomes a wholesale buyer. Accordingly, glue is purchased in pallets or packages, which is cheaper. For example, pallets contain 48 bags. When the price for a pallet of summer glue is 8,640 rubles, 1 bag costs only 180 rubles. Winter glue is a little more expensive - 211 rubles. Polyurethane glue is the most expensive - 500 rubles per bottle. Not very cost effective, but saves on transportation costs. Laying aerated concrete blocks with polyurethane foam glue is faster. |
When purchasing glue, pay attention to the sell-by date; after it, the mixture begins to lose the qualities declared by the manufacturer. Outwardly, this does not manifest itself in any way, but in practice it is not possible to correctly place the gas block on the glue - either the mixture sets too quickly, or it does not stick well to the concrete. Broken or wet packaging should also be a concern. But even if it is perfect, it is better not to buy expired glue, even at a reduced price.
Load-bearing wall masonry
The next row of walls is laid after the cement mortar of the first row has set. The laying of the second and subsequent rows is done with dressing in half a block. In some places, block overlap is allowed less than half a block, but not less than 10 cm.
The position of the blocks, as when laying the first row, is controlled by a stretched mooring cord and level.
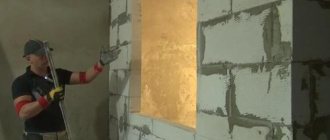
The mortar is applied to the surface of the blocks using a trowel or carriage made to fit the width of the masonry or a trowel used in tiling work. The solution must be applied evenly over the surface of the masonry.
Using a trowel, the solution is also applied to the vertical surface of the blocks.
The project may indicate that the adhesive solution is not applied to the vertical surfaces of the blocks of the tongue-and-groove system; such a decision is justified if subsequent double-sided plastering of the walls is provided, and the load on the block is significantly lower than the load-bearing capacity.
The ends are cleaned using a sanding board or plane. The length of the outermost block must be at least 10cm.
The mortar protruding from the seams is removed using a trowel. Rubbing the solution is not allowed.
The alignment of the masonry is repeated after laying each row of blocks.
After laying each row, the deviation from the horizon will be checked using a level.
If it exceeds the established tolerance, the deviation is eliminated when laying subsequent rows. After 2-3 rows in height, the evenness of the masonry is checked with a level.
Features of aerated concrete, difference from traditional building materials
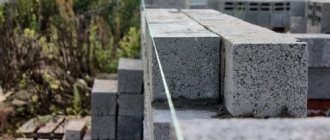
Aerated concrete is one of the representatives of the group of cellular concretes, a porous material for low-rise construction. Its structure differs from the usual dense grades of concrete by the presence of a large number of small (2-4 mm) gas bubbles, evenly distributed throughout the block. The volume of cavities in relation to the volume of gas blocks can reach 80%, which can significantly reduce the weight of both an individual block and the entire building.
The presence of cavities is due to the production technology of the material. It includes:
- Portland cement;
- quartz sand;
- quicklime;
- gypsum;
- aluminum paste;
- water.
The formation of bubbles occurs as a result of a chemical reaction that occurs between lime and aluminum paste (the process requires aluminum powder, but it becomes too electrified and begins to fly around the room and stick to surfaces, so it is bound into a viscous paste). When all the crushed components are combined in a certain proportion, gas evolution begins. During the reaction time, the material is placed in molds and kept until it swells and rises, like dough. By changing the ratio of paste (gassing agent) and lime, you can achieve different densities of aerated concrete and obtain blocks of higher or lower density.
The porous structure of aerated concrete caused a significant difference in the parameters of the material from the usual properties of heavy grades of concrete. Many professionals never accepted this material, considering it unsuitable for serious construction. The presence of the component “concrete” in the name gives rise to associations with ordinary dense material, and the difference in properties forces us to compare both types with each other. At the same time, neither the difference in purpose, nor the specificity of materials, nor the beneficial qualities of aerated concrete are taken into account. It has less strength - this is enough to declare it unfit for use.
The inconsistency of this point of view is obvious. The beneficial qualities of aerated concrete have been proven in practice, and restrictions on the height (number of floors) of buildings are a common feature of the building material. Skyscrapers are not built from the same wood, but it never occurs to anyone to reject it on this basis.
The disadvantages of aerated concrete are relatively high water absorption and low strength. These qualities make adjustments to the construction process, requiring the fastest possible installation of cladding (or other type of exterior finishing), as well as restrictions on the height of the building. According to SNiP, the height of a house made of aerated concrete should not exceed 3 floors, although reinforced gas silicate or aerated concrete blocks can withstand quite a lot of weight.
The advantages of aerated concrete are its low weight and the ability to retain thermal energy. These properties were the goal of the developers who first produced aerated concrete almost 100 years ago. The material made, if not a revolution, then a serious contribution to construction methods. The need to create powerful foundations has disappeared, it is possible to reduce the thickness of the walls and save on heating the house. These advantages significantly outweigh the disadvantages of the material (many do not consider them disadvantages, but only specific features of the material).
Connection unit for external and internal load-bearing walls
During multi-storey construction, the connection node is carried out in accordance with the construction project or an album of technical solutions
Load-bearing external and internal walls made of aerated concrete are placed on the dressing.
The masonry in the place of the future wall is controlled. All irregularities are eliminated with a plane. Dirt and dust are removed with a brush.
Blocks are laid on the dressing on opposite sides of the wall, further laying is carried out from the outer blocks to the center using a cord.
The height of the stacked blocks is controlled by a level and adjusted using a rubber mallet; the vertical and horizontal position is also controlled.
At wall joints, the vertical joint of aerated concrete blocks is always made using a special adhesive solution.
Reinforcement
The purpose of reinforcement is to increase the load-bearing capacity of the masonry. Reinforcement reduces the likelihood of cracks. The need for reinforcement of certain sections of the wall is assessed for each specific object.
The need for reinforcement and the location of the reinforcement are determined at the design stage. It is necessary to reinforce the first and every fourth row of masonry, support areas of lintels and areas under window openings, parts of the wall with increased load.
Long walls are reinforced, for which it is necessary to provide resistance to lateral loads (wind). Using an electric or manual wall chaser, grooves are made in the middle part of the masonry blocks corresponding to the length of the reinforcement. Depending on the width of the masonry or project, reinforcement in one or two belts is possible. The groove must have dimensions of at least 25x25mm and be at least 60mm from the edge of the block in the case of reinforcement in two crowns.
For better adhesion to the solution, the dust remaining in the grooves must be removed with a brush or a hair dryer.
The groove, previously moistened with water, is filled with cement mortar approximately halfway and reinforcing bars with a diameter of 6-8 mm are laid. Individual rods are placed in a groove with an overlap of 300-350mm.
After immersing the rods, the groove is completely filled with mortar, the excess is removed with a trowel, the surface is leveled with a plane or sanding board, and the dust is removed.
Tools used
- A trowel is the main tool of a mason, used for applying mortar to blocks.
- Remove excess glue with a notched trowel The width of the canvas should correspond to the width of the block, so as not to make unnecessary movements. The teeth are selected depending on the quality of the blocks: 4 mm - for even blocks, 8 mm - for products with large deviations in geometry.
- Trowel for aerated concrete (carriage) - this specialized tool has a capacious bucket with a tooth. The device allows you to pour the solution onto the blocks and immediately remove the excess. The carriage is an alternative to the trowel and comb.
- A hacksaw for aerated concrete differs from a regular one in having large, sparse teeth; the tool is used for sawing blocks with the least amount of damage.
- The corner template is not a required fixture. It allows you to make an even cut at a right angle.
- Brush or broom. Mechanical processing of aerated concrete leads to the appearance of large amounts of dust. Small particles impair adhesion between the glue and the blocks, so before applying the solution you need to clean the surface of the stones.
- A grater is a plane for aerated concrete, on the working side of which there are multidirectional teeth. This tool is used to remove irregularities on blocks.
- A rubber mallet helps to adjust and shrink the blocks onto the mortar without damage.
For aerated concrete blocks, you can only use a mallet with a rubber tip. Wooden and steel strikers will leave dents.
- Bubble level is a measuring device for checking horizontal and vertical planes between adjacent blocks.
- Hydraulic or laser level (level). A group of measuring instruments that allow objects to be placed at the same level at a great distance from each other.
- A wall chaser is a device for creating recesses in blocks for laying reinforcing bars.
- Lace - rope for creating cast-offs around the perimeter of the house. It is pulled between the outer blocks so as not to disturb the overall geometry of the walls.
- A hammer drill with an attachment for mixing construction mixtures.
Construction of door and window openings
In future locations for installing window and door units, it is necessary to provide concrete reinforcement of the wall in advance for installation of fasteners.
Using a manual wall chaser, grooves measuring 70x70mm are installed in the vertical parts of the opening.
Concrete is poured sequentially, in sections with a height of 400-600mm.
Wooden plugs are temporarily secured with nails.
The plugs are removed after the solution has completely set.
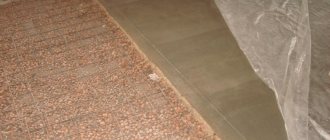
Horizontal waterproofing under masonry
Laying the walls must be preceded by waterproofing the foundation, so that in the future the moisture of the foundation cannot be transferred to the aerated concrete. For this procedure, modern bitumen materials are best suited, which are sold in rolls, are easily cut into pieces with a construction knife and fit well.
Brief instructions for horizontal waterproofing
- Dust the surface of the tape;
- Apply bitumen mastic to the tape;
- Cut the waterproofing rolls into strips of the required width;
- Lay on the tape with an overlap of at least 150 mm;
- You press.
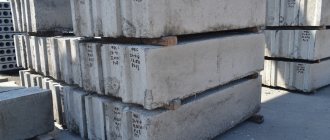
U-block lintels
To cover openings in walls made of aerated concrete blocks, both prefabricated and on-site monolithic lintels are used.
Site-fabricated monolithic lintels are monolithic reinforced concrete structures poured into the cavity of U-blocks.
The reinforced concrete part must have reinforcement corresponding to the calculations. The best solution for reinforcement is a reinforcement cage.
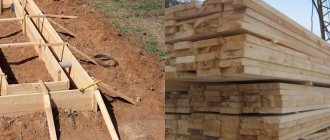
The U-shaped blocks are placed on temporary supports. As a support, you can choose a board and timber. The base must be reliable and rigid so that the lintel does not bend during pouring.
U-blocks are installed in the design position, vertical joints must be glued.
The depth of support of the lintel must be at least 250mm.
The thicker U-block wall should be on the outside of the wall.
The evenness of the masonry is checked and, if necessary, the position of the partition is adjusted. Read more about laying aerated concrete partitions.
The reinforcement frame is laid closer to the inside of the wall.
Insulation is installed if required by the project.
The U-block is wetted with water, the cavities are filled with fine-grained concrete of the class specified by the project. After pouring, the concrete must be compacted by bayoneting.
The surface of the poured concrete is leveled flush with the top edge. Removal of temporary supports is allowed only after the concrete has completely hardened. Work on laying blocks on the lintel continues only after the concrete has completely hardened and the full load-bearing capacity of the lintel has been achieved.
Advantages of aerated block over other materials
Today, gas block is a popular choice for low-rise construction. After all, it allows you to build your own home (garage, outbuilding, farm or small shop) even with a very limited budget! Aerated concrete blocks save time and resources, and provide excellent thermal insulation properties for a home. In order not to depend on suppliers of low-quality materials, you can purchase a stationary line for the production of aerated concrete from our catalog and install it directly on the construction site!
Before answering the question of how much it costs to install an aerated block, we note that choosing such a material will help you save in the short term (on mortar, expensive special equipment, labor costs) and in the long term (on heating). The price of the work usually depends on the complexity of the material, and aerated concrete is not particularly capricious. A “team” of two people can easily build a house!
Connecting blocks with reinforced concrete
The connection of aerated concrete walls with reinforced concrete frame elements is not fundamentally different from the connection of an aerated concrete partition and a load-bearing wall. In the case of using aerated concrete blocks to fill a reinforced concrete frame, the junctions of the blocks with reinforced concrete are filled with cement-sand mortar.
Aerated concrete masonry is connected to a reinforced concrete column or perpendicular wall using metal ties installed every 2-3 layers of blocks. One part of the connection is laid in the masonry seam and secured with special nails, the second part is attached to the side surface of the pillar or wall.
The junctions of the blocks with the floors or beams of the frame structure are filled with polyurethane foam.
Common Mistakes
- The absence of cut-off waterproofing under the first row of masonry leads to capillary suction of moisture from the foundation.
Often, instead of waterproofing, a brick belt is made under the first row. Ceramics raise moisture better than aerated concrete, so this makes no sense.
- Poor cleaning of blocks from dust and debris before laying impairs adhesion between rows.
- Do not sand the joints with a block float before laying the next row. Unevenness of the seam can lead to local stresses and cracks.
- Installation of a lintel without calculation leads to the appearance of structures with excessive or insufficient strength.
- The junction of two pieces of reinforcement on a corner block.
- Bandaging violations - the appearance of through vertical seams when joining partitions, corners or rows of masonry.
- The absence of a reinforced concrete belt under the floors or roof can lead to the appearance of cracks.