A strip foundation for a fence is a continuous strip of concrete, which is poured along the entire length or facade of the future fence. It is considered excellent protection of the structure from deformation.
This base can withstand heavy loads well. If the installation technology is followed, the service life of the structure will be significantly extended. Following the recommendations of the masters, you can make it yourself.
Which fence is suitable for “tape” as a foundation?
Such a foundation is placed in cases where it is necessary to make a reliable foundation for a heavy fence. These include:
- brick;
- forged;
- stone;
- gabions;
- from corrugated sheet;
Photo: corrugated sheet fencing on a strip base - concrete;
- made of solid wood;
- combined options.
Suitable for areas where it is not possible to build a deep columnar foundation.
A buried tape will provide a solid foundation on weak soils, while a non-buried tape will provide a solid foundation on hard, stable ground.
The need for waterproofing
Waterproofing is mandatory so that excess moisture does not accumulate in the base. You can do this in the following ways:
- Lay roofing material or at least a plastic bag on the crushed stone - then moisture will not get on the concrete.
- Special compounds are also used that are added directly to the solution. If added, the base will be resistant to water.
As you can see, the main thing is to choose the right foundation. If the base is chosen correctly, it will last for more than one year.
Advantages and possible disadvantages
The advantages of such a foundation:
- High strength at low installation depth.
- Resistance to mechanical loads and environmental influences.
- A high-quality poured solid concrete strip extends the life of the fence for decades.
- If necessary, the base can be reinforced with pipes and metal corners.
- The tape protruding above the ground level is lined with stone, which makes the structure more beautiful.
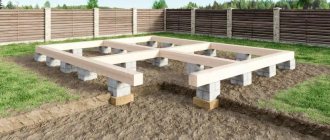
Photo: 3D model of tape laying
Among the disadvantages is the large waste of materials, and therefore the high cost of construction. If the construction area is large, you will need to use special equipment and 2-3 assistants.
Installation of brick pillars
Columns for fencing are made in two types: one and a half bricks and two bricks. The dimensions of the pillar, laid out in one and a half bricks, are 38x38 cm, consumption is 4 pcs. for one row. In two bricks - 51x51 cm, consumption - 6 pcs. for one row.
Roofing felt is laid on the foundation around the pipe. Apply cement mortar in a layer of 1 cm and lay the brick, using a level to level it horizontally and vertically. Each subsequent row of bricks must overlap the seams of the previous row. This technique is called dressing; it adds strength to the masonry.
To get even seams, use a square rod with a diameter of 8 mm. Four pieces of rod are placed on four sides of the post, mortar is applied and brick is laid. Using a level, level the plane, then carefully pull out the square. The result is an even seam of the same size.
Drawing for the construction of a fence
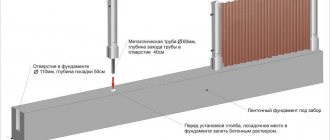
An important element of the pillar design is the mortgage. This is a metal plate or angle on the side of the post. The mortgage is needed to connect the column with the fence section. The plates are released at a distance of 20 cm from the top and bottom on each pillar. Three mortgages are made for the gate and wicket.
Types of strip bases
There are:
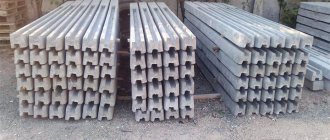
- Prefabricated. For the arrangement, splitter blocks, artificial or natural stones are used. Installation is simple and reduces time significantly. During construction, slight deviations in size are allowed. It is important that the foundation material is strong and resistant to moisture.
- Monolithic. For heavy structures with high load-bearing capacity. Their creation is labor-intensive, requires experience in construction and high consumption of materials.
- a - made of blocks: 1 - blind area, 2 - backfill with soil.
- b - monolithic: 1 - bulk soil, 2 - monolithic concrete.
- c - brick: 1 - brick foundation, 2 - backfill with soil.
- d - on heaving soils: 1 - sand-gravel mixture, 2 - crushed stone or gravel, 3 - sand cushion. I - from blocks
- II - monolithic
- III - made of brick.
Depending on the raw materials used, the tape is distinguished:
- brick;
- reinforced concrete;
- rubble concrete;
- soil-cement;
- stone.
According to the method of deepening into the ground, there are three types:
- Recessed. It is built below the freezing point of the soil at a depth of 1 m. Moreover, the looser the soil, the higher the indicator should be. It is used under massive fences made of brick, stone, concrete, with forged elements.
- Shallow. It is installed at a depth of up to 50 cm on stable soils. Suitable for high fences made of corrugated board, euro-fence, wood, siding. Profile pipes, concrete or screw piles are used as pillars.
- Not buried. The support point of the base coincides with the ground level. Suitable for installation on sandy soil for small fences. An excellent option for areas with high groundwater levels. This foundation is not afraid of the forces of frost heaving.
The width of the future foundation depends on the weight of the fence material for the spans. The heavier it is, the wider the trench should be made. The average is 40 cm.
Thematic material:
- Overview of the main types of strip foundations
- How to make a foundation for a fence
Preparation of concrete
To make a strip foundation, it is permissible to use either a ready-made mixture purchased at a local concrete concrete plant or prepared independently; by the way, if all technological requirements are met, the quality of such concrete will not be inferior to factory-made concrete. The sequence of operations is as follows.
- A dosed amount of cement and water is poured into a container with pre-filled water; constant mixing is required during the filling process.
- Lastly, sifted sand and crushed stone are added.
During production, the solution will become either excessively thick or thin. The density of concrete is adjusted by adding sand or water.
Expert opinion
Vladimir Ulyanov
I have been involved in fences for over 10 years, answering questions and helping people cope with the installation task on their own.
Ask a question to an expert
To make concrete for pouring the foundation, it is advisable to use cement M400 and higher.
Often, cement manufacturers indicate the dosage in kg in recommendations for the production of mortar, so using reference materials, it makes sense to convert kg into volumetric values. This will make it easier to produce ready-mixed concrete.
Protecting the foundation from excess moisture, providing drainage
Regardless of the type of tape used, in order for it to serve for a long time, it is recommended not to neglect the arrangement of the waterproofing layer.
It is done in two ways:
- Roofing felt flooring. A budget-friendly, fast, but not so reliable method of protection against moisture, since after 2-3 years it begins to peel off. This material is used to lay out the bottom of the trench and cover the finished frozen base. For fixation, they are covered with resin or hot bitumen on top.
- By adding a product like Penetron to the concrete solution. This is excellent protection for strip foundations of any depth. Its advantage is that the entire base becomes impermeable to moisture. Penetron is added to the solution at the mixing stage. The finished base does not require additional coating with waterproofing material.
If you need to pour a foundation for a fence in areas with a high groundwater level, you should worry about creating drainage in advance.
A plastic or asbestos-cement pipe with a diameter of 8 to 11 cm is laid in a trench on top of the sand cushion, both edges of which are recommended to be filled with sand. This is done so that when pouring the tape with concrete, the solution does not get into the pipe cavity. Below the base of the foundation, in several places, you will need to dig inspection wells into which water will flow from the pipes during flushing.
If the fence is on a slope, then it is more convenient to make open drainage. That is, dig several ditches connected to each other near the structure.
Problems during construction
When designing a fence, several important factors need to be taken into account:
- Windage, that is, high wind load can lead to the fence overturning.
- Uneven soil deformations due to its type and proximity to groundwater.
To avoid troubles associated with the soil, it is necessary to take a number of measures, including correctly calculating the depth of the strip base, and preparing a cushion of sand and crushed stone when preparing the trench
Before constructing the foundation, you need to look at the fences installed in neighboring areas. If they are “led”, then most likely the soil is to blame.
Step-by-step instructions for creating a strip base for a fence
In order to correctly complete all stages of work, it is recommended to draw up a drawing of the future structure in advance, which will indicate in detail the placement, dimensions of all elements, types of materials and other quantities. The diagram allows you to see what difficulties you will encounter. If errors are detected, they can be corrected at the design stage.
Tools and materials you will need:
- bayonet shovel;
- level;
- wooden pegs and rope;
- boards, plywood, nails and hammer (for formwork);
- cement, sand, crushed stone, water (for solution);
- container and construction mixer for manual mixing or concrete mixer;
- reinforcement bars;
- pillars.
In places where wickets and gates are installed, it is permissible to replace the strip foundation with a columnar one.
Determine the dimensions, choose a location
Before starting construction, it is important not to forget about the SNiP requirements regarding the distance of fences from buildings, nearby areas, and streets. If possible, obtain the consent of your neighbors to avoid conflict situations.
If we talk about the dimensions of the strip foundation (width, height, length), then they are selected individually based on:
- soil type;
- depth of groundwater;
- type of sectional material (whether the load will be large);
- number of gates, wickets.
It is worth performing an accurate calculation of the base area in advance. The following formula will help with this:
(k(n)*F)/(k(c)*R),
where k(n) is the reliability coefficient;
F is the expected load on the base;
k(c)—working conditions coefficient;
R - soil resistance.
Such data can be found in special tables. If you doubt the accuracy of the calculations, use simplified versions of construction calculators.
Carrying out markings
This is the initial stage of work. We clear the site of unnecessary objects, garbage, and vegetation.
A laser level will be an excellent helper when marking. If this is not the case, then the verticality of the corners will have to be checked with a regular level.
We carry out from the corner of the fence. We drive wooden pegs in these places. Then we install them at the points where the pillars will be installed every 2-2.5 meters. We pull the rope tightly between the pegs.
It is better to make external and internal markings under the tape, not forgetting about the indentation of 40-50 cm.
Preparing the trench
The trench is dug manually with a shovel. It is important to ensure that the bottom is equally level throughout the entire foundation. To do this, we transfer soil from high areas to lower ones so that it does not have to be removed.
We make the width of the tape 20 cm larger than the width of the future fence. We select the depth based on the soil characteristics of the region.
To better distribute the load throughout the structure, we create a sand cushion in the trench. To do this, pour a 10–15 cm layer of sand onto the bottom, level it, moisten it with water and tamp it.
Choosing the right brand of cement
The reliability and durability of the foundation directly depend on the quality and strength of the prepared mortar. Therefore, you should not save on concrete by buying goods from a dubious manufacturer.
Depending on the type of fence, we recommend taking into account:
- For fencing made of welded mesh, corrugated sheets, picket fences erected on hard soils, grade M 100, 200 is sufficient.
- For heavy fences made of brick, stone, and forged elements, it is worth using cement grade M 250, 300, 400, 500.
On moisture-saturated soils, the required concrete option is M 400 or M 500.
The optimal crushed stone fraction is 20-30. It is better to take quarry sand.
Calculating the amount of concrete
To accurately determine the required volume of solution, it is necessary to multiply the cross-sectional area of the foundation by its length.
To mix a high-quality mixture for 1 cubic meter of concrete you need:
- 340 kg of cement;
- 0.86 cu. m crushed stone;
- 1.05 cu. m of sand.
The amount of reinforcement is calculated from its diameter.
To make the solution harden faster and be resistant to frost, plasticizers are added to the mixture.
We install the formwork
Formwork is a panel structure that provides the strip base with a neat, even and straight shape. For production it is allowed to use pieces of boards and plywood.
The height of the formwork must be greater than the depth of the foundation.
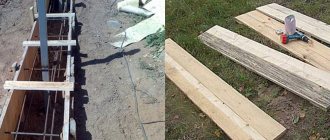
We nail parts of the boards together. We fasten the shields along the perimeter of the trench, securing them with spacers.
Users often search for:
- Paint for metal fence against rust
- Installation of a metal fence
Installing pillars
Even at the fencing design stage, it is recommended to determine what material for supports will be used:
- tree;
- brickwork;
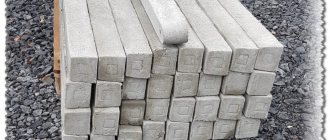
- asbestos-cement, concrete pipes;
- metal profile pipes.
A detailed description of each type and step-by-step installation can be found here:
More often they choose profile pipes with a cross section of 60*60 mm. Before installation, they must be treated with a primer and painted to extend their service life and protect against corrosion.
Under each pillar we dig a hole with a diameter of at least 20 cm and a depth of 1 m. We fill the bottom with a layer of crushed stone and sand. We fix the pipe in the hole. We check the verticality of the installation with a level.
Making trench reinforcement
After fastening the supports, we move on to reinforcement. Rods with a diameter of 8 to 12 mm are suitable for this.
Experienced builders recommend tying the wire together into beams rather than welding them. When fastened by welding, the frame loses flexibility.
Before laying the frame, it is better to line the bottom of the trench with a layer of brick.
The reinforced structure consists of 4 long longitudinal rods that are connected by transversely located jumpers. The average cell size is 33*35 cm. For jumpers, rods of a smaller diameter are always used. The number and diameter of the elements are determined when developing the drawing of the future fence.
The depth of laying the upper and lower levels of reinforcement is 10 cm from the top edge and, accordingly, from the bottom of the trench. There should also be protrusions of 5 cm on each side. They are necessary for ease of installation inside the trench.
Filling the tape
Performed in 2 ways:
- Continuously. When filling a small area.
- With a technological break. Used for laying foundations for long fences. We pour concrete in layers of 20 cm. We tamp each layer. Fill the next one after the previous one has dried.
We remove the formwork after the tape has completely hardened. In the warm season, 7–10 days will be enough for this ; in the cold season, you will have to wait up to a month. We treat the finished base with hot bitumen. We backfill the soil.
Preparation
At the initial stage of construction work, a route is laid for the construction of the fence and a preliminary calculation of the estimate of materials and volume of work is carried out.
The starting points for the calculation will be:
- The length of the section or the total length of the entire fence.
- Determination of the main material of pillars and spans.
- Studying the quality indicators of soils on the site.
- What type of formwork will be made?
- What material is needed to reinforce the fill?
- How to fill the volume of formwork.
When is it necessary to cover the foundation?
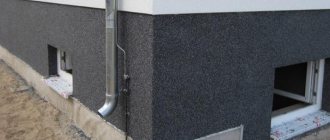
When erecting a stone, brick, or wrought-iron fence, the strip protruding above ground level becomes part of the structure, therefore, in order for the fence to have a complete look, its lower part is finished. The following materials are suitable:
- natural or artificial stone (granite, sandstone, flagstone);
- facing bricks, tiles;
Photo: corrugated fence with brick pillars - pieces of colored glass (to create a mosaic).
In order to save money, you should not use such a technique as painting on a concrete surface. This will cause the solution to crack.
Monolithic tape is a reliable basis for the fence, which will give it neatness and extend its service life by years.
CemAqua
Waterproofing additive for concrete.
More details
Advantages:
- Reduced overall waterproofing costs.
- Protection of the reinforcing frame from corrosion.
- Increased service life of the finished structure.
If ready-made concrete blocks are used when constructing a strip foundation for a heavy fence, they are treated with penetrating impregnation. Then the surface stops absorbing water, and the interior of the reinforced concrete products is preserved in the same way as when adding special compounds to concrete when making the mass yourself.
An example of a water repellent is CemAqua from the manufacturer Cemmix. It reduces water absorption and reduces the risk of formation of efflorescence stains and mold. For 1 cubic meter of ready-made concrete, only 3-4.5 liters of this composition are required (B25 concrete). When choosing a different class of concrete, the consumption changes slightly; the approximate volume of the additive is indicated on the sticker on the canister.
