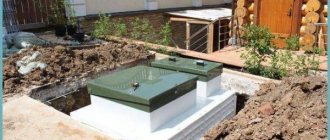
When the need arises to change the existing layout of a house or apartment, a do-it-yourself foam block partition is an excellent solution to this problem. This will help the owners create a new housing scheme without destroying load-bearing walls.
Among the various materials, foam block for partitions is the most suitable. With low weight it has high strength. It is easy to process, so you can set it to any shape. At the same time, it is fireproof. Since the masonry of foam block partitions has a large height with a small thickness, it must be reinforced. And for better sound insulation, you should choose blocks with a lower volumetric density.
What types of foam blocks are there?
The sizes of foam blocks for partitions can be completely different. However, blocks with a thickness of at least 80 mm are more often used.
Types of foam blocks vary depending on density, manufacturing technology and purpose. By density, blocks can be:
- Thermal insulation grades D400 and D500. Their weight is 11-19 kg. They are used to insulate interior walls.
- Structural and thermal insulation grades D600 and D900. These are blocks weighing 23-35 kg. Used in the construction of load-bearing walls of low-rise buildings.
- Constructive grades D1000 and D1100 with a weight of 39-47 kg. Used for the construction of load-bearing walls and ceilings.
According to manufacturing technology, they are distinguished:
- Rifling block. A distinctive feature is the precise dimensions, ideal geometry and continuous edge.
- A molded block that increases efficiency by reducing precision.
- Reinforced (high strength).
By purpose it can be divided into:
- wall;
- partition (it is used for partitions in an apartment);
- non-standard (customer’s wishes are taken into account).
How to lay foam block
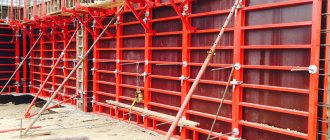
According to a pre-created diagram, they outline the frame of the partition on the floor, and then use a plumb line to transfer the boundaries to the ceiling. Using a dye thread or level, a boundary line is marked on the floor and ceiling. On the adjacent walls, the frame of the future structure is applied in the same way. These frames are needed to build smooth interior partitions from foam blocks. You can also attach metal profiles to the walls for mounting plasterboard partitions.
And in order to control the evenness of the foam concrete walls along their entire plane, a fishing line is pulled between the installed pendulums. This will subsequently save time and effort during plastering and putty work.
Before the first laying, the floor is swept and cleaned of dirt, dust and a deep penetration primer is applied. If the base is wooden, pins are driven into it to give strength to the future wall, only then onto the mortar. If the floor is concrete, then you can lay the foam blocks directly on the mortar.
The following rows can also be laid on a mortar, or you can use adhesive mixtures and gypsum plaster. Tile adhesive may also be suitable for these purposes. However, its consumption at a 2 mm layer thickness will be approximately 15 kg/m³.
The joints in the rows should be made in a checkerboard pattern to make the partition made of foam blocks stronger and more rigid. To do this, start row 1 with a whole block, and the next row with half. Since this material is easy to process, this will not be difficult to do.
For greater strength, a reinforcing mesh is placed every 3-4 rows. Also, iron pins are inserted into the load-bearing walls so that they later fit into the masonry.
When the installation of the foam block partition is completed, all holes, crevices, and cracks are puttied with putty. After this, the surface is primed. Plastering begins only after the mixture and putty have dried.
Doorway
If the construction of partitions made of foam blocks includes doors, then the doorway is formed immediately. The blocks begin to be placed from the walls and are cut so that an even vertical doorway is obtained. If this cannot be achieved, everything can be corrected with a grinder or saw. Leveling with these tools can only be done a couple of days after laying, when the glue has completely hardened. Otherwise, the partition will begin to deform.
The width of the opening is the thickness of the door leaf, the door frame and the installation gap of about 3-5 cm. The maximum height depends on the selected door. The standard height is 205 cm.
Reinforced concrete lintels are used to cover the opening. However, you can install a temporary U-shaped bracket made of wooden slats, where the top strip should be along the length of the opening, and the side strips should be 50-70 cm. Be sure to strictly observe the 90° connection angles.
When the construction of the partition block approaches the mark of the doorway, a pre-created bracket is installed. It is screwed to the slopes with screws. Then they measure the height from the last row to the bracket and cut the foam blocks so that they have the shape of the letter L. They are installed on top so that the joint falls in the middle of the future boat. This will allow you to evenly distribute the load on the doorway. The temporary bridge can be removed only after the glue has hardened, i.e. not earlier than after 2 days.
After the temporary bracket is removed, a permanent top header needs to be installed. It is necessary to install it by making cuts 7-10 cm deep and about 2 cm high. We lay out the reinforcement there, which is fixed with mounting wedges. For installation, use cement mortar or glue.
Sealing the joint where the partition foam block meets the ceiling is another important point. Typically, its width should not exceed 1.5 cm. The construction of partitions from foam blocks requires the presence of a gap, which is filled with polyurethane foam or polyurethane. The blocks are not placed right up to the ceiling because the seam must attach the partition to the ceiling. Also, due to its elasticity, foam absorbs pressure or stress from deformation of the floor slab that occurs during operation.
You can fill the seam only after the glue has completely hardened. Otherwise, when it expands, it deforms the foam block partition. You need to foam the joint on both sides to achieve better sealing of the seam. In addition, it also has a soundproofing function. After hardening, the foam is carefully trimmed flush with the wall.
When the installation of the foam block for partitions is completed, remove all the guides. If everything is done correctly, the surface of the partition should be smooth and ready for finishing work.
Installation Rules
Foam block material is soft and porous, and a metal door is installed in it in several ways:
Many people are interested in how to secure a door frame in an opening made of foam blocks to a wooden frame?
When inserting a door into a wall made of aerated concrete, it is necessary to ensure that it stands on a foundation base, as a more reliable element.
A massive door creates significant loads, which cause the fastenings to become loose over time. To prevent such deformation manifestations, experts recommend installing the box in such a way that the load forces are distributed over a larger area. To do this, use a wooden frame with an embedded beam. The wood is first treated with an antiseptic composition.
It is recommended to use larch as it is more resistant to moisture.
If a small door is planned for installation, then embedded beams are buried in the aerated concrete, or overhead panels corresponding to the wall thickness are placed in the openings. Such panels can be solid or installed as separate elements. Upon completion of installation, the free space between the wall and the door frame must be foamed. This will allow the frame to lock more firmly.
Under a large door, a frame is made of wood material; the installation of the frame is more durable. The anchors are installed every sixty centimeters, to a depth of at least fifteen.
To strengthen the openings, frames are made from metal angles or profile thick-walled pipes. They are installed from floor to ceiling, the ceilings are fixed with anchors. Pipes are allowed to be buried in foam blocks, but for this you will have to prepare grooves. After this, holes are drilled in the frame to secure it to the aerated concrete.
Maximum reliability of fixation is provided by metal mortgages installed during the construction of the wall. These elements are plates with welded reinforcing bars, which are embedded into the walls during masonry work. The frame is fixed using a welding machine or bolted connections.
Possible mistakes
Many problems can arise if 1 row of blocks is laid out incorrectly. You need to make sure that the row is even. If necessary, level the base using a concrete screed. To control the evenness of row 1, a fishing line is stretched at the height of 1 block. The evenness of the side surfaces is checked with a level or fishing line. If a person is thinking about how to build a partition using not special ready-made mixtures, but makes the solution himself, then he needs to make sure that the proportions are chosen correctly.
Sometimes the owners feel sorry for the wall and refuse to drive metal pins into it. If this is not done, the partition structures will be weakened and shaky. The same effect is created by the reinforcing mesh between the rows of masonry.
It is worth remembering that foam blocks absorb water well. To prevent all the moisture from the adhesive mixture from going into the blocks, the row is pre-moistened with water. Each next row can be laid out only after the previous one has dried a little. This way you can avoid deformation.
Glue for interior partitions costs 2-3 times more than mortar. However, its consumption is 6 times less. In addition, a thin layer of glue will hold more securely than a thick layer of mortar. And if you apply it with a notched trowel, this will further save the mixture.
kamedom.ru
What is the material
The advantages of foam block are:
The main difference is that during the construction process there is no need to spend additional money on thermal insulation; costs associated with heating the room are reduced by three times.
The material does not create a large load on the foundation and is easy to work with. A comfortable microclimate is maintained indoors.
There is only one drawback - fragility. Houses made of foam block material are necessarily reinforced on several levels.
Preparatory work
First of all, you must decide how you will fill the opening. A prerequisite is to ensure the connection of the newly laid section of the wall or brick partition with the existing one.
Bookmarking a doorway can be done:
- First method From the existing opening, bricks are knocked out along the edges through two to four rows along the height of the opening to a depth of at least 120 mm (half a brick), forming so-called grooves for tying the brickwork. The bricks of the newly constructed wall using M-50 cement mortar will fit into these grooves, thereby creating strong adhesion to the old surface.
- The second method is the use of anchor elements - reinforcing bars with a diameter of 6 - 10 mm or large nails 200 mm long, which are installed in the masonry joints after three to four rows in height. The anchor elements must extend into the seams of the doorway to a depth of at least 100mm. In plan, the distance between the rods is recommended to be done in increments of about 100mm. For a more technologically advanced installation, use a hammer drill to drill sockets in the seams of the old wall.
Portal about construction
When carrying out repair work, it is often necessary to block a door or window opening with bricks. The reason is moving a door or window to another place or simply sealing an unnecessary transition between rooms. You can safely take this part of the repair into your own hands and save money in this way, since it is quite simple to complete.
The openings must be laid on a solid foundation.
Technology for laying a brick opening
Dismantling completed
Laying a doorway with bricks begins, like all processes, with preparing the opening itself. First of all, it is necessary to carry out dismantling work - this is removing the door leaf, removing the door frame, tow, foam, if any, cutting down the mortar from the slopes.
The new brick structure must rest on a solid and level foundation. The base can be concrete or reinforced concrete - floor slabs, for example.
It is allowed to rest the insert on a good quality cement screed, which is laid directly on the reinforced concrete floor slabs. If the screed crumbles, it is better to remove it completely before the overlap.
We dismantle the floor covering, the threshold, if it is present in the area where the work is being carried out, and clear the place for installing a brick insert. We remove debris, dust and move on.
If you decide to choose the first method and make fines, then after you pull out the bricks along the edges of the opening, be sure to moisten its side surfaces and base with water. Brickwork is carried out according to the usual requirements for it. Read more about the technology in the article - installation of brick partitions.
To save money, if you have a used brick, then after cleaning it from the mortar, you can safely use it to fill the opening. This is often practiced, since the blocked opening does not bear any load - a lintel remains above it. An insert is a self-supporting part of a wall or partition.
Let's start laying
In the second method of embedding, if you decide to ensure the solidity of the old and new structures with the help of anchors, then lay out three to four rows, drill sockets in the seams of the existing wall of the opening and drive reinforcing pins or nails into them.
At the same time, make sure that the seams of the new structure coincide horizontally with the existing seams of the wall or partition. The seams are carefully filled with mortar.
Almost always, between the top row and the bottom of the opening there is a gap that can be filled with mortar, pieces of brick and mortar. Check the vertical evenness of the masonry of the opening using a rule or a level lath.
If you want to know by what criteria the quality of work is controlled, then read the article - quality control of brickwork.
The opening is blocked
The opening, as an option, can be sealed with fortan or foam blocks, if the wall has the appropriate width. Drywall is one option; the installation process is dry and clean, but the surface strength is incomparable to brick. You need to look at the situation.
If you plan to nail something onto a sealed opening, then you will not be able to hang a heavy object, wall cabinets with dishes, seaming, and so on on this area. Of course, it is possible to provide reinforcement with profiles, but this is impractical.
After sealing the doorway, all that remains is to plaster the new area and then begin finishing work. Bricking a doorway is not a super complicated process. This work can be done with your own hands if you have basic construction skills.
remont-stroitelstvo77.ru
Law first
Remodeling an apartment is, of course, an interesting thing, but the law does not always allow you to do what you would like. This is primarily due to safety, since almost every element of the design of a residential building has its own purpose. For example, you cannot move a bathroom into a living space, and vice versa. Also, openings cannot be made in load-bearing walls. If you recklessly make any changes to structural elements, you can significantly reduce the strength.
Please note that you must coordinate any redevelopment actions with the relevant services before work begins. This way you will avoid problems. But if you do make a redevelopment, then still try to arrange everything correctly. Otherwise, over time, when you want to sell your apartment, you will have to urgently resolve this issue, which cannot always be done quickly.
In order to correctly complete all approvals, you must first go to the district administration and receive there an order to develop an architectural planning task and technical conditions. Next, we go to an organization that operates under a license and order the development of the project. Having received the project, we coordinate it with the district architect and, if all is well, we receive an order to begin work.
If we are talking about sealing an opening, then verbal approval from the architecture will be sufficient. After all, you are not destroying the structure of the house, but on the contrary, you are sealing the opening. However, everything here will depend on exactly how you decide to seal the opening. If you are drilling into a load-bearing wall, these actions may be unsafe.
With what? Choosing material
Before you start work, you need to decide on the material with which you will seal the doorway. If you want to seal it once and for all, then use one of these materials:
- Brick;
- foam block;
- drywall.
Block laying technology
Interior partitions made of foam concrete are installed both during the construction and during the renovation of an already functioning house. The masonry is made using foam blocks for the construction of partitions with a density of D600, with a standard height and length of 300x600 mm. The thickness is selected depending on the functions of the future wall. The partition for zoning the room allows a size of 50 or 75 mm. A permanent partition with the installation of a door or window is laid out from foam blocks with a thickness of at least 100-150 mm.
In order for installation to be carried out quickly and without difficulty, you should prepare materials and tools in advance:
- special glue for connecting foam blocks to each other;
- polyurethane foam, deep penetration primer;
- glue container;
- drill - for drilling holes for communications, as well as mixing the adhesive solution for foam blocks;
- drills and mixer attachment;
- long building level, tape measure, painting cord;
- metal profile for installation of drywall, dowel-nails, hammer drill;
- hacksaw - to cut the block to the desired size;
- reciprocating electric saw - for making openings;
- putty knife.
Tool
To narrow or widen doorways in an apartment, you will need a simple construction tool:
- hammer, sledgehammer, long chisel;
- hand saw for wood;
- plane;
- hammer drill, drill, screwdriver, grinder;
- pliers, figured and straight screwdriver.
The set of materials depends on the work performed. To narrow the interior doorway, you will need a wooden beam, a metal profile, drywall, brick or foam block. The blocks are laid using cement mortar, and the gypsum board sheets are fixed to the metal frame with self-tapping screws. When expanding the doorway in height, you will need a metal corner to strengthen the upper lintel.
Instructions for building a partition step by step
Do-it-yourself installation of the wall is carried out in stages.
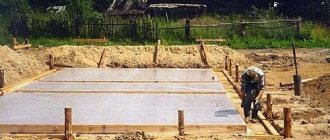
1. Preparing the base. Of course, foam blocks cannot be installed on parquet, tiles or wooden floors. In this case, there will be no adhesion to the base. A full foundation is not required, since partitions and walls made of foam concrete are not load-bearing. A full-fledged foundation for the structure is not required - it is enough to make a regular cement screed 7-10 cm thick from B20 cement, level it using a level, and let it dry completely.
2. Marking the contour. The distances indicated in the project from existing structures to the future partition are first laid out on the floor plane, strictly maintaining the angles. Then, using a tape measure, building level, metal profile or paint cord, mark the walls and ceiling.
3. Installation of temporary frame. For these purposes, a profile is used, which is attached with dowels and nails to the floor, walls and ceiling.
4. Preparation of walls and ceiling. This work is necessary to improve their adhesion to the glue. Use an industrial vacuum cleaner to remove dust and impregnate a wide strip of primer parallel to the profiles mounted on the ceiling and walls.
5. Preparing the glue. It is mixed in a bucket using a drill with a special mixer attachment. The consumption of the adhesive mixture is approximately 15 kg per cubic meter of wall.
6. Laying foam blocks. This work is performed step by step in the following order. Apply the adhesive solution to the base and wall with a spatula in a strip that is slightly higher and longer than the block, and its thickness is 3-4 mm. The foam block is placed in the right place, tapped with a mallet, and the correct installation is checked using a fishing line stretched between the vertical posts of the frame. Next, glue is applied to the plane of the bottom row and the end of the previous block. Each next row is shifted by 0.5 times the length of the foam block to make the partition stronger.
7. Dismantling the frame. 2 days after the last row has been laid and the glue has set, the auxiliary frame is dismantled. The gap between the upper plane and the ceiling on both sides of the wall is filled with foam. This creates elastic seams (necessarily continuous) - they serve to compensate for the thermal expansion of the partition made of foam blocks.
Finally, the doorway is made with your own hands. Its standard height is 207 cm from the floor, its width is 8 cm greater than the width of the door leaf. Check the verticality of the marked lines and cut out the opening with a reciprocating saw. Its upper part is reinforced with steel rods with a diameter of 16 mm. The work is done as follows: parallel grooves (10 cm long) are cut on each side, foam concrete is knocked out of them, rods are inserted and secured with mounting wedges.
When is reinforcement necessary?
When making a partition on your own, you should strengthen it in certain places with reinforcement.
1. Connection with main walls and piers. Before installation begins, pins or large nails are driven into the adjacent walls at the junction with the future partition, acting as connecting elements. First, holes 50 mm deep are drilled in the wall, into which pieces of reinforcement lubricated with an adhesive solution are inserted. Holes are simply cut out in the foam blocks, or the blocks are laid directly on the protruding ends of the reinforcement. Subsequently, the rods are hammered in every few rows of masonry.
2. Ligaments between the septa. Connecting elements are installed for those structures that will then be tied to the partition being constructed.
3. Reinforcement of masonry. For this purpose, a construction mesh made of fiberglass is used. It must be laid in the three lower and upper rows. If the masonry is large, its middle part is also reinforced.
Recommendations and possible errors
Sometimes you hear that laying foam blocks can be done without installing metal structures made from profiles. However, the frame simplifies the task for beginners who are building a wall with their own hands for the first time. They will not have to worry about aligning the foam blocks along the marked marking line - they will only need to control the middle using the aforementioned fishing line. There are other nuances that allow you to avoid common mistakes.
1. The masonry turned out to be fragile.
With the help of a special construction adhesive, foam concrete sets well and holds securely. Adhesive compositions are produced in the form of dry mixtures. Usually they come with instructions, according to which the powder is diluted with water.
It is allowed to work only with freshly prepared glue: otherwise it loses its qualities, and the partition loses its strength.
2. The wall has shrunk and the trim has cracked.
To prevent this from happening, be sure to buy autoclave cut foam blocks. In addition, they are ground in during installation. The action plan is as follows. The block is placed at a distance of 2 cm from the previous one, and then with a sliding movement it is pulled up and pressed against it, focusing on the bottom row. This squeezes out excess glue.
3. When making a doorway, the cut out fragment was pressed down by the saw blade.
When cutting out an opening in the partition, you first need to drill a number of holes in the foam blocks with a drill. In this case, the lower horizontal cut is made first - in this case the saw will not jam.
It is best to plaster interior partitions with the adhesive mixture used for installation. Then the operations are performed step by step:
- installation of electrical wiring;
- putty;
- cladding or painting.
Cost of foam blocks
The price depends on the product brand (density), manufacturing technology, and manufacturer’s reputation. For example, certified autoclaved, steam-dried, cut foam blocks of the D700 brand are 10-15% more expensive than molded and less dense analogues that do not have a quality certificate. The average cost of material in the capital region is shown in the table.
| Brand | Dimensions, mm | Price, rub/m3 |
| D500 | 300x100x600 | 3040 |
| D600 | 250x250x625 | 4900 |
| D600 | 150x250x600 | 2550 |
Cost of work
If you decide to hire professionals, you should first clarify the cost of laying interior partitions. This will allow you to create a general estimate of construction or repair work.
Currently in Moscow, average prices vary between 400-500 rubles/m2. The more expensive the masonry is, the thicker the block and the more complex the structure configuration.
stroitel-lab.ru
Deciding on the goal: how to seal a doorway
There are several reasons why an opening in a wall is sealed. Based on the reason, they choose suitable materials for the job. To completely fill the opening, you will need reliable and high-quality material. It must not only close the existing entrance, but also have sound and heat insulation qualities. The construction industry provides a wide range of materials for repairs, so you can cover the resulting space with plasterboard, lay it with bricks or blocks
Reasons why you should seal a doorway:
- Redevelopment of living space in an apartment;
- Replacing an old door with a new model;
- Reducing the passage space into the room;
- Decoration.
Redesigning a space is a common reason to move the entrance to a room to another location. In this case, preference should be given to brick or drywall. Brick can be used to lay the entrance quickly and inexpensively. Drywall sheets are easy to work with because they are lightweight and can be cut. You can sew up the opening after removing the door leaf and dismantling the frame itself.
When replacing doors, a problem arises: the new door is smaller than the old one. Therefore, there is a need to partially seal the passage so that the new door can be installed smoothly and in the right place.
The passage into the room can be large. You can reduce it yourself using small bricks or foam blocks. Doorway decor in studios is common. It is not necessary to close it completely: you can partially close it or cover it with decorative elements.
Based on the reason why it is worth removing or reducing the opening, the necessary materials and tools are selected and the stages of work are determined.
Window dismantling
In order to properly lay the window opening, you should perform all work in stages, following the relevant instructions. Preparatory work involves dismantling the window. To do this, the doors are removed from their hinges, and then the method of attaching the frame to the wall is determined in order to find the best option for dismantling it. Typically, the window frame is removed using a powerful pry bar, after cutting the frame crosswise with a hacksaw. After this, you should clean the window opening from traces of plaster.
Choosing a material: how to seal a doorway in the wall
Many apartment owners have encountered inconvenient home layouts. The doorway may not be convenient or less functional if one room is isolated and the other is a passage room. To close the doorway, use a blind seal.
You can seal a doorway that is no longer needed using any material you have at hand
This can be done using:
- Brick;
- Drywall;
- Foam blocks.
The first two materials are inexpensive and do an excellent job of this task. You can close the doorway yourself. To do this, you need to level the opening with the wall and make the entrance to the room in another convenient place.
Sometimes, you can enter the back room by walking diagonally across the entire living room. You need to go the same way to get to the bathroom, toilet, kitchen or hallway. This layout is not convenient if the family has children and they live in the back room. You can move the doorway to another part and separate the nursery from the living room or parents’ room. You will have to get rid of the old opening.
Foam blocks are a good material for this purpose. Their cost is slightly higher than that of the first two materials. They are suitable for sealing openings in panel houses.
Decoration with curtains
A simple but very interesting option for decorating a doorway using curtains is a look into the past. Several decades ago, people demarcated their living space in this way, decorating the passage with wooden or fabric curtains. The desired effect was achieved: the boundaries of the room were visually outlined, without creating a closed space.
Curtain - a simple and effective solution
But similar solutions are still popular now, but the variety of shapes and materials has become much greater. The most commonly used are bamboo sticks, which are very durable and produce a pleasant sound when colliding with each other. You can paint them yourself in the desired shade or choose a ready-made option to suit your interior.
You can use curtains anywhere, even on the border between the hallway and the bathroom, although this is a little intimate, but if home owners are interested in this option, then why not experiment.
During the renovation process, it may be necessary to remodel the home, and in this case, you need to determine what is better to close the doorway instead of the door. For this purpose, materials of various types and properties can be used. In this case, you can completely eliminate the opening and level it with the wall or make a decorative design.
Sometimes it becomes necessary to seal a doorway
How to close an opening instead of a door: stages of working with bricks
Brick is used to completely seal the opening. Laying with bricks or foam blocks is a radical method. The choice of material depends on the thickness of the wall itself into which there is an opening. The material is suitable for covering open space in a load-bearing wall. Substances are added to the cement-sand mortar to strengthen the masonry. Before you start arranging the opening, evaluate the budget for the work being carried out
Stages of work:
- Remove the floor covering up to the slab;
- Make a fortification;
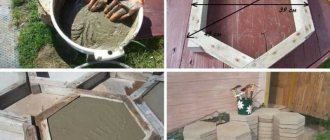
- Mix the masonry mortar;
- Carry out the laying (in parallel, do the dressing with the main wall).
Reinforcement is used as a connection to the wall, which serves as reinforcement. You need to apply the solution to each row, then level it evenly and remove the excess.
If the wall is brick, several bricks are taken out of it and the masonry is made from new ones. They are the connecting element with the bricks that cover the opening.
Window trim
After completing the brickwork, you should leave the bricked window in this condition for some time so that the mortar sets well and dries. It is good if there is sufficient ventilation in the room. This will significantly speed up the drying process. At the next stage of sealing the window opening, finishing work is carried out. They involve cleaning the surface after laying the brick, priming, plastering, as well as putty for wallpaper or paint.
Having cleared the embedded window fragment from traces of cement mortar, you can begin priming and plastering the wall surface. The primer is applied with a special brush with a thick fleecy head. It is recommended to apply several layers of such a protective and strengthening composition, allowing it to dry completely. Then they begin to level the surface of the filled window opening.
For this purpose, ready-made dry mixtures containing lime are usually used.
How to seal an opening above a door with plasterboard: steps
You can seal the opening with a sheet of drywall. This material is often used in construction and decoration. Drywall has many advantages. It's inexpensive. The sheets are light in weight. Working with this material will take a little time and effort.
Drywall has gained great popularity in construction today due to the simplification of operations.
To work with drywall, you will need a minimum of materials and tools: a hammer drill, dowels, self-tapping screws, cross strips, profiles, putty, tape measure.
Step-by-step work on sealing the opening above the door:
- Take measurements;
- Make a three-dimensional frame;
- Cut off a piece of the desired size from the sheet;
- Fix the sheet to the profile with self-tapping screws;
- Fill the joints with putty;
- Perform final finishing.
There is another simple option: do not use a frame, but attach the trim to liquid nails. This option is less reliable than the first.
openfile.ru
How to block a doorway with foam blocks