When it comes to foundations, most people immediately imagine a strip foundation.
And for good reason, because tape is the basic type, the most successful and reliable support structure.
No type of foundation can demonstrate such a combination of qualities, efficiency and simplicity as a strip foundation.
It has several design options that expand the capabilities of the base and allow you to obtain the optimal option for given conditions.
Let's consider one of the specific working issues that arise during the construction of the belt - the creation of a brick plinth.
Calculation of brick requirements for laying a plinth: technical nuances, construction calculator
From a technological point of view, it is more expedient to calculate red brick for the basement of a building at the stage of designing a house in order to include the financial costs of purchasing the material in the estimate. But in practice, quite often this is done already when planning the construction of the base.
Technical aspects of calculation
To calculate ordinary bricks (regardless of whether this will be done on a calculator or independently), we need to know the thickness of the future base and its height. These parameters are multiples of the dimensions of the masonry material used, taking into account the thickness of the joints, which are usually 10-12 mm.
Possible masonry thickness options are shown in Fig. 1:
Figure 1. Types of masonry of different thicknesses
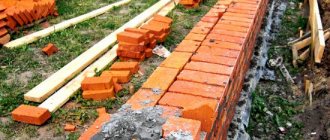
As a rule, the basement of the house is laid out with a thickness of 380 or 510 mm. Laying a base with 1 brick (see photo 6) is used mainly in the construction of wooden buildings, seasonal country houses, bathhouses and other small buildings.
Photo 6. An example of laying out a base part 250 mm thick
Laying ½ brick is used only for cladding the base (see photo 7).
Photo 7. Basement lined with brick
The height is calculated after you decide what type of brick goes to the base - 1NF or 1.4NF. When calculating, horizontal seams must be taken into account.
The average consumption of masonry elements depending on the thickness of the structure is presented in the table below. But the specific amount of material is calculated individually for a specific building. At the same time, it is recommended to buy with a small margin (within 5-7%) in order to avoid downtime due to lack of material.
Table 1. Average brick consumption per 1 m 2 of masonry
Number of bricks in the masonry (including mortar joints), pcs.
General characteristics of brick structures
Sand-lime brick has a lower degree of strength than ceramic brick. Nevertheless, sand-lime bricks are the most popular for the construction of a basement belt over a strip foundation. Here are the main points and characteristics of the construction of a brick plinth.
- How wide is the base strip? This parameter depends on the dimensions of the material from which the wall elements of the future house are built. For example, if you plan to use aerated concrete blocks, then the width of the walls will be 300 mm. In the case when it is planned to carry out insulation and finishing work, then the entire 40 - 45 cm. When finishing the walls with decorative masonry, it is necessary to increase the parameters to 60 cm;
- What height should a brick plinth on a strip foundation be? It is impossible to give an exact answer. The standard height is a brick plinth, which corresponds to the average level of snow precipitation. By foreseeing this fact, you can prevent the base of the house from the destructive effect of capillary moisture on it. In practice, the height of the basement masonry of strip foundations reaches the floor level of the first floor. This is the best option.
Next, let's look at what types of brick plinth can be installed:
- Sunken type. It is often used in the construction of aerated concrete walls, with the walls protruding significantly forward. When using this design, moisture on the outside leaves the walls quite quickly. The advantage is that there is no need to install an additional drainage system unit;
- protruding plinths. This is a suitable option for houses with basement-type premises or a foundation house with a basement. It protects more reliably from the cold. But in this case, you will have to install a drainage system around the entire perimeter of the building;
- basement belt, which is level with the wall along the outer edge. In practice, it is rarely used, since in this case the waterproofing layer of the basement of the house remains unprotected and is not attractive in appearance. But if this method is still used, then it is necessary to carry out additional insulation work and cover the base with finishing material.
Base thickness for aerated concrete
Another rather important issue concerns the thickness of the base and its insulation. The thickness of the base can be:
- Less than the thickness of the main wall.
- Greater than the thickness of the main wall.
- Same thickness as the wall.
It is important to remember here that for a shallow foundation it is necessary to insulate the base and blind area so that frost along the foundation tape does not reach under the heel of the foundation. If you do not plan to insulate aerated concrete walls, it is better to make the base 5 cm thinner so that the EPS boards with which you need to insulate the base are just below the level of the wall
If you do not plan to insulate aerated concrete walls, it is better to make the base 5 cm thinner so that the EPS boards with which you need to insulate the base are just below the level of the wall.
If you plan to insulate aerated concrete walls, then also take into account the thickness of the insulation.
It looks more beautiful if the main wall is level with the foundation, without any steps. But if this is not critical for you, then you can choose any option for the base: protruding, flowing, according to level. The main thing is to ensure proper drainage of water from the wall and provide the necessary insulation of the basement.
What do you need to know?
In most cases, the foundation should protrude 0.3-0.9 m above the ground. The base itself should be at least 0.5 m. Depending on the location for construction and other factors, the height of the base can be increased. For example, if the building is located on a slope, it is better to increase the height of the lower part of the structure. In addition, there are many buildings that have a basement. In this case, the lower building is at least 2 meters.
Keep in mind that the base cannot withstand humidity, which will affect the life of the house, and this period should be as long as possible.
By the way, arranging a brick plinth on a strip-type foundation is considered one of the most convenient. This type is the most common. In this case, the base itself is a continuation of the foundation.
As for which brick is best for the foundation plinth, the solid type is best. Its advantage is that moisture will not accumulate inside the brick, as would happen in the case of a hollow material, sooner or later condensation accumulates inside, which subsequently gradually destroys the material, respectively, the building itself. However, it will take several years for complete destruction. When the brickwork collapses, the entire house will begin to deform.
In addition, it is better to choose fired bricks. Its technical indicators for various properties and, in particular, stability are much higher. The same applies to the ability to withstand compression. Fired brick also has good frost resistance parameters.
In order for a brick base to last longer, it is necessary to improve the insulation so that moisture and sudden changes in temperature do not affect it so much.
Protective coating for basement walls
To protect the brick, which is laid on a strip foundation, the masonry is lined with various materials:
- plaster;
- siding;
- a natural stone;
- artificial tiles.
Plaster
Plastering the plinth is the most common method of protecting brickwork. There are various compositions of plaster mortars on cement and gypsum bases. One of the popular methods of plastering is covering the walls with a “fur coat”. By adding pigments of the desired color, an overall harmony of color is achieved with the overall appearance of the facade of the house.
Siding
Facing the base with siding involves covering the brickwork with panels made of plastic or galvanized metal. Before installing siding, the walls are insulated with slabs of expanded polystyrene or polystyrene foam.
A natural stone
There are two types of facing masonry with natural stone.
In the first option, natural stone is used in the form of slabs of regular geometric shape.
In the second case, the base is covered with wild stone or flagstone.
Artificial tiles
The tiles are laid in the same way as natural stone slabs.
Using artificial cladding is very beneficial.
Modern technologies for the production of building materials make it possible to obtain artificial cladding that completely imitates the structure of valuable rocks, and the cost of artificial material is much cheaper than cladding made of marble or granite.
Step-by-step reinforcement of walls, what you need to know and how to do
To begin with, of course, the territory itself is prepared (that is, the foundation is created) immediately, after which the floor slab is poured, but before that, formwork must be installed.
To do this, you MUST use corrugated reinforcing rods, which after installation (with which there will be no problems) are securely tied with ordinary wire (aluminum or other). Please note that it is also MANDATORY to tie securely and firmly!
The wire should not only hold the structure together so that you don’t fall or unnecessary fragments will separate, but it should pull the rods together, firmly securing them into a single structure! Please note that you need to tie the rods in every place where they touch, because this is the only way to achieve maximum quality of work.
Which brick to choose for the plinth?
The most important question that interests many developers is which brick is best for the plinth on the foundation. Since the basement part of the building is located in the most vulnerable place from the external environment, the material for its masonry must have not only increased strength to withstand the load-bearing loads from the building’s structures above, but also high resistance to various adverse factors, primarily high humidity.
In this regard, sand-lime brick, which has a fairly high tendency to absorb moisture, which, as a result of cyclic freezing and thawing, leads to the gradual destruction of its structure, can be immediately excluded from the list of materials used.
To the question of what kind of brick to lay the plinth with, we can unequivocally answer that the most suitable material from both an economic and practical point of view is ceramic (see photo 2).
Photo 2. Ceramic bricks on pallets
What brand of brick is needed for the plinth?
- M-250 is a reliable material with increased resistance to any external influences.
- M-150 is the minimum acceptable grade of red brick for the plinth. Its use is desirable with subsequent cladding with protective and decorative materials. For finishing, cement plaster, facing tiles are usually used, and less often (due to the high price) clinker bricks.
The numerical indicator of the brand reflects the maximum load that the material can withstand before destruction begins, which for M-250 will be 250 kg/cm 2 .
The plinth can be made from backing brick (also known as construction brick) - in this case, the masonry is usually faced to add aesthetics, but it is often done “for jointing” (when using products of decent quality). When building premium-class houses, they can use a facing material for laying out the basement, the cost and decorative qualities of which are much higher, but subsequent finishing is not required.
Photo 3. Ordinary (backfill) ceramic material
As for the brand of brick for the plinth in terms of frost resistance, it all depends on the construction budget. But it should not be less than F50 – i.e. The product must withstand at least 50 freeze/thaw cycles. There are also materials on sale with higher performance (up to F100), the use of which is preferable, but their price is appropriate.
Which red brick is better for the base: solid or hollow?
Hollow ceramic material is characterized by the presence of a different number of technological holes (13-46%), which contribute to lower thermal conductivity. The specific gravity is lower compared to solid products, but so is the strength.
Solid brick for the base (see photo 4) has a solid structure (emptiness no more than 13%), therefore the thermal conductivity is slightly higher. But in terms of strength, it is significantly superior, which allows it to be used for the construction of critical load-bearing structures.
Photo 4. Solid ceramic material
If you have not yet decided which brick is better to choose for the plinth, we recommend buying solid products that are characterized by greater compressive strength.
It is also possible to use hollow material (see photo 5), but only for the construction of buildings with a height of no more than 1 floor, which do not create excessive loads on the foundation. At the same time, during the selection process, keep in mind that voidness is a variable indicator. That is, for some elements it can be 15%, and for others – 46%. Accordingly, their permissible load will be different. In this case, you don’t need to think long about what brick to make the plinth from - choose the “golden mean”.
Photo 5. Hollow red brick
What size should the brick for the plinth be?
- 1NF – single with dimensions 250×120×65 mm;
- 1.4NF – one-and-a-half with dimensions 250×120×88 mm.
There is no fundamental difference in which of these types of bricks to use for the basement of a house. Focus on the expected height of the basement of the building - this will help you choose the right size material.
It is worth noting that ceramic products can also be double (2.1NF, 250×120×140 mm), but they are produced only in the hollow type. In practice, such a brick is not used for the plinth.
How long should the foundation last after pouring?
How long should the foundation last after pouring?
In general, ideally, the foundation should last a month, and if more, then better. Since it dries completely and then you can safely lay the walls))
Probably everyone knows that after completing the foundation work, you cannot immediately build a building. This begs the question: how long should the foundation last? Let's try to figure it out.
1. All foundations must be erected before building a house; this does not apply only to the pile-screw foundation - it allows you to build walls immediately after the piles are erected.
2. The opinions of experts regarding how long the foundation should stand are divided. Thus, the traditional construction method suggests leaving the foundation for a year and a half. Allegedly, during this time the concrete gains the necessary strength. Although it takes decades for concrete to gain its full strength.
3. Many people are of the opinion that construction can continue a week after pouring. At the same time, they believe that the concrete is already quite strong during this time. In fact, supporters of this opinion do not take into account the fact that the foundation may sag unevenly after winter, which means not only the foundation, but also the walls will crack. I think it’s clear that in this way the work will have to start all over again.
4. Some builders believe that, provided there are so-called “good soils,” it is enough for the foundation to stand for 3-6 months. In this case, in order not to take risks, it is necessary to carry out all possible geological surveys.
5. It is also advised to lay the foundation before winter. This is explained by the fact that it is at this time of year that concrete has to withstand the most severe loads in the form of frost, snow and soil expansion. In this case, in the spring the foundation must be leveled and reinforced, and then the walls must be built. But, if possible, it is still better to let the foundation settle for a year.
Basement finishing.
The finishing of the base is carried out using various construction methods:
- Plastering with cement mortar and painting;
- Concreting the external surface;
- Modern finishing with tiles or artificial stone;
- Durable siding finish.
- Finishing with plinth panels
The first two types of finishes are suitable for updating the appearance of the base from time to time, that is, repainting it in a different color.
Today, there are various finishing materials for the foundation on the market, but thickened plinth panels for finishing the plinth are especially popular, as they have several advantages:
- Can withstand significant loads;
- The appearance does not deteriorate over time;
- Not affected by chemicals;
- Fireproof and frost-resistant.
The insulating layer of the panel is made of PVC material. The panel is a kind of mosaic that is mounted on a foundation of equal-sized elements. The elements themselves are attached to a pre-prepared wooden or metal sheathing using self-tapping screws. As you can see, the option of lining the foundation with plinth panels is a quick, modern solution to the task of lining your foundation.
A well-finished plinth will not only decorate the building, but also serve as its reliable protection. Each owner decides for himself how to cover the basement of his house. The task of the builders is to have the work done professionally, then such a plinth will last for decades. If you approach the finishing of the plinth with imagination, then your plinth will successfully highlight the architecture of the building.
Practical advice
While the final steps are being taken to install the strip foundation, you need to take into account all the parameters of the brick base. It must clearly correspond, firstly, to the plan of the future building, and secondly, it must be a multiple of the size of the bricks.
For example, 25 cm is suitable for one, 50-51 cm for a couple, 37-38 cm for one and a half sizes. The height in this case should be at least 35-40 cm. All these parameters are very important for the stability of the base and the entire building , so they need to be thought through in advance.
A brick plinth on a strip foundation requires mandatory attention during arrangement, since it is an intermediate sector between the foundation itself and further construction. If the base is laid out correctly, the building will be strong and moisture-resistant, and the operating characteristics will increase significantly.
But remember that today a brick base is mainly used only for shield-shaped houses or wooden buildings.
In addition, when you are about to start construction, always stock up on the necessary tools and materials so that you are not distracted by searching for missing parts during the process.
Concrete plinth - objection
Concrete is a universal and most common material for foundations. However, working with it is associated with certain difficulties.
What causes the difficulties of working with concrete:
- During individual construction, it is difficult to calculate the volume of the required mixture with an accuracy of up to a cubic decimeter.
- The limited volume of the solution, along with low plasticity, can prevent the leveling of the horizontal surface of the foundation.
- Homemade formwork does not always provide the ideal bowl shape. Moreover, the higher the height of the base, the higher the complexity of the preparatory work.
Due to these factors and a number of others, the surface of the poured concrete strip after hardening may turn out to be uneven.
In addition, concrete is not cheap. Pouring the foundation requires the use of expensive equipment. Work with the material should be carried out promptly - it cannot be stretched out over time.
The minimum pre-setting time for the concrete mixture is 28 days. However, in humid weather and low temperatures, the curing time of concrete can double.
For the reasons listed above, a low concrete plinth is first made, and after hardening its height is adjusted using other, more technologically advanced materials. Traditionally, the most convenient building material is brick.
Possible errors and their elimination
The most important mistakes include:
- Unevenness of brickwork seams across the width; in this case, the brick begins to “walk” along the entire vertical surface of the wall from row to row; even if it is possible to bring the top row of masonry into the desired plane, its appearance from the outside looks sloppy and untidy. To correct it, it is better to disassemble the masonry before the masonry mortar has reached its design strength and invite a more experienced mason to construct it.
- Collapse and tilting inward or outward of horizontal planes of masonry rows; masonry seams do not need to be made thicker than 1 cm; it should be the same on the inside and outside; if the mason lacks experience, it is permissible to use homemade temporary templates that perform the same functions as plastic crosses when facing with ceramic tiles.
- Stepping, when the upper plane of the column is higher or lower than the reference mark of previously laid corner columns; elimination of defects of this kind, both by chipping off the bricks of the top row and, conversely, by increasing the thickness of the mortar joint before laying the main planes of the walls, is unacceptable; such a brick plinth is also subject to disassembly and alteration.
Stages of work execution
We figured out what the base is for and what to make it from. It remains to figure out how to properly fill the element so that it turns out reliable and durable.
Preparation
Before starting construction of the foundation for the plinth, you should carefully study the condition of the soil at the construction site. The depth of groundwater is of great importance, the presence of which at the one and a half meter mark can limit the excavation bottom to one meter. In this case, you will have to install drainage to remove water from the foundation.
The bottom is leveled and compacted, and the future foundation is marked. To place the walls, trenches with a depth of thirty centimeters are made, at the bottom of which a sand-crushed stone cushion is placed.
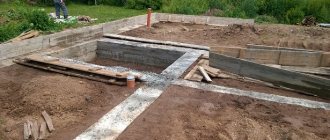
Installation of formwork
A formwork structure made of wooden panels up to half a meter high is placed along the trench walls. Inside it there is a frame base made of reinforcement. This measure will give the structure strength and reliability, and it is not recommended to neglect it.
Concreting
The prepared trench is filled with concrete mortar, which gains strength within three to four weeks.
Block laying
Most often, the foundation for a house with a basement is built from FBS blocks. This method makes it possible to quickly erect foundation and basement walls, even though renting a crane is expensive.
The masonry alternates with ligation of the suture areas. Block stones are connected to each other with a solution based on sand and cement. During work, you should consider where windows and ventilation openings will be located so that there is always an influx of fresh air and daylight in the basement.
The foundation of the plinth must rise above the soil surface, the recommended level is up to one meter. A brick or reinforced concrete belt is laid along the upper block row to level the base horizontally.
Construction of a monolithic basement tier
Such a base is more difficult to construct, so construction work will have to be taken with full responsibility. The algorithm of actions is as follows:
installation of the formwork system. Formwork panels can be made from planed lumber, or you can rent a ready-made structure
When assembling the shields yourself, pay attention to their inner side so that its surface is smooth. The boards are fixed carefully so that they do not become deformed due to the gravity of the concrete solution; reinforcement
To give the structure additional strength, reinforcement is performed. Reinforcing mesh made of metal rods is prepared in advance, the cell parameters of which are 150 by 150, 200 by 200 or 250 by 250 mm. The reinforcing bars are fixed together by welding. The dimensions of the mesh should be smaller than the width of the formwork so that they are covered on all sides by the concrete mass. The number of reinforcing mesh is determined by the height of the base part; it is recommended to place them every thirty to fifty centimeters;
concreting. At this stage, it is recommended to act according to a certain scheme: first, the solution is poured to a fifteen-centimeter height, it is given time to thicken slightly, a reinforcing mesh is laid, the filling is performed again, etc., to the designed height. The plinth arranged in this way is distinguished by its reliability and high strength index.
Waterproofing
This construction stage is considered mandatory, since exposure to moisture will cause the destruction of not only the foundation, but also the entire structure.
The waterproofing layer can be performed in two ways - coating and pasting. The first option uses bitumen-based mixtures that are melted before application. In the second case, roll materials are used, working with which requires adherence to certain technologies.
How to calculate the number of bricks
The amount of material is calculated based on the parameters of the base.
Its height is always a multiple of the whole number of rows, and its width corresponds to the usual types of masonry:
- Half a brick (120 mm). For 1 m2 of masonry (including seams) 51 pieces of standard single brick are needed.
- In brick (250 mm). 102 bricks per 1 m2.
- One and a half bricks (380 mm). 153 pcs/m2.
- In two bricks (510 mm) 204 pcs/m2, etc.
The required amount of brick can be calculated based on the area of the tape, guided by the given standards.
You can approach the issue differently and count the number of briquettes individually by dividing the length of the tape by the length of one piece and multiplying by the number of bricks in the thickness of the masonry and then multiplying by the number of rows.
For those who do not have the time or desire to do calculations, an online calculator can be useful.
There are many of them, they all operate on the same principle - your own data is entered into the appropriate boxes - tape length, width, and other initial data.
The result is the desired value, taking into account the size and other features of the selected type of brick.
IMPORTANT! In any case, the obtained result should be increased by 15-20% in order to compensate for losses from poor-quality cutting, breaking or other unproductive costs of the material.
Construction of a brick plinth
The height of the plinth is usually determined by practical use. If the project provides for the location of auxiliary premises below the first floor, for example, a boiler room or a garage, then the base will be high. By the way, this solution gives the building a noble and elegant look. The brick base has not lost its position for many years.
Before starting work on the construction of the main structure, it is necessary to reliably isolate the foundation from moisture penetration.
Which brick to choose
There are many types of bricks currently produced
Bricks are produced in various types: clay, silicate, with and without voids, single and one-and-a-half, shaped.
Types of material with voids are not suitable for a brick foundation base for the reason that it can condense moisture, which will certainly destroy it over time, which poses a danger to the entire building.
Therefore, it is most reliable to construct a plinth from solid clay, clinker, silicate or acid-resistant bricks. Materials are produced by manufacturers with different physical and technical characteristics. You should choose a brick with high strength, resistance to temperature changes, and also poorly resistant to moisture.
If you plan to build a basement using brick, then the width of the foundation should be calculated based on the geometry of the brick. So, the thickness of one brick means a size of 25 cm, one and a half bricks - 38 cm, and two - 51 cm.
Waterproofing
Mastic is indispensable when waterproofing the base
Waterproofing the foundation is not just a necessary procedure, but a mandatory one. Otherwise, the entire building will suffer: mold and dampness will be permanent guests.
The most famous option is to lay two layers of roofing felt on bitumen mastic and one layer of glass insulation. Not only the top, but also the vertical surfaces of the foundation are also treated with bitumen mastic.
A damp foundation is a danger to the entire structure
That’s why so much attention is paid to waterproofing work.
How to set corners
Laying a brick plinth begins at the corners. Usually solid brick is used. Due to a certain complexity and responsibility, this work is entrusted to experienced masons.
- On the waterproofing layer in the corners, first, without mortar, the first row of bricks is laid out to the required width of the plinth.
- The correctness of the angles is verified by level and plumb line;
- Linear measuring instruments are used to check the geometric parameters of the perimeter of the building and its diagonals at the corners.
Brickwork
Only after completing all the previous stages do they begin to lay out the base (from the corners to the middle of the wall). The main assistants of every mason are a plumb line, level, twine or rope.
When laying the plinth, it is necessary to constantly monitor the horizontality of the structure
In order for the wall to be smooth and strictly vertical, it is necessary to check all dimensions every three to four rows. The rope is stretched from one corner to the other so that the mason can lay out the wall as evenly as possible.
A brick plinth can be erected on a foundation made of any material. In this case, it is necessary to take into account the weight of the walls so that it does not exceed the bearing capacity of the base.
Most of all, a brick base is suitable for light walls made of wood or half-timbered walls. To fasten the bricks together, a cement-sand mortar of grade M75 is used. In order for the structure to be stronger and to withstand loads well, after 4-5 rows of masonry in height it is necessary to reinforce it with steel meshes.
The diameter of the wire for reinforcement must be at least 3 mm, the cell size must be from 4 to 120 mm. Welded meshes are used. The mortar for brickwork is laid in such a way that it completely covers the reinforcement to avoid corrosion.
Brick rows are laid out in strictly horizontal rows in a certain order, which is called a dressing system. The seams in height in adjacent rows should not coincide; they are placed in a “checkerboard” order. That is, the stones are positioned with a shift relative to each other. This effect is also achieved by alternating spoon (along the longitudinal sides of the brick) and bonded (along the end sides of the stone) rows.
We recommend watching a video on how to lay the material yourself.
Along the entire perimeter of the base it is necessary to install ventilation holes measuring 150-250 mm every three meters, at some distance from the soil surface. The height of the windows can be equal to the width or be slightly larger.
Laying work
The most important stage at the beginning of the construction of the basement is the construction of the corners. The first row must be laid strictly across the entire width of the building. The solution of cement, water and sand should have the following proportions 1:3:3.
The brick basement is insulated from the inside as desired, but the outside requires mastic, which is applied with a brush, roller or specialized apparatus. Laying is carried out with constant monitoring of the level and cord.
Setting the corners
Setting the corners when laying the plinth is one of the main tasks; incorrectly placed corners will lead to curvature of the walls!
To do this, place a dry row of bricks in the corners and determine the desired width of the plinth. All corners must be level.
Using twine or a tape measure, you need to measure the length of all sides and 2 diagonals - if the angles are set correctly, then the dimensions should be identical.
Laying a brick plinth on top of the foundation
You can begin installation only after all measurements have been made. To secure the bricks, a cement-sand mortar in a ratio of 1:3 is required, diluted with water to the required thickness of the mortar.
The main condition for this work is to carefully fill the vertical or horizontal joints with the prepared mortar to ensure the strength of the foundation.
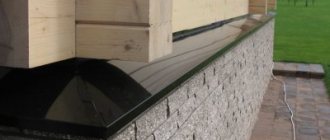
Base insulation
To insulate the foundation, waterproof materials such as polystyrene foam are required, which must be used to treat the entire outer surface, secured with a special glue - which does not contain acetone and solvents - which harm it.
Basement waterproofing
Before you start building the structure, you need to make sure that all waterproofing materials are in stock - plaster, stone, ceramic tiles.
Waterproofing methods:
- Waterproofing is carried out at 2 levels - at the very bottom, before the first brick laying, and on top of the bricks. The easiest way is to lay roofing felt in two layers. The first layer ensures the wall is protected from moisture, and the second layer provides protection.
- Extruded polystyrene foam, which is fixed to the outer surface of the base. Due to the fact that this material has zero water absorption, it has high protective properties. It also has thermal insulation, and therefore will give the building additional protection.
- Bitumen lubricant is applied to the entire surface of the bricks in a thick layer in several approaches. Various plaster mixtures.
Ventilation
The foundation masonry must have holes that are located at a height of 15 cm from the ground, which will ensure good ventilation. You need to cover the holes with a metal mesh or flaps.
Brick base protection
Protection is required if construction work must be stopped. To do this, a film is laid on the structure being built, which protects the frame from various unfavorable environmental conditions.
Despite the fact that this article describes detailed instructions on how to lay a brick plinth, they will not help if you do not have even a little experience working with these materials.
Types of brick foundations
The brick foundation can be made of strip or columnar. From the names it is clear that the strip is a ribbon laid out of brick, running along the entire perimeter and under the walls of the future building. Columnar construction involves placing the building on free-standing brick masonry pillars.
Which brick to choose for the foundation
Not just any brick is suitable for constructing a good, solid foundation that will last for many years. Since brick is the main material used in the construction of this type of foundation, the strength, durability, reliability and load-bearing capacity of the foundation of the house depend on its quality.
Facing or sand-lime bricks are not suitable at all, since they are not intended for long-term use and are subject to rapid destruction. Only solid red fired (ceramic) bricks with high resistance to freezing are suitable for the foundation.
Sometimes a brick foundation is built using materials left over from old masonry. Although this option will be quite economical, one has to doubt its quality.
Types of masonry
There are many types of masonry that have decorative or purely practical significance .
The choice of the most suitable option is primarily determined by the thickness of the base.
Since there are no half-brick plinths, the minimum option is brickwork . The main element of the masonry is dressing, i.e. placing bricks in such a way that all seams intersect with solid briquettes.
The most famous method of tying is the usual spoon masonry, but it does not allow outer and inner rows to be tied together.
Therefore, chain masonry is most often used, when one row of bricks is laid using the usual spoon method, and the other row is laid using a butting method, i.e. consisting of bricks laid across the axis of the wall .
NOTE!
When using chain masonry, there are special rules that require butting the first and last rows, protruding elements or areas located directly under the beams.
How to lay out the basement part: materials for construction
The base part of the foundation helps protect the building from getting wet and prevents moisture from penetrating into the structure. This structural element is especially important in wooden houses, where protection of the lower part is required. There are several materials from which the base is made.
Reinforced concrete
The base part made of reinforced concrete is used for monolithic pouring. This is one of the most durable and reliable types of plinth arrangement. When pouring concrete, the presence of air ducts and openings for the outlet of communications is provided.
The advantages of this choice:
- reliable protection from moisture;
- simplicity;
- short construction time;
- high strength indicators.
The disadvantage of this material is poor thermal insulation, as well as the high cost of work. Reinforced concrete is suitable for the construction of plinths on a strip foundation.
Tree
People who want to have a completely wooden cottage choose to arrange a basement made of wood. This includes two main materials - timber and logs. The second option is more suitable for wooden log houses - it perfectly complements the overall exterior of the house.
The base itself is built from larch, since its lower part will constantly be in contact with the ground, and this will lead to exposure to moisture. The tree does not like excessive moisture, and larch is resistant to water.
The advantages of this solution:
- Durability.
- Attractive appearance.
- Environmentally friendly.
- Health safety.
A base made of timber or logs protects wooden walls from destruction, but this plus can turn into a major disadvantage if the arrangement of the base part is carried out in violation of the technology.
Natural stone
The foundation is often made of natural stone, and accordingly, the basement is built from this material. The masonry is made of large stones. Due to their strength, the structure becomes resistant to heavy loads. A combination of concrete and stone is often used: then the masonry is made of natural material, and the voids between it and the corners are filled with reinforced concrete.
What are the advantages of a plinth made of natural stone:
- pressure resistance;
- low cost of work;
- availability of stone in each geological region.
An option with a plinth made of natural stone can be considered in those houses where it is necessary to reduce the cost of construction. This method has several disadvantages: the house must be built in an area without seismic activity, as well as in a favorable geological environment.
Brick
For a brick plinth, red solid brick is used. The complexity of the procedure is one of the main disadvantages, since you constantly need to monitor the evenness of the masonry using a building level. But such a base does not need to be additionally coated.
Its advantages:
- Durability all around.
- Lack of special care.
- Environmental friendliness of the material.
- Resistance to temperature changes and weather vagaries.
- Availability.
There is another disadvantage - the need for additional protection of the material from moisture. For this purpose, special hydrophobic impregnations are used.
Blocks
The dimensions of aerated concrete or foam concrete blocks must be no less than the height of the base itself. When arranging, be sure to ensure that there are no horizontal seams. This is one of the difficulties when laying the base part along with maintaining the weight of each block. This type of plinth is used with strip foundations.
Its advantages:
- fast construction;
- availability;
- evenness of masonry;
- good thermal insulation characteristics.
Craftsmen advise making a special drainage under the base, which will remove moisture from the material. This procedure is carried out at the stage of pit construction.
Features of arrangement for a wooden house
How to arrange a basement in wooden houses? This question is relevant, since wooden materials are very susceptible to moisture, and it cannot be used at the basement level. There is no need to think long here. You can make a base from various materials presented above:
- From cinder block;
- plinth belts can be expanded clay concrete;
- made of brick.
It happens that in an old wooden house there is no base at all, then it is raised using supports and a base is built from a previously selected material.
You can update the foundation base of an old wooden house using cladding. To do this, you can use brick, artificial stone, covering it with siding, etc. And the old wooden house will turn into a work of art.
Author: Ignatiev Yuri
Tools and materials used during work
To lay brick on the foundation surface, you need to prepare the following materials and tools:
Bricklaying Tools
- trowel or trowel. Used for laying and mixing the solution, removing excess;
- bushhammer. It will come in handy when it is necessary to split a brick into pieces of a certain size;
- plumb line Designed to check the verticality of the created structure;
- construction cord. It is stretched between the outer bricks and allows masonry to be carried out strictly along one line;
- brick ordering is used to speed up the masonry process, since it marks rows according to the thickness of all elements present;
- wooden rule. Used to control the quality of the external surface of the structure being created;
- container for preparing mortar or concrete mixer;
- building level. Improves the quality of the base as it helps control the presence of even minor level differences.
Recommendations
Recommendations from professionals:
- the horizontal thickness of the seam joint should be within 12 mm, in the case of reinforcement - 16 mm;
- You can get a high-quality seam using a metal rod with a cross-section of 12 mm. Its location is in the corners of the future basement structure;
- laying the mortar is done with a trowel. It also removes excess cement. It is better to do it right away before the composition hardens;
- after checking the verticality and horizontality of the laying, errors are eliminated by tamping with a hand trowel;
- a cord stretched between opposite corners of the future structure will allow for even ordering;
- For beginners, it is recommended to lay the first order dry. Then, proceed to bandaging with cement mortar;
- You need to ensure that the surface of the walls is neat and clean. Produce seam joints in a timely manner. While the cement is not dry;
- the process of reinforcing walls will increase their strength. Reinforcing material is laid every 4 rows;
- facing building materials at the final stage of construction will protect the structure from precipitation and other aggressive environments;
- double waterproofing protection ensures the stability of the structure from the influence of external weather factors and groundwater flows;
- The main rule for arranging the foundation is the correct alignment of the corners.
The service life and safety of the building depend on the correct execution of the plinth. You need to follow technology and not neglect safety precautions.
average rating
more than 0 ratings
Share link
Pros and cons of a brick plinth on a strip foundation
The brick base has the following advantages:
- Assembly from piece materials is slower, but does not require curing time for the material, so it is ultimately much faster than concrete casting.
- The brick plinth allows you to correct shortcomings made during the casting of the tape. In particular, you can correct the shape, align the corners, etc.
- An intermediate layer appears between the walls and the tape, allowing you to redistribute the load and more evenly transfer it to the tape.
- Brick has certain thermal insulation abilities that make it possible to improve the microclimate of the zero level or first floor.
The disadvantages include:
- Brick can absorb moisture, which creates problems for the structure of the entire house and requires appropriate measures to be taken.
- Bricklaying is a labor-intensive process that requires skill and experience.
- The load-bearing capacity of brick is lower than that of concrete casting.
- A large number of connecting seams significantly weakens the masonry, making the base vulnerable to mechanical stress and moisture.
Both advantages and disadvantages directly follow from the properties of bricks, so they should be considered typical features of a building material.
Brick selection
To build a reliable brick support, for construction you only need to purchase solid red ceramic bricks that have undergone technological firing.
This material is durable and practically does not absorb moisture. If you properly waterproof the constructed column, the support can reliably withstand loads for many decades without losing its original characteristics.
The most important characteristic of solid red brick is its frost resistance. This parameter shows how many freezing/thawing the product can withstand
With a value of F35, there is a manufacturer’s guarantee for the reliable operation of such bricks for at least 35 years. When purchasing material, you should keep this indicator in mind. The higher it is, the longer the foundation will last without destruction.
It is necessary to carefully select the bricks that will be used to make foundation columns. Preference should be given to a product without cracks and not burnt.
How to make and fill a brick plinth for a private house with your own hands?
To do everything yourself, without being distracted by additional purchases, you will need the following:
Scheme of a sunken base.
- cement;
- sand;
- crushed stone to fill the structure;
- water;
- tape measure or strong thread;
- brick;
- roofing felt;
- polyethylene film;
- pipe cuttings;
- trowel;
- plumb line;
- building level.
Setting the corners when building a brick structure with your own hands
Before laying is done, the corners must be set correctly. If this is not done, the walls may be laid incorrectly in the future. If the deviation is insignificant, unevenly aligned corners can be corrected when laying the first row. It should be noted that it is not recommended to rely on this at all. It's best to do everything right from the beginning.
The first thing you need to do is lay bricks in the four corners without mortar along the width of the base being made. In the corners they must be leveled.
After this, using a tape measure or using a strong thread (it should not stretch under any circumstances), you will need to accurately measure the length and width of the sides of the future private house, taking into account the corners that were laid out earlier. In addition, it is necessary to measure 2 diagonals. All measurements must be equal: the length of one side must be equal to the length of the other side of the wall, and so on.
Scheme of types of basement floors
If the measurements are equal, everything was done correctly. Therefore, it can be made of brick with your own hands. If any measurements do not match, it means that not all angles are equal to 90°. This will need to be fixed urgently. This can be done as follows: constantly rechecking all the measurements that were described above and at the same time moving the corner bricks on any of the sides, find the correct location in the corners so that the measurements on all sides coincide, the permissible deviation is a maximum of 2-3 cm. With further masonry the difference can be eliminated.
House screed against cracks
As a rule, cracks appear in old buildings as a result of various external influences, although cracks can also appear in a new building if the construction technology is violated or some factors are not taken into account. The appearance of cracks must be stopped, as gradual destruction of the building is possible. Solving this problem is not easy, but there are several ways to solve it yourself. One of the methods involves screeding the house using various materials.
Use of fittings
Construction reinforcement is strong enough to hold together the walls of a building, preventing further cracks from occurring. Despite this, such a technical operation will require certain skills, as well as the ability to use an electric welding machine. In addition, you will have to find the necessary information to correctly calculate the amount of reinforcement and its diameter. Calculations depend on the size of the building, as well as the nature of its damage.
Naturally, you can try and find all the necessary information, although it is better to involve an experienced construction organization. In this case, you will have to invest some money, but the calculations will correspond to a high professional level.
If the walls do not have serious damage, then in places where cracks appear, the brickwork can be replaced, and in cases of a high degree of destruction, it is better to use reinforcement, either reinforced or conventional.
What will it take?
In addition to the reinforcement itself, you will need some other materials, including tools:
- Fittings.
- Threaded studs.
- Nuts and washers.
The technology of screeding a house using reinforcement is not complicated. Metal corners with holes whose diameter corresponds to the diameter of the studs are installed at the corners of the house. Studs are welded to the ends of the reinforcement, after which the reinforcement with threads at the ends is inserted into the corners, which are installed on opposite corners of the building. After this, nuts and washers are screwed onto the studs, and then the nuts are screwed on. The structure is tightened by turning the nuts. Naturally, without a special wrench, this will not be possible.
Quality of fittings and its types
Reinforcement is metal building elements that are used to form reinforced concrete building structures. The use of reinforcement and concrete makes the structure especially durable. In addition to reinforced concrete products, reinforcement is used in construction to strengthen various building structures.
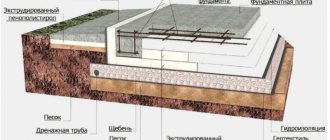
Waterproofing and marking
Waterproofing and marking the foundation for the plinth must be carried out at the initial stage of work. The service life and appearance of the created structure depend on the correct execution of these processes.
Foundation waterproofing
Foundation waterproofing scheme
Waterproofing the foundation along a horizontal surface is necessary to prevent the penetration of capillary moisture into the brickwork and wall structure. In this case, experts recommend installing the waterproof layer twice. The first time the waterproofing is laid on the surface of the foundation, the second time - on the finished base.
Roofing felt is most often used for this purpose. It is best to lay it in two layers, so that the first overlaps the seams of the second by 10–15 cm. Installation of roofing felt can only be done on a perfectly flat surface, on which there are no dents or bulges.
The maximum permissible difference in height should be 1.5 cm. If it exceeds 2 cm, it is necessary to level the surface. This can be done using a thickened masonry joint or a thin screed made of ordinary cement-sand mortar.
Installation of waterproofing in the form of roofing felt is carried out in several ways:
- directly onto the surface of the foundation without the use of additional adhesives;
- using hot bitumen;
- heating the surface of the roofing material with a burner.
Foundation marking
Foundation marking scheme
Experts lay the brick on a cement-sand mortar, but it is first recommended to lay it out dry. This is necessary in order to determine the thickness of the vertical seam. The standard value is 1 cm. If after laying out it turns out that the row protrudes or is shorter from the foundation, it is recommended to increase or decrease the width of the seam by 0.2 cm.
This approach will help to carry out masonry from solid elements without halves or quarters. Such a base will look more attractive. If you cannot do without halves and quarters, you need to accurately determine their size and placement.
After laying out the materials without mortar, it is necessary to mark the locations of the vertical joints on the foundation. After this, each element is carefully removed and installed using an adhesive. The bricks are laid in the same order. Otherwise, the vertical seams may move due to deviations from the standard dimensions of the materials used.
How to properly make a basement recess below the base of the foundation
Content:
When you deepen your basement, you can improve the characteristics of an existing space or create a completely new one. In any case, you must approach the recess very carefully, otherwise you can cause serious damage to the foundation and building.
Why do you need to deepen the basement below the base of the foundation?
The deepening of an existing basement or basement is done mainly in order to increase the distance between the floor and the ceiling, which gives the space additional advantages and conveniences:
- Thanks to the recess, a small unused room can be made usable and equipment or a recreation area can be placed there;
- Compliance with codes – Sometimes existing basement spaces are deepened in order to turn them into shops, cafes, pharmacies and other establishments where a certain standard of ceiling height is required.
A recess to create a new space is made mainly for:
- Increasing the usable space;
- Warehouse or cellar installations;
- Technical room arrangements;
- Construction of a new living space.
Technology for safe deepening of the basement and building foundation
In order to deepen the basement or basement of your home or building, you need to dig below the base of your existing foundation, which means you risk disturbing its structure and damaging your home. In order to do everything correctly and safely, you need to approach the issue of deepening professionally and with an understanding of all the nuances associated with deepening.
What needs to be examined before starting work
Not every foundation can be simply taken and deepened. This attitude can lead to a very unfortunate situation and affect the integrity of your building and its blade-free operation. Before performing such important and complex work, be sure to study the following important information.
Before you begin deepening work, you need to study:
- Foundation type – A design of your home or a visual examination of the structure of your foundation will help answer this question. Not every foundation can be deepened; strip and column foundations are mainly suitable for deepening. It is not possible to deepen a slab foundation, but you can make a local recess in it, like a caisson or cellar.
- Foundation design - It can be concrete blocks, rubble stone, etc.
- Foundation Depth - This can be done by design or by visual inspection and regular depth measurement.
- At what level is the groundwater located and whether it exists at all - This can be done with the help of geological surveys.
- What kind of soil does the building stand on? Watered soil may not be suitable for excavation.
- Condition of the building's foundation - Are there any cracks, shifts or other irregularities in it? If there are serious cracks and other problems, deepening is not recommended.
The basement floor, when carrying out deepening work, must be above the level of the base of the strip foundation. If you need to go below this level, it is recommended to strengthen the foundation .
Strengthening the foundation before deepening it
Strengthening the foundation can be done in several ways, which differ from each other in complexity and possible loads.
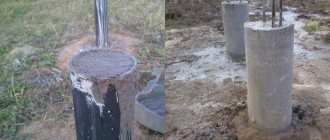
- Transfer to piles - After calculating the area, in a certain step, so-called special wells or pits are dug out, which are filled with concrete. Once the concrete has gained the required strength, the load of the existing foundation is distributed over the installed concrete piles.
- Step-by-step deepening - The soil is dug out under the sole using certain grips, these grips are poured with concrete and wait until it stands completely, and then this procedure is repeated until the entire perimeter is filled with a concrete cage.
- Installation of support piles - Piles are installed under the foundation, and sometimes on the side, resting on them beams mounted along or across the wall. The constructed supports are sunk into the ground below the future floor level.
- Sheet piling wall installation – A sheet piling fence is built along the foundation from various materials, installed below the floor level.
- Recess with indentation - With this method, the recess of the basement is not made closely under the foundation strip, but with a small indentation of 0.6-1.5 m. Thus, the foundation remains in place, and the walls formed after excavation are filled with concrete. When using this method, the excavation is carried out on a slope and forms a sloping wall called a “Berm”.
Diagram of the device for strengthening foundations using various methods:
Methods Strengthening the foundation
Stages of work execution
- Strengthening work - Every 1-1.5, a small hole is dug up or special wells are drilled, which are filled with concrete and turned into support pillars or piles for the foundation. After completing these measures, nothing threatens the foundation and you can begin to deepen the basement.
- Soil work - All soil from the required area is removed manually or mechanically, depending on the area and the possibility of lowering the equipment.
- Slab Pouring – The base or floor of the new basement is leveled and then the concrete base is poured over it. Before pouring the concrete base, 10 cm of crushed stone and a metal mesh are laid on the base for strength. It is necessary to apply waterproofing to the concrete base, after which a reinforced base slab is installed. Before pouring the slab, a reinforced frame is installed, which is subsequently filled with concrete.
- Pouring the basement walls - a reinforced frame is erected around the perimeter, formwork is installed, and then the walls are poured with concrete. When pouring walls, be sure to take into account the installation of waterstops in all cold joints.
- Waterproofing – It is imperative to apply waterproofing to the base slab facing the walls and press it with a pressure screed and a pressure wall. Without proper waterproofing, you risk flooding in your new basement, as well as mold and mildew from excessive moisture ingress.
- Construction of a pressure wall made of brick or other material and pouring the screed onto the floor.
Drawing out the foundation level with a watering hose
The foundation is the foundation of any home, and if you draw the foundation of any building by eye, it will most likely lead to the Leaning Tower of Pisa in your backyard. To prevent such an architectural misunderstanding from happening, the foundation should be laid out horizontally. This procedure is much easier to perform than it might seem at first glance. And the tool for this work can be found on any personal plot. At the first stage of manufacturing the foundation strip for the future structure, it is necessary to dig a trench. The depth of this trench, first of all, must correspond to the “monumentality” of the structure and the type of soil
However, you should not focus on small differences in the depth of the dug trench.
The next step is to determine control points and their locations. They should be placed in the corners, but if the length of the foundation is too long, then it is possible between the corners. Sufficiently strong pegs of the required height should be driven into these places. After this, with the help of an assistant, you need to pour water into the watering hose, which should be transparent, then remove all air bubbles. The result should be a system of communicating vessels, familiar to everyone from physics lessons, thanks to which you can easily set the surfaces of the liquid in the elbows at the same level horizontally. Use a hose. This liquid-filled hose is called a water level. Without this tool it is almost impossible to build a house or even a barn. As soon as the liquid stops moving, you can make marks opposite the liquid boundary on all pegs, moving sequentially from those already marked. Then you need to decide to what level you are going to pour the stone-concrete mixture. To do this, you should lower the resulting marks to the same length in advance without losing accuracy. The fill level will help determine the twine that is stretched between the new marks. After pouring concrete, all pegs must be removed. As soon as the concrete has hardened, you can begin laying the foundation with bricks, checking at every 2nd and 3rd level. Interim checks are recommended to be carried out as often as possible.
Is it necessary to insulate the strip base?
The issue of the importance of insulation is actively discussed by all interested people - owners of country houses, builders and summer cottages. Here are the reasons for insulating the tape:
- Cutting off the tape from contact with cool soil layers or frosty air reduces the temperature difference between the brick and the internal humid air.
- Increasing the temperature of the tape greatly changes the ratio of the degree of heating of the air and the surface of the concrete, which reduces the intensity of condensation.
- The impact of surrounding cool soil layers on areas located directly under the house is reduced, which reduces the risk of frost heaving loads.
- Reduces the level of deformation of house structures, which are caused by temperature differences in individual elements and areas.
Opponents of insulation have the following arguments:
- The efficiency of installing a thermal insulator on a massive concrete strip is relatively low and cannot fully solve the problem.
- The procedure is quite labor-intensive and requires large expenses.
- Insulation will not eliminate the need to create high-quality ventilation of the basement, which can itself solve the problem with the appearance of condensation.
Both the first and second are based on statistical data and personal experience in using strip foundations. There is still a consensus on the tapes, although there are still more supporters of insulation. The reason for this is an improvement in the quality of thermal insulators and a better understanding of the essence of the physical processes that occur in the area of the strip base and surrounding elements.