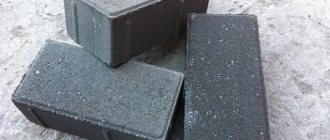
Mauerlat is one of the elements of the roofing system of a house, which is a log or timber laid on top along the entire perimeter of the outer wall. The main material for its manufacture is wood, or more precisely, lumber from pine or other coniferous species. The dimensions of the timber are 150 x 150 mm, 150 x 100 or 80 x 180.
Sometimes a log is used, from which the bark is first cleared, after which one side is trimmed to fit as tightly as possible to the wall surface. During the construction of a metal-based roof frame, an I-beam or channel is sometimes used.
Why is it needed?
The main function of the Mauerlat is the uniform distribution of the total concentrated load, which is transmitted by the support points of the rafters to the full surface of the upper part of the walls.
Find out how to install a seam roof and prices for building materials on our website.
We design the connection of the roof to the structural components of the roof, guided by the advice of experts.
The second purpose of this element is to tie the roof structure to the walls. The mauerlat is laid while maintaining a certain distance from the outer edge of the wall and is attached to it. The bottom part is insulated using roofing felt or other waterproof material - this measure helps to avoid rotting of the wood. Separate fastening of each link with two located next to it allows you to obtain a stable, reliable structure along the entire perimeter of the roof structure. You can also lay the Mauerlat in separate segments under the rafter legs.
Without this element of the roofing system, only timber, log or frame wooden houses can be built. In these cases, the role of the Mauerlat is played by the upper beam or the upper crown of the logs.
How to make a Mauerlat on aerated concrete with and without an armored belt, what nuances to pay attention to
People uninitiated in the nuances of capital roof construction are unlikely to know why a Mauerlat is needed, what kind of structure it is. And the question of how to make a Mauerlat on aerated concrete causes complete misunderstanding. In fact, it attaches simply. The main thing is to prepare all the components: reinforcement frame, fasteners, timber beams and competently carry out waterproofing and wood processing.
Design dimensions
The recommended dimensions of the wooden beam should be at least 100 x 100 mm. The optimal cross-section is 150 x 150 or 100 x 150 mm. The wood must first be treated with a special antiseptic composition to protect it from rotting and damage by insects.
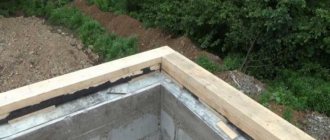
The preferred method of laying the Mauerlat is to install a continuous element along the entire perimeter of the walls. The individual bars are secured into a single unit using a direct lock. Its parameters are determined by the dimensions of the timber. It is necessary to additionally hammer nails into the lock, which will make it possible to obtain beams connected to nearby links, which together form a rigid integral system. Subsequently, rafters are attached to it. The bars should be located closer to the inside of the masonry so that a distance of at least 5 cm is maintained to the outer edge. Often, a protrusion is placed on the outside - a brick-based parapet, against which the mauerlat will rest.
Filling the armored belt under the Mauerlat
The peculiarity of the work on filling the armored belt is that it is carried out at height. That is, the supply of concrete or its components to the work site is significantly difficult. And the filling of the armored belt must be done in one step. It should be understood that ordering a concrete pump in this case is inevitable.
Using a concrete pump guarantees filling of the belt in one step
How much concrete to order
Calculating the material requirements for this case is simple. For example, with an armored belt size of 25x30 centimeters and a perimeter length of 40 meters, you will need concrete: 0.25 x 0.3 x 40 = 3 cubic meters. We must agree that it is very difficult to prepare such a quantity of material and raise it to a height.
How to fill an armored belt
Filling must be done with concrete grade no lower than 200, which requires the following recipe:
- cement grade 400 - one part;
- washed sand - three parts;
- gravel - three parts;
- water - one part with control of the consistency of the solution.
To make concrete more fluid, plasticizers are introduced into its composition that do not affect the quality.
The concrete solution is fed into the formwork continuously and fills the formwork to the brim. During the process of pouring concrete, it must be constantly pierced with a rod, or better yet, treated with a submersible vibrator. Otherwise, voids may form in the mass, affecting the strength characteristics of the reinforced belt.
Vibrator processing guarantees the quality of concrete
To secure the Mauerlat during the pouring process, you need to install a fastener. The following options are possible:
- A wire with a diameter of 5–6 millimeters is tied to the reinforcing mesh so that its ends up to 40 centimeters long extend beyond the concrete level on both sides of the reinforced belt.
- It is also possible to release the fastening ends of the wire along the axis of the armored belt at a distance of 20–25 centimeters. In this case, the two ends are released through two holes, and the beam is attached to the concrete surface by twisting.
- In addition to these methods, anchor bolts or threaded rods are also used, with the help of which the Mauerlat is attached over the armored belt.
Attaching the Mauerlat to the wall: basic methods
The main requirement for attaching timber to the top of the wall is maximum strength and immobility. The most common methods of installing a Mauerlat to load-bearing walls are:
- fastening using steel wire;
- fastening using anchors pre-embedded in the reinforcing belt under the Mauerlat;
- fastening by means of studs embedded in the masonry.
Wire method
This technique is the simplest. Fixation is carried out using thick steel wire. In some cases, rafters are used: they are connected to metal reinforcement built into the masonry by twisting wire. With their help, the base is pressed against the walls. However, the use of such a device is advisable only when other methods are unavailable for certain reasons.
The classic method of wire fastening is as follows: approximately 4-5 rows before the end of the masonry, the middle of the pieces of wire are placed. Between them there should be a step of 60 to 70 cm. The ends of longer length (25-30 cm) rise up. In the case where the building is not to be plastered, the outer part of the wire is hidden in the solution. After the solution hardens and acquires a sufficient degree of strength, the wire ends are twisted over the beam with a tight attraction to the wall.
In small buildings and country houses, it is very convenient to use wooden plugs the size of bricks. They undergo antiseptic treatment in advance and are wrapped in roofing felt. Corks can also be made from timber tarred with bitumen. They are laid below the level of the rafter support or directly below it in increments of 500 to 700 mm.
The elements are connected using metal staples rather than nails.
Fastening with anchor bolts and armor belt
In cases of construction of a reinforced belt on the walls, the laying of fastening elements for the Mauerlat must be done first. In general, the creation of an armored belt is a very correct decision, since its presence significantly strengthens the frame of the building, helps to align the upper crown of the wall in the horizontal direction and represents one of the most important elements of rigidity of the entire structure.
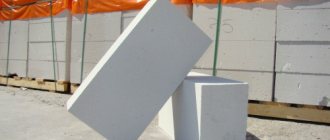
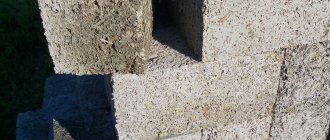
If it is necessary to fasten the Mauerlat to aerated concrete, the use of a reinforced belt is mandatory due to the excessive softness of the blocks themselves, which are not designed for mounting any fastenings, including anchors.
The most convenient way to install a reinforced belt on an aerated concrete wall is to use blocks in the shape of the Latin letter U. Their installation is carried out in such a way that a complete continuous gutter is formed along the entire perimeter of the external walls of the building.
The corner blocks are cut in such a way that no gaps are formed in the walls of the gutter and it is not interrupted in any area.
Then the reinforcement cage is assembled. In most cases, reinforcement of 12 mm thickness is used, tied with transverse 6 mm jumpers. It is placed in a gutter and filled with concrete. The process of pouring concrete must be done in one go in a circular manner - thanks to this method it is possible to obtain a monolithic structure.
As for the anchors, at the stage when the armored belt has already been installed in the formwork or gutter, threaded anchors must be tied to it using tying wire. In this case, it is necessary to ensure that the anchors are aligned along the line as evenly as possible. Another condition is their maximum vertical alignment perpendicular to the horizontal plane. The reinforced belt is very convenient to pour into U-shaped blocks.
The assembly of the frame for the armored belt is carried out on the basis of 12-gauge reinforcement and is placed in formwork along its entire length.
The number of anchors must match or be greater than the number of rafters. It is also mandatory to think through the anchor fastening areas in advance - they should not be in the places where the rafter legs are attached.
As a result of concrete hardening, the anchor bolts are very firmly embedded in the belt and tied to the reinforcement frame of the reinforced concrete structure, which provides the most durable and rigid fastening of all potentially possible.
Subsequently, the Mauerlat is put on studs through pre-drilled holes and, using two nuts and a washer, is pulled to the wall.
In some cases, the armored belt is replaced with monolithic concrete pads. Their length should not be more than 400 mm. Most often, such pillows are placed in brick walls. They are a kind of pits in the masonry, also containing a metal structure (lattice) made on the basis of thin reinforcement or rod.
Metal-based threaded rods are embedded into the yet-to-harden concrete. A distance of no more than 20 m should be maintained between them. The length of the rod should exceed the thickness of the Mauerlat by about 3-4 cm. After this, the product is put on the rods and tightened with nuts and washers.
The rods can be made from pieces of reinforcement: bolts are pre-welded to them - their threads should be directed upwards. The bolt heads are cut off. The protruding parts of the reinforcement can simply be bent. Metal plates are welded to the lower parts of the rods to prevent possible tearing out of the concrete. This technique provides increased resistance to strong winds.
With a roof area of less than 200 sq. m can be done without pouring concrete. In this case, the reinforcement is simply embedded in the upper rows of the masonry (3-4 rows). The pitch of the rafters and the pitch of the reinforcing bars should not coincide.
Using embedded studs
When constructing light roofing structures and small buildings, when there should not be a significant load on the roof surface, the Mauerlat is fastened using studs embedded in the masonry. They are metal bolts in the shape of the letter “L” or bolts welded to a metal square measuring approximately 50 x 50 mm.
Experts believe that when creating a support, this type of installation is the most reliable. When directly immersing metal studs into brickwork, the depth should be 45 cm. Their location on the wall is vertical, and the length of the part protruding above the surface of the mauerlat is at least 3 cm.
Another method of fastening is possible - on support pads. This is the difference from similar actions for concrete buildings, when a monolithic armored belt is installed.
To create support pads on brick walls, the minimum height of the concrete pad should be 220 mm and the length should be 400 mm. Before pouring concrete, it is recommended to wrap the threads of the studs with construction tape - in the future this will prevent its contamination and ease of screwing on the nuts.
Before mounting the Mauerlat, holes must be drilled in it using a special drill bit. For precise marking, it is placed on the tip of the pins, after which it is struck on the surface with a massive hammer. As a result, marks remain in the right places on the surface. It is necessary to ensure that the studs are located even along the edges.
What is a flat roof aerator? Find out how it looks and installs.
You can find useful tips on building a roof staircase here.
The recommendations at https://rooffs.ru/krovelnye-materialy/germetiki/vidy-harakteristiki-tseny.html will help you choose the right bitumen sealant for the roof.
The foundation of the future roof is laid along the center line or shifted slightly outward or inward (the specific method depends on the design features of the building). The main condition is to maintain a minimum distance of 5 cm from the outer part of the wall.
A layer of waterproofing material is laid on the wall - it should be pinned onto studs. Afterwards you can proceed to the main installation.
In the process of adjusting the material, special attention should be paid to the fact that trimming the Mauerlat is unacceptable. Only the rafters can be trimmed. In this case, you need to make sure that they do not just touch the bar, but rest firmly on it. To simplify the task, it is recommended to use a template for the supporting part of the structure.
How to attach the base?
Upon completion of the preparatory work, you should choose a method for fixing the Mauerlat. There are different ways to install a roof base. The choice depends on the physical and technical parameters of the materials used and design features. It is important to consider the method of fixing the rafter legs to the timber beams. For sliding installation, additional crossbars are installed. This method involves creating a small amount of freedom in the roofing system. The crossbars are installed to maintain the level of strength. For persistent fixation, bars are attached to the rafters or teeth are made into them.
Fixation with wire
Constructing a Mauerlat using this technology will take a little time. A simple method that is suitable for small areas. Stages of work:
- Prepare pieces of wire of the required length.
- Place the wire in front of the last rows of masonry.
- Make holes in the wooden base.
- Stretch the wire after the cement has dried.
- Tighten and secure.
Return to contents
Fastening with studs
The fixation method is suitable for roofs with heavy loads. The stud is attached directly to the masonry. You can install the clamp in a reinforced concrete belt, which will increase labor and time costs. To properly install the material in the masonry, it is necessary to carry out the following work:
- Place studs into the wall to a depth of 0.5 m.
- Fill with concrete mortar without contaminating the threads of the fasteners.
- Place waterproofing material on the studs.
- Make holes in the wooden base, observing the step of laying the studs.
- Install the Mauerlat.
- Secure the bars with nuts at the ends of the studs.
Return to contents
Wooden plugs
Installation with the help of such clamps is characterized by low cost. You can lay plugs before the last row of masonry or under a wooden base. Most often they are installed behind the Mauerlat near the outer part of the wall. Sequence of work:
- Prepare wooden blocks, the size of which corresponds to the parameters of the bricks used for laying.
- Place the workpieces in masonry on a waterproofing coating.
- Connect the plugs and the Mauerlat using metal staples.
Return to contents
Fastening with anchors
The method is suitable for installing a Mauerlat belt over a large area. The base is secured with anchors to a concrete pad. The fixation method is relatively expensive. You cannot attach rafters and install anchors in the same place. If bolts are attached to hollow bricks, a special void filler or liquid nails are used for the top row of masonry. Stages of work:
- Install the formwork.
- Lay the reinforcement cage.
- Install bolts.
- Fill the formwork with anchors with concrete.
- Remove the formwork after the concrete has dried.
- Install waterproofing.
- Make holes in the wooden blocks, observing the pitch of the anchor bolts.
- Attach the Mauerlat to the anchor, pressing it with nuts.
Return to contents
Installation of armored belt
The fastening method is carried out continuously around the perimeter of the building. This type of fastening is designed to distribute high loads over a large area of the structure. The roofs of high-rise buildings cannot be erected without an armored belt. It is recommended to install such fastenings in houses made of aerated concrete to increase the level of rigidity. The reinforcement belt prevents the walls from deforming when the soil subsides. The installation process consists of the following steps:
Tools and materials required for work
To carry out the work you will need the following tools and materials:
- timber with a minimum cross-section of 150 x 150 mm;
- waterproofing material (most often roofing felt);
- adjustable wrench;
- level for horizontal installation;
- hammer;
- drill;
- bolts;
- nails.
In addition to the above, additional materials are required depending on which fastening method is chosen.
For wire fastening, a fairly thick (from 4 to 6 cm in diameter) steel-based wire rope is required;
When using wooden plugs you need:
- blocks of wood the size of bricks;
- metal construction brackets 25 cm long;
When carrying out work using construction studs, the following is additionally required:
- metal L-shaped long pins - the diameter of their thread should be 12-14 mm, the length of the short section should be 12-14 cm, and the length of the threaded part should be 5 cm;
- metal washers;
- nuts for M12 thread (pin thread);
- concrete (grade 250) – needed when creating concrete pads.
Characteristics of the armored belt
The strength of the armored belt under the Mauerlat directly depends on what its design will be. Each building has its own dimensions, but there are general rules that should be followed. Among them are:
- correct height;
- width corresponding to the size of the wall;
- the length should not be shorter than the walls.
The size of 20 cm is taken as the basis for the height. In some, it is allowed to build an armored belt under the Mauerlat with a height of 15 cm. But it is better to make it larger, not smaller. Also, the height of the armored belt under the Mauerlat should not exceed the width of the wall. The width of the armored belt must correspond to the width of the wall. The minimum cross-section of the armored belt under the Mauerlat should be 25x25 cm.
The armored belt must be monolithic. To achieve this, it must be poured in a short time so that the concrete does not set in parts. The armored belt received this name due to the fact that a metal base is laid inside the structure. The latter is a lattice that is assembled from reinforcement with a diameter of 10 millimeters or more. In this case, the grate should not be flat, but three-dimensional in order to evenly distribute the force.
Installation subtleties
After determining the specific method of fastening and calculating the location areas and the number of necessary fastenings, the installation stage begins.
- First of all, it is necessary to prepare the place, i.e. take measures to ensure good waterproofing between concrete masonry and wood. This condition is mandatory, since in areas of contact between wood and brick, wooden parts are subject to rotting. To prevent this phenomenon, two layers of waterproofing material are placed under the Mauerlat. You can use traditional roofing felt, polyethylene or reliable expensive materials.
- When using studs and anchors, the required number of holes must be prepared in advance. This task is not entirely simple, since even when using a level and a thread, perfectly even vertical alignment of fasteners turns out to be impossible, especially when it comes to liquid concrete. Therefore, it is first necessary to determine the exact location of the bolts and the possible degree of their deviation.
- With the wire method, everything is much simpler: for each fastening, two holes should be drilled in the timber at a distance of approximately 25-30 cm, wire should be threaded through them, and the ends should be twisted, pulling the Mauerlat to the wall as strongly as possible.
For this purpose, it is recommended to use any flat board, on which the areas where the tops of the bolts are located should be accurately marked. This can be done by applying it to the extreme ones and marking the location of the rest. After this, the points are transferred to the Mauerlat beam, in which holes are drilled in accordance with them. All that remains is to put the Mauerlat on the bolts with the holes and, using nuts, tighten the block.
Calculation of standard sizes of rafter beams
The size of the beam depends on the following factors:
- wall perimeter;
- roof structure;
- intended use of attic space (residential or non-residential);
- climatic features of the region.
The Mauerlat is selected so that its width is at least 1/3 of the thickness of the walls. The length is selected according to the length of the wall. If this is not possible, it is permissible to connect two beams of the same length. To ensure reliable fixation, the connection is made with an approach: grooves are cut out at the edges, making up half the thickness of the beam, after which the beams are fastened together with nails.
How to attach the rafters to the Mauerlat
After completing the installation and fastening of the Mauerlat to the wall, you must proceed to the installation of the rafter system. Depending on the type of rafters (hanging or layered), the shape of the structure, and the tasks assigned to the fastening unit, fastening can be of two types:
- hard;
- articulated.
The hinged type has varying degrees of freedom. Basically, fastening with a zero degree, or a rigid connection, is used for rafters, eliminating the possibility of rotations and displacements.
A connection with two degrees, or a sliding connection, allows rotation and a certain displacement of the rafter beam in relation to the mauerlat beam.
The sliding type of interface makes it possible to level out the shrinkage of the building and the thermal expansion of the wood, thereby preventing rupture of the structure and the occurrence of excessively strong thrust loads on the walls.
When creating a rigid mate, use:
- metal corners;
- nails;
- support beams (they are nailed to the rafters).
The support beam is tapped under the rafter beam in such a way that the beam rests rigidly on the power plate along the pressure line. The support beam can be up to 1 meter long. Following these recommendations allows you to avoid displacements perpendicular to the axis of the Mauerlat.
To prevent the rafters from moving along the Mauerlat axis in the transverse direction, metal corners and nails are used. The nails must be driven in at an angle on both sides so that they cross into the beam. The third nail is driven vertically through the rafter beam from above.
Creating a sliding mate is done in three ways:
- by sawing the rafters in the board, followed by laying the saw on the mauerlat and fastening with nails, plates (corners) or staples;
- the method of releasing the rafter beam onto the wall and securing it with a plate;
- fastening using the so-called “sled” - a special steel-based fastener for rafter connections.
The latter method is most often used for frame-panel structures, houses made of timber or wood. Frame and wooden buildings exhibit noticeable shrinkage. In the case when the roofing structure cannot move simultaneously with the frame of the house, enormous stress arises, which can destroy both the rafter system and the walls of the house.
In what cases is an armored belt needed and how to make it
This unit plays the role of an “intermediary” between the building frame and the upper structure, consisting of a rafter system and a roofing pie. Point loads from each rafter leg are transferred to the supporting structure and are evenly distributed along the upper plane of the walls. The nature of the loading consists of two vectors:
- Vertically directed, due to the mass of the rafter system and wind loads on the roof.
- Horizontal, transmitted by an inclined element - rafters. Ultimately, the pushing force can lead to deformation of the walls and their destruction.
Therefore, a reinforcing belt is a mandatory element if the building frame is made of foam concrete, expanded clay concrete, brick and similar materials. It should be noted that the installation of an armored belt does not eliminate the need to install a power plate, since these units perform fundamentally different functions:
- the armored belt strengthens the structure of the building box;
- The Mauerlat is the basis for the construction of the rafter system.
A reinforced belt along the top of the wall is necessary to strengthen the structure of the house
Strictly speaking, most modern building structures contain several armored belts. The first of them is located below, under the building frame, and has its own name - grillage. Its purpose is the same - distribution of loads on the foundation. The second and subsequent ones are higher, the last one is on the top of the wall under the Mauerlat.
It should be understood that the main reinforcing element is the grillage. The construction of subsequent belts of reinforced structure (due to the installation of more powerful reinforcement) without a lower reinforced belt is pointless and is a waste of money.
Interfloor armored belts give the building additional strength
CONCLUSIONS:
- Mauerlat is an element of the roofing system of a house, which is a log or timber laid on top along the entire perimeter of the outer wall.
- Its main function is to uniformly distribute the total load on the walls and tie the roof structure to the walls.
- The most common methods of installing a Mauerlat to load-bearing walls are: fastening using steel wire, fastening using anchors pre-embedded in the reinforcing belt under the Mauerlat; fastening by means of studs embedded in the masonry.
- When installing a Mauerlat, it is first necessary to take measures to ensure good waterproofing between the concrete masonry and the wood.
- After completing the installation and fastening of the Mauerlat to the wall, the rafter system is installed.
- The fastening of the rafters can be rigid and hinged.
From the video you will learn how to attach the Mauerlat to the armored belt.
What is a Mauerlat
The word Mauerlat arose as a derivative of the German “wall” and “crossbar”. This perfectly describes the essence of the design. Mauerlat (mother log, matitsa, uterus) is a power frame made of beams, which are located along the perimeter of the load-bearing walls, taking on the load of the roof and distributing it evenly. If we consider the crossbar in the overall design of the roofing system, we can see that it has rather modest dimensions (shown in brown in the photo).
The support is made entirely of wood. For this, a beam with a cross-section (thickness) of 150x150 mm is used. You can replace it with three boards 150x50 mm thick, nailing them together in such a way as to form a beam of the required thickness. Other parameters are also acceptable, but the ones indicated are optimal and are more common. For example, a roof with a thickness of 100 mm will not support it, and a beam of 250 mm will not be able to support a wall.
Arm belt construction technology ↑
Installation of formwork ↑
Formwork can be done in various ways using:
- wooden boards (slabs): they are attached to the wall using bars, and also secured on top. When the formwork is dismantled, the top ones are removed. As for the lower bars, they remain in the monolithic filling.
- side supports;
- threaded rods. They are installed in holes pre-drilled in the formwork. Tubes are cut in the following sizes:
- the ratio of the diameters of the tube and the stud is as follows: the inner one is slightly larger than the outer one of the second,
- the valley and width of the armored belt must be equal.
Next, the pin is placed inside the tube so that its ends come out through the previously prepared holes. The entire structure is tightened with nuts and large washers. In the end, only tubes should remain in monolithic concrete. To do this, after filling the armored belt with concrete, allow it to pre-harden. Next, you need
- unscrew the nuts
- disassemble the formwork,
- knock out the studs;
- U-block method. To ensure the integrity of the belt, they must be trimmed at the corners of the building;
- on the outside of the wall, a row of 10-centimeter blocks is laid, and inside, several rows of bricks are laid on edge, or they are replaced with boards.
Attention!
It is necessary to take into account that the wall at the level of the armored belt requires insulation, especially in the case of formwork made of boards, since the concrete can freeze in winter.
The upper edge of the formwork is set strictly in a horizontal plane using a water level.
Installation of reinforcement cage ↑
The reinforcement mesh consists of:
- working longitudinal rods Ø 10–12 in the amount of at least four pieces;
- intermediate jumpers in the form of clamps made of reinforcement with a diameter of six to eight millimeters, placed in increments of 200–400 mm.
Attention!
Using an excessively large step when placing clamps is fraught with displacement of the working rods during concreting, and this, in turn, will subsequently disrupt the correct operation of the arm belt.
- knitting wire that holds them together. It should be noted that welding cannot be used for connections, since, on the one hand, it weakens the reinforcement, and on the other, it creates favorable conditions for corrosion in these places.
At the junction points and at the corners of the walls, the mesh is additionally reinforced to add rigidity to these areas. For these purposes, bent reinforcement is used and inserted on each side by 300–400 mm.
We recommend
For reinforcement, it is recommended to use composite reinforcement. The point is not only that it is cheaper, this material is lighter, it is not subject to rotting, requires greater breaking force, and is much easier to work with.
Method of fastening a structure with an armored belt
When choosing aerated concrete for building walls, you need to understand that the frame of a house made from it will not cope with the weight of the roof placed on it. The construction of a reinforced belt will help her cope with this problem.
Dimensions of the armored belt and its purpose
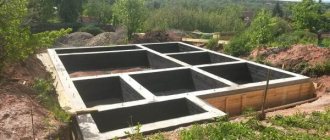
An armored belt is a reinforced concrete closed structure that envelops the building perimetrically (that is, around the entire building). Tasks put forward to him:
- protection against wall deformation;
- additional rigidity for aerated concrete buildings;
- adjusting the load on all wall surfaces evenly.
An armored belt is a kind of foundation intended for the roof of a building. Its dimensions are selected in accordance with the width of the walls and are approximately 25 cm. The outermost row should be laid out in blocks like the English letter U. They will subsequently perform the task of formwork when pouring concrete.
It is extremely important that the Armopoyas is produced in a continuous monolithic structure.
Installation of armored belt
The step-by-step technology for producing armored belts is as follows:
- First, formwork should be built around the perimeter of the house.
- Next, an armored belt is made from monolithic blocks.
- Then the frame is assembled from reinforcing bars.
- Studs are installed for fastening.
- Now everything needs to be filled with concrete mortar.
- When it hardens, the formwork must be removed.
After completing the construction of the armored belt and removing the formwork, it will be possible to begin installing the Mauerlat.
How to properly install and secure the Mauerlat
This element and the rafter system must consist of the same materials.
Before installing the Mauerlat on aerated concrete, you must remember to treat it with antiseptic substances. Then wrap it in a layer of waterproofing material such as: hydroisol, steklomastelastoizol.
The Mauerlat is fixed to the wall structure with studs, iron wire or anchors. If it is made of wood, then it can be secured with special metal brackets.
After this, it will be necessary to fasten the Mauerlat to the rafters. The connection is made by tapping, tapping or sawing down to no more than 25% of the thickness. It is fixed with bolts, self-tapping screws, special angles, and steel plates.
The construction of a reinforced concrete armored belt will be able to prevent unwanted punching in aerated concrete blocks. It will contribute to the uniform distribution of gravity on the house box and the influence of dynamic and static forces pressing on the walls.
Installation technology without armored belt
The SNiP requirements state that installing a Mauerlat on an aerated concrete house without a reinforced belt is in principle unacceptable. This is allowed to be done only in rare cases. This can be explained by the fact that an aerated concrete structure is not able to cope with the thrust snow load, dynamic and wind. The armored belt provides significant protection against deformation. As an exception, the Mauerlat is allowed to be mounted on a building without an armored belt.
This construction option will speed up and reduce the cost of the construction process. But in this case, you should adhere to the following requirements:
- for the base, a light but larger beam is selected, having a cross-section of at least 20 cm;
- it should be reinforced with steel elements: metal profile, nails or locks;
- The climate where construction is taking place is not harsh and there are snow or wind loads, but they are of insignificant force.
- The Mauerlat should be positioned in relation to the outer edge in the load-bearing walls at a distance of 0.5 - 1 cm. The Mauerlat is fixed with chemical anchors, steel wire or special pins.
It is very important before installing the Mauerlat on aerated concrete to accurately calculate the number of fasteners, as well as the distance between two adjacent fasteners.
You need to understand that the service life of the roof directly and largely depends on the strength and correct installation of the Mauerlat. And for this reason, errors, even seemingly insignificant ones, should not be allowed. This is the only way the roof will not cause deformation of the house, but will serve as reliable protection from external and weather factors. This work should be entrusted to experienced developers and roofers.
Types of fastening
Fastening with steel wire.
There are ways by which you can securely fasten the Mauerlat to aerated concrete. It is necessary that the fastening be installed as securely as possible - this will help to avoid displacement of the roof. In the construction industry, it is customary to fix an element using the following means:
Metal wire. When laying the top rows of blocks, builders lay steel wire in such a way that it is firmly embedded in the aerated concrete. The wire should protrude from both sides. Its length must be sufficient to attach the Mauerlat to aerated concrete. The Mauerlat must be firmly fixed to the surface. In this case, the structure does not need to be additionally secured with an armored belt. Anchors. To securely fix the fastening, specialists often resort to an armored belt. The armored belt will help simplify the process of fastening the structure and strengthen it. By using a reinforced belt, builders are able to level the surface of aerated concrete, which plays an important role in the durability and strength of the roof. Buildings made of aerated concrete blocks have low density. The building material cannot securely hold metal studs or anchors. Experts recommend using U-shaped reinforced concrete blocks to install the reinforced belt. Builders place them at the top of the masonry to create a gutter. You can use parts of aerated blocks to secure the belt. A frame made of reinforcement is fixed in the gutter. Before pouring the concrete mixture, anchors are placed in the gutter, which are previously prepared from wire. Each anchor must be installed carefully and levelly. You can align the line using fishing line or cord. Builders advise concrete anchors so that they are placed perpendicular to the Mauerlat structure. The reinforcement frame fasteners are filled with concrete mortar. Filling the mixture should be done in one approach. The number of anchors used can be any, but it should not be less than the number of rafter inclined legs
At the same time, it is important that the latter do not cover the anchors from above; for this it is worth making precise markings of the places where the bolts will be fixed. After the concrete mixture has hardened, the anchors will be securely installed
This method will allow you to firmly strengthen the mauerlat: the bars will hold tightly. Thus, the roof will be fixed on a strong and durable foundation. After the cement mortar has hardened, builders begin laying the Mauerlat structure. It must be taken into account that the anchors must be placed in pre-drilled holes. The fasteners are secured with nuts, under which metal washers are placed. It is important to correctly calculate all the points where the holes will be drilled. To do this, lay the Mauerlat on a cement belt on the bolts, and then tap the structure with a mallet. Dents will appear on the building material in which holes need to be drilled. Sometimes specialists do not make a belt of cement along the entire length of the wall, but place cement pads in the required places. To do this, you will also need to tie anchors to metal rods. Hairpins. If the structure is small in size and the weight of the roof is insignificant, then studs are used to secure the Mauerlat. This type of fastening is made in the form of steel bolts that have a square base five centimeters wide. When laying gas blocks inside, studs are embedded into which nuts are screwed. The technology is reminiscent of securing the Mauerlat to anchors. Holes in the concrete are made in the same way as for anchors: markings are made, then a timber beam is installed and the nuts are screwed in.
Capsules with reagents. There is another method of installation work, which allows you to securely fix the structure on aerated concrete blocks. Before installation, you should buy capsules with the reagent. Installation of timber beams is carried out due to the penetration of special substances into the pores of the aerated concrete surface. The reagents used during installation work will not cause deformation of the gas blocks, which is important for those areas located on the edge. Chemical reagents are an adhesive solution containing synthetic components. When substances penetrate into concrete, the product firmly fixes the materials.
Metal studs - where this type of fastening is appropriate
This option is good for very small houses or other buildings where there is no heavy load on the aerated concrete walls. Well, or for some reason it is not possible to build an armored belt. In other cases, metal studs are quite weak and cannot withstand excessive pressure, so experts do not recommend using them to attach the Mauerlat to the walls of large buildings.
Stages of work:
- To insert studs into aerated concrete, you must drill holes in it at a distance of one to one and a half meters.
- Insert SPT 12 studs into the aerated concrete.
- Then the hairpin needs to be filled with solution.
- Before putting the Mauerlat on the studs, install a layer of waterproofing - you can use roofing felt, but as mentioned above, it is better to use a more modern material.
- Place the Mauerlat timber on the insulation, placing it on the washers.
- Tighten the nuts.
- At the junction points, the Mauerlat is tightened with staples.
- Next you can install the rafters.
Important: it happens that during the work there are already gables - it is better to remove them. Lay the beams along the edges of the walls, then file the rafter legs - this way, it will be possible to redirect the thrust from the rafters to the beam
Splicing the Mauerlat along the length
Most often, wooden beams are 6 m long. If the walls of the house are longer, then the mauerlat will need to be increased in length. There are several connection options:
- ends, secured to metal plates (unreliable);
- “tooth” (beams are cut halfway in height, connected with an overlap and secured with bolts or studs).
The second option is more reliable and desirable.
Proper fastening of the Mauerlat will ensure high reliability of the structure. If mistakes are made, and there are hurricane winds in the construction area, the roof can simply be torn off the wall, so this stage of work must be taken very seriously.
The need for underlay and waterproofing
With direct contact between the wall and the Mauerlat, condensation forms due to the different thermal conductivities of the materials, so cut-off waterproofing must be installed (otherwise the wood will begin to rot).
In practice, waterproofing of Mauerlat is most often made from roofing felt or any other rolled bitumen-guided material in two layers. Ruberoid can be rolled out on the surface of the wall or attached to the Mauerlat using staples and a stapler; a strip of the required width is marked and sawed off from the roll with an ordinary hacksaw.
It is recommended to lay a linen or jute inter-crown sealant on top of the waterproofing for a tight fit and additional thermal insulation.
Another possible option is to install the Mauerlat on a substrate made of foamed polyethylene, which has both insulating and waterproofing properties.
That seems to be all I wanted to talk about in this article. As always, I invite readers to discuss nuances in the comments.
Options for constructing armored belts, design diagrams
When installing a reinforced concrete belt, two types of formwork are used:
- removable,
- non-removable.
The first type includes formwork made of boards or chipboard. In this case, the width of the reinforced concrete belt is equal to the thickness of the wall, the height according to the project drawings is at least 0.25 m. It is used for covering with slabs.
The second type of formwork is made from ready-made U-profiles, additional or partition aerated concrete blocks along the internal and external perimeter of the frame walls. Sometimes the inner wall of the formwork is made of plywood or chipboard.
Using ready-made blocks
Advantages of U-blocks made of aerated concrete over removable formwork:
- The geometric dimensions of industrially produced profile blocks are standardized.
- The manufacturing time of a reinforced concrete beam is reduced.
- Simplicity of installation of the interfloor armored belt of an aerated concrete house, low weight of the elements.
- Inside the cavity it is possible to install additional insulating liners made of rigid mineral wool or expanded polystyrene.
A wide range of standard sizes allows you to choose a U-profile for any gas block in width (from 20 cm) and height. The profiles are mounted with the thick side facing out. Additional insulating inserts are attached inside to the thick side.
Standard geometric dimensions of produced U-profiles:
- the length is the same for all elements of the same manufacturer: 0.5-0.625 m;
- height 0.2-0.25 m;
- width 0.2-0.4 m;
- thickening 7.0 or 14.5 cm, selected depending on the thickness of the aerated block wall.
The fittings are installed inside the tray. Plastic gaskets or special plates with holes for the rods are used. This allows you to ensure the immobility of the reinforcement structure in the design position and maintain the necessary protective layer.
Using additional blocks
Additional elements are used when the length of the wall is not a multiple of whole blocks. They are not produced by industry, but are sawn at the construction site to the required size.
Sometimes gas blocks are used as additional components for installing partitions. They are available in thicknesses of 75, 100, 150 mm.
Installation of reinforced belt formwork for aerated concrete under wooden floor beams can be made from partition or additional elements.
This is done like this:
- On the outside of the wall, an aerated concrete partition element with a thickness of 75, 100 mm is installed on glue. Basalt mineral wool or 5 cm polystyrene foam is glued onto it from the inside.
- An additional element 5 cm thick is cut out and installed with glue on the inside of the wall.
- Reinforcement is installed between the formwork elements. It is allowed to install 2 rods if the width does not allow the structural use of 4 rods. Plastic stands are used to secure the frame and preserve the protective concrete layer.
- The mixture is carefully poured in so as not to damage the formwork, and compacted by bayonet fittings and a trowel.
- After setting, the beams are mounted supported on concrete.
Two reinforcement bars are allowed because wooden floors are lighter than concrete slabs.
Application of double-sided formwork
Under the floor of reinforced concrete slabs, it is necessary to install a reinforced reinforced belt with a width equal to the thickness of the wall, a height of 25-30 cm, and a frame of 4 horizontal reinforcement rods.
The formwork for such a beam is installed from boards on bars along the inner and outer perimeter of the walls. The bars are attached from the bottom to the aerated concrete elements of the second and third rows from the top with mechanical anchors. Spacers are installed on top after installing the reinforcement. Insulation is installed inside the outer perimeter boards.
Reinforcing belt under the Mauerlat
To fasten the rafters and transmit the resulting static, tensile forces from the weight of the roof, a Mauerlat is used. This element distributes point loads evenly over the top area of the walls.
In the absence of a reinforced concrete beam, the mauerlat is attached with wire, mechanical or chemical anchors to the second blocks from the top. Building codes recommend installing an armored belt with anchors underneath it. This will allow you to firmly fix it without resting the element directly on the gas blocks.
The studs for the Mauerlat fastenings are installed evenly. It is necessary to drill holes in the aerated concrete block, screw a nut on the bottom of the stud, and hammer it in to the designed height. After pouring the concrete, you will get anchors onto which the Mauerlat is attached.
It is allowed to reduce the height to 150-200 mm. The width is left the same so that the resulting point and thrust loads from the roof rafters are effectively distributed to the walls.
Fastening on mechanical anchors without armored belt
Finally, the last way to attach the Mauerlat to aerated concrete is the use of traditional mechanical anchor bolts.
The anchor consists of:
- internal steel rod with applied thread;
- outer casing - the spacer part of the mechanism.
The principle of operation of the anchor is the gradual deformation of the outer body as the nut on the bolt is tightened. In this way, the bolt is firmly fixed in the drilled hole.
Installation of anchors occurs as follows:
Along the last row of blocks, beams are laid out along the walls. Holes for mounting bolts are made along the entire length of the beam in 1 m increments.
Please ensure that the anchors are placed at the corners of the building and at the junction of two pieces of timber. Using a special drill, a hole is made through the laid Mauerlat in the gas block to the depth of the anchor insertion
In this case, the depth of the hole should be no less than the thickness of 2-3 rows of masonry. An anchor bolt is inserted into the hole made.
It is advisable to use products with a length of at least 50 cm and thread M 12-14. Finally, put a washer on the bolt and tighten the nut as tightly as possible. As a result of compression, the anchor body contracts and expands the material. So the bolt is securely fastened into the thickness of the wall.
Armobelt for the walls of a house made of aerated concrete
Often inexperienced, novice builders do not even know why a reinforced concrete belt should be poured onto the walls of a one-story house. And the need for its device lies in the following reasons:
- An armored belt for aerated concrete under floor beams connects the structure of the entire house into a single whole and serves as a kind of rigid frame. In other words, thanks to it, the building receives additional strength and resistance to wind loads, ground movements, good stability during seismic activity and ensures uniform shrinkage of the house.
- Ensures uniform distribution of all loads from interfloor and attic floors, as well as the roof truss system, onto walls made of aerated blocks.
- A monolithic reinforced concrete belt makes it possible to leave openings of any width in the walls for installing window blocks and doors, without the use of special lintels (a kind of saving on material).
- A monolithic reinforced concrete belt is needed for the installation of a rafter system, since it requires rigid and reliable fastening, which aerated concrete blocks practically cannot provide.
Armored belt sizes
Monolithic is poured around the perimeter of the entire building, and its dimensions are tied to the width of the external and internal walls.
In terms of height, it can be poured at the upper level of the aerated block or lower, but it is not recommended to raise it above 300 mm - this will simply be an unjustified waste of material and an increase in the load on the walls of the house.
The width of the armored belt for aerated concrete is made according to the width of the wall, but it may be a little narrower.
It is recommended to make the frame for the armored belt with a square cross-section, since a square is considered more resistant to mechanical loads than a flat rectangle.
Concrete belt reinforcement
For reinforcement, metal or fiberglass reinforcement is used. Usually its cross-section does not exceed 12 mm. Most often, the reinforcement frame consists of four long rods that are laid along the wall of the house. From these, using brackets from reinforcement of a smaller cross-section, a square or rectangular frame is formed. Long reinforcing bars, every 300 - 600 mm, are attached to the brackets with tying wire. It is not recommended to use welding to connect them in the frame because the metal at the point of penetration is weakened, and at the same time, corrosion may occur at this point.
The frame should not be allowed to come into contact with aerated concrete blocks. To do this, special plastic pads with a height of about 30 mm are placed under it. As a last resort, you can place separate pebbles of crushed stone.
Attention. In order to properly make a frame for a reinforced belt, it is recommended to use reinforcement only with a ribbed surface, which ensures rigid adhesion to concrete
When can you do without an armored belt?
Pouring a reinforced belt to strengthen walls does not always make sense. Therefore, in order not to spend extra capital on purchasing materials, you should know in what cases you can do without a reinforced concrete belt:
- The foundation is located on solid rock.
- The walls of the house are built of brick.
It is also not necessary to pour a concrete belt over aerated concrete blocks if a wooden floor will rest on them. To unload the floor, under the load-bearing floor beams, it will be enough to pour concrete into small supporting concrete platforms about 60 mm thick.
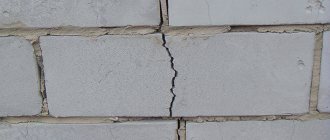
In other cases, when construction is carried out on peat bogs, clay, and other weak soils, it is necessary to make an armored belt. It is especially impossible to do without it when constructing walls made of aerated concrete, expanded clay and other large-cell blocks, which are fragile materials.
Aerated blocks are practically unable to bear point loads and become covered with cracks at the slightest subsidence of the foundation or when the soil moves.
How to fill an armored belt with concrete correctly
When making concrete yourself, it is recommended to use 4.8 parts of crushed stone, 2.8 parts of sand and approximately 20% water for one part of cement, and the concrete should be elastic, but not liquid.
When filling, the following rules must be observed:
- Concrete placement must be carried out in one continuous work cycle. For a high-quality reinforced concrete belt, partially dried layers of concrete mass are unacceptable.
- Air bubbles should not be allowed to remain in the concrete mass, which form pores and thereby reduce the strength of hardened concrete.
To prevent this from happening, freshly poured concrete must be compacted using an internal vibrator or a special attachment using a hammer drill. In extreme cases, it can be compacted with a tamper or a metal pin.