Many apartment owners are faced with the phenomenon of holes in the walls or ceiling. This situation especially often manifests itself during preparation for renovation, when, after removing the wallpaper, holes are discovered in concrete floors, or when entering new buildings that completely require finishing. Filling holes in the walls and ceiling is an important part of the complex of preparatory work, after which you can begin finishing work: laying tiles, gluing wallpaper, painting or whitewashing the ceiling.
Diagram of holes in a concrete floor.
Holes in concrete walls can appear for various reasons, which also determines the method of sealing them.
Sealing holes in ceilings
from 2700 rubles/m2
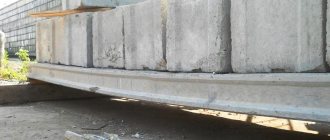
Hollow horizontal slabs represent the load-bearing structures of the building. Therefore, the main indicator of their quality and suitability is load-bearing capacity. These structures are subject to enormous pressure exerted by the weight of the structure - everything that is located on the floors above. As a result of multidirectional forces acting in structures, cracks form, which only grow over time. This significantly reduces the load-bearing properties and, therefore, jeopardizes the safety of the building.
In addition to purely physical wear, chemically aggressive environments have a negative impact on hollow blocks. The slabs are seriously damaged due to unforeseen circumstances, for example, the consequences of high temperatures during a fire, earthquakes, or mechanical damage. will help cope with these problems and strengthen hollow core slabs in Moscow and other Russian cities.
Holes from screws and nails
Holes from nails or screws (self-tapping screws) are the most common reason for repairing concrete walls.
This is largely due to the fact that in Soviet times it was customary to fasten nails and screws using large wooden plugs. Holes for them were often made with a brace or bolt. Such holes were quite large, reaching up to 2 centimeters in diameter.
Despite the fact that there may be several such holes in the apartment, filling them is not particularly difficult. To carry out the work you will need:
- plaster or repair composition;
- spray bottle with water or brush;
- primer;
- putty knife.
If there is still a plug in the hole, it must be removed before filling the hole. You can do this in two ways:
- Screw a screw or self-tapping screw into the cork, and then pull it out with a nail puller along with the cork.
- Drill out the plug with a drill. For work, it is advisable to use drills for wood or metal.
When the hole is free of the plug, you should spray it a little from a spray bottle. You can also treat the hole with a brush dipped in water with the addition of a primer. Then the finished gypsum or repair mixture is taken on a spatula and smeared into the hole. When the mixture tightly fills the entire hole, the sealing is ready and all that remains is to wait until the solution dries completely.
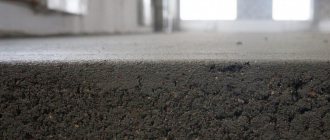
Small potholes
Concrete floor laying diagram.
As with traffic holes, potholes are quite common in concrete. Typically, the reasons for their appearance can be various construction works, such as drilling or blows with a sledgehammer. Also, the appearance of small potholes can be caused by a violation of the isotropy of the material or painting the wall along the cracks.
Small potholes are sealed using the same algorithm as sealing plug holes.
The pothole is treated with water with the addition of a primer, and then covered with a repair compound, gypsum or plaster with a spatula. If necessary, a dried pothole can be sanded with coarse sandpaper with a grain size of 80-100.
How to remove ventilation
Creating a healthy macroclimate in the home is an urgent task today. Sealing housing with the help of heat-protective and waterproofing layers, installing plastic windows, along with undoubted advantages, also introduces some inconveniences into everyday life. The air composition does not meet the necessary requirements. Climate control technology does not solve the problem; it only provides cooling or heating.
Ventilating rooms by opening windows is not always convenient or comfortable. It is necessary to guarantee the flow of fresh air into the housing and the removal of exhaust air. How to remove ventilation when there is an urgent need for this procedure? Which of the possible options to choose in a particular situation? Information on methods and technologies for installing air duct exhaust systems and organizing a high-quality supply of fresh air will help answer these and other questions.
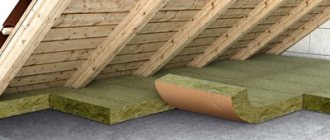
Materials for sealing joints and cracks
The tool is prepared, but before you seal the ceiling joint between the slabs, you need to select building materials.
- Deep penetration soil. For a base made of concrete or brick, you can use acrylic primer: it forms a durable film on the surface that has good adhesion and binds dust particles together. You can also use concrete contact primer: after it the base is rough, and the putty sticks even better.
- Special cement or gypsum compositions for sealing joints. For upper floors and wet rooms, mixtures must be moisture resistant.
- Serpyanka mesh. As noted above, the slabs can move due to the mobility of the structure itself. In this case, the mixture may crack due to insufficient elasticity. To stabilize concrete slabs, their joints are glued with a special tensile mesh. If the gaps are large, then the serpyanka is glued on top of the mounting foam for additional reinforcement.
- Materials for decorative finishing. This could be a putty mixture, wallpaper, a suspended ceiling that will mask all the shortcomings of the work, or foam tiles.
Features of using dry mixtures
The range of dry mixes for construction and repair is constantly expanding. It is very convenient to use ready-made mixtures: all proportions are met in advance, which means there is no risk of incorrect mixing. The dry composition allows you to add various modifying components to improve the properties of the finished product.
The shelf life of dry mixtures is longer than that of liquid analogues. You can knead a small portion, but the liquid mixture must be worked out immediately so that it does not dry out.
There are several main types of dry mixes:
- Cement. Suitable for both external and internal work. They take quite a long time to dry, but you can prepare a large volume of the mixture at once. Due to the long drying period, layer-by-layer application becomes more difficult, and too thick a layer on a vertical wall will not stick. The mixture leaves behind a rough surface, so it must be puttied on top.
- Calcareous. Essentially it is a cement mixture to which lime is added (cement content no more than 10%). The finished mass adheres well to concrete and brick bases and dries faster than the previous version. Limestone is a natural antiseptic, that is, it protects against mold and mildew. A surface plastered with such a mixture has high thermal insulation properties.
- Gypsum mixtures are only suitable for dry rooms inside the building. But the gypsum coating dries quickly and adheres well to vertical surfaces with a layer of up to 5 cm. A decorative coating can be immediately applied to such a coating, skipping the plastering stage.
Holes from screws and nails
Holes from nails or screws (self-tapping screws) are the most common reason for repairing concrete walls.
This is largely due to the fact that in Soviet times it was customary to fasten nails and screws using large wooden plugs. Holes for them were often made with a brace or bolt. Such holes were quite large, reaching up to 2 centimeters in diameter.
Despite the fact that there may be several such holes in the apartment, filling them is not particularly difficult. To carry out the work you will need:
- plaster or repair composition;
- spray bottle with water or brush;
- primer;
- putty knife.
If there is still a plug in the hole, it must be removed before filling the hole. You can do this in two ways:
- Screw a screw or self-tapping screw into the cork, and then pull it out with a nail puller along with the cork.
- Drill out the plug with a drill. For work, it is advisable to use drills for wood or metal.
When the hole is free of the plug, you should spray it a little from a spray bottle. You can also treat the hole with a brush dipped in water with the addition of a primer. Then the finished gypsum or repair mixture is taken on a spatula and smeared into the hole. When the mixture tightly fills the entire hole, the sealing is ready and all that remains is to wait until the solution dries completely.
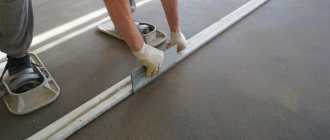
Deep defects
Filling deep potholes is already somewhat difficult, and its implementation should be approached responsibly and carefully.
Work must begin with the preparation of a repair mixture suitable for use on concrete. In this case, the mixture should have the texture of plasticine. To do this, you should use solutions that have the ability to dry quickly - gypsum cement or sand concrete (3 parts cement to 1 part sand). If the work is carried out in a dry room, the use of gypsum is allowed. But in this case, the hole should be sealed in no more than 1-2 minutes, until the mixture dries.
The repair mixture is carefully placed into the hole. To clean a hole from crumbled putty, many experts recommend using a vacuum cleaner. In this case, the likelihood of small dust particles remaining on the walls of the hole is reduced to zero and the sealing will be more successful.
Scheme for sealing cracks in the ceiling.
As soon as the solution has set, a second layer of the mixture is applied using a façade spatula. After this, the pothole is left to dry for 2 days. If severe shrinkage occurs, you will need to apply another layer of the mixture.
Coordination of embedding of floors
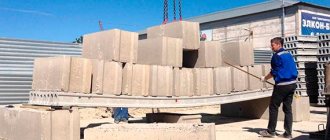
Floors are, as a rule, load-bearing structures, and all work with them, including embedding, refers to redevelopment and requires strict official approval.
The main paper that the Moscow Housing Inspectorate workers will require from you is the restoration project. It should contain all calculations and drawings regarding the type of slab, the degree of its reinforcement, rigidity, reinforcement methods, choice of methods and the necessary tools for the work.
Such a project can only be developed by a company that has SRO approval. In addition, only such an organization has the right to fill out acts of hidden work that are inevitable when embedding floors. For example, which will not only help you develop a competent project with all the calculations, but will also quickly and efficiently bring it to life, carrying out all the necessary repair work.
PromAlpForum
- Links
- PromAlpForum Rules
- Unanswered messages
- Active topics
- Search
- our team
Sealing holes in reinforced concrete slabs.
- print version
Sealing holes in reinforced concrete slabs.
- Quote
Post by alpinoid » May 29, 2010, 11:11 am
Dear Colleagues. I need your help. It is necessary to repair holes and chips in reinforced concrete ceiling slabs. There are some options, but I don't want to reinvent the wheel. Surely everything was invented a long time ago with minimal loss of effort and time. If someone knows how or knows, tell me the embedding technology itself and the way to get to the work site. There are about 50 holes (technological, punched for communications) throughout the workshop. There is also exposed fittings that need to be removed or plastered. There are still cracks that need to be embroidered and caulked. So you have to move around the entire workshop. I worked on farms myself, I have experience. But I want to hear something, maybe new and original. Yes, by the way, the roof on top, above the holes, can be disassembled.
Re: Sealing holes in reinforced concrete slabs.
- Quote
Post by rezo » May 29, 2010, 11:23 am
Re: Sealing holes in reinforced concrete slabs.
- Quote
Post by alpinoid » May 29, 2010, 11:55 am
There is this proposal: we open the roof above the hole, drill two holes along the edges, lower two pieces of reinforcement on cables or cords into them, lower them to the floor, weld a metal sheet (formwork), pull it to the ceiling, fix it, fill it with mortar. But the problem is how to calculate the location of the hole on the roof? Measure meters from the inside - left, right, forward, backward; Then the data is transferred to the roof. Unrealistic, big error. Moreover, the holes are most likely protected by metal sheets, because... I have walked on this roof several times - it does not sag anywhere. An option is to drill from the inside into the center of the hole so that you can see where to disassemble it on the roof. But again the problem is how to get to the point of work from the inside? And there are a ton of them, these points.
Re: Sealing holes in reinforced concrete slabs.
- Quote
Post by alpinoid » May 29, 2010, 12:08 pm
Re: Sealing holes in reinforced concrete slabs.
- Quote
Post by VVVlad » May 29, 2010, 12:54 pm