The technical characteristics of concrete floors must meet the requirements of SNiP 2.03.13-88 and the recommendations of the manual in the development of existing rules and regulations. Unfortunately, not all builders do their work efficiently; while laying the finishing coating, they have to deal with correcting defects.
How to level a concrete floor
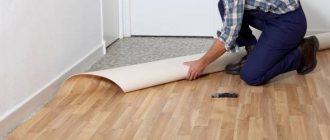
Concrete floors can be leveled with self-leveling mortars, cement-sand mortar screeds or ceramic tile adhesive. For linoleum and carpet, leveling concrete floors is considered a mandatory operation; for ceramic or stone tiles, the decision is made based on the actual state of the load-bearing base. All floors installed on joists can be laid without prior leveling of the concrete base.
Smooth concrete floor for tiles and laminate
In this article we will look at several examples of leveling using various materials, taking into account the actual condition of the floors.
Liquid floor for leveling concrete floors: self-leveling mixture, self-leveling floor
Liquid flooring for leveling a concrete floor is one of the most effective and popular methods of surface preparation for laying various types of coatings.
It is imperative that the floors are leveled under carpet and linoleum; for stone/ceramic tiles, a load-bearing base is prepared depending on the characteristics of the defects. But the floors under the joists do not need to be leveled. There are several methods to level a concrete floor; the choice of a specific technology depends on the characteristics and condition of the base, the types and severity of defects.
Using self-leveling screeds
Self-leveling screeds are made from several components that provide good spreadability of the mixture over the base, mechanical strength, lightness and ease of use, minimal shrinkage, resistance to chemical and other influences, relatively low cost, and manufacturability.
Leveling concrete with a self-leveling screed is carried out in several stages. Mixtures for self-leveling floors are made from gypsum or cement as a binder, filler (usually sand), plasticizers and glue (responsible for elasticity and strength), pigments (optional). This mixture for leveling a concrete floor can eliminate both minimal and fairly serious defects.
Tools and materials for performing the work: the mixture itself, a container for the solution, an industrial vacuum cleaner, paint/needle rollers, a water or laser level, a wide stainless steel spatula, damper tape, dowels for beacons, a tape measure, a rule.
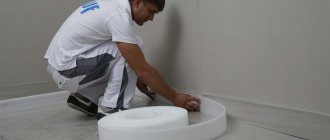
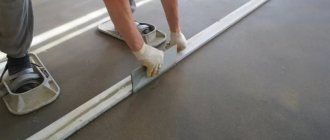
Leveling the concrete floor along the beacons
Before leveling the floor, it is worth considering this method. It guarantees a perfectly flat surface, but is more labor-intensive than the previous one. The most difficult stage is the actual creation of beacons. Necessary tools for work: laser level, large rule, narrow/wide spatulas, folding wooden meter, trowel.
The minimum thickness of the fill is 10 millimeters (the height of the metal profiles), the height of the beacons is at least a few millimeters.
As a mortar for pouring, you can use a cement-sand mixture, mortar for self-leveling floors, even adhesive for ceramic tiles.
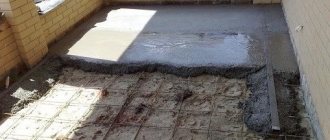
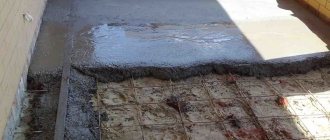
What is a monolithic slab?
The design of this type of foundation is quite simple, but has its own nuances that must be taken into account during the installation process. A monolithic foundation is otherwise called a “floating slab”. This is due to the fact that in the event of changes in the soil on which the house stands, this foundation moves depending on the changes occurring. This allows the house to remain intact and not deform during various vibrations in the soil.
Such a foundation consists of concrete; its design includes not only a concrete base, but also a reinforcing frame, waterproofing, and a sand cushion that protects the future structure from groundwater. Additionally, the foundation is protected from destruction by waterproofing material.
It is rational to use a type of non-buried foundation in construction. This makes it possible to use and build it in areas with difficult types of soil. The minimum thickness of a monolithic slab is 10 cm , otherwise the foundation structure is unsuitable for reliable support.
Leveling with tile adhesive according to a simplified scheme
Another method of leveling the floor that you can do yourself. Most often, this option is chosen for ceramic tiles: it is possible to reduce work time and achieve good strength. During the process of laying tiles, it is very difficult to level the floor (laying it directly on an uneven floor), so inexperienced craftsmen correct the base all in advance.
other methods
In addition to those discussed above, there are other methods of leveling a concrete floor for different types of coating.
Regardless of which floor leveling method was chosen, only strict adherence to technology and the use of quality materials will ensure the expected result in the form of a strong, reliable and durable foundation.
Source
How to make a cement floor screed - a detailed guide
Concrete floor screed is the most common type of subfloor, which is used in private construction and in other types of buildings. There are several reasons for this - a concrete screed is a reliable, strong, durable type of foundation, which, moreover, can be installed independently. In this article we will talk about installing a concrete floor screed with our own hands, and we will describe it in the format of detailed step-by-step instructions.
How to determine differences in floor heights
To choose a method for leveling a concrete floor, you need to know the maximum difference in height. There are three ways. It’s faster and easier - with a laser level (plane builder), more difficult and longer - with a water level. The third method is using a 2 meter long building level and a measuring wedge. The latter method only gives the magnitude of the differences on the concrete base. By the way, you can use it to check the result of floor leveling. But it does not provide a “reference point” like the previous two. That is, it is applicable only if you know that, in general, your floor is made “horizontally” and there are no tilts in one direction or the other.
To decide how to repair unevenness in a concrete floor, you need to know the thickness of the leveling layer.
If you have at least some kind of laser level, it is easier to work with it. If you don't have one, it's better to buy or rent one. You will definitely need it for repairs. It is better to take a self-leveling one, which can turn horizontal planes in a circle. This is ideal. It will also work with a narrower beam, but there will be more permutations.
With laser level (level)
We install the level at a certain height and turn on the horizontal plane. The most convenient place is at a height of about 12-150 mm. A line is drawn on the walls; we draw it with a pencil. You will need the line later - when you level the floor coverings, and during other work too. Take a 2-meter ruler (you can attach a measuring tape to the bar). We visually find the highest and lowest points, go through it with a ruler, and measure the height. Be sure to check the corners. Often they are at different heights. Based on the measurements, we see where it is more than 150 mm, where it is less. The difference between the largest and smallest value will be the difference in floor heights.
How to determine differences in floor heights using a laser level
If you need to display the general floor level in the entire apartment or house, we draw a strip where the beam reaches in other rooms. In the corridor, another room. Depends on the layout. We have a mark on the wall in another room, move the level there, set it so that the beam coincides with the mark, and again draw a line on the walls. So we go through all the rooms. And then we deduce the difference in the floor in the entire apartment.
With water level
The water level works on the principle of communicating vessels. This is a long transparent hose with transparent bulbs at the ends. The hose is filled with water so that water is visible in the flasks. There are divisions on the flasks that you can use to navigate. When the flasks are raised to the same height, the water in them is established at the same level.
How do you usually work with a hydraulic level? Apply current on the wall. Place one flask at this mark. It can be held by a partner or it can be secured in some way. The second point is placed at a certain distance - 1-1.5 meters. Depends on how long you have a ruler or bar to connect these dots. To move the set point, you need to set the second end of the water level so that the water level in the first coincides with the mark. So, step by step we go around the room, moving the mark and building a horizontal line.
Determining floor differences with hydraulic level
Next, to determine how large your floor differences are, tie the second end of the level to the bar. At what altitude? The bar should rest against the floor, the water level in the flasks should be the same. As a guide, you can use a point previously marked on the wall. On the bar opposite the “correct” water level, place a mark (a red line, for example). Let's look at it in relation to it.
More options with a regular building level
Now walk around the room, rest the bar on the floor, wait until the water in the flasks “settles down” and see whether the level matches the reference level (red line) or not. And if it doesn’t match, then by how much. For this you will need a ruler. Metal is more convenient, it is easier to determine even small deviations. If your memory is good, remember it, if not, write it down. Just don’t forget to write down which direction the deviation is. If the water level is lower, put a minus, if higher, put a plus. Now, to determine the maximum difference, add the maximum plus value to the maximum negative value.
Using a rule (building level) and a measuring wedge
I know everything about the rule and the building level. What is important to us is that they are even. And the measuring wedge is a metal triangle with marked divisions. The essence of the method is that the bar is moved along the floor, checking for the presence of a gap. More precisely, the presence of a gap can be determined by inserting a sheet of paper between the floor and the level. If it moves, there is a gap. In those places where the sheet rests (that is, the plank lies tightly on the concrete, without a gap), we put marks. We measure the distance between these points.
Determining floor differences using a measuring wedge
Next, take a measuring wedge and determine the height of the gap. We drive it under the bar and look at the number on the scale. This will be the magnitude of the deviation at this location. So we check the entire concrete floor and find the maximum deviation.
Options for getting rid of uneven old screed by filling the floor
When carrying out renovations, people often encounter very poor subfloors. This could be a concrete screed that has become quite frayed over the years of use: potholes, chips, numerous cracks. Such a surface will never allow laying the flooring in a flat plane.
For this reason, it is necessary to level the floor screed using self-leveling mixtures. They have excellent technical characteristics, which include instant drying. Now you no longer have to wait almost a month for a separate section of the screed to dry before starting subsequent work.
In addition, such mixtures can also be used as a finishing layer of a self-leveling floor, which can be decorated as desired.
Advantages of leveling mixtures
The mixtures used in the work to ensure that the floor surface becomes perfectly smooth have a large number of positive qualities, among which the main ones are:
- The drying process takes a maximum of several days. After a few hours, you can begin laying individual types of flooring.
- A non-specialist is able to cope with the installation process on their own, having studied only the minimum requirements for preparing the mixture and pouring.
- Shrinkage of the finished solution does not occur if the technology for installing a self-leveling floor is followed. In addition, the surface becomes very durable and hard and can last for several decades.
- If there are low ceilings, then such mixtures are simply irreplaceable. The reason for this is the ability to create very thin layers within 3-5 mm. Everything will depend on the evenness of the base onto which the mixture is poured.
There are a large number of advantages, and all of them are aimed at obtaining the desired result in the end. It is very important that the surface for pouring is carefully prepared. It wouldn't hurt to spend a little more time on this.
Types of leveling compounds
To begin leveling the subfloor, you need to decide and select a specific mixture for the job. They contain very fine fillers. This allows for a smoother surface than a conventional cement screed. For minimal problems, specially liquid formulations are ideal, although their cost is slightly higher than conventional mixtures. All compounds used to level a self-leveling concrete floor are divided into types:
- Compounds with increased strength. Applicable for serious local problems. They can be poured if there is a deep crack, pothole or lack of an old-style concrete screed.
- Rough compositions. They are used when there are huge deficiencies in the base, the presence of numerous defects. This option is also called a “rough” floor. The layer of such a floor will be very large and can reach 50-70 mm.
- Finishing mixtures. They are able to level the surface to perfection and at the same time distribute themselves. All that remains is to fill and, if necessary, apply a rule or spatula. The layer can be made in thickness within 2-8 mm.
In addition, all mixtures are divided into cement and gypsum. The advantages of the latter are that they can be installed to a thickness of up to 10 cm. But there is a caveat - gypsum mixtures are only applicable in rooms with low humidity levels. They are not suitable for the bathroom or kitchen. At the same time, it will not be superfluous to arrange excellent waterproofing.
If you don’t have time to wait until the screed dries and you can install the floor covering, then the choice falls on quick-drying mixtures, which are abundant in construction stores from various manufacturers. A few hours after pouring, you can begin laying tiles or laminate.
It is worth noting that quick-drying mixtures are expensive to use for global repair work. They are more suitable for hiding minor defects in old concrete screed with a slight difference in floor level.
Tools
A complete list of equipment and tools that will need to be used will be useful for the job. The list will depend on the specific type of work performed and may change depending on the situation.
Containers are very important because they are used to mix the mixture with water. The amount of the finished solution should be such that it is enough for a maximum of 40 minutes of work. Otherwise, it will begin to harden and lose its properties and qualities. An electric drill and a mixer are suitable for the kneading process. The drill should operate at low speeds so as not to create a large number of bubbles that could affect the quality of the self-leveling floor.
Not all craftsmen trust the quality of the finished solution, such as its ability to self-distribute over the surface. It is for the purpose of leveling that spatulas are used. In any case, after finishing the work, bubbles will appear on the surface of the solution along the concrete screed, which should be eliminated. For this we use a needle roller. The length of the needle should be approximately 1-2 mm longer than the screed layer. Movement over the poured mixture is carried out in paint shoes, which allows you not to damage the surface.
The specific list of tools may vary. Everything will depend on the level of repair in the room, on the presence of potholes, cracks, and places where the old concrete screed has peeled off and needs to be leveled.
Preparation and priming
The surface on which the solution is poured must be perfectly clean and free of defects: holes, cracks, potholes. The mixture may get into them. Existing defects are eliminated and sealed with putty. If the old base begins to peel off, it should be removed completely to intact sections.
If this is not done, the leveling layer will begin to “walk”, cracks and shrinkage will appear. Even a flat surface is cleaned, after which debris, dust and other unnecessary elements must be removed from the work site. The best assistant in such a situation will be a construction vacuum cleaner. Every detail that is not removed will affect the quality of the poured solution.
The grip will decrease and the floor covering will deteriorate.
If possible, the foundations for pouring should be leveled as much as possible. Self-leveling mixtures are best used with a layer thickness of 20-30 mm. There shouldn't be any serious damage. Otherwise, it would be a good idea to apply a layer of screed and wait until it dries completely. But not everyone has that much time to wait for the solution to be prepared. For this reason, many people have a question about how to level the floor screed. It is enough to take the appropriate mixture for work, recommended in certain conditions.
Leveling the screed with a self-leveling floor cannot be done without priming the base. This item is mandatory. Under no circumstances should he remain on the sidelines. If necessary, if there is strong absorption of the primer, the process should be repeated again. All this is done to increase the level of adhesion of the mixed solution to the surface.
When the house is located in places with high levels of humidity or a large amount of precipitation, an additional layer of waterproofing should be installed.
Deciding on the method of leveling the concrete floor
Once you have decided on the maximum difference in floor heights, you need to analyze what can be improved with little effort. Take a close look at your floor. It often happens that there is some kind of hump that creates a large difference. cutting down concrete is still a pleasure, but if it helps reduce costs or reduce repair time, then you can do it. When everything that could be corrected has already been corrected, the height difference will again have to be determined. Next, you can choose how and with what to level the concrete floor.
Leveling a concrete floor in this condition is not at all easy.
For small differences up to 5 mm
If you have differences of 1-1.5 mm per two meters of length, this is generally an almost ideal floor and there is no need to level it. You can put any covering. If the situation is slightly worse, but the differences in height of the concrete floor are up to 5 mm, such deviations are considered small. Leveling a concrete floor can be done in several ways:
Can also be leveled with tile adhesive
When choosing a composition for leveling a concrete floor, pay attention to strength. The strength of the leveling layer should be the same as the base. A difference of 50 units is acceptable, no more. For example, if your screed is M150, then the leveling layer cannot have a strength higher than M200. Why? Because if tensions arise in it (and they will arise), it will simply tear the bottom layer. And cracks in the floor are not good at all.
Differences up to 3 cm
Leveling a concrete floor with height differences of up to 3 cm is the most inconvenient task to implement. Laying a concrete screed less than 3 cm thick is problematic, since to guarantee long-term operation the layer must be 3 cm or more. If you can raise the floor level a little, you can use:
Leveling the floor under laminate, linoleum using a dry screed along the joists
If raising the floor level is not in your plans, you can use levelers. A coarse or medium composition will be needed. Look at the thickness of the layer. Three centimeters - most likely, you will find only in the starting lineups, and smaller ones (up to 15 mm exactly) can be found in the middle ones. Be prepared for the fact that when using a starting leveler, another layer may be required - a finishing layer.
How to level a concrete floor with differences of more than 3 cm
Leveling a concrete floor in an apartment with a height difference of more than 3 cm is traditionally done by laying a DSP screed. If you need to cheaply level the floor, DSP is your budget option. But the cement-sand screed for leveling has a serious drawback - it “matures” for 28 days. Moreover, at least the first week it is necessary to maintain high humidity. Then wait until it dries. In order for the concrete to be strong and not crumble or crack, the drying process cannot be artificially accelerated. And only tiles can be laid on a damp base. Other floor coverings have fairly stringent requirements for substrate moisture.
If you don’t want to deal with “wet” processes or the ceiling does not allow you to add a large load, leveling the concrete floor with a dry screed will help. There are two options - bulk and on logs. The second option is when one of the sheet materials is placed on the logs - plywood, fiberboard, fiberboard, gypsum fiber board. We get a flat surface with minimal differences. But this method will lead to the floor level rising by at least 7-8 cm.
Leveling the floor using beacons is one of the most popular methods
The bulk method of making a dry screed is to pour granules (usually expanded clay) onto the floor, level it and lay the same sheet material on it. It's easier and faster to do, but it has its own peculiarities. If you use the wrong backfill or level it poorly, during operation you may end up with distortions, holes, and dips. But, leveling the concrete floor in this way, following the technology, gives very, very good results. The “load capacity” of such a floor is up to 10 tons per square meter. So more than enough.
What to do if the concrete is covered with bitumen mastic
Sometimes, after removing the old floor covering, it is discovered that it was lying on bitumen. This situation often occurs in old housing stock. If you plan to level the concrete floor with a screed using beacons, all you need to do is inspect it for cracks and peeling. The peelings must be removed and the bald areas covered with a new layer of bitumen. Fill out the cracks as much as possible. Fill with polyurethane glue or epoxy resin, and also fill with bitumen on top.
If the damage is too extensive, remove the old bitumen completely if possible. If you can’t remove it completely, remove only the damaged areas and fill the cracks. Coat everything on top with a new layer - there will be excellent waterproofing.
If a bitumen-impregnated floor looks like this, it's best to remove everything
If you plan to level a concrete floor using “levelers” (levelers), it is advisable to remove the bitumen. It has a too smooth surface, which has a bad effect on the level of grip. A “spatula” attachment is installed on the hammer drill and beaten. Then they remove debris and dust, and prepare the surface for priming.
If bitumen cannot be removed, you can go over the leveling mixture several times with soil for difficult bases. The adhesion will be sufficient, but the cost of such a primer is high. When the soil is dry, you can pour the levelers.
Brand of concrete for the foundation slab - how to choose?
I initially focused on concrete grades M300 or M350. These are average figures for pouring a monolithic foundation slab for a private house. I didn’t want to take a lower level brand, because I decided to make the slab not high, only 15 centimeters thick. The answer to the question: “Why so thin” - look in the article at the link below, all the calculations are given there.
Thickness of a slab foundation: Example of how to calculate the thickness of a slab
Our house is quite light and small, it weighs no more than 70 tons. Therefore, there is no point in taking a higher brand either. After such logical conclusions, I compared the price of the M300 and M350 brands, saw that the M350 was slightly more expensive and decided to take it.
Of course, I previously studied the composition of this concrete mixture, characteristics and scope of application. Therefore, I will provide this information below for more detailed coverage of the topic.
Technical characteristics of concrete M350
- High margin of safety (after hardening and gaining strength, the monolith does not crack under the influence of a compressive load of up to 25 MPa)
- High density of the solution, which is responsible for low surface wear
- The dense structure is also responsible for the absence of pores and air cavities, which makes the material resistant to moisture absorption
- Experts also note the frost resistance of this composition, which is not relevant in our climate, but I’ll tell you anyway. Experience has shown that the structure of the monolith does not lose integrity after two hundred freeze-thaw cycles.
M350 composition
- Portland cement grade 400 and higher (the higher the number, the stronger the material)
- Filler:—sifted sand, river or quarry, cleared of impurities—medium fraction crushed stone
- Water
- Additives. According to GOST, the use of special additives for M350 concrete is allowed to improve the properties of the mixture. Plasticizers help increase the mobility of the mixture, anti-freeze additives increase its frost resistance (this is about the question of whether it is possible to pour a foundation slab in winter? It is possible, but you need to study the issue well, based on the characteristics of the winter climate)
Scope of application of concrete grade M350
- Arrangement of strip and slab foundations for massive buildings on soils with high bearing capacity
- Concreting the supports of pile foundations
- Construction of monolithic buildings
- Production of prefabricated concrete products designed for increased loads - support columns, floors, beams, etc.
- Creation of highway and airfield pavements
How to level a concrete floor and improve sound insulation and/or thermal insulation
If your apartment is not on the ground floor, there is a heated room below you, you should not be concerned about thermal insulation. Your floor will be at “room” temperature. If you want to make a warm floor, that's a different story and you will need electric or water heating. The base will also have to be leveled under it, and it is also advisable to insulate it so as not to heat up the neighbor’s ceiling. So, how can you level a concrete floor while improving heat and sound insulation?
If at the same time you also need waterproofing, it can be implemented in both cases, and it can be either. This can be PVC film spread on concrete, built-up or coating waterproofing.
Source
ironer
Another useful device with which you can quickly level the building mixture with your own hands is a concrete trowel. Outwardly, it resembles a large mop with a long adjustable handle up to 12 meters long and a working bar (more than 1 meter long) made of aluminum or magnesium alloy. The smoothers are very light and have good maneuverability, so it is convenient to work with them even for beginners.
There are several types of such “mops”:
- Channel. Allows you to smooth out the concrete composition, which still remains plastic, correcting its surface.
- Scraper. It is also capable of leveling the hardening solution, but at the same time it also removes excess water and cement laitance.
Simple ironing irons are inexpensive and easy to make. For this purpose, wooden beams are also used, to which a handle is attached. The length of the handle should match the length of the room so that you can easily reach any area.
There are also more “serious” electric and gasoline irons, which are characterized by high performance. But their cost is too high, so if you are planning a large project, the easiest way is to rent power tools.
After choosing the most convenient “assistant”, we will move on to practice and consider methods for preparing, pouring and leveling the floor.
Putty for concrete
In many apartments (mostly in new houses), the floor slabs are laid quite evenly, and their joints are securely sealed; As a rule, a cement-sand screed is placed on top. This may leave defects. The method of elimination depends on their nature, as well as on the type of floor covering chosen.
Local influxes of mortar on the screed from the developer can be cut off with a chisel, and small holes and marks from the rule can be removed using cement-polymer or polymer putty on concrete and thus obtain a ready-made base for laying tiles, laminate or parquet boards. It is not advisable to lay roll coverings directly on the rough screed , since the slightest defects appear on them (finish leveling with a bulk mixture is necessary). If a solid board, adhesive parquet board or piece parquet is chosen as a covering, it is necessary to ensure high tear strength of the putty. A two-component epoxy putty is perfect for this purpose, but you need to carefully prepare the base - remove dust, degrease it, and sometimes prime it with a strengthening primer.
Thin layer levelers
If there is a ledge, hill or slope on the screed made by the developer or the previous owners of the apartment, but the difference does not exceed 20 mm, for leveling it is advisable to use bulk solutions from ready-made mixtures, such as weber.vetonit 4100, Unis Horizon, Ceresit CN 68. They are easy to apply, that is, in fact, they spread over the surface themselves - you just need to help them a little with a spatula and expel the air with a needle roller. Such solutions dry very quickly, and after 4-12 hours the base can withstand foot traffic, and after 1-3 weeks (depending on the thickness of the layer) the coating can be laid.
Self-leveling mixtures
Self-leveling mixtures can be combined with any coating, but are quite expensive and, as a rule, can only be applied in a thin layer - no more than 30 mm. Read the instructions for using the mixture carefully! Many materials of this type impose specific requirements on the base, for example, they require dust removal, but exclude the application of adhesive concrete-contact primers.
Advantages and disadvantages
The main advantages of a monolithic foundation are:
The absence of large volumes of excavation work significantly reduces the estimated cost of the foundation being built due to the unnecessary use of heavy equipment (bulldozer, excavator, etc.) on the site.
One of the main disadvantages of a monolithic slab is the inability to combine the structure of this foundation and the basement.
For those who have groundwater close to their site, this is not necessary, but for dacha construction in the absence of groundwater, such a disadvantage can be critical.
The second disadvantage of this design is the high material consumption. Requires a lot of concrete and reinforcement.
The reinforcing mesh needs to be knitted, and in large volumes of slab bases this requires a lot of time.
And the third disadvantage of a monolithic slab is that pouring can only be done under favorable weather conditions.
But after comparing all the pros and cons, we can conclude that when constructing this type of foundation, there is a lot of savings on other materials and work, so such a foundation cannot be called particularly expensive.
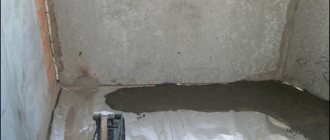
Wet screed
Significant unevenness is usually eliminated with the help of a screed, the installation of which in a new building should be carried out according to a standard design, and in secondary housing requires prior approval from the housing inspection authorities. Before pouring a wet screed, it is necessary to reliably waterproof the ceiling with an approach to the walls, otherwise water from the solution will leak into the voids of the building structures (this can cause a short circuit in the wiring within two floors) and into the room below. In addition, when installing the screed, it is necessary to ensure insulation of impact and structural noise. Rolled bitumen-based materials with a thickness of more than 4 mm or special two-layer substrates, for example “Antistuk”, “Tekhnoelast Acoustic” or “Shumanet-100” will help to perform both tasks at once. All joints of hydro-noise insulation strips (slabs) are glued with mastic or special tape.
Formwork
Since our vertical posts are already hammered in and the horizontal concrete level is marked on these bars, installation of the formwork will be very simple. It is better to take boards in the range of 20-50 mm in thickness and any width that is available. Naturally, the board needs to be edged.
how to mark a person's name in a contact on a wall with a word
The top boards are installed according to the marks on the rack bars. To make it easier to dismantle the formwork, it is better to screw the board from the side of the block - when removing it, the screws can be unscrewed without breaking.
After placing all the upper boards around the perimeter, the lower ones are screwed in if the width of the first ones is not enough. For formwork, it is enough for the board to extend just below the level of the external soil. All gaps between the soil and the formwork are covered with earth from the outside. Since concrete exerts considerable pressure on the boards during pouring, the formwork must be reinforced with oblique struts. Spacers are installed next to the posts, and if the board is thin, then spacers should be installed more often.
Cement-sand screed
Its optimal average thickness is 40 mm, the minimum local thickness is 20 mm. It is advisable to reinforce the structure with steel road mesh, and prepare the concrete from a factory mixture in bags. When the design thickness of the screed is more than 40 mm, lightweight concrete is used, most often expanded clay concrete, less often - more expensive concrete with foam glass.
It is important to dry the screed properly by covering it with film or periodically moistening it. Windows cannot be opened wide; only ventilation through vents or inclined sashes is allowed. The average maturation period for a wet screed is a month, but before laying the coating, be sure to check the residual moisture of the concrete with an electronic moisture meter.
With experienced builders, provided they use non-shrinking mixtures (for example, veber.vetonit 5000), the screed turns out to be quite smooth; it is quite possible to lay laminate and interlocking parquet boards on it (on top of the substrate).
However, often the base layer requires finishing leveling with a self-leveling solution. Usually it is carried out after 7-14 days, when sand concrete (expanded clay concrete) has gained about 70% strength, but some levelers can only be laid on a completely dry base.
Semi-dry screed
It dries in no more than a week and does not threaten leaks into the apartment on the floor below (this does not mean that you can do without a waterproofing and soundproofing layer). However, not all workers have experience using this technology, which increases the risk of defects.
Theoretically, when installing a semi-dry screed, special equipment should be used - a concrete mixer, a pneumatic blower, tamping and troweling machines. But in practice, work is often carried out manually, simply trying to ensure that the water-cement ratio does not exceed 0.2 (instead of the usual 0.3-0.5). Such a mixture is difficult to lay and level, and the density and strength of concrete without machine compaction will be lower than with a traditional recipe. Therefore, reinforcing polypropylene fibers are mixed into the water (approximately 100 g per 10 l). It is still advisable to level the layer using a trowel, although it is also possible to use self-leveling levelers.
A serious disadvantage of semi-dry screed is that only its thin top layer is strong enough, so it is not suitable for some finishing coatings, such as parquet and large-format tiles.
Excavation
These works have some specific nuances, since they directly depend on the topography of your site and the type of soil. If the soil in the yard is not fertile and you still have to import black soil, then all excavation work comes down to marking the yard with your own hands, leveling the surface and adding a thin layer of crushed stone.
It is necessary to remove the layer of earth so that the surface of the concrete is at the same level as the surface of the earth, i.e. by 20-25 cm.
And if the base is clay, then you don’t have to add crushed stone. It is best to remove a good fertile layer and transfer it to flower beds and beds, where it will be completely useful.
Dry prefabricated screed
A prefabricated screed consists of dry backfill and sheet flooring; it is inferior in strength and reliability to concrete screeds, but it can be assembled very quickly. The backfill screed weighs little, provides additional noise and heat insulation, and its thickness can be varied between 40-100 mm.
For leveling backfill, expanded clay gravel of a specially selected fraction (to reduce shrinkage), which is laid on top of a vapor barrier film and leveled along the beacons, is best suited. Next, lay sheets on a gypsum or cement base (most often GVLV 12.5 mm thick); they are laid in two or three layers and fastened with screws, and then the joints are puttied. It is also possible to use ready-made two-layer floor elements with stepped edges.
Much less common are dry screeds made from high-density mineral wool mats and plywood. This design is more expensive than backfill and cannot be used to level the floor - it only provides additional heat and sound insulation.
Any dry screed is afraid of moisture, so it is not suitable for bathrooms and kitchens, and after a leak, most likely it will have to be partially dismantled. The compressive and tear strength of the surface layer is not sufficient for the use of solid wood coatings - floorboards and block parquet. However, this is one of the optimal solutions for old houses with very uneven and also worn-out and cold floors. Dry screed is ideally combined with interlocking parquet boards and laminate, and also allows for the installation of linoleum, carpet and large-format porcelain tiles.
Floor on joists
When it is necessary to create a reliable base for a wooden covering and the load on the floor cannot be significantly increased, logs or (much less often) so-called modular raised floors are used. These structures make it possible to eliminate any unevenness in the ceiling, but with a significant additional loss of ceiling height - at least 50 mm (the minimum intrinsic thickness of the structure).
The easiest way to make logs is from high-grade coniferous timber and level them using plastic wedges. Aluminum products on adjustable screw supports will cost several times more.
The tongue-and-groove floorboard is attached directly to the joists (with this design, their cross-section must be at least 50 × 50 mm), and the parquet and parquet boards are attached to plywood flooring with a thickness of 16 mm or more. It is advisable to fill the space between the joists with expanded clay, mineral wool or soft wood-fiber boards - this will improve heat and sound insulation.