Floor beams are supporting load-bearing structures in a house, necessary to distribute various types of loads from overlying elements and structures: interior items, upper floors, roof. Depending on the dimensions of the building and the type of intended operation, interfloor ceilings are erected either from metal I-beams or from cheaper wooden beams (solid, glued).
For most private houses, beam-based floors are a more practical and effective alternative to monolithic floors.
What is a floor beam?
A floor beam is a rectilinear load-bearing structure supported by supports with a horizontal or inclined arrangement. All resulting loads from the beams are transferred to supports, which can be walls or columns, with subsequent distribution between other structural elements of the structure. The upper part of the beam usually acts as the floor for the upper room, the lower part acts as the ceiling for the room below.
Requirements for beams
Reliable overlap involves the selection of certain parameters for beams (length, thickness, pitch...), which are derived theoretically using special calculations and, in turn, depend on the material, area and cross-sectional shape, as well as on the method of fastening.
For private construction, wooden floor beams are especially in demand, combining high strength, reliability and ease of installation. Steel, reinforced concrete and combined variations are used, as a rule, in industrial construction and in the arrangement of facilities where an increased load on beams is expected.
However, in any case, before starting construction of the structure, it is necessary to check:
- Beam for strength . That is, calculate the total loads on the floor. Standard values for attic flooring are 105 kg/m2, interfloor – 210 kg/m2, in exceptional cases up to 400 kg/m2.
- Beam for rigidity . That is, calculate the beam for deflection and it should not exceed the values indicated in the table:
It is quite difficult to carry out such operations on your own without specialized education, so if you are interested in calculating beams online , you can calculate all the necessary values on our functional calculator. The program does not require special skills.
EXAMPLE OF CALCULATION OF A WOODEN FLOOR BEAM
Most rooms are rectangular in shape.
In this case, it is most rational to fasten the floor beams in such a way as to achieve the minimum possible length of the beam itself. So, for example, if the size of the room is 4 x 6 m, then it is better to use beams 4 m long, since the required cross-section for them will be smaller than for 6-meter beams. Please note that in our case 4 m and 6 m are the length span of the beam, the beam itself should be 30 - 60 cm longer
Now it’s worth returning to the issue of load. The floors of residential buildings are most often designed for a distributed load of 400 kg/m2, and even 200 kg/m2 will be sufficient to calculate the attic floor. All further calculations will be made for such a load, taking into account that the distance between the walls is 4 m.
Using boards and solid timber
In the case of using solid wooden beams or boards for flooring, the span length is chosen within 4–6 m, which is half the maximum distance when using building structures made of laminated veneer lumber. Parts made from bonded boards are often manufactured directly on the construction site.
The strength of the structure is superior to solid beams. The main advantage of the products is the possibility of constructing a composite part from several boards. Builders can independently regulate the thickness of the beam by fastening the required number of elements. The boards are connected to each other using threaded elements. Rubber or plastic washers are installed under the bolts and nuts. The elements prevent the effects of corrosion on metal embedded parts and protect the wood from cutting into the nut when tightening.
Connection of rafters at the roof ridge
Currently, in the construction industry, when creating a rafter system, 3 methods are used to connect rafters at the ridge:
- butt connection;
- installation on a ridge run;
- overlapping fastening to the ridge girder.
To understand which option is preferable, you need to understand how they are performed.
Butt connection
. The upper part of the rafter leg is cut at an angle that is equal to the angle of inclination of the roof and rests it against another rafter leg, which is also trimmed only in the opposite direction. This work is carried out according to a pre-made template. In some cases, to ensure greater tension in the stop, trimming is performed during installation, with the cut being made through both bars, as a result of which the two planes fit tightly against one another. Then the rafters are connected to each other using long nails.
When this method is used, a metal or wooden plate is used for additional fastening - it is installed with bolts or nails are driven into the joint.
Installation on a ridge run
. This method is in many ways similar to the previous method. The difference lies in the installation of the ridge beam. Such a wooden roof structure is reliable, but it cannot always be used, since it requires additional installation of support beams and then the attic is not very convenient to use.
This option allows you to carry out the installation of each pair of rafter legs directly on site without preliminary work or the use of templates. The upper edge of the leg in this case rests on the ridge beam, and the lower edge rests on the mauerlat.
Overlap fastening to ridge purlin
. The work is carried out similarly to the previous option, only the upper joint of the rafters is overlapped. They touch at the top not with their ends, but with their sides. Fastening elements are bolts or studs.
Self-production of glued elements
There are several options for making laminated veneer lumber yourself:
- combination of three elements into one structure;
- gluing two parts in the shape of a Z symbol;
- connection of lamellas using special elements, metal inserts.
The first method is considered the most practical; it is much simpler than the other two. At the initial stage of work, boards for timber are selected and laid on the central element so that the annual rings of the wood face in opposite directions. Marks are made on the surface of the boards with a black marker or a simple pencil, which will indicate the sequence of their laying.
The central element is cleaned on both sides with sandpaper, which will create a rough surface and improve glue adhesion. Side boards are processed only at the point of contact with the main beam. At the next stage of work, the surfaces are degreased with a solvent, an antiseptic and fire retardants are applied. These liquids and protective compositions are applied alternately: first the solvent, then other impregnations after the base composition has dried. Not only the sides of the lumber are processed, but also the ends.
Now you need to apply a thin layer of glue (1-2 mm) to the cleaned and pre-treated surfaces. The top and bottom boards are laid on the central beam so that they are in the same plane. To fasten the elements, clamps are used, which are installed on the beam every 40–50 cm. The curing time of the glue is indicated by the manufacturer (usually does not exceed 2 days).
Floor insulation technology
An example of arranging a heat-insulating floor pie along beams
Now let's turn directly to the technology of floor insulation. In fact, there is nothing complicated here. Moreover, the presence of beams and a base already simplifies the work.
Indeed, in most cases you will not have to install an additional frame or anything like that. It will be quite simple to fill the cavity between the beams with insulation and layers of insulation, and then hammer it with boards.
Stages of work when insulating the interfloor ceiling from the floor side:
- We prepare the floor and, if necessary, open the boardwalk.
- We prepare the insulation and all the necessary materials.
- Lay a layer of vapor barrier. You can work with Izospan or any other suitable vapor barrier film.
- We install insulation.
- We lay a layer of waterproofing, if necessary.
- We fill the cavity with boards.
- Apply the finishing coat.
If you need to insulate from the ceiling, then the technology here is almost identical. Only you most likely won’t need waterproofing at all. And if it is needed, it will be installed under the covering first.
Then there will be a layer of insulation, which is attached with dowels to the bases of the beams, and then a vapor barrier film.
When working with insulation based on polystyrene foam, there is no great need for a vapor barrier film. Here it is necessary to assess the general situation.
Which beam to choose for flooring: dimensions and installation process
In private construction, the interfloor ceiling is usually erected from wooden beams. Firstly, the material is quite accessible, and secondly, it is lightweight, so you can handle the construction of the ceiling on your own and without the use of special equipment. Well, thirdly, wood is an excellent heat insulator.
Choosing timber for floors
What will we talk about:
General information
Types of floors
The attic floor can be installed as a roof element, and then it will be part of the rafter system. It can be set as an independent element. To retain heat, be sure to use layers with thermal insulation and vapor barrier. The ceiling of the basement and basement must be very durable and able to withstand heavy loads. Such spans are also insulated and layers of vapor barrier material are laid so that the cold does not penetrate from the basement into the house.
Beams differ in types, each of which has its own advantages and disadvantages. In order to make solid beams, hardwood is used. A big drawback is solid wooden beams, since they have a length limitation of no more than 5 meters. Beams made of laminated wood perfectly combine aesthetics and high strength. Their use helps to significantly increase the maximum length, which can be up to 20 meters and is ideal for covering large spans. Considering that this material looks very beautiful, it is often not covered with a ceiling, and it is a design element.
Advantages
There are several significant advantages, which include:
- Easy to install.
- Ability to cover large spans.
- Light weight.
- Long service life.
- High level of fire safety.
- The material cannot be deformed.
The overlap between floors with beams is made of a material with a rectangular cross-section, which is typical for a board or timber, or a round one is used, which is made from a log.
Requirements for floor beams
The installation of timber beam floors may entail a number of special requirements that must be taken into account.
They consist of the following:
- Beam products must be made of coniferous wood, since they have a high margin of safety. In this case, the wood moisture content should be no more than 14%, since otherwise the logs under load will have a large deflection.
- It is prohibited to use wood that has been subject to disease, fungus, or has been damaged by insects to create floor beams.
- Before installation, elements for creating beams should be treated with antiseptics.
- To prevent the floor or ceiling from sagging due to load in the future, a construction lift should be made. To do this, the ceiling of the lower floor must have a slight rise - this will not disturb you; on the contrary, under load everything will level out and be in the desired position.
- If you plan to lay beams with great frequency, then instead of them you can use boards, which must be installed on the ribs.
Calculation procedure
Before you begin installing a wooden floor with beams, you should perform some calculations, thanks to which you will know the size and number of beams.
To do this you will need:
- Determine the length of the span on which the installation will be carried out.
- Make calculations for the expected load that will occur after installation.
- With the specified data, you can perform calculations for the section of beams and installation pitch. To do this, use special online calculators or tables.
The length of the beams will be the sum of data such as the length of the span that should be covered and the stock of beams that will be installed in the wall itself. You can find out the span using any measuring instruments, and the supply of beams that will be installed in the wall directly depends on the material from which the wall is made.
The most popular span option, which is covered with beams, is from 250 to 400 cm. But keep in mind that the longest permissible length of beams made of boards or timber cannot be more than 600 cm. If the span length is greater than the permissible size, we recommend make beams from laminated timber. In addition, to cover a span of more than 600 cm, you can install a special wooden truss. The load that goes on a wooden beam generally consists of the weight of the span parts (internal filling, beams, floor and ceiling cladding) and the weight of temporary elements (household appliances, furniture, people present in the room).
Installation of prefabricated monolithic floors
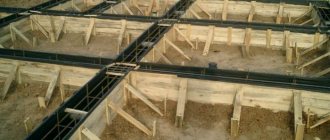
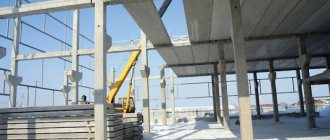
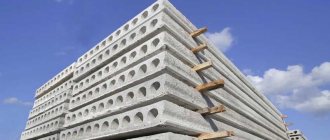
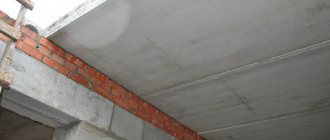
So, the basis of the SMP is floor beams (made of concrete or reinforced concrete), which are laid on a cleaned and pre-leveled horizontal surface of the walls (crossbars). The installation of beams can be done manually or using small-scale mechanization. From below, as a rule, temporary telescopic racks are installed for support, which are placed at an average distance of 1.5 m from each other. If there are no racks, you can use wooden poles. Mounting supports are installed before laying the beams. When using high-strength concrete beams in certain openings, you can completely avoid the use of racks.
Important: To support the rack, you need a solid foundation with good load-bearing capacity, otherwise there is a danger of the rack being pushed through under the weight of the ceiling.
The beams are laid directly on the wall material, the strapping belt is poured later simultaneously with the slab. The filler can be ordinary or special T-shaped (blocks with a chamfer at the bottom), aerated concrete, foam concrete, polystyrene concrete, expanded clay concrete blocks, as well as blocks made of warm ceramics, pressed wood or polystyrene foam (for installing an insulated monolithic slab at the level of the first floor) . When installing blocks (filling elements), they can be modified (trimmed). Generally, blocks can be cut with a diamond wheel or, as with pressure-treated wood blocks, with a regular chainsaw. They are laid manually along the longitudinal direction of the beams with a minimum gap between adjacent elements.
After installing the frame elements, a concrete diaphragm is poured - a top layer of concrete about 5 cm thick, located directly above the inserts and forming the upper surface of the floor intended for use. Before concreting, all surfaces of the floor elements must be cleared of construction debris and dust. Additional supports can be removed when the concrete reaches at least 70% of its design strength, preferably 85%. At an average ambient temperature above +10 °C, the supports are removed after 10–18 days, at a temperature of +5…+10 °C – after 20–30 days.
Ceiling height in a private house
The height determines the convenience of the room in a private home and the method of its operation. The volume of circulating air depends on it.
Minimum height
Safety standards require a minimum ceiling height of 2.4 m for a private home. In this case, it is allowed to install gas appliances: stove, boiler and water heater
This is also important from a practical point of view. Chandeliers are installed on the ceiling, and at a lower height it is uncomfortable for a person taller than 1.7 m to move around
The psychological factor is taken into account: low altitude is depressing, and causes panic in people with a fear of enclosed spaces. It introduces restrictions on the use of suspended structures and finishing
Optimal ceiling height in a private house
The optimal height for a ceiling in a private house is considered to be 2.5–2.7 m with finishing decorative finishing. There are no restrictions on choosing a larger indicator, since a small area in this case looks more profitable. This takes into account:
- service method;
- space heating;
- harmony.
Cleaning the floor will require a stable ladder. Replacing lamps in spotlights will be difficult. Great height negatively affects the comfort of the room, which is taken into account when choosing the finish and method of using the room. Heating costs will increase. To maintain a comfortable temperature of 22° under the ceiling, the air will have to be heated to 30° and higher. Heat loss through the ceiling increases, which leads to icing of the roof, the appearance of rot and fungus on the rafter system.
If a ceiling of 3 m or higher is required, the heating issue can be resolved by installing a warm water or electric floor. In this case, the surface is heated evenly and the air, rising, warms the entire volume of the room. In private houses with second light, where the ceiling is at roof level, convection heaters are not used. They are replaced with infrared ones or the above option with a floor.
Important! For private houses with convection water or electric heating, ceilings are not made higher than 2.7 m
see also
Comments 41
Well, there’s Vladirom’s calculator, enter the span and pitch of the beams vladirom.narod.ru/stoves/beamcalc.html
I have a studio hall-kitchen size 5.80 * 9.60 laid I-beam 200 equal-flange 2 pieces of 6 meters between them, 3.15 meters each, 150 * 150 timber and 50-KA board. During the construction of the 2nd floor, 14 sibit pallets were installed, the deflection in the middle was 4 mm.
This is specifically so as not to write the same thing. I posted a cheat sheet a year ago: vk.com/expertm_nsk?w=page-118571856_52625662
When bent, a beam tends to twist into a spiral. To minimize subsidence when walking, you can make diagonal supports from 50x50 timber across the beams themselves or install crossbars from sections of these beams. The ceiling will be stiffer and sag less. The beams themselves are at least 100x200 mm, pitch 600. PS. I couldn't find a drawing with cross braces.
150x200 should be enough. It is better, as written below, to assemble with boards. The main thing is not to spare nails. The width between the beams is standard 600mm.
Now they are blocking me with timber 100x150 every 80
100*200 through a swing of 90-100 cm laying is sufficient with a margin if the length is no more than 6 meters
room length 5.3 width 6.4
so, it seems that it is accepted that the length is greater than the width)) for you it’s the other way around. Beams, if your width is normal, are 100*200. I have these at a length of 5.6 m and everyone says that with a margin, only So that the distance between them is no more than a meter, I laid them 90 cm apart.
Assemble a “butterfly” beam - three 50x200 boards per edge, with wooden spacers between them, tighten them with pins along the spacers, the beam spacing is 600mm. Other things being equal, the “butterfly” is stronger than a whole beam of the same section, because spatial rigidity appears in it
what is a butterfly beam
Assemble a “butterfly” beam - three 50x200 boards per edge, with wooden spacers between them, tighten them with pins along the spacers, the beam spacing is 600mm. Other things being equal, the “butterfly” is stronger than a whole beam of the same section, because spatial rigidity appears in it
Assemble a “butterfly” beam - three 50x200 boards per edge, with wooden spacers between them, tighten them with pins along the spacers, the beam spacing is 600mm. Other things being equal, the “butterfly” is stronger than a whole beam of the same section, because spatial rigidity appears in it
so the ceiling height will be 660cm
So I thought I’d throw two beams one hundred and fifty on top of each other and sew them together. since the height of my gas block is three hundred mm
I made 50 by 150 boards and the floor rests on them and I’m making a second floor. They jump a little when you jump on them. but my step is 1100-1200, initially I didn’t think that there would be a second floor.
By the way, the strength of strength material will help you - the deflection of a beam under a uniformly distributed load is considered... The moment of inertia of a rectangular section is also... It is more difficult to find reliable information about the modulus of longitudinal elasticity of wood, but you are unlikely to be mistaken by an order of magnitude...
By the way, I remembered another valuable tip - wooden beams should be made with the so-called bending, so that under the influence of a constant load the beam will bend and take a rectilinear shape...
Builders are unlikely to bother with stretching the beam... (it’s more convenient to bend it and fix it in this state...),
Do you think the author of the article understood you?
Concrete slabs are better))) In general, the neighbor laid thicker timber, otherwise it would sag.
Or you can fasten 2 200*50 boards together and use them as timber, it’s stronger))
10x20 will be good, the distance between the beams often depends on the flooring, often it is OSB, so they select it so that the beam fits at the junction of the slabs. But it’s not worth more than 60, the flooring will sag even when walking, and will creak. There are options for floors with double beams, thicker for the floor of the 2nd floor and thinner between them for the ceiling of the first.
It’s better to put a gun carriage
With a span of 5 m, I laid 400x100 (2 x 200x100, fastened together) with a step of 700 mm (between lags of 600 mm - the size of the foam block). During the construction process, pallets with 500 kg foam blocks, 4 pieces each, were placed on a pair of such logs. There was a deflection in the center
2 x 200 in height? How did you fasten it?
Yes, 2x200 in height. Studs all the way through. 5 pieces each. But you should do it like this, just screw the boards at an angle of 90 degrees to each other.
I built two houses. The first one was for myself at the age of 23. The green one didn’t know much. I put 1009120)*200. The result is, in principle, normal, but when children play and jump, it’s not very comfortable. The second time I ordered 100 (120) at 250. In the end, they brought 150 to 250 for the same price. Very heavy, but the difference is noticeable in the noise and shaking of the chandelier))). The larger the rib, the less deflection, vibration, etc.
Article rating:
Save to:
Which timber to use to cover 5 meters Link to main publication
Sequence of work
First of all, a thermal engineering calculation is carried out. Regardless of its result, it will be necessary to create an insulating layer 0.3 m thick. In cases where for some reason it is smaller, you will have to put up with insufficient thermal protection. Some of the insulating material is placed in the spaces between the beams, and about 1/3 of it is placed on top - this approach helps to avoid the occurrence of cold bridges, which even appear on the beams themselves.
Let's assume that some type of technical wool has been chosen. The advantages of such a product do not cancel out its disadvantages: a fine suspension upon contact with the skin and mucous membranes, including inhalation, provokes irritation. It is better to place slabs on top of the wooden floor, which are placed in two layers in a checkerboard pattern.
Mineral wool must be cut with scissors or a knife, the joining of the edges must be tight to avoid heat leakage. You need to put on special clothing in advance: a respirator, gloves and safety glasses. Waterproofing a cold attic is mandatory when the rafter system is not protected from moisture. But even if it is protected, such a measure is unlikely to be superfluous.
Installation of ceiling insulation
The installation of an insulating layer on wooden beams based on mineral wool begins with laying a vapor barrier. The film is placed in accordance with the technology, achieving an overlap of 10 cm. Each part protruding beyond the edge of the main block should be bent around. The points at which the film is connected to the wall require lifting the material by at least 5 cm, and the thickness of the mineral wool is also taken into account.
At the second stage, it is the turn of the insulating material itself. It is cut with construction knives, carefully ensuring that the wool is not pressed through and does not have cracks, since both of these factors will significantly deteriorate its quality. The wool should not be raised higher than the beams. If you have to create a very thick layer, then the main structures are built up with additional slats or timber. Another layer of vapor barrier is placed on top of the insulation, and only then the rough finishing is carried out.
Floor insulation
Many people, in order to increase living space in their home, make the attic a second floor. Insulation of its floor in this case has its own characteristics.
The sequence of layers in a wooden house is as follows:
- first floor ceiling;
- construction paper;
- load-bearing beams made of good timber;
- mineral wool, it is placed in cells formed by the beams themselves;
- another layer of paper;
- floor covering.
It is strictly unacceptable to deviate from this list or violate the order of items on it, as this will greatly worsen the protection against heat leakage and water penetration. A couple of layers of plywood are added to the insulation in the “pie” - it helps to increase protection from loud sounds. And if expanded clay is used instead of mineral wool, then a concrete screed is placed over it using a dry method.
The floor should be insulated by placing the material in the cells formed by the rafter system. Manufacturers have taken care of turning simple technical wool into slabs that are much lighter and more convenient to install. To be able to press the slab directly into the cells, its thickness must be at least 20 cm. Professionals love this method, but amateurs should abandon it due to the excessive consumption of material. The best option is to place the slabs under the rafters and in the spaces between them; if necessary, auxiliary frame parts are made.
Laying slab materials only under the rafters themselves will require the creation of additional sheathing, absorbing part of the attic volume. Therefore, such a solution is allowed only in cases where no other measures help at all. If the ceiling of the second floor is located under the attic, and not under the roof itself, it is necessary to increase the thermal protection of the ceiling both from below and from above.
In order for the insulation of the second floor floor to give an optimal result, you need to work not only on it. Even the walls need to be prepared: close the cracks with tow, soak them with antiseptics. Only under this condition can it be guaranteed that with any changes in the external environment, all parts of the house will be warm.
Then you will need:
- secure horizontal slats for the ventilation system;
- install a membrane that increases steam protection;
- install vertical posts, which will then allow you to secure the slabs;
- place insulation in the gaps of the racks made of timber or aluminum profiles;
- fix the second vapor barrier layer;
- finish the surface with clapboard, plasterboard sheets, chipboard or other covering.
Glued laminated timber
To increase the strength or size of solid beams, they are fastened together manually during installation of the floors. For the same purposes, laminated veneer lumber manufactured at enterprises is used. It consists of several bars connected to each other. The thickness of an individual element is regulated by the number of products glued together. Glued laminated timber is produced at the factory by pressing, its length reaches 12 m.
Finished products retain the characteristics of solid lumber and can be nailed without loss of strength or cut into pieces of the required size. The only drawback of such structures is their high cost. It is necessary to carefully calculate everything before installing the first floor ceiling on wooden beams.
Note! Glued laminated timber is often used in construction for the installation of arched ceilings.
Ventilation of a cold attic
Since it is very important that the ventilation of a cold attic is regulated, there is no need to cover the sheathing and rafters. This can be ensured, for example, if sewing is done with gaps. If ondulin or slate were used as roofing material, and films for vapor and wind insulation are not used, then nothing additional needs to be done for ventilation, since air will pass between the waves of the roof
If ondulin or slate were used as roofing material, and films for vapor and wind insulation are not used, then nothing additional needs to be done for ventilation, since air will pass between the waves of the roof.
Air movement diagram of an unheated attic
If the roof is gable, then ventilation holes are made in the gables. Here you can make a loose fit between the lining of the wooden overhangs, while the holes need to be made evenly. If the linings fit tightly or the fronts are stone, then in this case holes are made in the wall. The total area of the ventilation ducts should be equal to 0.2% of the floor area.
There is another, more economical way - to install regular ventilation grilles. One grate is turned down with holes, and the other is made adjustable.
The ventilation arrangement of the hip roof is different. Here they make an inlet hole at the bottom in the hem, and an outlet hole at the top at the ridge. If the overhangs are wooden. It is enough to place the bars loosely with a gap of a few millimeters. Holes must be provided in the plastic lining.
Attic ventilation can be arranged differently depending on the type of roof. So, if slate and euro-slate are used, a classic ridge is installed, with a flexible roof - a turtle (valve). A special valve is also needed when using a ceramic roof. The use of metal tiles involves the use of a regular ridge, which will save on the valve.
Load Definition
The size of the beam for the floor between floors is determined by the load that the structure must withstand. It’s one thing to have an uninhabited attic, which acts as an air gap between the roof and the home, and quite another thing to have an attic, where the total weight of furniture, people, household appliances and insulation can reach significant values.
The total load is the sum of the mass of all objects and the weight of the structure itself.
For a non-residential attic, the calculation will be approximately as follows:
- if the room is not used as a warehouse, and a lightweight heat insulator was used - mineral or basalt wool, expanded polystyrene, then the dead load is taken as 50 kg / sq. m;
- according to SNiP, the standard load during operation of a non-residential attic space is 70 * 1.3 = 90 kg/sq. m, taking into account the safety factor;
- accordingly, the total load is calculated as 50+90=130 kg/sq.m. m. In practice, the value is immediately increased to 150 to ensure a safety margin.
If old things are folded and stored in the attic, including furniture, if heavy insulation is used, and also when the ceiling is covered with heavy finishing material, the operating load is increased to 150.
- Accordingly: 50+150*1.3=245 kg/sq. m.
It is also recommended to make interfloor ceilings in a house from timber in cases where the second floor is a residential attic. However, when making calculations, it is necessary to take into account the weight of furniture, the floor on the second floor, partitions, if any, and the total weight of permanent residents.
- Typically, the total load is 300–150 kg/h. m.
If the second floor consists of residential, heated, actively used premises, then the total load will be at least 400 kg/sq. m. Determination of the cross-section of timber, both glued and solid, is carried out based on the obtained values.
Calculation of floor beams
When planning the construction of a floor, you first need to calculate the design of its base, that is, the length of the beams, their number, optimal cross-section and spacing. This will determine how safe your ceiling will be and what load it can withstand during operation.
Beam length
The length of the beams depends on the width of the span, as well as on the method of fastening the beams. If the beams are fixed on metal supports, their length will be equal to the width of the span. When embedding walls into grooves, the length of the beams is calculated by summing up the span and the depth of insertion of the two ends of the beam into the grooves.
Beam spacing
The distance between the axes of the beams is maintained within 0.6-1 m.
Number of beams
The number of beams is calculated as follows: plan to place the outer beams at a distance of at least 50 mm from the walls. The remaining beams are placed evenly in the span space, in accordance with the selected interval (step).
Beam section
Beams can have a rectangular, square, round, or I-section. But the classic option is still a rectangle. Frequently used parameters: height – 140-240 mm, width – 50-160 mm.
The choice of beam section depends on its planned load, the width of the span (along the short side of the room) and the spacing of the beams (step).
The load of the beam is calculated by summing the load of its own weight (for interfloor floors - 190-220 kg/m2) with the temporary (operational) load (200 kg/m2). Typically, for exploited floors, the load is taken to be 350-400 kg/m2. For attic floors that are not in use, you can take a smaller load, up to 200 kg/m2. A special calculation is required if significant concentrated loads are expected (for example, from a massive bathtub, swimming pool, boiler, etc.).
The beams are laid along a short span, the maximum width of which is 6 m. Over a longer span, sagging of the beam is inevitable, which will lead to deformation of the structure. However, in such a situation there is a way out. To support beams over a wide span, columns and supports are installed.
The cross section of the beam directly depends on the width of the span. The larger the span, the more powerful (and durable) beam must be chosen for the ceiling. The ideal span for covering with beams is up to 4 m. If the spans are wider (up to 6 m), then it is necessary to use non-standard beams with a larger cross-section. The height of such beams must be at least 1/20-1/25 of the span. For example, with a span of 5 m, you need to use beams with a height of 200-225 mm and a thickness of 80-150 mm.
Of course, it is not necessary to perform beam calculations yourself. You can use ready-made tables and diagrams that indicate the dependence of beam sizes on the perceived load and span width.
After completing the calculations, you can begin installing the floor. Let's consider the entire technological process, starting with fixing the beams on the walls and ending with the finishing cladding.
Pros and cons of wooden floors
To install the ceiling yourself, you need to prepare. The floor in the house must rest on a strong and rigid structure. Before starting work, you will have to study the requirements for the elements, the features of their calculation and the types of sections.
The following advantages of wooden flooring can be highlighted:
- attractive appearance, the ability to make a wooden floor without additional measures;
- light weight, reduced load on walls and foundations, savings on construction;
- possibility of carrying out repairs during operation;
- speed of installation, execution of work without additional machines and mechanisms.
Wooden beams do not weigh down the structure and are quickly installed
But it is also worth highlighting the disadvantages:
- flammability of wood, the need for special impregnation with fire retardants;
- lower strength compared to reinforced concrete or metal elements;
- shrinkage and deformation due to changes in temperature and humidity;
- susceptibility to rot, mildew and mold at high humidity, it is necessary to treat with antiseptics at the construction stage and periodically during the service life.
What are the requirements for floors?
Floors must first of all have the necessary strength to withstand their own weight and the loads acting on them (uniformly distributed or concentrated).
According to SNiP 2.01.07-85 LOADS AND IMPACTS (or rather, in a more current version, the set of rules SP 20.13330.2011 “Loads and Impacts”), floors in residential buildings must withstand a uniformly distributed load of at least 200 kg/m². However, in practice, interfloor floors in a private country house are usually designed for a higher load, and attic floors for a lower load. Special calculations are needed when concentrated loads of significant magnitude are expected - a large-volume bathtub, spa pool, boiler, piano, etc.
Another requirement is that the ceiling must be rigid, that is, not sag under loads (permissible deflection is from 1/200 of the span for attic floors to 1/250 of the span for interfloor), and also not be unsteady, that is, not sway when moving furniture or movement of people.
| To increase the rigidity of the floor, wooden beams are reinforced with spacers | Wooden beams are reinforced with spacers, which increase the rigidity of the structure |
Beams made of unlaminated wood often have a high percentage of moisture, which is why they can become deformed during the operation of the building. Non-glued beams can cover a span of no more than 6 m in length.
In addition, the ceilings are designed to protect the room from the penetration of airborne and impact noise from rooms located above or below. In the design of the beam floor, to dampen noise, slabs of mineral wool insulation are provided, installed in the gap between the supports. The noise level in the room depends on the thickness of the insulating layer. Typically, an insulation layer 150 mm thick is created.
There are cases when floor beams must partially remain in the interior, and the thickness of their parts hidden behind the ceiling lining is not sufficient to lay the slabs between them required to ensure a good thickness of insulation. Then you can install a frame made of wooden blocks on top of the beams, also filled with mineral wool slabs. The most effective solution in terms of sound insulation is a floor consisting of two contours of wooden beams (optionally, multidirectional) that have no contact with each other. Each circuit is filled with soundproofing material.
The ceiling must be thermally insulated when it separates rooms with a temperature difference of <10 °C (for example, it is located between a cold basement or attic and a heated living room). Finally, it needs to be fire resistant - have a degree of flammability that meets the requirements of fire safety standards.
In buildings made of logs and timber, it makes sense to rest the floor beams at both ends on the load-bearing walls: the settlement of such walls is approximately the same, which means that the floors will not skew
Advantages and disadvantages
The wooden blocks that are used for flooring have their strengths and weaknesses.
The main advantages of beams made from boards are:
- minimal weight of structural elements, which reduces the load on the load-bearing walls and foundation of the building;
- beautiful appearance;
- the possibility of installing a plank floor without additional preparation;
- high speed of installation work without the help of lifting mechanisms;
- It is possible to repair the ceiling during the operation of a residential building.
The disadvantages of wooden structural elements include:
- the need to impregnate wood with antiseptics and fire retardants; such solutions prevent rotting and combustion of the material;
- lower strength indicators compared to metal or reinforced concrete products;
- deformation and shrinkage of the structure as a result of sudden temperature changes or under the influence of high humidity.
Note! The installation of a wooden floor is possible on enclosing structures made of aerated concrete, brick or on walls made of any other material.
How to create a reliable foundation for rafters?
The first step you need to take is to build a solid foundation for these rafters. For example, if the floor beams do not have any support (at least in the form of an intermediate wall of the house), then the trusses on it need to be organized only according to the hanging principle. If there is support, the rafters can be safely supported directly on the beam without any auxiliary elements.
In simple terms, if the beam in the attic floor is installed securely and has its own supports, then rafters can be installed on it, and if all this is missing, then it makes sense to firmly connect the rafters to the beams themselves and hang them as a single system. Otherwise, before building the roof, you need to support the beams from inside the room, for which there are three different construction methods:
- The simplest classic support consists of a tie, one support beam and struts. The puff is suspended in the middle. Such suspension systems are used today most often for large spans.
- A double support consists of a tie, hangers, two struts and a crossbar, which serves as a spacer between the boards.
- There is even a triple post, which is a separate three hanging system, or one double hanging system and one single hanging system. This is already a complex rafter system.
Ideally, you can also calculate such beams for deflection and tension, to what extent they are ready to support the entire roof. There are special online calculators and formulas for this, although it will also be enough to invite an experienced carpenter for your own peace of mind.
Installation of interfloor and ceiling slabs on wooden logs
The photo shows interfloor ceilings.
Interfloor ceilings in a house made of timber begin to be installed by laying the logs. To do this, prepared timber is placed on the walls, which is pre-wrapped with roofing felt. This will protect the wood from moisture penetration and, as a result, from rotting.
The outer beams should be laid no closer than 5 cm from the wall, and the distance between adjacent crossbars should not exceed the previously calculated values, which in our case are equal to 60 cm.
An important condition is that the logs must be laid over the entire thickness of the walls, having maximum support and stability. The gaps between the joists on the wall are filled with bricks or building blocks, after which a subfloor made of 150x25 mm edged boards is laid on top.
Ceilings made of timber are almost completely identical to interfloor ones, with the only difference being that the thickness of the beams may be smaller, and the step between them may be several centimeters larger.
Prefabricated timber
The photo shows prefabricated timber.
Quite often there is a situation when there is no lumber on sale, in particular, timber of the required size. In this case, there are several ways in which it is quite possible to solve this problem. The first method is to use prefabricated beams in the construction. You can easily do it yourself using a screwdriver or drill. (see also the article Joining timber along the length - connection options)
Let's say you need logs measuring 150x250 mm, but there are no such sizes on sale, but boards with dimensions 50x250 mm are always in abundance at any lumber base. In order to get a beam of the desired size, it is enough to buy 3 such boards and fasten them together.
It is better to use wood screws rather than nails as fasteners, since over time the wood dries out and the nails do not hold the boards together so firmly.
As the instructions for making prefabricated joists yourself advise, if you use them for basement or basement floors, then before tightening them with self-tapping screws, you should treat each board with an antiseptic.
This will prevent the appearance of wood pests and will significantly increase the service life of the entire floor. If you use prefabricated timber for interfloor slabs, then no pre-processing of the boards is required.
The admissibility of using this type of lag is obvious and is not questioned. This material is as environmentally friendly as regular timber, since no adhesives are used during assembly.
Attention! The load-bearing capacity of prefabricated timber is even higher than that of solid lumber, and the cost is slightly lower. From all of the above, it becomes clear that in some cases the use of prefabricated elements is even preferable to solid ones.
Glued laminated timber
Photo – laminated timber.
This type of lumber is an acceptable alternative if the required solid logs cannot be found, or their price is high enough for you, and it is not possible to make a prefabricated structure yourself.
Glulam beams are made from several boards of different lengths, fastened together using a two-component structural adhesive, which is used in the manufacture of wooden load-bearing building structures. (see also the article What are the advantages of laminated cedar beams)
Floor beams in a wooden house made of laminated veneer lumber are characterized by good strength and resistance to loads, but they also have some disadvantages.
- Due to the fact that adhesives are used in their production, such material can no longer be called environmentally friendly.
- In their production, a fairly large percentage of low-quality lumber is used. Significant shrinkage is possible after several years of use, which means that a laminated timber floor may “sag” over time.
- And the main disadvantage of glued beams is their limited service life, which is determined by the manufacturer at 20 years.
To calculate the volume of lumber, you can use the calculator:
Design and safety
When installing such a roof, in addition to ensuring a competent design of the roofing pie, the materials used to lay all its layers also require careful selection.
Soil layer and paving slabs. To improve the top layer of the roof, green spaces, lawns and flower beds are used, and paving slabs are used for the pedestrian zone. All this creates additional load on the building, so it is necessary to ensure maximum strength of the load-bearing structures.
We recommend reading the article on how to build a frame house with a flat roof.
Drainage layer. Sometimes called the "heart", it is responsible for eliminating stagnant water in the upper layers of the cake and lower parts of the soil layer. Crushed stone or gravel (20-40 mm), as well as a geotextile drainage covering, are used as drainage.
Thermal insulation layer. Thermal insulation is calculated based on the type of building and number of floors. The thickness of the insulation is chosen in the range of 5–30 cm - such restrictions are necessary to avoid unnecessary load on the waterproofing.
Waterproofing layer. More elastic and durable material, EPDM, TPO, PVC membranes or bitumen rolls are used as waterproofing, which allows them to cope with all the loads from the upper layers of the pie.
Drainage system. It ensures the drainage of precipitation from the roof plane and the normal functioning of the drainage system. The drainage funnel must be two-level and heated.
Beams for interfloor slabs: purpose, types, calculation of parameters and installation of beams
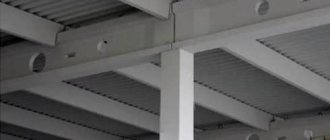
Overlapping with timber on an I-beam as an intermediate connection.
Floor beams are used as load-bearing beams that transfer the load from all objects in the room, including the own weight of the floor, to the walls of the structure. These beams serve as support for the floor joists and as the basis for the ceiling finishing.
Thus, we see that we have before us a structural element, the proper use of which requires the correct calculation of such parameters as:
- cross-section of timber for flooring. It is important to select the width and height of the section, as well as their ratio;
- step of arrangement of load-bearing elements over the area to be covered;
- moisture content of lumber. This is also a very important parameter on which the success of the entire event may depend;
- the type of wood used to make beams. Most often it is pine;
- lumber quality. It is important to ensure that there are no cracks, a large number of knots and other defects;
- the presence, extent and composition of wood treatment with protective complexes, including antiseptics, fungicides, fire retardants and insecticides.
the length of the beam in relation to its cross section. There is a maximum length for timber floors, and usually it does not exceed 6 meters, since wooden material cannot reliably cope with large spans;
The photo shows the ceiling of the first floor.
For the construction of interfloor structures, massive four-edge material made from northern pine is usually used. The most popular sections are 100x100 mm, 150x100 mm, 150x150 mm, 200x150 mm, 200x200 mm.
It is believed that the greatest load-bearing capacity is possessed by parts whose height exceeds the width by 7:5, and the length exceeds the height by approximately 24 times.
Important! The purpose of timber for interfloor ceilings is to accept, distribute and transmit loads from the weight of people, objects and its own weight to the load-bearing walls of a house or apartment.
Attic device
An attic is a room limited by the roof slopes and the ceiling of the residential floor. This room can be used as a seasonal storage place or for the purpose of organizing additional living space. Depending on the nature of use, attics of residential buildings are divided into the following types:
- Residential. The livable attic of a home is called a loft and can serve as an additional bedroom, living room, bedroom or office. To use the attic as a living space, it must have a ceiling height of at least 2.2 meters, natural lighting, ventilation, and thermal insulation of the slopes.
- Non-residential. A non-residential attic can be used to install any technical equipment or organize storage of things. In this case, the height of the attic space may be less than 2 meters, there may be no natural light, and the thermal insulation of the slope is replaced by insulation of the attic floor.
Important! When carrying out repairs or reconstruction of a house, it is important to immediately decide how the attic will be used in order to correctly calculate and design the attic floors. The type, material, distance between the beams will depend on this, which will ensure sufficient strength and load-bearing capacity of the structure
The design of the attic floor depends on the size of the house and the nature of the use of the under-roof space. The attic is a kind of air gap that separates the heated space of the first floor and the roof and thermally insulates it. Its floor performs the following functions:
- Carrier. The floors between the upper floor and the attic perform a load-bearing function, so they must be strong enough and reliable, because people move around it, equipment and storage areas are installed.
- Isolating. The room in an unheated attic has a temperature not much higher than the outside temperature. Therefore, the ceilings perform a thermal insulating function, preventing the heated residential floor from cooling down. To retain heat, they include a layer of insulation.
Remember that the temperature, comfort, and safety of living in the house depend on the correctness and quality of the work on arranging the attic. Therefore, it is better to entrust the design, installation or repair of floors to professional craftsmen.
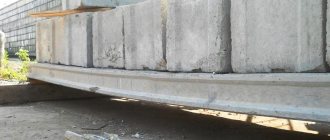
What are prefabricated monolithic floors, or SMP for short?
This is essentially an improved version of reinforced concrete slabs. The basis is suitably spaced beams, between which special blocks are placed to form a filling layer. Such floors are characterized by both lightness and strength.
Lighting
In order for natural light to freely enter the rooms under the roof, translucent structures are needed. In this case, the only correct solution would be to install skylights. An important point in the process of preparing to install a window into the roof slopes is the manufacture of a strong wooden frame on the inside, which will help hold the window frames and prevent possible deformation. The frame is installed between the rafter legs, so the width is ordered taking into account this distance and the thickness of the beams. Windows can be installed on gables or directly in the roof of the house. What are the advantages of roof windows?
- Saving on energy costs. Such windows allow you to increase the transmission of natural light by 40%.
- Exquisite design. Windows help create a unique atmosphere in the room under the roof; they organically complement the design, creating spaciousness in the room.
- Functionality. Manufacturers offer various configurations and functional loads of windows for attic spaces.
Dormer windows are an excellent source of daylight
As for wiring into the attic to create high-quality artificial lighting, there are several proven methods:
- laying wires over the walls, hiding them in special plastic boxes;
- arrangement of hidden electrical wiring by laying the wires under the inner lining.
The first method is the simplest; you can do it quickly and easily with your own hands. The second method is more technically complex, since the fire safety standards and requirements for a private home must be taken into account. Hidden electrical wiring is installed during the installation of the frame, wall and ceiling cladding.
When the electrical wiring is installed in the attic, all sockets and switches are placed in their places, you can begin the most exciting stage - interior planning. Flights of imagination are welcome here! You can choose classic style solutions, cozy Country or gentle Provence. For young people you can create an urban room under a roof in the Loft style, and for children - a fabulous dream island.
The easiest way to highlight the beauty of your attic interior is through thoughtful lighting.
Transforming a dusty and dark attic into a cozy and spacious room under the roof itself is a labor-intensive process and requires financial costs. Knowing the secrets and tricks, following the rules and advice of experts, you can quickly transform an uninhabited cold attic under the roof into additional living space.
Transforming an Abandoned Attic
Inter-beam filling of the floor
How to properly fill the space between beams
The filling between the beams is essentially a set of enclosing elements, each with its own purpose. Let's see what device options there are here.
Overlap without joists
This type of construction can only be used if the distance between the load-bearing beams does not exceed 60 centimeters. If this rule is neglected, the floor will be “unsteady”. The layout of such an overlap is shown in the following diagram.
Overlap without joists
Let's break this cake down layer by layer:
- So, in this case, our floor beams become the basis for holding the sheathing, a subfloor will be laid on top of them, and inside there will be layers of vapor, heat and sound insulation - the last two, often in the form of one material.
- Let's go from bottom to top. The lowest layer is the finishing material of the ceiling, which can be plastic, wooden lining, plasterboard, MDF, etc. The trim is installed last if you do not plan to lay the insulation directly on top of it. This solution is extremely unreliable, so we will skip its description.
Floor filling options
- To keep everything firmly in place, especially if a fairly heavy thermal insulator such as expanded clay is used, a wooden flooring (12) is mounted below, which will be held in place by cranial bars (10) wound parallel to the beams along their lower edge. For cranial bars, a rail with a cross section of 30*40 and higher is perfect. Everything is attached with self-tapping screws.
Flooring, vapor barrier, insulation
- Next, a layer of vapor barrier is placed on top of the flooring, which will prevent debris from spilling down, plus it will protect the beams themselves and the insulation between them from the penetration of moisture from the air.
- Next is a layer of thermal insulation - usually it is either foamed polystyrene or mineral wool, although there are a great many other options on the market. Moreover, mineral wool would be preferable, since it is not a flammable material and is not afraid of rodents.
Insulation damaged by mice
Advice! Mineral wool greatly loses its thermal insulation properties when wet, so it is necessary to take care of its high-quality insulation.
- The next layer is again film, but this time waterproofing. Water can seep out from above if something is spilled on the floor or the roof leaks. It is also recommended to use membrane films that do not interfere with gas exchange.
- The distance from the film to the insulation is usually left at 50 millimeters to ensure air circulation, although sometimes this rule can be neglected
The waterproofing film does not adhere closely to the insulation
But what about sound insulation, since today’s popular insulation materials are not so effective in this regard? Of course, the weight of the same mineral wool per 1 square meter will be some 5-6 kilograms, and sound in such a loose environment will propagate practically without interference!
In this case, before laying the insulation, it is worth installing a separate layer of sound insulation, for example, installing a soundproofing panel, or pouring sand or clay, if we are talking about a very budget construction project. At the same time, do not forget that the load-bearing capacity of the floor must withstand increased loads.
Soundproofing panel
It is also necessary to place a separating membrane film between the layers of sound and thermal insulation.
Sound insulation will not be complete if vibrations are transmitted through the beams themselves when walking on the floor of the upper floor. To eliminate this unpleasant effect, an elastic material, for example, the same roofing felt, is laid over the beams.
Next, a rough flooring is installed, which will serve as the basis for a finished floor covering, for example, laminate. For flooring, boards with a thickness of 32 millimeters are used - thinner is possible, but provided that the step between the beams is small and the floor will not sag.
Floors with joists
If the bars for the beams are not wide, then you can’t do without logs
During the course of the article, we analyzed the table, from which it became clear that the cross-section of the beams and the step between them are interrelated quantities. The pattern here is directly proportional - the more powerful the bars, the greater the distance between them it is allowed to leave.
- The approach with a large indentation is good for reducing labor costs in terms of arranging niches for beams, but the strength of the floor itself may suffer.
- Logs help solve the problem - transverse boards or beams that are placed on an edge or laid flat. Lumber is taken with the following section - 50x75 or 50x100 millimeters.
- The step between them is chosen to be acceptable for the future flooring. The end connection of the elements is performed above the logs. The fastening element in this case is a wooden, metal or plywood overlay.
Beam floor with joists
The inter-beam filling of the floor will be the same as in the previous case, however, due to the increased thickness of the floor, you can add another layer of insulation to make the insulation more effective. You also need to remember that, unlike beams, logs are not embedded in the wall, but simply adjacent to them.
So, we have learned how a beam ceiling is constructed, which you can now easily build yourself, following the recommendations given in this article. The video in this article will help further clarify the issue - be sure to take a look. And now we say goodbye to you, see you soon!
Materials
Regardless of the chosen design, it is preferable to use coniferous wood for the main block, which is most resistant to high humidity, fungus and rot. Sufficient thermal insulation is provided by beams measuring 15x20 cm, but thinner ones (5x10 cm) are completely impractical. In the interval between the rolls, layers of waterproofing, vapor barrier and insulation are placed. It is better to attach not boards to the supports, but plywood 1.5-2 cm thick.
To secure the lower flooring, wooden blocks of 5x5 cm are stuffed, the protrusion from which allows you to place boards or sheets. The roll is attached to the bars using self-tapping screws. For the thermal insulation itself in a brick building, a variety of materials can be used. When the beam is inserted into the wall, it is filled with cement mortar (if the masonry is two bricks thick) or left free if the wall is laid with 2.5 bricks.
Most private houses are equipped with wooden beams. This is a fairly durable material, and also has an affordable price. However, an attic with wooden beams can only be made when the width and length of the house are no more than 10 meters, since longer lumber is not produced anywhere.
A metal beam (I-beam) is stronger than a wooden structure - it can withstand significant loads without damage. The downside of such advantages is the heavy weight of the structure, which does not allow its use in a wooden dwelling. Reinforced concrete beams, obtained from carefully molded reinforced concrete, are only applicable in apartment buildings.
Definition of section and pitch
After selecting the loads and determining the length of the beams, they begin to calculate the step of their laying for the installation of the formwork of the future floor, and also determine the size of their cross-section.
All work is carried out according to the following rules:
- the ratio of the width and height of the load-bearing elements of the floor is at the level of 1:1.4 (the width of the beam ranges from 4–20 cm, and the height of the products depends on the thickness of the heat-insulating material, and is in the range of 10–30 cm);
- the installation step of the beams is affected by the calculated loads and dimensions of insulation, plywood or any other material for filing;
- between adjacent beams leave a free space of 30 to 120 cm.
To accurately determine the cross-section of a wooden floor beam, there are special tables. When carrying out calculations, it is necessary to pay attention to the maximum deflection value; for attic floor beams no more than 1/200; for interfloor elements - 1/350.
Floor beams are the main load-bearing elements of the entire wooden floor. The reliability of the wooden floor depends on the correct choice and selection of the size and number of beams. The main dimensions of wooden floor beams are their length and cross-section. You need to determine the length of the beam based on the width of the span that you will need to cover. The cross-sectional dimensions of the floor beam depend on the span length, the distance between the installed beams (installation step) and the expected load that will act on the floor beams. The article will tell you how you can independently calculate the number and sizes of beams.